SpringBoot-----SpringBoot注册Web组件
SpringBoot-----SpringBoot注册Web组件
文章目录
- 一、Sevlet
- 二、Filter
- 三、Listener
一、Sevlet
由于SpringBoot项目没有web.xml文件,所以无法在web.xml中注册web组件,SpringBoot有自己的方式注册web组件。
1 、在SpringBoot中,扫描web组件的注解是@ServletComponentScan
2 、在SpringBoot中,自动扫描Servlet组件需要在Serlvet类上添加注解@WebServlet
第一种方式 使用ServletComponentScan注解
步骤:
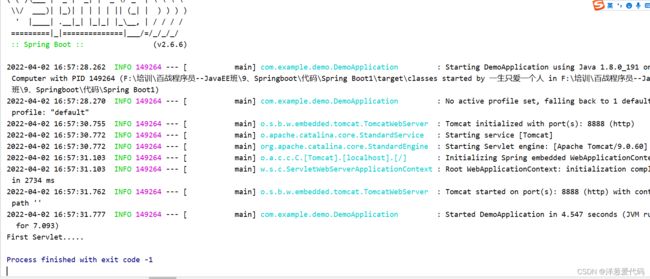
1、创建一个Servlet
package com.example.demo.wr.oyc.servlet;

import javax.servlet.ServletException;
import javax.servlet.annotation.WebServlet;
import javax.servlet.http.HttpServlet;
import javax.servlet.http.HttpServletRequest;
import javax.servlet.http.HttpServletResponse;
import java.io.IOException;

@WebServlet("/first")
public class FirstServlet extends HttpServlet {
    @Override
    protected void doGet(HttpServletRequest req, HttpServletResponse resp) throws ServletException, IOException {

        System.out.println("First Servlet.....");
    }


    @Override
    protected void doPost(HttpServletRequest req, HttpServletResponse resp) throws ServletException, IOException {
        super.doPost(req, resp);
    }
}
2、在DemoApplication类的上方添加一个ServletComponentScan注解
package com.example.demo;

import org.springframework.boot.SpringApplication;
import org.springframework.boot.autoconfigure.SpringBootApplication;
import org.springframework.boot.web.servlet.ServletComponentScan;

@SpringBootApplication
@ServletComponentScan
public class DemoApplication {

    public static void main(String[] args) {
        SpringApplication.run(DemoApplication.class, args);
    }

}
第二种方式 创建Servlet注册配置类(使用了ServletRegistrationBean类)
步骤:
1 、创建Servlet
package com.example.demo.wr.oyc.servlet;

import javax.servlet.ServletException;
import javax.servlet.annotation.WebServlet;
import javax.servlet.http.HttpServlet;
import javax.servlet.http.HttpServletRequest;
import javax.servlet.http.HttpServletResponse;
import java.io.IOException;

@WebServlet("/first")
public class FirstServlet extends HttpServlet {
    @Override
    protected void doGet(HttpServletRequest req, HttpServletResponse resp) throws ServletException, IOException {

        System.out.println("First Servlet.....");
    }


    @Override
    protected void doPost(HttpServletRequest req, HttpServletResponse resp) throws ServletException, IOException {
        super.doPost(req, resp);
    }
}
2 、创建一个Servlet注册配置类
package com.example.demo.wr.oyc.registerWebModel;


import com.example.demo.wr.oyc.servlet.FirstServlet;
import org.springframework.boot.web.servlet.ServletRegistrationBean;
import org.springframework.context.annotation.Bean;
import org.springframework.context.annotation.Configuration;

@Configuration
public class ServletCofig {

    @Bean
    public ServletRegistrationBean getServletRegistrationBean(){

        ServletRegistrationBean bean = new ServletRegistrationBean(new FirstServlet());

        System.out.println("注册了FirstServlet组件...");

        bean.addUrlMappings("/second");

        return bean ;

    }
}
二、Filter
两种方式:
一种使用@WebFilter和ServletComponentScan
另外一种是注册过滤器类的注册类(使用@Configuration和 @Bean)
第一种方式:
步骤: 1 、创建一个过滤器FirlstFilter类
package com.example.demo.wr.oyc.filter;
import javax.servlet.*;
import javax.servlet.annotation.WebFilter;
import java.io.IOException;

@WebFilter(urlPatterns = "/first")
public class FirstFilter implements Filter {
    @Override
    public void init(FilterConfig filterConfig) throws ServletException {

    }

    @Override
    public void doFilter(ServletRequest servletRequest, ServletResponse servletResponse, FilterChain filterChain) throws IOException, ServletException {
        System.out.println("进入First Filter");
        filterChain.doFilter(servletRequest , servletResponse);
        System.out.println("离开First Filter");
    }

    @Override
    public void destroy() {

    }
}
步骤: 2、在启动类上添加@ServletComponentScan
package com.example.demo;

import org.springframework.boot.SpringApplication;
import org.springframework.boot.autoconfigure.SpringBootApplication;
import org.springframework.boot.web.servlet.ServletComponentScan;

@SpringBootApplication
@ServletComponentScan
public class DemoApplication {

    public static void main(String[] args) {
        SpringApplication.run(DemoApplication.class, args);
    }

}
方式二、
步骤1:创建一个类(注册过滤器类)
package com.example.demo.wr.oyc.registerWebModel;
import com.example.demo.wr.oyc.filter.FirstFilter;
import com.example.demo.wr.oyc.filter.SecondFilter;
import org.springframework.boot.web.servlet.FilterRegistrationBean;
import org.springframework.context.annotation.Bean;
import org.springframework.context.annotation.Configuration;

@Configuration
public class FilterConfig {


    @Bean
    public FilterRegistrationBean getFilterRegistrationBean1(){

        FilterRegistrationBean filterRegistrationBean =
                new FilterRegistrationBean(new FirstFilter());

        System.out.println("注册了FirstFilter组件...");

        filterRegistrationBean.addUrlPatterns("/first");

        return filterRegistrationBean ;
    }


    @Bean
    public FilterRegistrationBean getFilterRegistrationBean2(){

        FilterRegistrationBean filterRegistrationBean =
                new FilterRegistrationBean(new SecondFilter());

        System.out.println("注册了SecondFilter组件...");

        filterRegistrationBean.addUrlPatterns("/second");

        return filterRegistrationBean ;
    }
}
步骤2 创建一个启动类
package com.example.demo;

import org.springframework.boot.SpringApplication;
import org.springframework.boot.autoconfigure.SpringBootApplication;
import org.springframework.boot.web.servlet.ServletComponentScan;

@SpringBootApplication
@ServletComponentScan
public class DemoApplication {

    public static void main(String[] args) {
        SpringApplication.run(DemoApplication.class, args);
    }

}
三、Listener
两种方式:
一种使用@Listener和ServletComponentScan
另外一种是注册过滤器类的注册类(使用@Configuration和 @Bean)
第一种:
步骤一 : 编写一个FirstListener类 添加@WebListener注解
package com.example.demo.wr.oyc.listener;
import javax.servlet.ServletContextEvent;
import javax.servlet.ServletContextListener;
import javax.servlet.annotation.WebListener;
import javax.servlet.http.HttpSessionAttributeListener;
import javax.servlet.http.HttpSessionEvent;
import javax.servlet.http.HttpSessionListener;
import javax.servlet.http.HttpSessionBindingEvent;

@WebListener
public class FirstListener implements ServletContextListener,
        HttpSessionListener, HttpSessionAttributeListener {

    public FirstListener() {
    }

    // -------------------------------------------------------
    // ServletContextListener implementation
    // -------------------------------------------------------
    public void contextInitialized(ServletContextEvent sce) {
        System.out.println("First Listener Init......");
    }

    public void contextDestroyed(ServletContextEvent sce) {
      /* This method is invoked when the Servlet Context
         (the Web application) is undeployed or
         Application Server shuts down.
      */
    }

    // -------------------------------------------------------
    // HttpSessionListener implementation
    // -------------------------------------------------------
    public void sessionCreated(HttpSessionEvent se) {
        /* Session is created. */
    }

    public void sessionDestroyed(HttpSessionEvent se) {
        /* Session is destroyed. */
    }

    // -------------------------------------------------------
    // HttpSessionAttributeListener implementation
    // -------------------------------------------------------

    public void attributeAdded(HttpSessionBindingEvent sbe) {
      /* This method is called when an attribute
         is added to a session.
      */
    }

    public void attributeRemoved(HttpSessionBindingEvent sbe) {
      /* This method is called when an attribute
         is removed from a session.
      */
    }

    public void attributeReplaced(HttpSessionBindingEvent sbe) {
      /* This method is invoked when an attribute
         is replaced in a session.
      */
    }
}
第二种:
步骤一 编写一个注册监听器的一个类(@Configuration @Bean)
package com.example.demo.wr.oyc.registerWebModel;


import com.example.demo.wr.oyc.filter.FirstFilter;
import com.example.demo.wr.oyc.listener.FirstListener;
import org.springframework.boot.web.servlet.FilterRegistrationBean;
import org.springframework.boot.web.servlet.ServletListenerRegistrationBean;
import org.springframework.context.annotation.Bean;
import org.springframework.context.annotation.Configuration;

@Configuration
public class ListenerConfig {

    @Bean
    public ServletListenerRegistrationBean getListenerRegistrationBean1(){

        ServletListenerRegistrationBean listenerRegistrationBean =
                new ServletListenerRegistrationBean(new FirstListener());

        System.out.println("注册了Listener组件...");


        return listenerRegistrationBean ;
    }

}
✨脚踏实地,一步一步,总能成功✨


