Java多线程系列—多线程的实现方式(01)
多线程的实现方式
实现线程是并发编程中基础中的基础,因为我们必须要先实现线程,才可以继续后续的一系列操作。
基本实现方式
Runable
public class ImplementRunable implements Runnable {
    @Override
    public void run() {
        while (true) {
            // 输出线程的名字,与主线程名称相区分
            System.out.println(Thread.currentThread().getName());
            try {
                // 线程休眠一秒
                Thread.sleep(1000);
            } catch (Exception e) {
                throw new RuntimeException(e);
            }
        }
    }

    public static void main(String[] args) {
        new Thread(new ImplementRunable()).start();
    }
}
本质上还是new Thread, 只不过是将Runable对象作为构造函数传递了进去
Thread
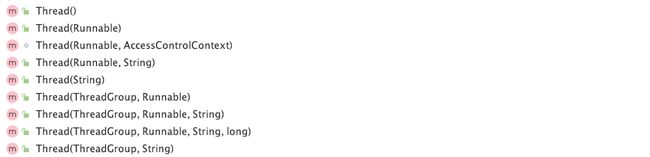
我们最常见的是通过继承Thread类来实现或者是直接new Thread 对象,但是我们知道Java 是单继承的,也就是说我们如果继承了Thread类就不能继承其他类了,所以这也是我们常常使用Runable实现多线程的原因,这个时候我们可以将Runable的对象传递给Thread 的构造函数。下面是Thread 常见的构造函数
下面我们看一个例子
public class ExtendsThread extends Thread {

    public ExtendsThread() {
        // 设置当前线程的名字
        this.setName("MyThread");
    }

    @Override
    public void run() {
        // 每隔1s中输出一次当前线程的名字
        while (true) {
            // 输出线程的名字,与主线程名称相区分
            System.out.println(Thread.currentThread().getName());
            try {
                // 线程休眠一秒
                Thread.sleep(1000);
            } catch (Exception e) {
                throw new RuntimeException(e);
            }
        }
    }

    public static void main(String[] args) {
        new ExtendsThread().start();
    }

}
Callable
Runnable和Callable都代表那些要在不同的线程中执行的任务。Runnable从JDK1.0开始就有了,Callable是在 JDK1.5增加的。
它们的主要区别是Callable的 call()方法可以返回值和抛出异常,而Runnable的run()方法没有这些功能,而且Callable可以返回装载有计算结果的Future对象。
public class ImplementCallable implements Callable<Integer> {
    @Override
    public Integer call() throws Exception {
        return new Random().nextInt();
    }

    public static void main(String[] args) throws ExecutionException, InterruptedException {

        //创建线程池
        ExecutorService service = Executors.newFixedThreadPool(1);
        //提交任务,并用 Future提交返回结果
        Future<Integer> future = service.submit(new ImplementCallable());
        Integer integer = future.get();
        System.out.println(integer);
    }
}
但是需要注意的是Callable是不能直接和Thread 使用的,需要配合线程池进行使用,我们也演示了如何通过Future对象获取结果。其实这里我们也可以将Callable配合FutureTask使用,后面我们在演示FutureTask的时候再演示
TimerTask
public class TimerTaskDemo {
    /**
     * 延迟100ms后,间隔1s打印出:hello world
     *
     * @param args
     * @throws InterruptedException
     */
    public static void main(String[] args) throws InterruptedException {
        Timer t = new Timer();
        t.scheduleAtFixedRate(new TimerTask() {
            @Override
            public void run() {
                System.out.println("hello world");
            }
        }, 100, 1000);
    }
}
这个看起来像是一种新的实现方式,但是当你去看TimerTask的实现的时候,你会发现这个类实际上是继承自Runnable也就是说这其实就是通过Runnable实现的方式,其实就是将TimerTask对象放入一个TaskQueue对象的队列中去,然后等到调度的时间到了,然后执行TimerTask的run 方法。
需要注意的实当我们使用Timer类的时候,提示我们使用ScheduledExecutorService来替代它,这是为什么呢,这是因为Timer没有使用线程池,而且整个Timer的调度是单线程的,所以我们还是要看一下Timer的具体实现原理

我们下面具体梳理一下一个任务调度的流程
-
我们创建了一个Timer对象
 public Timer() {
     this("Timer-" + serialNumber());
 }
 public Timer(String name) {
     thread.setName(name);
     thread.start();
}
我们看到这个构造函数里面启动了一个线程,这个线程就是TimerThread
-
使用了scheduleAtFixedRate方法,创建并调度了一个定时任务,其实只是将这个任务添加到了TaskQueue的队列中去
public void scheduleAtFixedRate(TimerTask task, Date firstTime, long period) { if (period <= 0) throw new IllegalArgumentException("Non-positive period."); sched(task, firstTime.getTime(), period); } private void sched(TimerTask task, long time, long period) { if (time < 0) throw new IllegalArgumentException("Illegal execution time."); // Constrain value of period sufficiently to prevent numeric // overflow while still being effectively infinitely large. if (Math.abs(period) > (Long.MAX_VALUE >> 1)) period >>= 1; synchronized(queue) { if (!thread.newTasksMayBeScheduled) throw new IllegalStateException("Timer already cancelled."); synchronized(task.lock) { if (task.state != TimerTask.VIRGIN) throw new IllegalStateException( "Task already scheduled or cancelled"); task.nextExecutionTime = time; task.period = period; task.state = TimerTask.SCHEDULED; } // 将task 添加到了定时器的队列中去, queue.add(task); if (queue.getMin() == task) queue.notify(); } } -
Timer 实现了它NB 的调度功能,这一部分我们是没有参与的,属于黑盒,其实也不黑,我们揭开看看,秘密就在TimerThread里面,我们知道这个线程对象在Timer创建的时候就启动了
private TaskQueue queue;

TimerThread(TaskQueue queue) {
    this.queue = queue;
}
// 线程的入口, run 方法
public void run() {
    try {
      	// 调用核心方法——循环
        mainLoop();
    } finally {
        // Someone killed this Thread, behave as if Timer cancelled
        synchronized(queue) {
            newTasksMayBeScheduled = false;
            queue.clear();  // Eliminate obsolete references
        }
    }
}

/**
 * The main timer loop.  (See class comment.)
 */
private void mainLoop() {
    while (true) {
        try {
            TimerTask task;
            boolean taskFired;
            synchronized(queue) {
                // 任务队列为空则一直等到
                while (queue.isEmpty() && newTasksMayBeScheduled)
                    queue.wait();
                if (queue.isEmpty())
                    break; // Queue is empty and will forever remain; die

                // Queue nonempty; look at first evt and do the right thing
                long currentTime, executionTime;
              	// 从任务队列里获取任务
                task = queue.getMin();
                synchronized(task.lock) {
                    if (task.state == TimerTask.CANCELLED) {
                        queue.removeMin();
                        continue;  // No action required, poll queue again
                    }
                    currentTime = System.currentTimeMillis();
                    executionTime = task.nextExecutionTime;
                    if (taskFired = (executionTime<=currentTime)) {
                        if (task.period == 0) { // Non-repeating, remove
                            queue.removeMin();
                            task.state = TimerTask.EXECUTED;
                        } else { // Repeating task, reschedule
                            queue.rescheduleMin(
                              task.period<0 ? currentTime   - task.period
                                            : executionTime + task.period);
                        }
                    }
                }
                if (!taskFired) // Task hasn't yet fired; wait
                    queue.wait(executionTime - currentTime);
            }
          	// 执行任务,我们看到这里不是启动了新的线程,而是阻塞式执行
            if (taskFired)  // Task fired; run it, holding no locks
                task.run();
        } catch(InterruptedException e) {
        }
    }
}
到这里我们就知道了,Timer 是单线程执行定时任务的,也就是说可能你的任务时间到了还是没有执行,因为上一个任务还没有执行结束,这里我们写个例子看一下,就是上面那个例子,简单改改
public static void main(String[] args) throws InterruptedException {
    timer();
}
// 整体来说我们还是希望1s 执行一次
public static void timer(){
    Timer t = new Timer();
    t.scheduleAtFixedRate(new TimerTask() {
        @Override
        public void run() {
            System.out.println(Thread.currentThread().getName()+ ": hello world");
            // 我们在这个任务里面进行了等待
            try {
                TimeUnit.SECONDS.sleep(1000000);
            } catch (InterruptedException e) {
                e.printStackTrace();
            }
        }
    }, 100, 1000);
}
其实你执行了之后就会发现,并不能保证你的任务TimerTask对象1s 执行一次,因为上一次的任务还没有执行结束。这个也就是为什么idea 建议你使用ScheduledExecutorService,它本质上还是属于线程池的范畴,我们在学习线程池实现的时候再将。
FutureTask
在Java并发程序中FutureTask表示一个可以取消的异步运算。它有启动和取消运算、查询运算是否完成和取回运算结果等方法。
只有当运算完 成的时候结果才能取回,如果运算尚未完成get方法将会阻塞。
一个FutureTask对象可以对Callable和Runnable的对象进行包装,由于FutureTask也是实现了了Runnable接口所以它可以提交给Executor来执行,也可以和Thread 搭配使用,但是这里有个问题那就是我们知道Runnable是没有返回值的,那FutureTask是怎么做到返回值的呢,我们下面看一下
public class FutureTaskDemo {
    public static void main(String[] args) throws ExecutionException, InterruptedException {
        callableDemo();
        runableDemo();
    }

    public static void callableDemo() throws ExecutionException, InterruptedException {
        Callable<Integer> call = new Callable<Integer>() {
            @Override
            public Integer call() throws Exception {
                System.out.println("正在计算结果...");
                Thread.sleep(3000);
                return 1;
            }
        };
        FutureTask<Integer> task = new FutureTask<>(call);
        Thread thread = new Thread(task);
        thread.start();
        Integer result = task.get();
        System.out.println("callableDemo的结果是:" + result);
    }


    public static void runableDemo() throws ExecutionException, InterruptedException {
        Runnable run = new Runnable() {
            @SneakyThrows
            @Override
            public void run() {
                System.out.println("正在计算结果...");
                Thread.sleep(3000);
            }
        };
      	// 返回值是我们自己预先定义的
        FutureTask<Integer> task = new FutureTask(run,1);
        Thread thread = new Thread(task);
        thread.start();
        Integer result = task.get();
        System.out.println("runableDemo的结果是:" + result);
    }
}
其实我们看到FutureTask本质上还是使用了Callable或者是Runnable
高级实现方式
Java8 lambda 表达式
这其实就是个语法糖,本质上还是老套路,下面我们还是简单看一下,这到底是是个啥玩意,本质上是函数式接口
public class LambdaDemo {
    public static void main(String[] args) {
        lambdaThread();
        lambdaRunable();
    }


    public static void lambdaThread() {
        Thread t = new Thread(() -> {
            System.out.println("lambdaThread 的实现方式");
        });
        t.start();
    }

    public static void lambdaRunable() {
        Runnable r = () -> {
            System.out.println("lambdaRunable 的实现方式");
        };
        Thread t1 = new Thread(r);
        Thread t2 = new Thread(() -> {
            r.run();
        });

        t1.start();
        t2.start();
    }
}
Java8 stream
这主要是用到了Java8 中的stream api
public class StreamDemo {
    public static void main(String[] args) {
        Stream.of(1,2,3,4,5,6,7,8,9,10).parallel().forEach(ele->{
            System.out.println(Thread.currentThread().getName()+":"+ele);
        });
    }
}
输出:我们看到启动了多个线程
ForkJoinPool.commonPool-worker-1:3
ForkJoinPool.commonPool-worker-1:4
ForkJoinPool.commonPool-worker-5:5
ForkJoinPool.commonPool-worker-5:10
ForkJoinPool.commonPool-worker-4:1
ForkJoinPool.commonPool-worker-2:9
ForkJoinPool.commonPool-worker-3:2
ForkJoinPool.commonPool-worker-5:6
ForkJoinPool.commonPool-worker-1:8
main:7
并发流使用的默认线程数等于你机器的处理器核心数。通过这个方法可以修改这个值,这是全局属性,System.setProperty("java.util.concurrent.ForkJoinPool.common.parallelism", "12");
fork/join框架是jdk1.7引入的,java8的stream多线程并非流的正是以这个框架为基础的,所以想要深入理解并发流就要学习fork/join框架。fork/join框架的目的是以递归方式将可以并行的任务拆分成更小的任务,然后将每个子任务的结果合并起来生成整体结果。它是ExecutorService接口的一个实现,它把子任务分配线程池(ForkJoinPool)中的工作线程。要把任务提交到这个线程池,必须创建RecursiveTask的一个子类,如果任务不返回结果则是RecursiveAction的子类。
线程池
这里我们就不详细解释和线程池有关的东西,我们就说线程池是如何实现多线的,也就是线程池是如何创建线程的,我们知道使用线程池的目的就是避免手动创建大量线程,将控制权交给线程池从而达到线程重用的目的。
首先我们看一下我们是怎么使用线程池的
public class ThreadPoolDemo {
    public static void main(String[] args) throws InterruptedException {
        ExecutorService executorService = Executors.newCachedThreadPool();

        while (true) {
            executorService.submit(() -> {
                while (true) {
                    System.out.println(Thread.currentThread().getName());
                    try {
                        TimeUnit.SECONDS.sleep(10);
                    } catch (InterruptedException e) {
                        e.printStackTrace();
                    }
                }
            });
            TimeUnit.SECONDS.sleep(1);
        }

    }
}
从这里我们可以看到,我们其实只要向线程池提交一个Runnable对象即可,其实根据我们前面通过Runnable实现线程的方式我们大概能猜到,线程池就是利用我们提交上去的Runnable对象,为我们创建了线程。在我们创建线程池的时候其实有这样一个参数,就是用来创建线程的工厂,Executors.newCachedThreadPool() newCachedThreadPool 方法其实只是java 为我们提供的一个便捷方法,其实最终都会调用下面这样一个构造函数。
public ThreadPoolExecutor(int corePoolSize,
                          int maximumPoolSize,
                          long keepAliveTime,
                          TimeUnit unit,
                          BlockingQueue<Runnable> workQueue) {
    this(corePoolSize, maximumPoolSize, keepAliveTime, unit, workQueue,Executors.defaultThreadFactory(), defaultHandler);
}
下面我们可以看一下这个工厂了
/**
 * The default thread factory
 */
static class DefaultThreadFactory implements ThreadFactory {
    private static final AtomicInteger poolNumber = new AtomicInteger(1);
    private final ThreadGroup group;
    private final AtomicInteger threadNumber = new AtomicInteger(1);
    private final String namePrefix;

    DefaultThreadFactory() {
        SecurityManager s = System.getSecurityManager();
        group = (s != null) ? s.getThreadGroup() :
                              Thread.currentThread().getThreadGroup();
        namePrefix = "pool-" +
                      poolNumber.getAndIncrement() +
                     "-thread-";
    }
  	// 下面就是我们创建线程的方法
    public Thread newThread(Runnable r) {
        Thread t = new Thread(group, r,
                              namePrefix + threadNumber.getAndIncrement(),
                              0);
        if (t.isDaemon())
            t.setDaemon(false);
        if (t.getPriority() != Thread.NORM_PRIORITY)
            t.setPriority(Thread.NORM_PRIORITY);
        return t;
    }
}
对于线程池而言,本质上是通过线程工厂创建线程的,默认采用 DefaultThreadFactory ,它会给线程池创建的线程设置一些默认值,比如:线程的名字、是否是守护线程,以及线程的优先级等。但是无论怎么设置这些属性,最终它还是通过 new Thread() 创建线程的 ,只不过这里的构造函数传入的参数要多一些,由此可以看出通过线程池创建线程并没有脱离最开始的那两种基本的创建方式,因为本质上还是通过 new Thread() 实现的。
线程的启动与状态
start 方法和 run 方法
这个其实是一个非常老生常谈的问题了,就是说我们只有调用start 方法才会帮我们启动一个线程,如果你是直接调用run 方法的话,那其实就是同步调用。
多次启动
我们先看一下多次启动会出现什么
public class ThreadStartTimes {
    public static void main(String[] args) {
        Runnable target;
        Thread thread = new Thread(()->{
            System.out.println(Thread.currentThread().getName());
        });

        thread.start();
        System.out.println(1);
        thread.start();
        System.out.println(2);
        thread.start();
        System.out.println(3);
    }
}
输出如下:
1
Thread-0
Exception in thread "main" java.lang.IllegalThreadStateException
	at java.lang.Thread.start(Thread.java:708)
	at thread.thread.ThreadStartTimes.main(ThreadStartTimes.java:12)
我们看到报错了,那我们看一下这个方法的实现
public synchronized void start() {
    /**
     * 也就是说我们的线程如果处在新建的状态下(NEW),threadStatus是0,其他状态下的线程是不能调用start 方法的
     * A zero status value corresponds to state "NEW".
     */
    if (threadStatus != 0)
        throw new IllegalThreadStateException();

    /* Notify the group that this thread is about to be started
     * so that it can be added to the group's list of threads
     * and the group's unstarted count can be decremented. */
    group.add(this);

    boolean started = false;
    try {
        start0();
        started = true;
    } finally {
        try {
            if (!started) {
                group.threadStartFailed(this);
            }
        } catch (Throwable ignore) {
            /* do nothing. If start0 threw a Throwable then
              it will be passed up the call stack */
        }
    }
}
也就是说如果我们的线程在第一次调用start 方法之后threadStatus以及不是0了,那这个时候你如果再去调用这个方法的话,就会报错。但是需要注意的是你在Thread 代码里面看不到状态的变更,也就是说状态的变更是由local 方法维护的
正确理解线程与Runnable 的关系
关于这一点的理解很重要,这也是为什么线程池存在的原因,我们看下面这段代码,我们看到线程的核心逻辑其实就是调用target.run(),而这里的target 就是runnable
@Override
public void run() {
    if (target != null) {
        target.run();
    }
}
因为一般情况下我们的run 方法或者是我们的线程对象就只持有一个runnable对象,这个时候往往给人一种错局,那就是runnable在功能上是和线程是等价的,其实不然,我们可以看一段下面的代码,这个线程池的一段核心代码,后面在学习线程池的时候我们也会详细解释
final void runWorker(Worker w) {
    Thread wt = Thread.currentThread();
    Runnable task = w.firstTask;
    w.firstTask = null;
    w.unlock(); // allow interrupts
    boolean completedAbruptly = true;
    try {
      	// 这里是重点
        while (task != null || (task = getTask()) != null) {
            w.lock();
            if ((runStateAtLeast(ctl.get(), STOP) ||
                 (Thread.interrupted() &&
                  runStateAtLeast(ctl.get(), STOP))) &&
                !wt.isInterrupted())
                wt.interrupt();
            try {
                beforeExecute(wt, task);
                Throwable thrown = null;
                try {
                    task.run();
                } catch (RuntimeException x) {
                    thrown = x; throw x;
                } catch (Error x) {
                    thrown = x; throw x;
                } catch (Throwable x) {
                    thrown = x; throw new Error(x);
                } finally {
                    afterExecute(task, thrown);
                }
            } finally {
                task = null;
                w.completedTasks++;
                w.unlock();
            }
        }
        completedAbruptly = false;
    } finally {
        processWorkerExit(w, completedAbruptly);
    }
}
我们看到线程不是简单的持有一个Runnable 对象,然后运行,等运行结束之后,线程也结束了,这里的实现方式是线程运行一个Runnable对象,运行结束之后从队列里面再获取一个Runnable对象,也就是说一个线程运行了多个Runnable对象,这就是线程池的原理,这就是线程和Runnable的关系
总结
-
无论是 Callable 还是 FutureTask,它们首先和 Runnable 一样,都是一个任务,是需要被执行的,而不是说它们本身就是线程。它们可以放到线程池中执行,如代码所示, submit() 方法把任务放到线程池中,并由线程池创建线程,不管用什么方法,最终都是靠线程来执行的,而子线程的创建方式仍脱离不了最开始讲的两种基本方式,也就是实现 Runnable 接口和继承 Thread 类。始终记住线程就是线程,任务就是任务,线程是Thread 任务是Runnable 之类的东西,只有这样你才能理解线程池的含义,也就是说我们把任务交给线程池,线程池用池子里的线程运行我们的任务,当一个任务运行完了,这个线程就可以运行其他任务了,从而达到线程的复用。
-
Callable、FutureTask、Future 都是在JDK1.5 的时候才引入的,所以当我们再回过头来看多线程的实现方式其实本质上只有一种,因为其他的实现方式也必须使用Thread 类才能实现多线程,所以我们可以这样理解其他的类例如Callable、FutureTask、Runnable 都是任务对象,然后任务对象需要放到线程里面去执行。
-
Thread 和 Runnable到底哪个好呢,Runnable好
- 首先是因为Java 只能单继承,所以我们可以利用Runnable来实现功能,我们的对象还可以继承其他所需要的类
- 其次就是我们Thread的每一次创建都是一次实实在在的线程开销,所以其实我们可以使用一个线程对象去执行多个Runnable,这个就很有意思了,这也是线程池的原理;
- 最后就是代码的设计这一块了,通过Runnable实现多线程,达到了 Runnable 与 Thread 类的解耦,Thread 类负责线程启动和属性设置等内容,Runnable 封装我们的业务逻辑,这其实也就是为什么我们可以使用Thread去执行多个Runnable对象,因为它们两个的定位和设计初衷就是不一样的,Thread就是物理上的线程,而Runnable就是要在线程上执行的业务逻辑。