Android系统控件可能会不能满足需求,那么就需要自定义一个控件。下面是我做的关于Android自定义控件以及其使用的方法。
1.首先,我们要对所需自定义控件的进行布局:
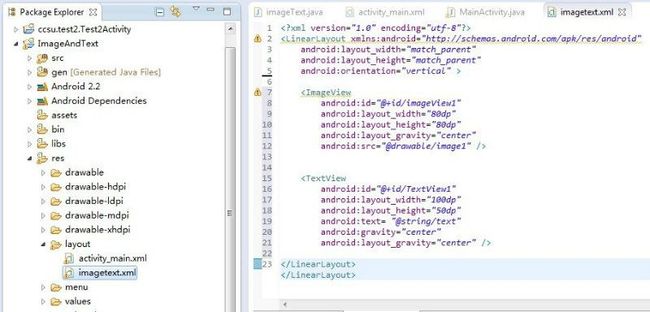
在layout建立布局文件 imagetext.xml
<?xml version="1.0" encoding="utf-8"?>
<LinearLayout xmlns:android="http://schemas.android.com/apk/res/android"
android:layout_width="match_parent"
android:layout_height="match_parent"
android:orientation="vertical" >
<ImageView //使用系统控件
android:id="@+id/imageView1"
android:layout_width="80dp"
android:layout_height="80dp"
android:layout_gravity="center"
android:src="@drawable/image1" />
<TextView
android:id="@+id/TextView1"
android:layout_width="100dp"
android:layout_height="50dp"
android:text= "@string/text"
android:gravity="center"
android:layout_gravity="center" />
</LinearLayout>
图 1
imagetext.xml
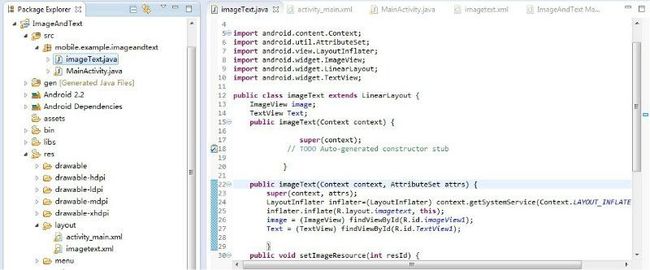
2.写一个类(imageText)继承LinearLayout,并导入布局(imagetext.xml)
package mobile.example.imageandtext;
import android.content.Context;
import android.util.AttributeSet;
import android.view.LayoutInflater;
import android.widget.ImageView;
import android.widget.LinearLayout;
import android.widget.TextView;
public class imageText extends LinearLayout {
ImageView image;
TextView Text;
public imageText(Context context) {
super(context);
// TODO Auto-generated constructor stub
}
public imageText(Context context, AttributeSet attrs) {
super(context, attrs);
//使用
LayoutInflater
载入我们自定义的布局文件
imagetext.xml
LayoutInflater inflater=(LayoutInflater) context.getSystemService(Context.LAYOUT_INFLATER_SERVICE);
inflater.inflate(R.layout.imagetext, this);
image = (ImageView) findViewById(R.id.imageView1);
Text = (TextView) findViewById(R.id.TextView1);
}
//设置图片资源
public void setImageResource(int resId) {
image.setImageResource(resId);
}
//设置文字
public void setTextViewText(String text) {
Text.setText(text);
}
}
3.在需要使用自定义控件的布局文件(activity_main.xml)中加入这控件。
android:layout_width="match_parent"
android:layout_height="match_parent" >
<TableRow android:paddingTop="20dp"> //table布局
<mobile.example.imageandtext.imageText //必须使用完整路径,否则不能找到自定义控件
android:id="@+id/imagetext"
android:layout_width="fill_parent"
android:layout_height="wrap_content"
/>
<mobile.example.imageandtext.imageText
android:id="@+id/imagetext1"
android:layout_width="fill_parent"
android:layout_height="wrap_content"
/>
<mobile.example.imageandtext.imageText
android:id="@+id/imagetext2"
android:layout_width="fill_parent"
android:layout_height="wrap_content"
/>
</TableRow>
4.在需要用到此控件的activity(MainActivity.jave)中设置该控件:
package mobile.example.imageandtext;
import android.os.Bundle;
import android.app.Activity;
import android.view.Menu;
import android.view.MenuItem;
import android.widget.ImageView;
import android.support.v4.app.NavUtils;
public class MainActivity extends Activity {
private imageText imageText1;
private imageText imageText2;
private imageText imageText3;
@Override
public void onCreate(Bundle savedInstanceState) {
super.onCreate(savedInstanceState);
setContentView(R.layout.activity_main);
imageText1 = (imageText) findViewById(R.id.imagetext);
imageText1.setTextViewText("大雄");
imageText1.setImageResource(R.drawable.image1);
imageText2 = (imageText)findViewById(R.id.imagetext1);
imageText2.setTextViewText("大雄他爸");
imageText2.setImageResource(R.drawable.image2);
imageText3 = (imageText)findViewById(R.id.imagetext2);
imageText3.setTextViewText("大雄他妈");
imageText3.setImageResource(R.drawable.image3);
}
}
5. 自定义控件效果预览:
图5 效果预览


