吴恩达深度学习学习笔记——C1W2——神经网络基础——作业2——用神经网络的思路实现Logistic回归
可以明确的说,如果不自己一步步调试作业代码,很难看懂作业内容。
这里主要梳理一下作业的主要内容和思路,完整作业文件可参考:
http://localhost:8888/tree/Andrew-Ng-Deep-Learning-notes/assignments/C1W2
作业完整截图,参考本文结尾:作业完整截图。
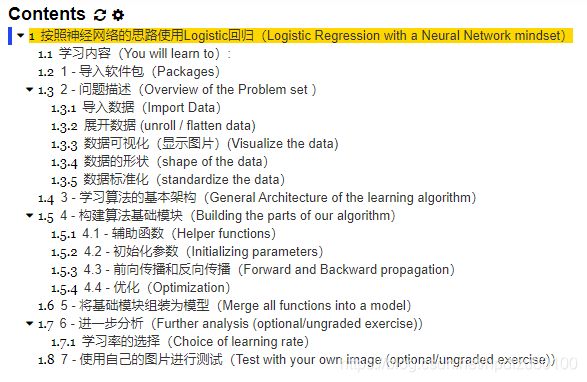
作业目录:
作业指导及目标
Logistic Regression with a Neural Network mindset(用神经网络的思路实现Logistic回归)
Welcome to your first (required) programming assignment! You will build a logistic regression classifier to recognize cats. This assignment will step you through how to do this with a Neural Network mindset, and so will also hone your intuitions about deep learning.
Instructions:
- Do not use loops (for/while) in your code, unless the instructions explicitly ask you to do so.
You will learn to:
- Build the general architecture of a learning algorithm, including:
- Initializing parameters
- Calculating the cost function and its gradient
- Using an optimization algorithm (gradient descent)
- Gather all three functions above into a main model function, in the right order.
...
主要软件包(numpy, h5py, matplotlib, PIL, scipy等)
1 - Packages
First, let's run the cell below to import all the packages that you will need during this assignment.
- numpy is the fundamental package for scientific computing with Python.
- h5py is a common package to interact with a dataset that is stored on an H5 file.
- matplotlib is a famous library to plot graphs in Python.
- PIL and scipy are used here to test your model with your own picture at the end.
...
问题概要(要解决什么问题?创建一个简单的图像识别算法(Logistic回归),判断给定的一幅图片中是否包含一只猫)
2 - Overview of the Problem set
Problem Statement: You are given a dataset ("data.h5") containing: - a training set of m_train images labeled as cat (y=1) or non-cat (y=0) - a test set of m_test images labeled as cat or non-cat - each image is of shape (num_px, num_px, 3) where 3 is for the 3 channels (RGB). Thus, each image is square (height = num_px) and (width = num_px).
You will build a simple image-recognition algorithm that can correctly classify pictures as cat or non-cat.
...
算法的粗略结构
3 - General Architecture of the learning algorithm
It's time to design a simple algorithm to distinguish cat images from non-cat images.
You will build a Logistic Regression, using a Neural Network mindset. The following Figure explains why Logistic Regression is actually a very simple Neural Network!
...
构造算法的零件
4 - Building the parts of our algorithm
The main steps for building a Neural Network are:
- Define the model structure (such as number of input features)
- Initialize the model's parameters
- Loop:
- Calculate current loss (forward propagation)
- Calculate current gradient (backward propagation)
- Update parameters (gradient descent)
You often build 1-3 separately and integrate them into one function we call model().
4.1 - Helper functions(帮助函数、基础函数)
Exercise: Using your code from "Python Basics", implement sigmoid(). As you've seen in the figure above, you need to compute (+)=11+−(+)sigmoid(wTx+b)=11+e−(wTx+b) to make predictions. Use np.exp().
...
4.2 - Initializing parameters(初始化参数)
Exercise: Implement parameter initialization in the cell below. You have to initialize w as a vector of zeros. If you don't know what numpy function to use, look up np.zeros() in the Numpy library's documentation.
...
4.3 - Forward and Backward propagation(前向传播和后向传播)
Now that your parameters are initialized, you can do the "forward" and "backward" propagation steps for learning the parameters.
Exercise: Implement a function propagate() that computes the cost function and its gradient.
...
4.4 - Optimization(优化)
- You have initialized your parameters.
- You are also able to compute a cost function and its gradient.
- Now, you want to update the parameters using gradient descent.
...
重点:
What to remember:
You've implemented several functions that:
- Initialize (w,b)
- Optimize the loss iteratively to learn parameters (w,b):
- computing the cost and its gradient
- updating the parameters using gradient descent
- Use the learned (w,b) to predict the labels for a given set of examples
...
5 - Merge all functions into a model(将定义好的函数组成模型)
You will now see how the overall model is structured by putting together all the building blocks (functions implemented in the previous parts) together, in the right order.
Exercise: Implement the model function. Use the following notation: - Y_prediction for your predictions on the test set - Y_prediction_train for your predictions on the train set - w, costs, grads for the outputs of optimize()
...
6 - Further analysis (optional/ungraded exercise)(进一步分析)
Congratulations on building your first image classification model. Let's analyze it further, and examine possible choices for the learning rate α.
...
7 - Test with your own image (optional/ungraded exercise)(使用自己的图片进行测试)
Congratulations on finishing this assignment. You can use your own image and see the output of your model. To do that: 1. Click on "File" in the upper bar of this notebook, then click "Open" to go on your Coursera Hub. 2. Add your image to this Jupyter Notebook's directory, in the "images" folder 3. Change your image's name in the following code 4. Run the code and check if the algorithm is right (1 = cat, 0 = non-cat)!
重点:
What to remember from this assignment:
1. Preprocessing the dataset is important.
2. You implemented each function separately: initialize(), propagate(), optimize(). Then you built a model().
3. Tuning the learning rate (which is an example of a "hyperparameter") can make a big difference to the algorithm. You will see more examples of this later in this course!
作业完整截图:


