SpringCloud-Rest微服务工程的构建
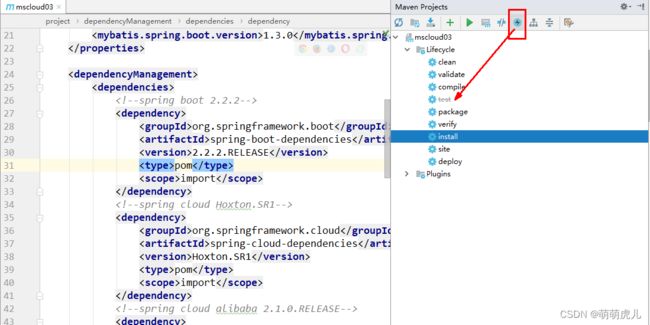
最后执行 install 操作,将父工程发布到仓库方便子工程继承
2.2 创建微服务提供者支付模块
2.2.1 创建maven子工程
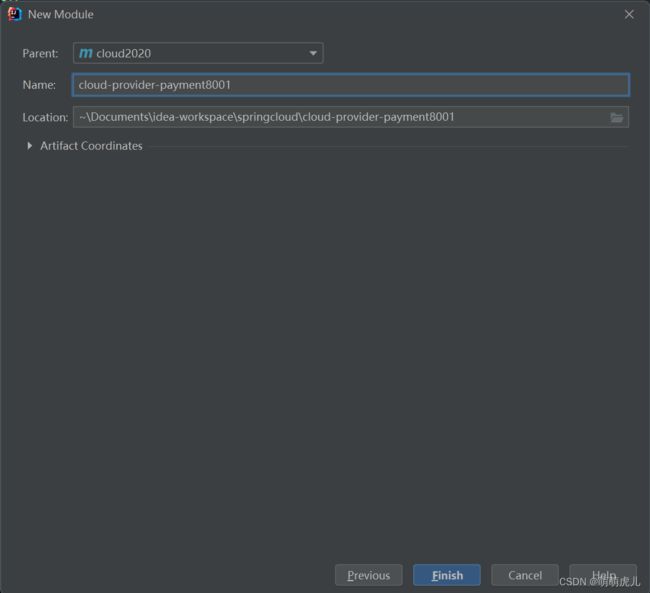
在父工程的基础上创建一个maven子工程,名字:cloud-provider-payment8001
2.2.2 改POM
            org.springframework.boot
            spring-boot-starter-web


            org.springframework.boot
            spring-boot-starter-actuator


            org.mybatis.spring.boot
            mybatis-spring-boot-starter


            com.alibaba
            druid-spring-boot-starter
            1.1.10


            mysql
            mysql-connector-java


            org.springframework.boot
            spring-boot-starter-jdbc


            org.springframework.boot
            spring-boot-devtools
            runtime
            true


            org.projectlombok
            lombok
            true


            org.springframework.boot
            spring-boot-starter-test
            test
2.2.3 创建YML
注意修改数据库名字、用户名、密码
# 端口号
server:
  port: 8001

spring:
  application:
    name: cloud-payment-service
  datasource:
    type: com.alibaba.druid.pool.DruidDataSource            # 当前数据源操作类型
    driver-class-name: org.gjt.mm.mysql.Driver              # mysql驱动
    url: jdbc:mysql://localhost:3306/db2019?useUnicode=true&characterEncoding=utf-8&useSSL=false
    username: root
    password: 123456


mybatis:
  mapperLocations: classpath:mapper/*.xml
  type-aliases-package: com.atguigu.springcloud.entities    # 所有Entity别名类所在包
2.2.4 主启动类
@SpringBootApplication
public class PaymentMain8001
{
    public static void main(String[] args)
    {
        SpringApplication.run(PaymentMain8001.class,args);
    }
}
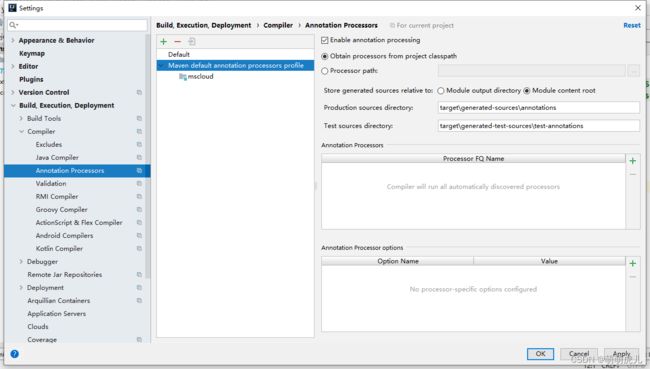
注意:我的idea默认不会识别出springboot的配置和配置文件。自定义主启动类时类名上会有波浪线提示,按照提示在工程中添加Spring的module即可。
2.2.5 业务类
1. SQL表
CREATE TABLE `payment` (
  `id` bigint(20) NOT NULL AUTO_INCREMENT COMMENT 'ID',
  `serial` varchar(200) DEFAULT '',
  PRIMARY KEY (`id`)
) ENGINE=InnoDB AUTO_INCREMENT=1 DEFAULT CHARSET=utf8
2.entities
@Data
@AllArgsConstructor
@NoArgsConstructor
public class Payment implements Serializable
{
    private Long id;
    private String serial;
}
@Data
@AllArgsConstructor
@NoArgsConstructor
public class CommonResult
{
    private Integer code;
    private String  message;
    private T data;

    public CommonResult(Integer code, String message)
    {
        this(code,message,null);
    }
} Payment是订单实体类,CommonResult是用于统一响应请求的。
3. mapper接口
@Mapper  //import org.apache.ibatis.annotations.Mapper;
public interface PaymentDao
{
    public int create(Payment payment);

    public Payment getPaymentById(@Param("id") Long id);
}
4. mapper映射文件
insert into payment(serial) values (#{serial});
5. Service接口与实现类
public interface PaymentService {
    int create(Payment payment);
    Payment getPaymentById(@Param("id") Long id);
}
@Service
public class PaymentServiceImpl implements PaymentService {
@Autowired
private PaymentDao paymentDao;
@Override
public int create(Payment payment) {
return paymentDao.create(payment);
}
@Override
public Payment getPaymentById(Long id) {
return paymentDao.getPaymentById(id);
}
}6. controller
@RestController
@Slf4j
public class PaymentController
{
    @Resource
    private PaymentService paymentService;

    @PostMapping(value = "/payment/create")
    //一定要使用@RequestBody注解,否则插入的数据异常
    public CommonResult create(@RequestBody Payment payment)
    {
        int result = paymentService.create(payment);
        log.info("*****插入操作返回结果:" + result);

        if(result > 0)
        {
            return new CommonResult(200,"插入数据库成功",result);
        }else{
            return new CommonResult(444,"插入数据库失败",null);
        }
    }

    @GetMapping(value = "/payment/get/{id}")
    public CommonResult getPaymentById(@PathVariable("id") Long id)
    {
        Payment payment = paymentService.getPaymentById(id);
        log.info("*****查询结果:{}",payment);
        if (payment != null) {
            return new CommonResult(200,"查询成功",payment);
        }else{
            return new CommonResult(444,"没有对应记录,查询ID: "+id,null);
        }
    }
}
2.2.6 测试
输入:http://localhost:8001/payment/get/31

响应:
{
    "code": 200,
    "message": "查询成功!",
    "data": {
        "id": 31,
        "serial": "wzwzwz"
    }
}对于Post请求,可以使用PostMan软件实现请求的发送。
2.3 创建微服务消费者订单模块
2.3.1 创建maven子工程
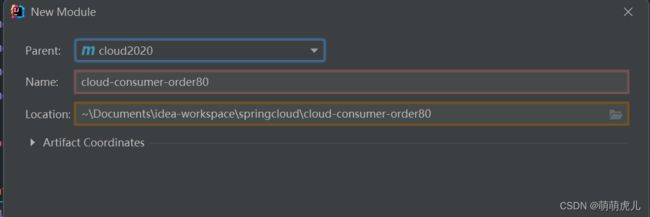
在父工程下建子工程,名字:cloud-consumer-order80
2.3.2 改POM
            org.springframework.boot
            spring-boot-starter-web


            org.springframework.boot
            spring-boot-starter-actuator


            org.springframework.boot
            spring-boot-devtools
            runtime
            true


            org.projectlombok
            lombok
            true


            org.springframework.boot
            spring-boot-starter-test
            test
2.3.3 写YML
#指定端口
server:
  port: 80

spring:
  application:
    name: cloud-order-service
2.3.4 主启动类
@SpringBootApplication
public class MainApp80
{
    public static void main(String[] args)
    {
        SpringApplication.run(MainApp80.class,args);
    }
}
2.3.5 业务类
1. entities
@Data
@AllArgsConstructor
@NoArgsConstructor
public class Payment implements Serializable
{
    private Long id;
    private String serial;
}
@Data
@AllArgsConstructor
@NoArgsConstructor
public class CommonResult {
    private Integer code;
    private String message;
    private T data;

    public CommonResult(Integer code, String message) {
        this.code = code;
        this.message = message;
        this.data = null;
    }
} 2.配置类(RestTemplate)
RestTemplate提供了多种便捷访问远程Http服务的方法, 是一种简单便捷的访问restful服务模板类,是Spring提供的用于访问Rest服务的客户端模板工具集
使用:
(url , requestMap , ResponseBean.class)这三个参数分别代表 REST请求地址、请求参数、HTTP响应被转换成的对象类型。
@Configuration
public class ApplicationContextConfig {
    @Bean
    @LoadBalanced
    public RestTemplate getRestTemplate(){return new RestTemplate();}
}
3. controller
@RestController
public class OrderController
{

    public static final String PaymentSrv_URL = "http://localhost:8001";

    @Autowired
    private RestTemplate restTemplate;

    @GetMapping("/consumer/payment/create") //客户端用浏览器是get请求,但是底层实质发送post调用服务端8001
    public CommonResult create(Payment payment)
    {
        return restTemplate.postForObject(PaymentSrv_URL + "/payment/create",payment,CommonResult.class);
    }


    @GetMapping("/consumer/payment/get/{id}")
    public CommonResult getPayment(@PathVariable Long id)
    {
        return restTemplate.getForObject(PaymentSrv_URL + "/payment/get/"+id, CommonResult.class, id);
    }
}
2.3.6 测试
输入: http://localhost/consumer/payment/get/31

响应:
{
    "code": 200,
    "message": "查询成功!",
    "data": {
        "id": 31,
        "serial": "wzwzwz"
    }
}实际上相当于Order模块将请求转发给了Payment模块,对数据库进行操作,然后Payment模块将查询结果以JSON的形式返回给Order模块,响应给客户端。
2.4 重构项目-公共类的抽取
我们可以注意到,Order、Payment模块的实体类是完全相同的,为了减少冗余,我们可以将重复的类抽取出来作为公共类,同时供多个模块使用。
2.4.1 新建一个maven项目
名字为:cloud-api-commons
2.4.2 改POM
            org.springframework.boot
            spring-boot-devtools
            runtime
            true


            org.projectlombok
            lombok
            true


            cn.hutool
            hutool-all
            5.1.0
2.4.3 entities
public class CommonResult
{
    private Integer code;
    private String message;
    private T data;

    public CommonResult()
    {
    }

    public CommonResult(Integer code, String message, T data)
    {
        this.code = code;
        this.message = message;
        this.data = data;
    }
    public CommonResult( Integer code,String message) {
        this( code, message,null);
    }

    public CommonResult(T data) {
        this(200, "操作成功", data);
    }

    //setter--getter
    public T getData() {
        return data;
    }

    public void setData(T data) {
        this.data = data;
    }

    public String getMessage() {
        return message;
    }

    public void setMessage(String message) {
        this.message = message;
    }

    public Integer getCode() {
        return code;
    }

    public void setCode(Integer code) {
        this.code = code;
    }
}
@Data
@AllArgsConstructor
@NoArgsConstructor
public class Payment implements Serializable
{
private Long id;
private String serial;
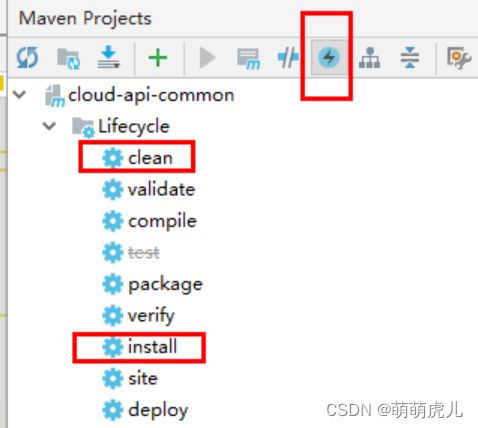
}2.4.4 执行maven命令-clean、install
这样就可以将这个模块存到maven仓库,供其他模块引用了。
2.4.5 Order、Payment模块的简化
将entities包全部删掉,然后各自添加依赖
            com.atguigu.springcloud
            cloud-api-commons
            ${project.version}
这样一来,我们建立了三个子模块,可以实现基本的业务。
1. cloud-api-commons
2. cloud-consumer-order80
3. cloud-provider-payment8001
