【Vue 路由(vue—router) 一】介绍、基本使用、嵌套路由
目录
前言
一、介绍、安装
1.定义
2.安装
1:在src根目录创建router目录,在目录中创建index.js,代码如下:
2:main.js 中进行挂载
二、基本使用(代码后赋)
展示效果
代码(看对应的代码段)
app.vue代码,此代码含有样式
三个路由组件的代码
router
三、嵌套路由
1.布局逻辑
2.效果展示
3.代码
about
两个路由组件
四、注意
前言
想要学习完整内容请关注主页的专栏————>Vue学习
本次的代码段是结合体,被我分开发文,我以在看代码段时,已经截图展示,所看部分
一、介绍、安装
1.定义
vue-router是Vue.js官方的路由插件,它和vue.js是深度集成的,适合用于构建单页面应用。
路由:route 一组key-v的对应关系(路径的改变对应的组件进行切换)
路由器:router 多个路由需要路由器管理
为了实现单页面应用
2.安装
npm i vue-router@3 安装3版本
如果使用 vue ui 就没有以下的操作,因为在创建项目的时候已经配置好了
1:在src根目录创建router目录,在目录中创建index.js,代码如下:
import Vue from 'vue';

//导入vue-router

import VueRouter from 'vue-router'

//应用插件

Vue.use(VueRouter)

//创建router规则对象

const routes = [

]

//创建router

const router = new VueRouter({

routes

})

//导出router

export default router
2:main.js 中进行挂载
import Vue from 'vue'
import App from './App.vue'

import router from './router'


Vue.config.productionTip = false

new Vue({

  router,

  render: h => h(App)
}).$mount('#app')
二、基本使用(代码后赋)
以下例子展现路由的基本使用
css样式已经写好了,直接实现路由效果
展示效果
首先学习的效果
代码(看对应的代码段)
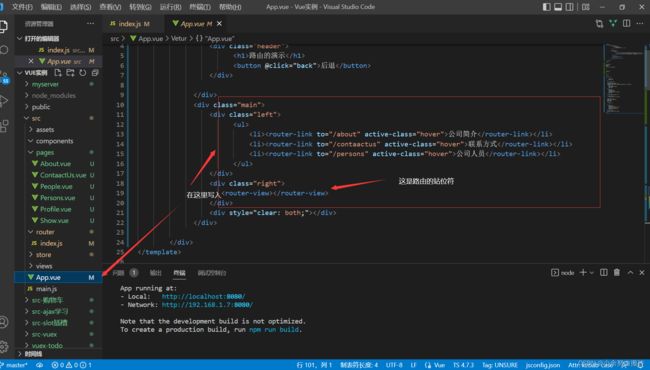
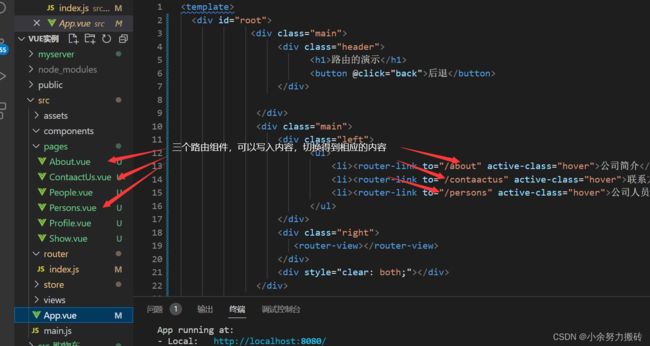
app.vue代码,此代码含有样式
公司简介 联系方式 公司人员
三个路由组件的代码
about
ContaactUs
联系方式
persons
-
姓名:{{item.realname}}
router
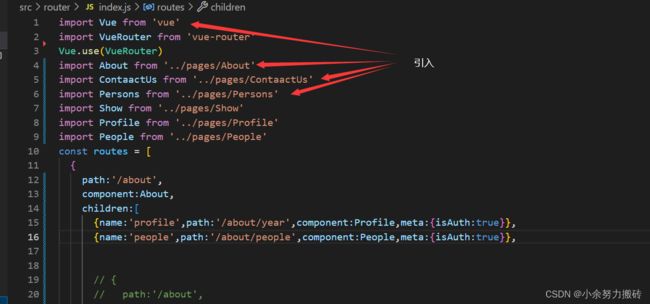
import Vue from 'vue'
import VueRouter from 'vue-router'
Vue.use(VueRouter)
import About from '../pages/About'
import ContaactUs from '../pages/ContaactUs'
import Persons from '../pages/Persons'
// import Show from '../pages/Show'
// import Profile from '../pages/Profile'
// import People from '../pages/People'
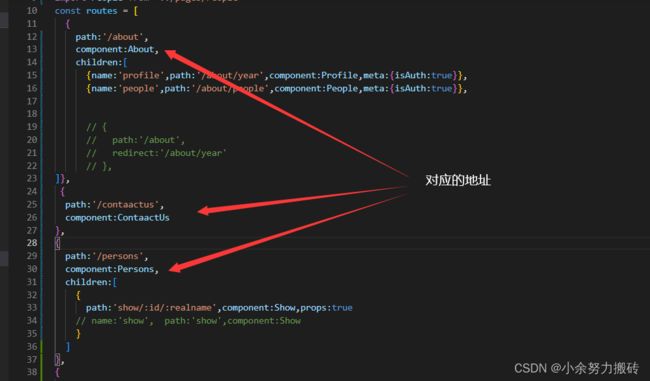
const routes = [
  {
    path:'/about',
    component:About,
    children:[
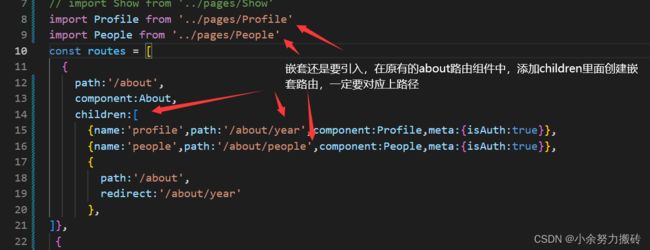
      // {name:'profile',path:'/about/year',component:Profile,meta:{isAuth:true}},
      // {name:'people',path:'/about/people',component:People,meta:{isAuth:true}},
      // {
      //   path:'/about',
      //   redirect:'/about/year'
      // },
]},
 {
  path:'/contaactus',
  component:ContaactUs
},
{
  path:'/persons',
  component:Persons,
  // children:[
  //   {
  //     path:'show/:id/:realname',component:Show,props:true
  //   // name:'show',  path:'show',component:Show
  //   }
  // ]
},
{
  path:'/',
  redirect:'/about'
},
]

const router = new VueRouter({
  mode:'history',
  routes
})

// router.beforeEach((to,from,next)=>{

//   if(to.name=="people" || to.name=="profile"){
// 		if(localStorage.getItem("token")=="123"){
// 			next();
// 		}
// 	}else{
// 		next();
// 	}
// })

// router.beforeEach((to,from,next)=>{

//   if(to.meta.isAuth){
// 		if(localStorage.getItem("token")=="123"){
// 			next();
// 		}
// 	}else{
// 		next();
// 	}
// })

export default router
以上就能实现,视屏上的的切换的路由效果,如果有不懂的,私信问我,源码私聊免费提供
三、嵌套路由
1.布局逻辑
嵌套路由在,最开始的路由下,加入路由
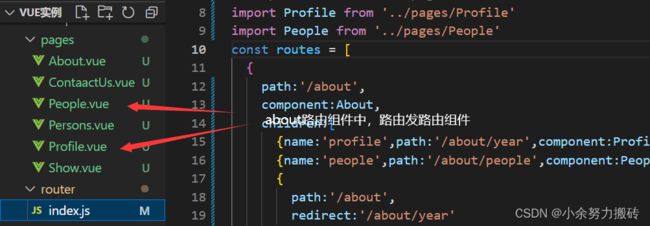
在about路由组件中
再次创建两个路由组件,点击是,获得相对应的内容,实现路由效果
2.效果展示
3.代码
about
两个路由组件
Profile
2002 08-20
People
傅小余
四、注意
这里我都使用到了默认路径,所以页面点开就会有展示效果
代码如下
第一个里面的默认
{
  path:'/',
  redirect:'/about'
},
第二个
 {
        path:'/about',
        redirect:'/about/year'
      },
