Introduction to the TestFlight SDK
https://developer.apple.com/testflight/
When you want to test an app on your device, usually you plug the device into your Mac and run the Xcode project. But what if you want to install the app on many devices for testing purposes or for enterprise distribution? What if your testers are spread out around the world?
Enter TestFlight, a free over-the-air platform developers can use to distribute beta and internal iOS applications to team members, and then track and manage testing and feedback using TestFlight’s dashboard. In addition to distributing the app, the TestFlight SDK includes a number of useful APIs to help with your testing process.
This tutorial will introduce you to TestFlight and demonstrate its APIs using a simple but fun app called MotivateMe. You will also learn how to create an ad hoc build and install it on a device using TestFlight.
You should already know the basics of Objective-C and iOS development to follow along. Since you’ll be building apps for distribution, you’ll also need a paid developer account.
Ready for take off? Let’s get started!
The TestFlight APIs
Right out of the box with just a few lines of code, TestFlight reports such things as testers’ device models, OS version, and how long they’ve used your app. It also automatically records any crashes the testers encounter. In addition to these passive benefits, TestFlight has a number of APIs that help provide a better testing experience:
- The Checkpoint API tells you much more about your users. For example, you can find out who reached a certain level in your game, unlocked an achievement or even who posted their score online.
- Do you want to get feedback from your users with just a single line of code? The Feedback API allows you to do just that.
- TestFlight also offers a remote logging solution. You can use
NSLog()to log directly into TestFlight’s server and you can check the logs for each tester through TestFlight’s website.
Before you play with these APIs, though, you need to know some basics. Here are the steps you’re going to follow as you move through this tutorial:
- Download and explore the MotivateMe starter project.
- Export the starter project as an ad hoc build.
- Install the ad hoc build on your device using TestFlight.
- Integrate the TestFlight SDK.
- Explore the TestFlight APIs.
Now that you know what you’re in for, it’s time to get a little motivation.
Getting Started
Download the MotivateMe starter project.
This is an app that motivates you to work harder by displaying the amount of money you’re earning each second. Sound appealing? Check it out by running it in your Simulator.
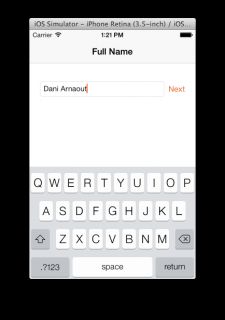
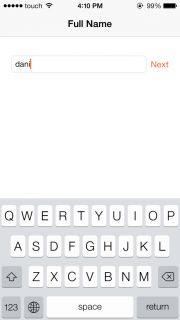
On its first launch, the app will prompt you to enter your full name. Do so and then tap Next.
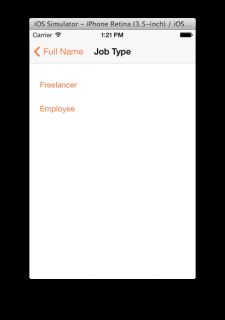
Choose your job type. If you get paid by the hour, then for the app’s purposes you are a freelancer. If you have a full-time or a part-time job, then you’re an employee.
Freelancer is my choice. If you’re a freelancer too, use the stepper to enter the amount of money you make per hour and then tap Next. If you pick employee, enter your monthly salary and the number of hours you work per day.
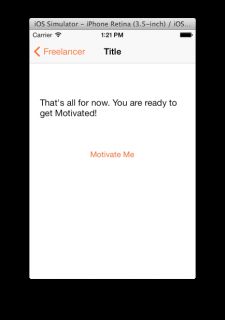
That’s all it takes to set up the app. Tap Motivate Me.
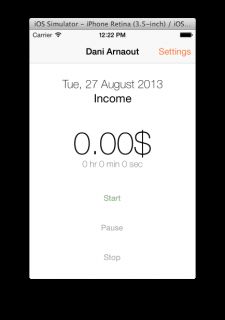
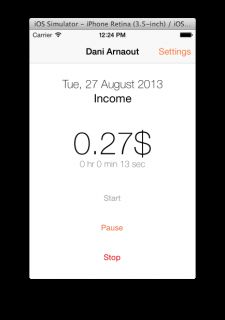
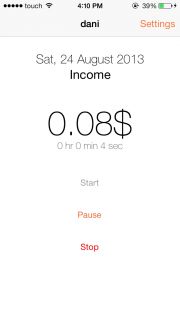
This brings you to the app’s main screen, where you spend most of your time. You can see your full name at the top, followed by today’s date. In the middle of the screen, you can see the amount of money you’ve banked so far and underneath, the length of time you’ve been working this session. At the bottom, you can manage your current state using the three buttons.
Press Start and pretend you’re working. Money will start flowing in – but don’t get too excited. Remember you are simply testing! In your hypothetical scenario as the developer of this app, the money will come later.
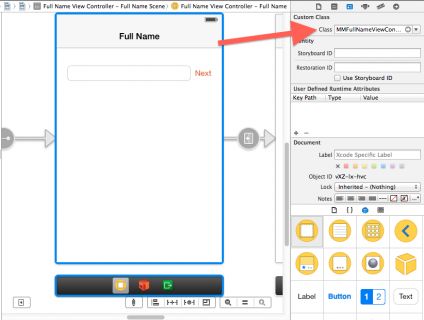
Quit the Simulator and familiarize yourself with the classes, which have been named after the titles of the storyboard’s view controllers. For example, go to Main.storyboard. Full Name is the title of the first view controller, so expect MMFullNameViewController to be its corresponding class name.
It’s time to run this app on your device as if you were one of your remote testers. But to do that, you first need to sign your app with a valid ad hoc provisioning profile.
If you’re familiar with the process of creating ad hoc builds, then you can skip to the Setting Up TestFlight section. Otherwise, get ready to play a little game.
Understanding Apple’s Rules Once and Forever
Certificates, identifiers, devices and provisioning profiles… it all sounds so complicated. iOS developers often find it difficult to fully understand the rules and requirements. To make it easier, let’s turn it into game of unlocking achievements.
To win this game, you have to export MotivateMe.ipa. Before you can do that, though, you must unlock five achievements:
- Prove you are an iOS Developer.
- Prove that you have a Mac.
- Find an App ID.
- Unleash your weapon – your iOS Device, of course.
- Link your App ID with your iOS Device.
You’ll be guided throughout the game, so just relax and enjoy.
Log in to Your Developer Account
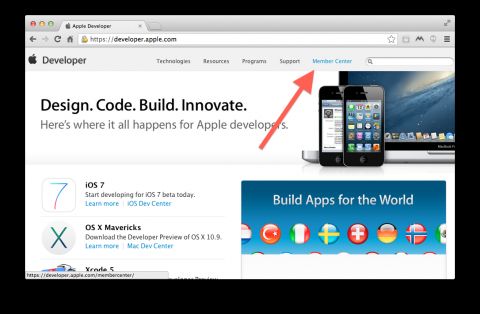
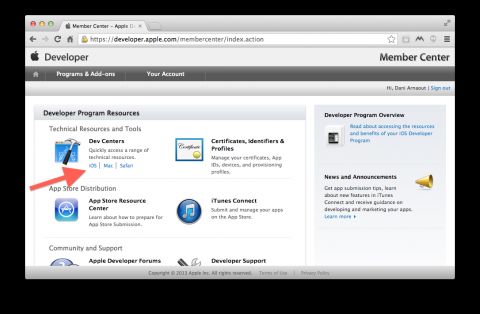
Your first challenge is to prove that you are an iOS developer. This one’s easy, but it’s a prerequisite for everything else. Simply log onto Apple developer’s website and go to the Member Center section.
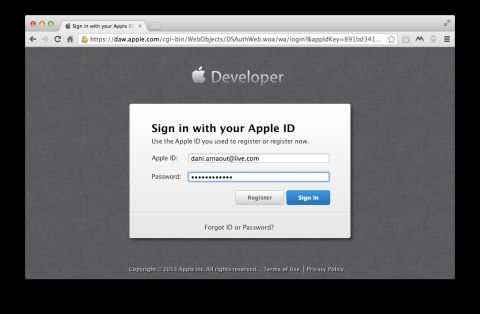
Then log in to your developer account.
*ACHIEVEMENT UNLOCKED*
Create a Distribution Certificate
Now for your second challenge, you must prove that you have a Mac to use for development. As credentials, you generally must create two certificates:
- One for development, which allows you to run your Xcode projects on your plugged-in devices.
- One for distribution, which allows you to export ad hoc builds and submit apps to the store using your certified Mac.
For this tutorial, you only need a distribution certificate, since you’ll be running MotivateMe on your device via the ad hoc build you’re going to create.
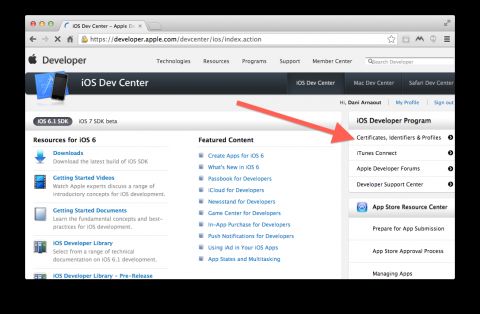
To create a distribution certificate, choose iOS on your login page under Dev Centers.
Go to iOS Developer Program: Certificates, Identifiers & Profiles.
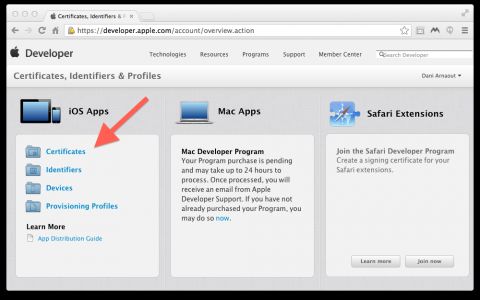
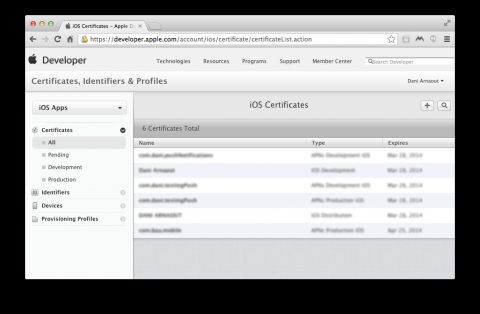
Choose Certificates to get a list of your certificates. If you see a distribution certificate there already, then you’re good to go.
Otherwise, create one by pressing the plus (+) button.
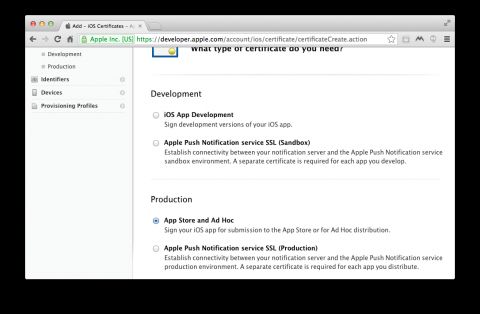
Choose App Store and Ad Hoc, then scroll down and tap Continue.
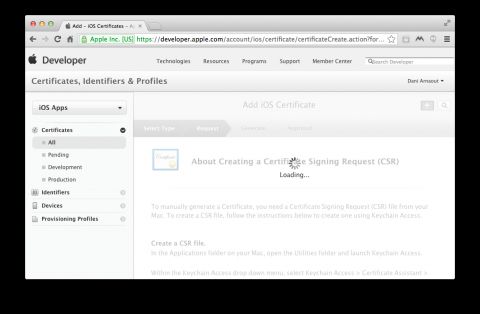
Tap Continue another time and wait for a few seconds.
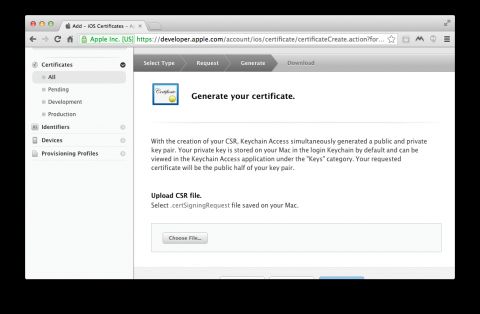
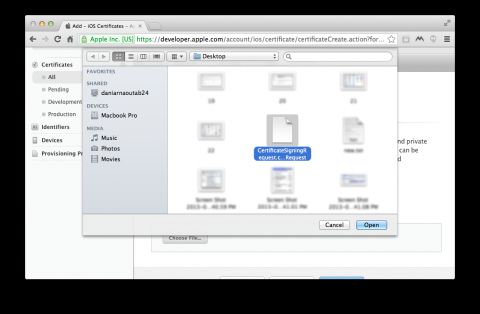
You’ll be asked to upload a certificate request.
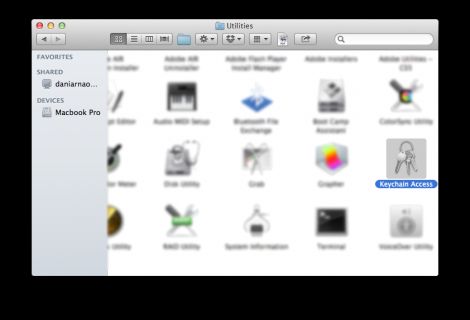
Apple is requesting that you send them a request from your Mac to authorize it as the Mac you’ll use to develop apps. To get a request, open up the KeyChain Access app from the Utilities folder on your Mac.
Double-click on the app to run it.
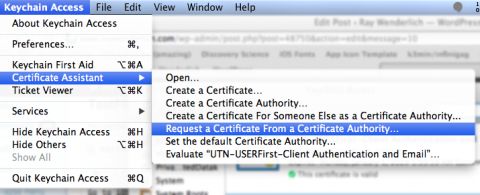
From the KeyChain Access toolbar on the top-left, go to Certificate Assistant and choose Request a Certificate From a Certificate Authority.
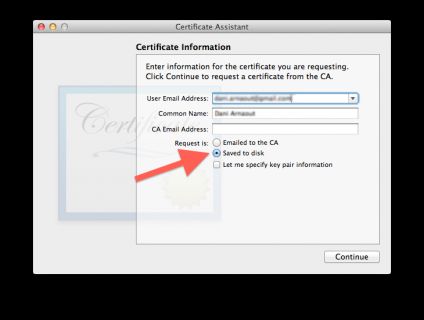
Fill in your email address and make sure to save the certificate to disk.
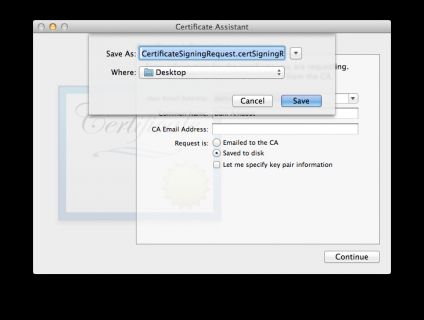
Save it to your desktop.
Go back to your developer page and upload this certificate request by clicking Choose File.
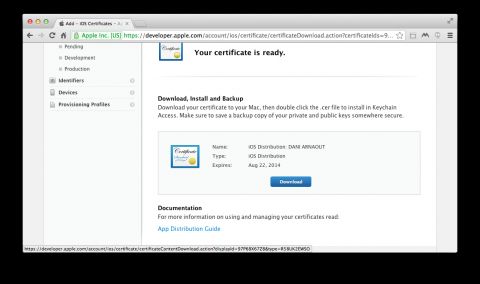
Click Generate, and there it is, your precious distribution certificate!
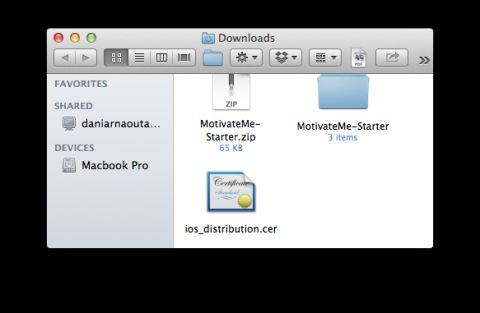
Download it and double-click it.
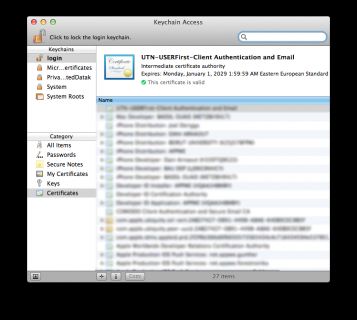
Now the certificate is installed in Keychain Access and your Mac is ready to distribute apps.
*ACHIEVEMENT UNLOCKED*
Obtain an App ID
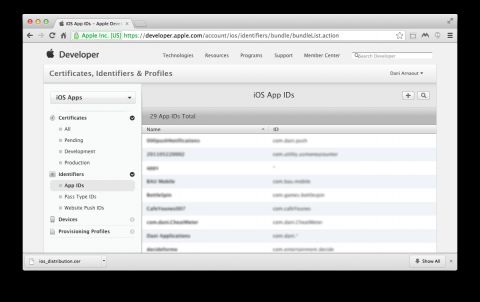
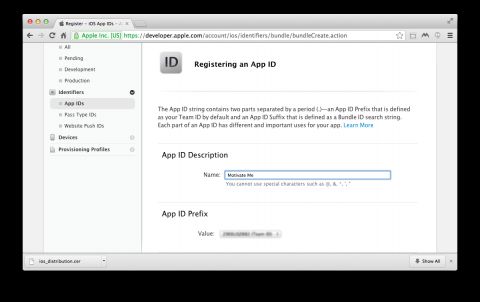
Your third challenge is to find an App ID for MotivateMe. Every app needs a unique key to differentiate it from other apps in the App Store. To generate an App ID, click the Identifiers button on the left sidebar of your Apple developer page.
Now click the plus (+) button to add a new identifier.
Give your app a name, choosing something descriptive like Motivate Me.
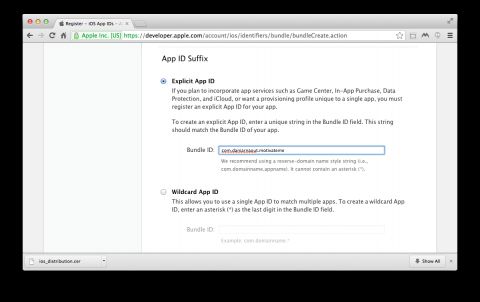
Scroll down and add an explicit App ID, which is a reverse domain name. Generally this looks something like “com.yourcompanyname.mygreatapp” with your name and the app name in the ID.
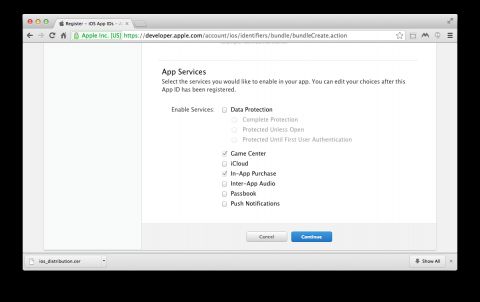
Finally, click Continue.
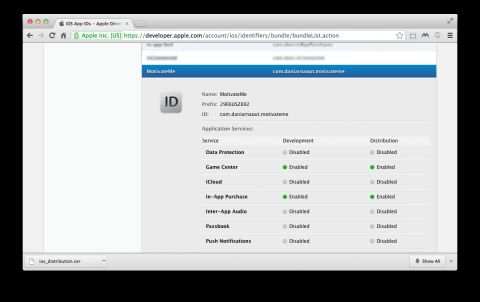
Here’s your new App ID!
*ACHIEVEMENT UNLOCKED*
Get Your Device’s UDID
It’s time to unleash your weapon. No, not your zombie-slaying katana blade – all you need is your iOS device and its UDID.
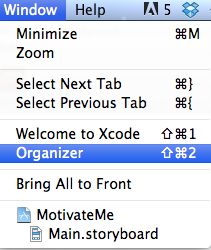
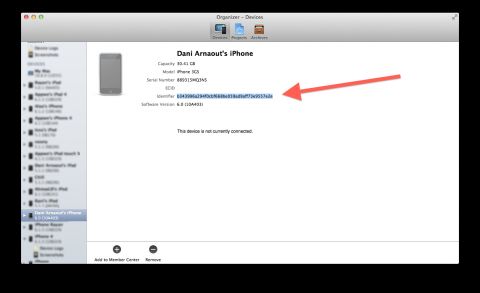
To get your device’s UDID, plug it in and open the Organizer in Xcode by choosing Windows->Organizer.
Select your device and copy the UDID, making sure to get all 40 characters.
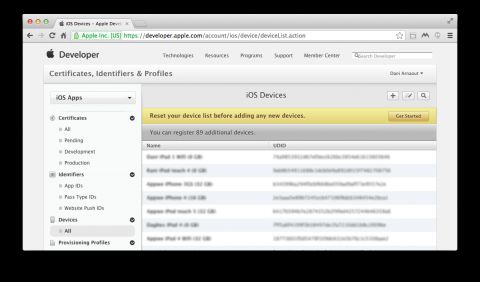
Back on the developer portal, choose Devices from the left-side menu and click the plus (+) button to add a new device.
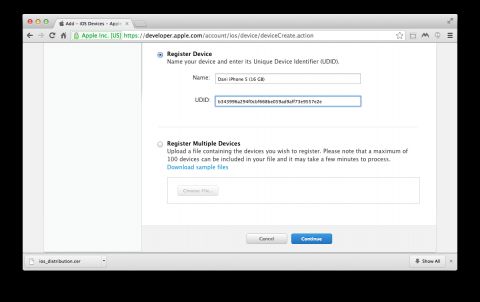
You’ll be prompted to fill in the UDID and to give the device a name. Paste in your UDID and enter a name that will let you identify the device later. Here’s a good approach to take when naming devices: [Your Name] [Device Type] [Device Model] ([Storage]). For example: Dani iPhone 5 (16 GB).
Once you’re done, click Continue.
*ACHIEVEMENT UNLOCKED*
Create a Provisioning Profile
The final challenge is to allow your device to run the Motivate Me app. To do this, you need to create a provisioning profile. There are three types:
- Development Provisioning Profile: When you install this type of profile, you’ll be able to run the app on your plugged-in device through Xcode.
- Ad Hoc Provisioning Profile: This profile allows you to distribute your app to a select group of testers. How select? Their device UDIDs have to be added to your account, just like you did in the previous section. This is the type of profile you need to install apps through TestFlight.
- App Store Provisioning Profile: This type is exactly what it sounds like – you use it to submit your app to the App Store.
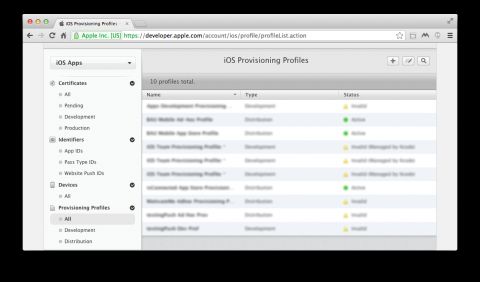
Click on the Provisioning Profile tab.
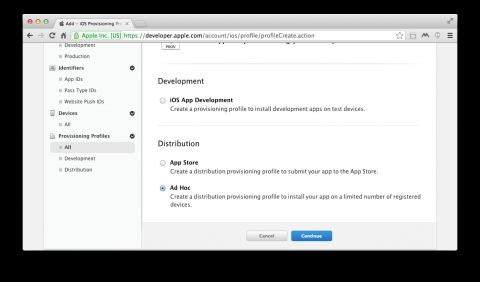
Since you need to create an ad hoc provisioning profile, choose the – wait for it! – Ad Hoc option.
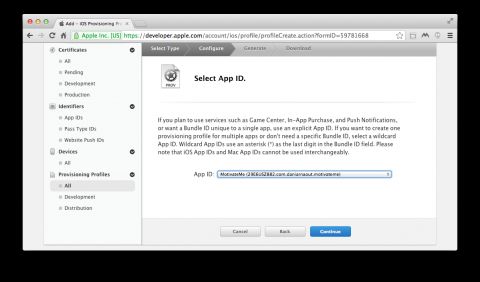
Now choose the corresponding App ID.
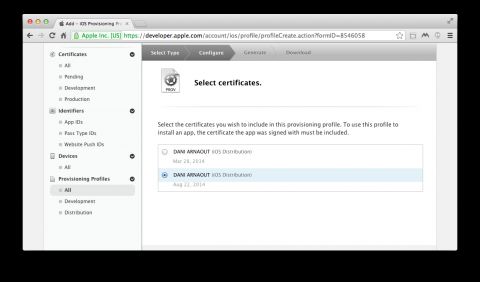
After that, choose the distribution certificate.
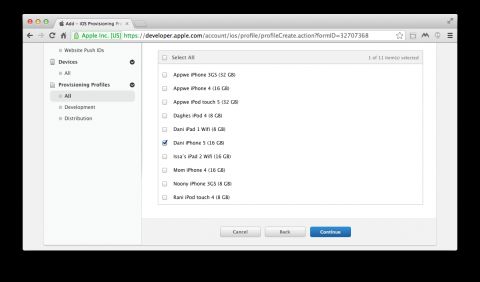
Then choose the devices on which you want to run this app.
Finally, enter a name for the profile. My approach is: [App name] [Profile type]. In this case, that’s: MotivateMe Ad-Hoc Provisioning Profile.
Once you’re done, click Continue.
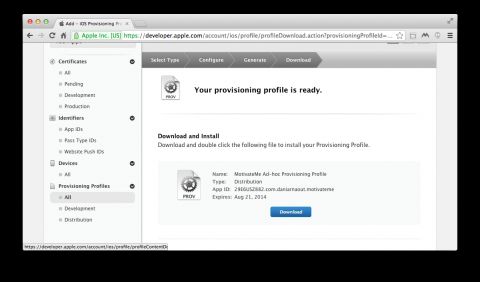
Download your profile and double-click it. Xcode will open the profile and add it to its list, making it available for you to select when building and signing your app.
But you haven’t won the game yet. Remember, you need to export a build of your MotivateMe app. To do this, read on.
Exporting a Build
Now that you have the environment set up and ready, all you have to do is to export an .ipa file so that later on, you can upload it to TestFlight.
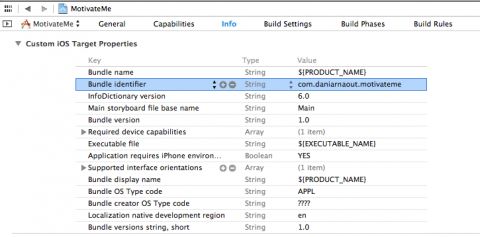
First go to your Xcode project and select the MotivateMe project on the left. Select the Info tab and set the Bundle Identifier to match your App ID that you set up in the developer portal. In my case it’s com.daniarnaout.motivateme.
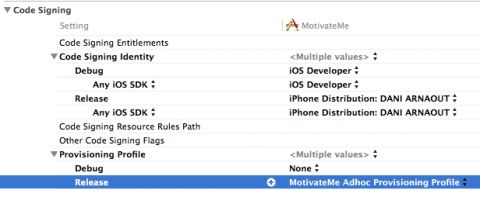
Next go to Build Settings. Scroll down to the Code Signing category and expand Provisioning Profile. Under Release, choose your Motivate Me Distribution Provisioning Profile.
Make sure that your build destination choice is iOS Device. If you have a device plugged in, you’ll see its name (e.g. “Dani’s iPhone 5S”) listed there instead.
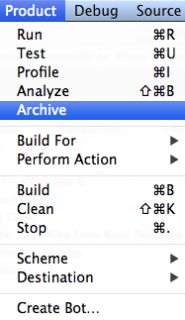
Go to Products and choose Archive.
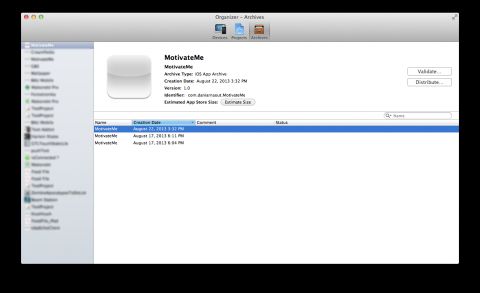
The Archive command will bundle up your app together with its resources and symbol information. Once Xcode has created the archive, the Orgavizer window will appear with a list of archives.
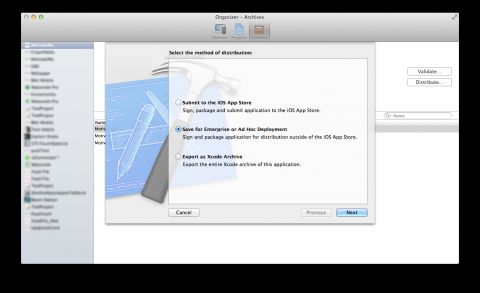
Click the Distribute button to start the process of converting the archive to something you can send out to your testers. On the following screen, select Save for Enterprise or Ad Hoc Distribution.
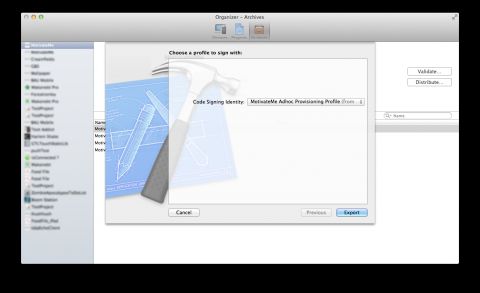
Make sure you select the suitable provisioning profile and then click Export.
Save it to your desktop, and there it is: your MotivateMe build!
The game is over, but the tutorial isn’t. It’s time to set up TestFlight, upload your build, and finally run it on your device.
Setting up TestFlight
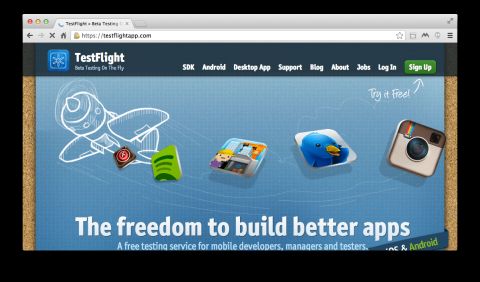
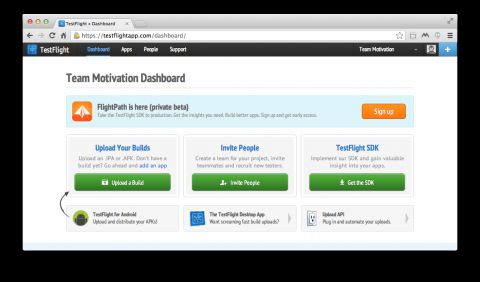
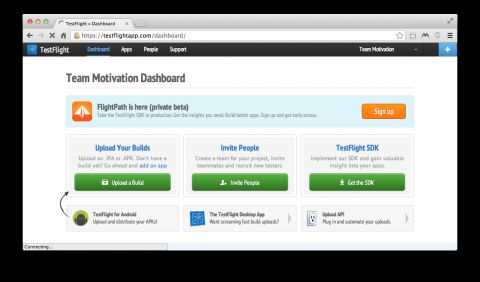
You’ve generated an ad-hoc build of the MotivateMe app and it’s on your desktop. Now you need to upload it to TestFlight to be able to run it on your device. Open your browser and navigate totestflightapp.com.
The steps before you are: create an account, create a team, upload your build and finally, install the app on your device. Sounds easy enough!
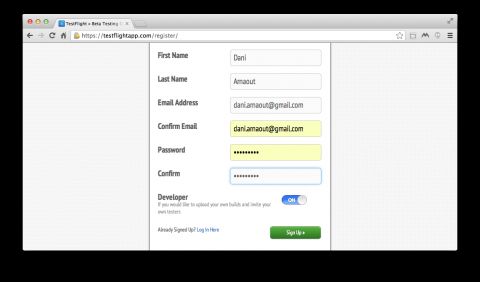
To create a TestFlight account, click the Sign Up button, fill out the form and then click the Sign Up button again.
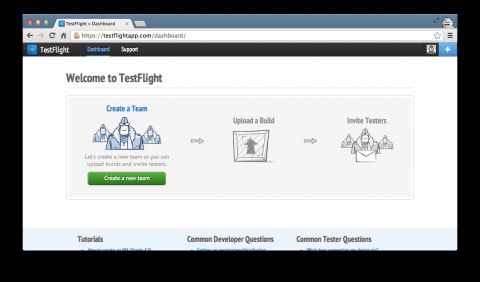
Create a new testing team by clicking Create a new team.
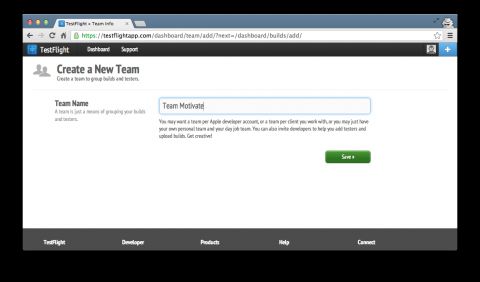
Give your team a name and click Save.
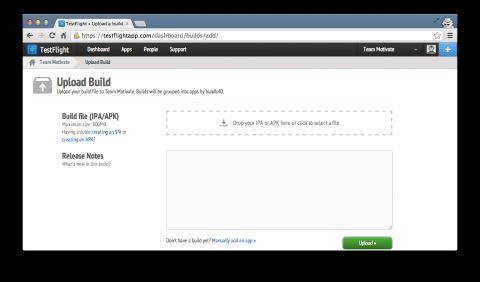
Now to upload your build. Press the blue plus (+) button and select Upload Build.
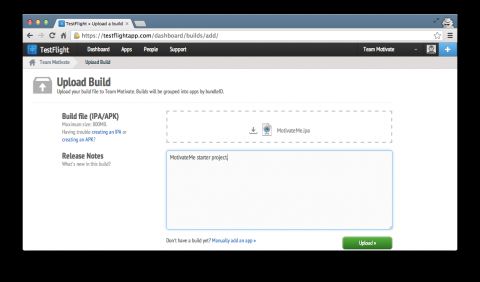
Drag your .ipa file to the browser window. Feel free to enter something in the release notes too. When you recruit some testers, this text will be emailed out to them with a link to the latest build of your app. Now click Upload and wait while the bits go over the wire.
That’s it! TestFlight has your build.
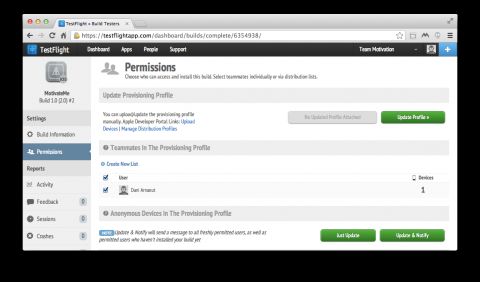
The Permissions screen lets you select which devices are allowed to install the build. For example, if the provisioning profile has 10 devices included, you could select just a subset of those 10.
As an extra convenience, TestFlight will link user accounts with UDIDs. If your testers already have accounts, you’ll see their names listed; otherwise, you’ll just see the UDID.
Note: If you’ve uploaded multiple versions of your app or the provisioning profile has changed, some users/devices might be missing from the list. If this happens, you can upload the distribution provisioning profile by clicking the green Update Profile button. If you followed the steps earlier in this tutorial, remember you saved the provisioning profile to the Desktop already.
Select all the test devices and click Update & Notify. That’s it! If your testers have accounts, they’ll receive an email telling them about the new build. Otherwise, you’ll need to tell them to visit testflightapp.com using Safari on their device.
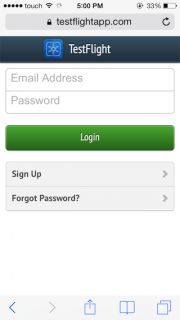
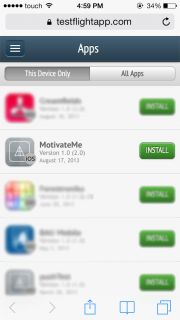
Speaking of which, that’s the next step for you too. Open Safari on your test device (one that was included in the provisioning profile) and go to testflightapp.com.
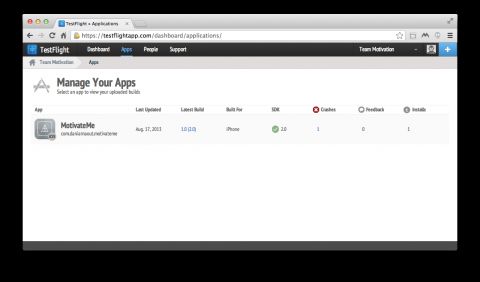
Log in with your email and password. You’ll find the MotivateMe app ready to install.
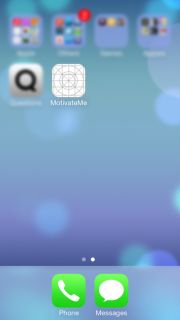
Install the app and wait for it to download.
There it is! You’ve successfully installed an app using an ad hoc build. That was a long journey from the developer portal to an installed app. Keep in mind that your testers will have an easier time of either clicking on a link in an email or going to testflightapp.com directly; the hard work of setting up the provisioning profile and archive is all you. :]
Integrating the TestFlight SDK
Now that you have the archiving and distribution process in your toolbox, it’s time to cover the features of the TestFlight SDK itself.
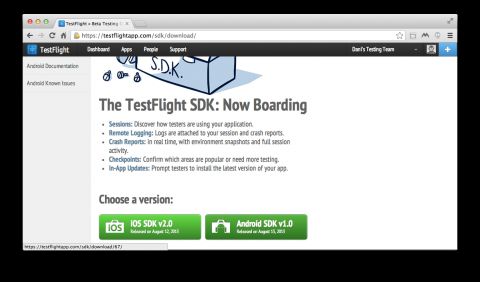
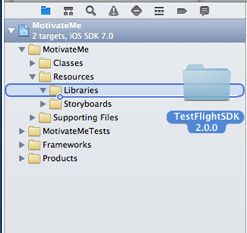
First download the TestFlight SDK.
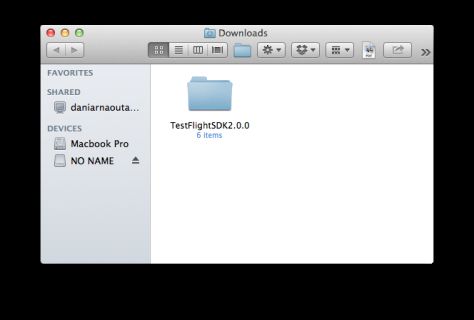
Make sure to download the latest SDK for iOS, which at the time of writing is version 2.0. Unzip the file by double-clicking on it.
Now drag this folder into your Xcode project and place it in the Libraries folder.
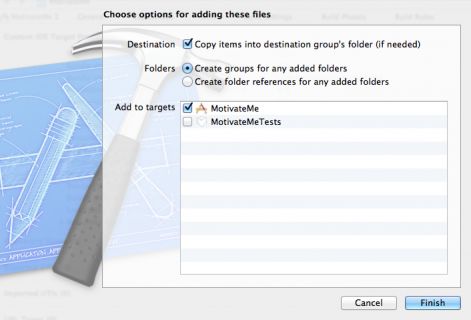
Make sure to check the first option for copying items.
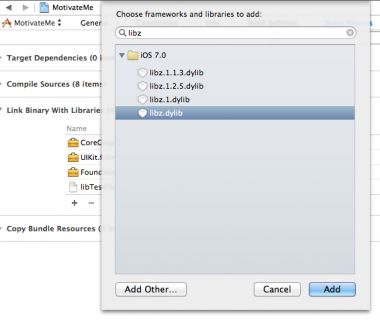
Now you need to add two frameworks. Select the project file from the navigator and switch to the Build Phases tab. Expand the Link Binary With Libraries option and click the + button.
The TestFlight SDK needs the libz.dylib library and the AdSupport framework. Find these in the list and add them.
Now without further ado, let’s jump into coding.
Start by importing TestFlight.h into MotivateMe-Prefix.pch.
Modify it to look like this:
#ifdef __OBJC__

    #import <UIKit/UIKit.h>

    #import <Foundation/Foundation.h>

    #import "MMAppDelegate.h"

    #import "TestFlight.h"

#endif |
Now go to MMAppDelegate.m and add an import for the AdSupport framework:
#import <AdSupport/AdSupport.h> |
To initialize TestFlight, add these lines to MMAppDelegate.m:
- (BOOL)application:(UIApplication *)application didFinishLaunchingWithOptions:(NSDictionary *)launchOptions { // Setup TestFlight [TestFlight setDeviceIdentifier:[[[ASIdentifierManager sharedManager] advertisingIdentifier] UUIDString]]; [TestFlight takeOff:@"<YOUR_APP_TOKEN>"]; // Use this option to notifiy beta users of any updates [TestFlight setOptions:@{ TFOptionDisableInAppUpdates : @YES }]; // Override point for customization after application launch. return YES; } |
The first line sets a unique identifier for your device. Apple has removed direct access to the UDID in the iOS 7 SDK so you can use the advertising identifier instead as a unique device identifier.
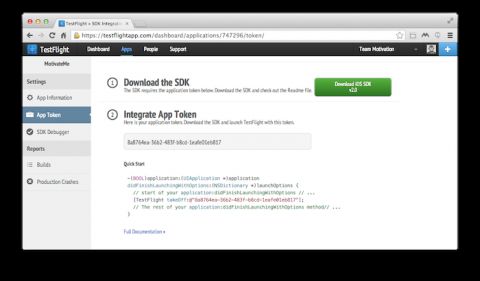
The second line uses your app’s token to start TestFlight. Each app has a unique token. To get yours, log in to testflightapp.com:
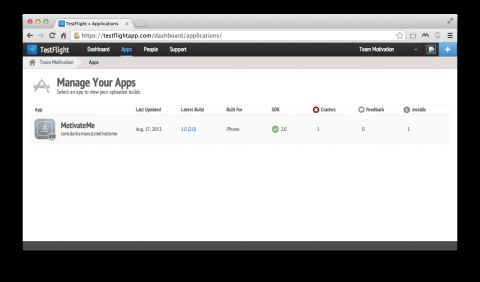
Choose the Apps tab from the upper tab bar.
Click on the MotivateMe app.
Navigate to the App Token section, and there it is.
Copy it and in the takeoff string in the code above, replace <your_app_token>with your copied token.
Now build your project to make sure there are no errors.
Congratulations, you have integrated TestFlight into your app. That one call to takeOff: will automatically log app launches and basic analytics. But you’re not happy with the basics – tt’s time to start using the APIs.
TestFlight APIs
There’s one important thing to note before you begin integrating some of TestFlight’s APIs. Testing an API requires a new build, archive, upload to TestFlight, and download to the device. For this tutorial, you’re going to integrate the APIs one at a time and then generate a single archive at the end to test them out on device.
Integrating Remote Logging
First up: the remote logging API. This one allows you to see the logging output af your app from the TestFlight website. You can see logs for beta sessions and for most production sessions.
To integrate remote logging, simply replace all of your NSLog calls with TFLog calls. An easy way to do this without rewriting is to add the following macro to your .pch file. Make the bottom part of your .pch file look like this:
#ifdef __OBJC__

    #import <UIKit/UIKit.h>

    #import <Foundation/Foundation.h>

    #import "MMAppDelegate.h"

    #import "TestFlight.h"

#endif


#define NSLog(__FORMAT__, ...) TFLog((@"%s [Line %d] " __FORMAT__), __PRETTY_FUNCTION__, __LINE__, ##__VA_ARGS__) |
To add remote logging to a certain point in your application, you have to add a simple NSLog(). OpenMMFullNameViewController.m and find prepareForSegue:sender:. Add a regular NSLog for thefullNameTextField text, so the method looks like this:
-(void) prepareForSegue:(UIStoryboardSegue *)segue sender:(id)sender

{

    // Remote logging

    NSLog(@"Full name entered: %@",self.fullNameTextField.text);


    // Save full name in user default for later use

    [[NSUserDefaults standardUserDefaults] setObject:self.fullNameTextField.text forKey:USERNAME_KEY];

    [[NSUserDefaults standardUserDefaults] synchronize];

} |
Build your app by hitting Command-B to ensure that it is error-free. That’s it for the remote logging API – for now. Testing will come later, after you’ve generated the archive and uploaded it to TestFlight.
Integrating the Feedback API
You can use the Feedback API to get feedback from your testers. This can be as simple as a text view or you can design an elaborate form. In any case, you simply pass an NSString with the feedback text, and the API will do the job in background to send the text to TestFlight. You’ll be able to review any submitted feedback on the web.
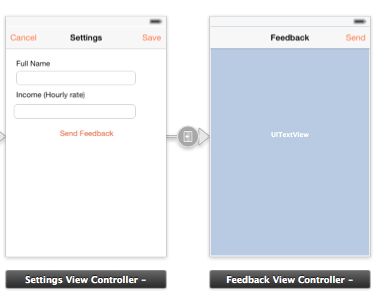
In your Xcode project, go to Main.Storyboard and check out the settings screen. There is a Send Feedback button that navigates to MMFeedbackViewController when the user taps it.
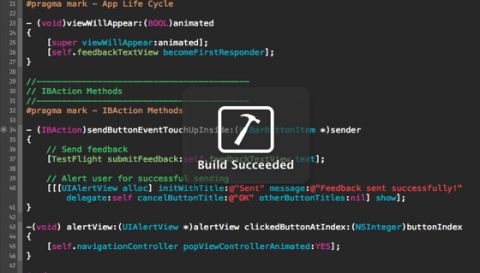
Add this one line to sendButtonEventTouchUpInside to make it look like this:
- (IBAction)sendButtonEventTouchUpInside:(UIBarButtonItem *)sender

{

    // Send feedback

    [TestFlight submitFeedback:self.feedbackTextView.text];


    // Alert user for successful sending

    [[[UIAlertView alloc] initWithTitle:@"Sent" message:@"Feedback sent successfully!" delegate:self cancelButtonTitle:@"OK" otherButtonTitles:nil] show];

} |
This is a built-in method in the TestFlight SDK that submits a string and adds it to the feedback section of your app.
Once again, build your app to make sure that everything is working fine and dandy.
If all’s well, move on to the next API.
Integrating the Checkpoint API
The Checkpoint API lets you know if your testers are hitting all corners of the app – wherever you’ve put a checkpoint – or if they have missed anything. It thus helps you track your testers’ behavior.
You can use checkpoints to track progress through levels in a game, or to check how many times a certain screen is opened. If you want to make sure a certain view is displayed or that a certain piece of code is reached, checkpoints are for you!
For this tutorial, you’ll be adding checkpoints at the following events:
- Upon the app’s first launch.
- When the user is done with the configuration steps.
- When the user taps the start button for the first time.
This requires modifying three methods in three different classes by adding a single line of code:
[TestFlight passCheckpoint:<NSString>]; |
Go to viewDidLoad in MMFullNameViewController.m and make it look like this:
- (void)viewDidLoad

{

    [super viewDidLoad];


    // Checkpoint for first time app launch

    [TestFlight passCheckpoint:@"First-App-Launch"];


} |
After that, go to motivateMeButtonEvenTouchUpInside in MMDoneConfigurationViewController.mand change it to look like this:
- (IBAction)motivateMeButtonEvenTouchUpInside

{

    // Checkpoint for first time app launch

    [TestFlight passCheckpoint:@"Configuration-Done-Successfully"];


    // Proceed to main screen

    [self dismissViewControllerAnimated:YES completion:NULL];

} |
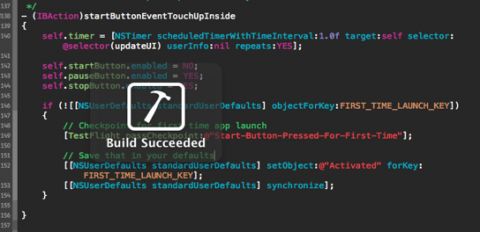
Finally, find startButtonEventTouchUpInside in MMMotivatorViewController.m and modify it to the following:
- (IBAction)startButtonEventTouchUpInside

{

    self.timer = [NSTimer scheduledTimerWithTimeInterval:1.0f target:self selector:@selector(updateUI) userInfo:nil repeats:YES];


    self.startButton.enabled = NO;

    self.pauseButton.enabled = YES;

    self.stopButton.enabled = YES;


    if (![[NSUserDefaults standardUserDefaults] objectForKey:FIRST_TIME_LAUNCH_KEY])

    {

        // Checkpoint for first time app launch

        [TestFlight passCheckpoint:@"Start-Button-Pressed-For-First-Time"];


        // Save that in your defaults

        [[NSUserDefaults standardUserDefaults] setObject:@"Activated" forKey:FIRST_TIME_LAUNCH_KEY];

        [[NSUserDefaults standardUserDefaults] synchronize];

    }


} |
Build your app.
One more left to go before testing can commence!
Integrating Crash Reporting
Watch out, this may be the only tutorial that teaches you how to crash an app.
Crash reporting is arguably the most important of TestFlight’s features for a developer. TestFlight automatically reports crashes without you having to write a single line of code. In other words, you don’t have to do anything to integrate it into your app except add the SDK.
So then, what should you do in this section? Hey, how about you crash your app? You have to have something to test, after all. Here’s a list of the most creative ways:
assert(! "crashing on purpose to test crash logs reporting.");[[NSThread mainThread] exit];exit(0);- No selector found
- Index out of bounds
You may have your own preference, but assertion looks good to me. Go tocrashButtonEventTouchUpInside in MMSettingsViewController.m and modify it to look like this:
- (IBAction)crashButtonEventTouchUpInside

{

    assert(! "Crashing on purpose to test crash logs reporting.");

} |
Of course your real apps won’t have this kind of button, and ideally won’t have any crashes at all!
Build your app for the last time to ensure that it’s ready for an ad hoc build.
Once you get a Build Succeed message, you’re ready to go.
Testing the APIs
You have now reached the testing phase of this tutorial, where you get to see these TestFlight’s APIs at work. Before you can test, though, you need to generate another ad hoc build. If you don’t remember how to do that, you’re about to get more practice.
Generating a New Build
Select your project in the navigator on the left. In the General tab, increment the build version from 1.0 to 2.0.
As you did before, archive your project for a device and export the ad hoc build. If you’re unsure at any point, revisit the Exporting a Build section to see all the steps required. Upload your build to TestFlight and you should be ready to go.
Now you are ready to start testing! Remove the app from your device to get a clean install, and follow the same steps as before to visit testflighapp.com on your device. You should see the new version 2.0 of MotivateMe available to install.
So… what’s the most interesting of the features to test? I have a hunch you are itching to try crash reporting, but you’re going to save the best for last.
Testing Remote Logging
Run MotivateMe on your device and enter your full name as you did before. Click Next.
Before you go any further with the app, log in to the TestFlight website.
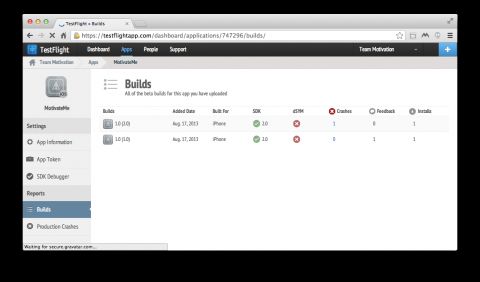
Go to the Apps section and choose MotivateMe.
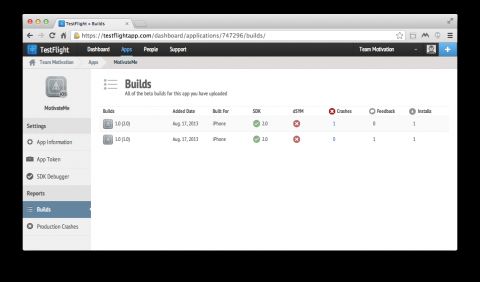
Select Build 2.0:
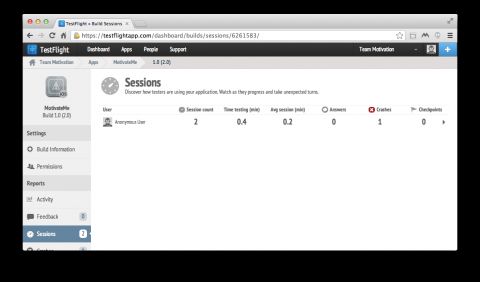
Choose the Sessions tab.
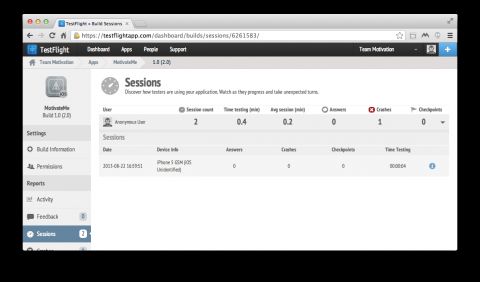
Click on the Anonymous User to get more info. In the post-iOS 7 world without UDIDs, all users will show up as “Anonymous”.
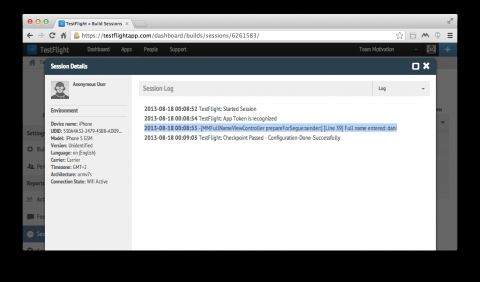
Select the Events drop-down list and choose Log instead of Events.
You can clearly see that TestFlight has logged whatever name you entered thanks to the TFLog call.
Remote logging is a success. As you move on, make sure not to close the webpage – you’re going to use it to monitor the other APIs.
Testing the Checkpoint API
Return to MotivateMe on your device and continue configuring the app until your reach the motivator view controller, just as you did when you were first exploring the app.
Once you’re on the motivator view controller, tap Start.
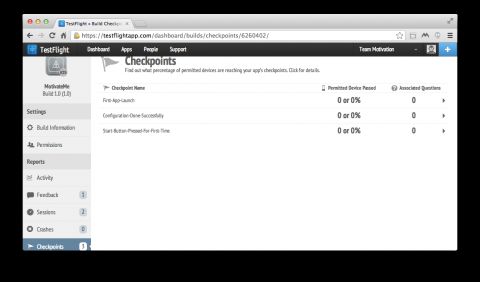
Back on the TestFlight website, select the Checkpoints section.
You’ll find a list of checkpoints and some statistics on how many times they were reached. With your own apps, you could check up on this screen to see what your testers are up to.
Checking the checkpoints… check!
Testing the Feedback API
To test the Feedback API, you first need to send some feedback from your device. Go to the Settingsscreen in MotivateMe and tap the Feedback button.
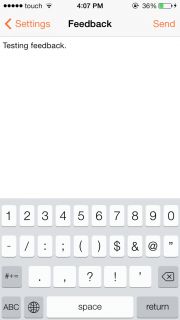
Type in a nice little message for yourself and tap Send.
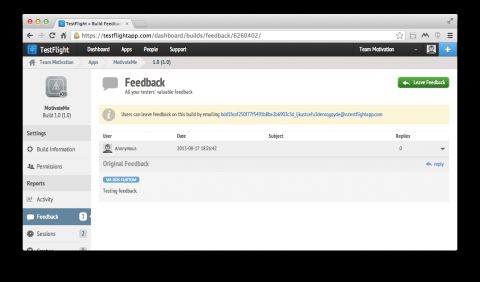
Return to the TestFlight website and find the Feedback section. Select it and choose Anonymous User to get more info. There you’ll find the feedback you sent to yourself. Nice of you to respond – you are a model tester.
Testing Crash Reporting
Finally, it’s time for the big one… CRASHING YOUR APP! Get ready to do some controlled destruction.
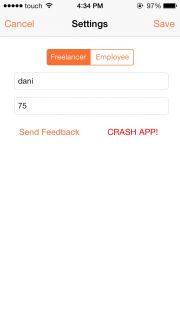
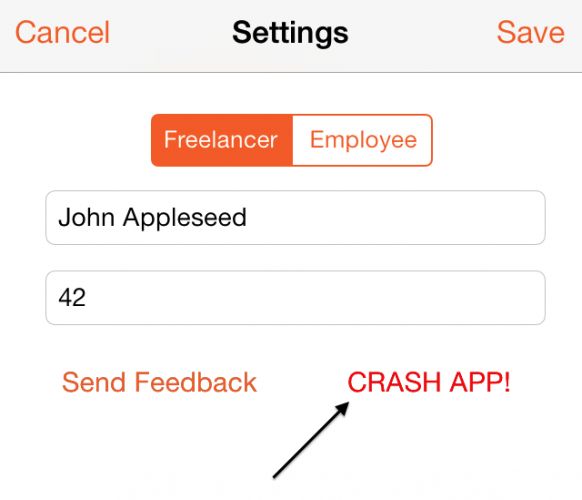
Go to the Settings screen in MotivateMe and tap the red CRASH APP button.
Booom! The app should crash and you’ll be back on the home screen.
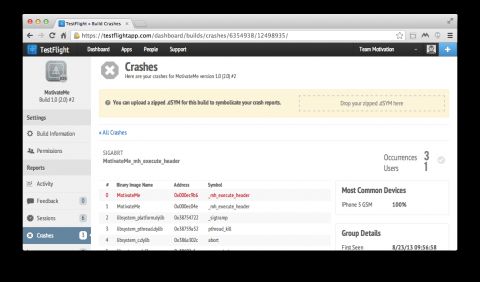
Go to your TestFlight page and check out the Crashes section. Ta-da! You have a crash report.
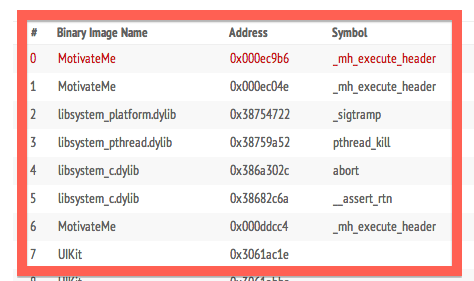
BUT! What is it you’re looking at?
Is there a way to make it readable? What’s with all the strange memory addresses?
Don’t you want to know exactly where the crash occurred – the specific class name and line? Yes. You need to symbolicate your crash report to be able to read it.
If you remember way back to the first time you ran the Archive operation on your project: archiving creates a bundle of your app and its symbols. The symbol list is called a dSYM file, and is the final piece that will turn those memory addresses into human-readable class and method names.
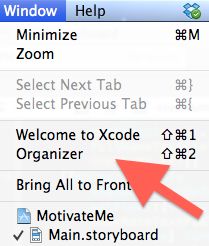
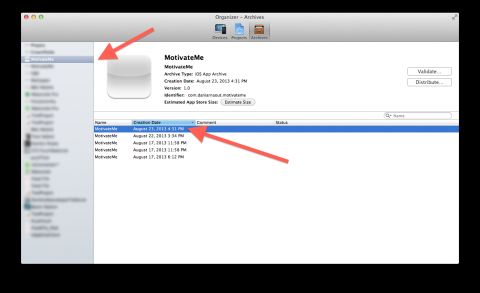
To access your app archive, go to Xcode and choose Window\Organizer. Navigate to the Archives tab.
Make sure to select your app from the left-side column.
Right-click your latest build and choose Show in Finder.
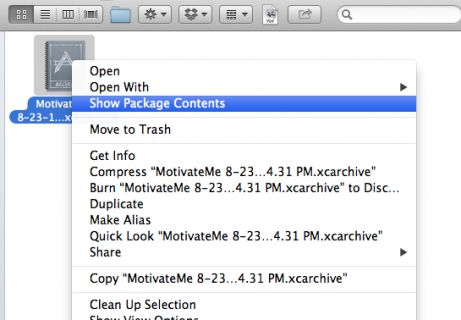
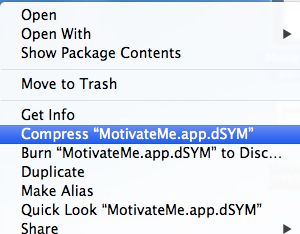
Right-click on the file and choose Show Package Contents.
You’ll find a dSYMs folder. Open it to find your app’s dSYM. Right-click the file and then select Compress. TestFlight expects your dSYM inside a ZIP file.
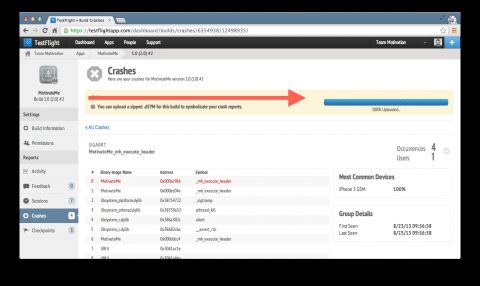
Go back to the crash report on the TestFlight site. There should be a yellow alert box prompting you to upload a dSYM which you can conveniently do by dragging the ZIP file you just made onto the that alert area.
You are all set. TestFlight will need a minute or two to process the dSYM.
Note: Need a refresher on dealing with crashes and crash reports? Check out some of our other tutorials while you wait for TestFlight to symbolicate.
Eventualy when you refresh the Crashes page on TestFlight, you’ll see your crash report is now human-readable, allowing you to determine exactly where your crash happened.
Follow the lead by going into MMSettingsViewController.m and finding line 53.
That’s the source of the crash – the assert you added earlier.
Now that you’ve uploaded your dSYM, any future crashes will be automatically symbolicated as they happen. You can check the status of each uploaded build on TestFlight to see whether you remembered to upload the dSYM.
Let’s hope you don’t get too many crashes! Unless, of course, you set them up on purpose.
Where to Go From Here?
Here’s the complete version of the project with TestFlight integrated.
In this tutorial, you learned how to set up a certificate, app ID, and provisioning profile to create ad hoc builds. You can now distribute builds through TestFlight and integrate the TestFlight SDK and its APIs into your own apps. You also have a handy app to motivate yourself and watch that income flow in as you work! :]
Some other useful things to consider:
- Additional APIs & Docs:The TestFlight SDK has a lot of other APIs that you can learn about here.
- TestFlight for Android: For the Android developers out there, TestFlight now supports Android. As of the time of writing it’s still in beta, but you can try it out now.
- TestFlight in Production: In this tutorial, you learned how to use the TestFlight SDK for beta testing, but how about using it in production? It would be great to learn more about your real users. You definitely want to get all crash reports to be able to fix any bugs in your app.
- TestFlight has plenty of company, and there’s no shortage of tools out there to help you with the development process. Check out HockeyApp, Apphance, and Crashlytics, to name just a few.
Thanks for reading! Let us hear about your test flights with TestFlight in the forums and comments below!

