mybatisplus insert 大量_SpringBoot整合SpringSecurity以及MybatisPlus详解
点击上方蓝色字体,选择“标☆公众号”
优质文章,第一时间送达
作者 | huisheng_qaq
来源 | http://002ii.cn/lRPkLr
本篇文章给大家带来的是
SpringBoot 整合 SpringSecurity 以及 Mybatis-Plus 详解
1、概述
Spring Security 是一个功能强大且高度可定制的身份验证和访问控制框架。 它是用于保护基于Spring的应用程序的实际标准。 Spring Security是一个框架,致力于为Java应用程序提供身份验证和授权。与所有Spring项目一样,Spring Security的真正强大之处在于可以轻松扩展以满足自定义要求springboot对于springSecurity提供了自动化配置方案,可以使用更少的配置来使用springsecurity。 而在项目开发中,主要用于对用户的认证和授权 官网:https://spring.io/projects/spring-security2、SpringSecurity 和 shiro 比较
shiro
Apache Shiro是一个强大且易用的Java安全框架,能够非常清晰的处理身份验证、授权、管理会话以及密码加密。
利用其易于理解的API,可以快速、轻松地获得任何应用程序,从最小的移动应用程序到最大的网络和企业应用程序。
Shiro 主要分为两个部分就是认证和授权,就是查询数据库做相应的判断,Shiro是一个框架,其中的内容需要自己的去构建,前后是自己的,中间是Shiro帮我们去搭建和配置好的。
Spring Security
Spring Security是一个能够为基于Spring的企业应用系统提供声明式的安全访问控制解决方案的安全框架。 它提供了一组可以在Spring应用上下文中配置的Bean,充分利用了Spring IoC(控制反转),DI( 依赖注入)和AOP(面向切面编程)功能,为应用系统提供声明式的安全访问控制功能,减少了为企业系统安全控制编写大量重复代码的工作。 众所周知,想要对对Web资源进行保护,最好的办法莫过于Filter,要想对方法调用进行保护,最好的办法莫过于AOP。所以Spring Security在我们进行用户认证以及授予权限的时候,通过各种各样的拦截器来控制权限的访问,从而实现安全。3、使用支持sql的数据库为mybatis-plus
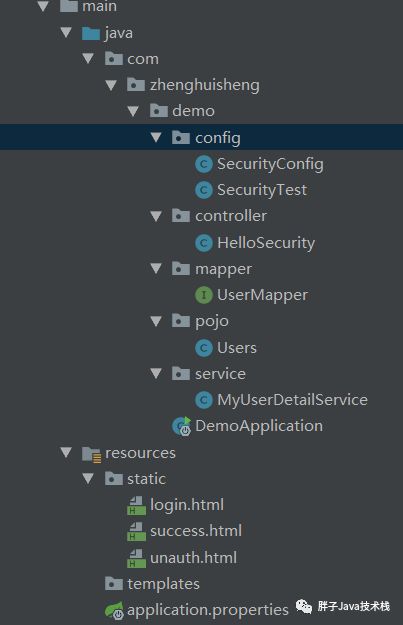
4、整体结构
5、使用的依赖
org.springframework.boot spring-boot-starter-security org.springframework.boot spring-boot-starter-web com.baomidou mybatis-plus-boot-starter 3.0.5 com.h2database h2 runtime mysql mysql-connector-java org.springframework.boot spring-boot-devtools runtime true org.springframework.boot spring-boot-configuration-processor true org.projectlombok lombok true org.springframework.boot spring-boot-starter-test test org.springframework.security spring-security-test test6、application.properties配置文件
#端口号配置server.port=8081#登录时可以使用的账号密码#spring.security.user.name=zhenghuisheng#spring.security.user.password=123456#数据库连接基本参数spring.datasource.driver-class-name=com.mysql.cj.jdbc.Driverspring.datasource.url=jdbc:mysql://localhost:3306/security?serverTimezone=GMT%2B8&useSSL=false&useUnicode=true&characterEncoding=utf8spring.datasource.username=rootspring.datasource.password=zhs03171812#日志输出,使用默认的控制台输出mybatis-plus.configuration.log-impl=org.apache.ibatis.logging.stdout.StdOutImpl7、对应的数据库
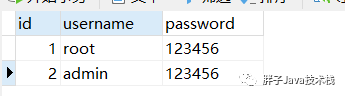
8、实体类,在实体类@TableId(type = IdType.AUTO)设为自增的同时,在数据库中也要设置为自增,不然运行直接报错
package com.zhenghuisheng.demo.pojo;import com.baomidou.mybatisplus.annotation.IdType;import com.baomidou.mybatisplus.annotation.TableId;import lombok.AllArgsConstructor;import lombok.Data;import lombok.NoArgsConstructor;import java.io.Serializable;@Data@NoArgsConstructor@AllArgsConstructorpublic class Users implements Serializable { //设置为自增 @TableId(type = IdType.AUTO) private Integer id; private String username; private String password;}9、在mapper包下新建UserMapper类,并且继承BaseMapper
package com.zhenghuisheng.demo.mapper;import com.baomidou.mybatisplus.core.mapper.BaseMapper;import com.zhenghuisheng.demo.pojo.Users;import org.springframework.stereotype.Repository;@Repositorypublic interface UserMapper extends BaseMapper {}10、在主程序中加入mapper的扫描文件
//增加扫描的配置文件@MapperScan("com.zhenghuisheng.demo.mapper")该注解开启之后可以通过注解实现用户的权限登录@EnableGlobalMethodSecurity(securedEnabled = true,prePostEnable = true,prePostEnable = true)11、测试数据库是否可以连通
package com.zhenghuisheng.demo;import com.zhenghuisheng.demo.mapper.UserMapper;import com.zhenghuisheng.demo.pojo.Users;import org.junit.jupiter.api.Test;import org.springframework.beans.factory.annotation.Autowired;import org.springframework.boot.test.context.SpringBootTest;@SpringBootTestclass DemoApplicationTests { @Autowired private UserMapper usermapper; @Test void contextLoads() { } @Test public void userInsert(){ Users users = new Users(); users.setUsername("admin"); users.setPassword("123456"); usermapper.insert(users); System.out.println(users + "输出成功"); }}12、controller层新建HelloSecurity类
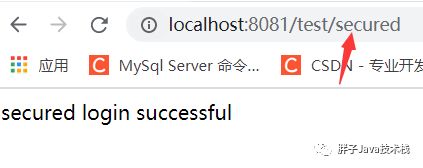
package com.zhenghuisheng.demo.controller;import org.springframework.security.access.annotation.Secured;import org.springframework.web.bind.annotation.GetMapping;import org.springframework.web.bind.annotation.PostMapping;import org.springframework.web.bind.annotation.RequestMapping;import org.springframework.web.bind.annotation.RestController;@RestController@RequestMapping("/test")public class HelloSecurity { @GetMapping("/login") public String Hello(){ return "hello world"; } @RequestMapping("/index") public String toLogin(){ return "登录成功"; } //使用注解测试用户权限 @GetMapping("/secured") @Secured({"ROLE_admins","ROLE_manager"}) public String secured(){ return "secured login successful"; }}13、config下新建一个SecurityTest继承WebSecurityConfigurerAdapter
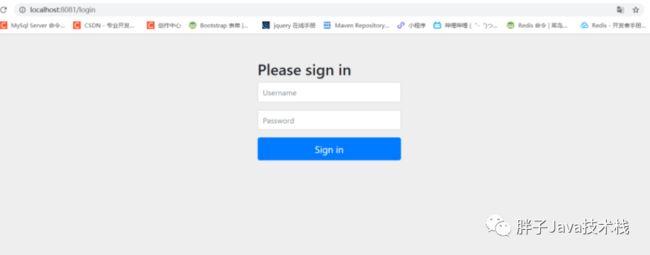
package com.zhenghuisheng.demo.config;import org.springframework.beans.factory.annotation.Autowired;import org.springframework.context.annotation.Bean;import org.springframework.context.annotation.Configuration;import org.springframework.security.config.annotation.authentication.builders.AuthenticationManagerBuilder;import org.springframework.security.config.annotation.web.builders.HttpSecurity;import org.springframework.security.config.annotation.web.configuration.WebSecurityConfigurerAdapter;import org.springframework.security.core.userdetails.UserDetailsService;import org.springframework.security.crypto.bcrypt.BCryptPasswordEncoder;import org.springframework.security.crypto.password.PasswordEncoder;import org.springframework.security.web.authentication.rememberme.JdbcTokenRepositoryImpl;import org.springframework.security.web.authentication.rememberme.PersistentTokenRepository;import javax.sql.DataSource;@Configurationpublic class SecurityTest extends WebSecurityConfigurerAdapter { @Autowired //UserDetailsService:用于查询数据库名和数据库密码的过程 private UserDetailsService userDetailService; @Override protected void configure(AuthenticationManagerBuilder auth) throws Exception { auth.userDetailsService(userDetailService).passwordEncoder(passwordEncoder()); } @Bean PasswordEncoder passwordEncoder(){ //返回一个具体的实现类 return new BCryptPasswordEncoder(); }}14、运行
输入localhost:8081,输入数据库中的用户名和密码就能登录成功了,即认证完成。再可以测试controller中的接口了
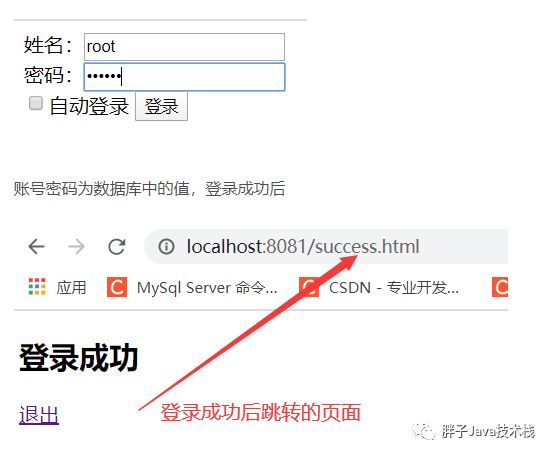
15、接下来重点来了,一般开发中不会有人真的使用这个默认的登录界面吧,static包下将即将使用的页面写好
login.html:登录界面
登录界面 姓名: 密码: 自动登录 Title 登录成功
退出 unauth.html:403没有权限问时的页面,当用户登录成功却没有权限时,即会跳转到该路径
Title 没有权限访问
16、点开WebSecurityConfigurerAdapter类,分析源码可知,在该方法中可以设置自定义登录

17、在SecurityTest类中重写configure方法即可,并且注意参数为HttpSecurity http。在以下都写了非常详细的注解
//自定义用户的操作,如登录页面等 @Override protected void configure(HttpSecurity http) throws Exception { http.formLogin() .loginPage("/login.html") //设置登录页面 .loginProcessingUrl("/user/login") //登录访问路径 .defaultSuccessUrl("/success.html").permitAll() //登录成功后的跳转路径 .and().authorizeRequests() .antMatchers("/","/test/login","/user/login").permitAll() //设置哪些路径可以访问,不需要认证 .antMatchers("/test/login").hasAuthority("admins") //授权,只有当用户为admins的时候,才能访问该路径 .anyRequest().authenticated() //所有请求都能访问// .and().rememberMe().tokenRepository(persistentTokenRepository()) //记住我,并设置操作数据库的对象// .tokenValiditySeconds(60) //有效时长// .userDetailsService(userDetailService) .and().csrf().disable(); //关闭crsf防护 //配置没有权限访问跳转的自定义页面 http.exceptionHandling().accessDeniedPage("/unauth.html"); //配置退出 http.logout().logoutUrl("/logout") //退出 .logoutSuccessUrl("/test/login") // 退出成功所返回的路径 .permitAll(); }18、再分析一波
.antMatchers("/test/login").hasAuthority("admins") //授权,List list = AuthorityUtils.commaSeparatedStringToAuthorityList("ROLE_admins");
而如果在使用hasRole方法和hasAnyRole方法时,看上面的图片就知道了,这个源码是有多无聊,自动在角色前面增加了一个 “ROLE_”。当然如果使用hasAnyAuthority方法和hasAuthority方法就不需要了。
这里是因为使用的注解开发了,在controller中使用了@Secured,当然也能使用@PreAuthorize和@PostAuthorize了!
18、测试
运行后直接输入:http://localhost:8081/login.html
在进行注解测试,看能否测试成功,这里发现也能成功!
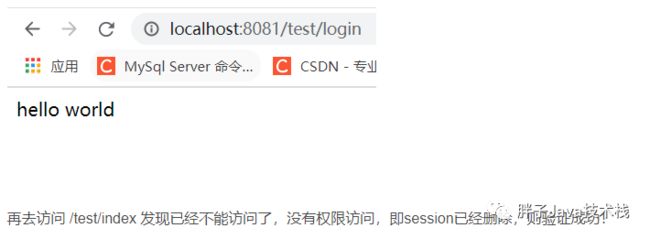
最后退出测试,即删除session
http.logout().logoutUrl("/logout") //退出 .logoutSuccessUrl("/test/login") // 退出成功所返回的路径 .permitAll();点击退出之后