前言
Jetpack Compose(简称 Compose )是 Google 官方推出的基于 Kotlin 语言的 Android 新一代 UI 开发框架,其采用声明式的 UI 编程特性使得 Android 应用界面的编写和维护变得更加简单。
本专栏将详细介绍在使用 Compose 进行 UI 开发中如何实现炫酷的动画效果。动画效果在 App 使用中至关重要,它使得 App 的交互更加自然流畅,用户使用体验更加良好。
在传统的 Android 开发中有古老的 View 动画和目前流行的属性动画,如今 View 动画几乎已被广大开发者所抛弃,属性动画因其可以作用于任何对象的灵活和强大特性而被开发者所拥抱。既然属性动画这么强大,那么它是否能用在 Compose 开发中呢?如果能那跟传统 UI 开发中使用又有什么区别呢?本篇就带领你来探索一下在 Compose 中属性动画的使用。
使用探索
在传统 Android 开发中,属性动画使用得最多的是 ObjectAnimator 和 ValueAnimator,接下来就探索一下在 Compose 中如何使用它们来实现动画效果。
ObjectAnimator 使用探索
首先看一下在传统 Android 开发中如何使用属性动画,比如使用属性动画实现竖直方向向下移动的动画:
val animator = ObjectAnimator.ofFloat(view, "translationY", 10f, 100f)
animator.start()
通过 ObjectAnimator作用于 View 的 translationY属性,不断改变 translationY 的值从而实现动画效果,一个很简单的属性动画,这里就不贴运行效果了。
那在 Compose 中能否使用 ObjectAnimator 呢?
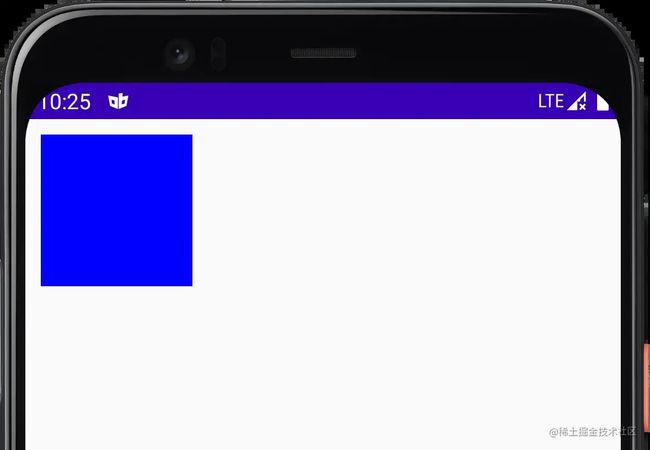
下面使用 Compose 在界面上显示一个 100dp*100dp 的蓝色正方形方块,代码如下:
class MainActivity : ComponentActivity() {
    override fun onCreate(savedInstanceState: Bundle?) {
        super.onCreate(savedInstanceState)
        setContent {
            Box(Modifier.padding(start = 10.dp, top = 10.dp)
                .size(100.dp)
                .background(Color.Blue)
            )
        }
    }
}
运行效果如下:
现在要同样实现一个竖直方向移动的动画效果,让方块从上往下移动。在上面的属性动画实现中 ObjectAnimator是作用于 View 组件上的,按照这个思路在这里 ObjectAnimator 就应该作用于 Box 上,但实际上我们这里压根拿不到 Box 的实例,因为这里的 Box 实际是一个函数且没有返回值,看一下 Box 的源码:
@Composable
fun Box(modifier: Modifier) {
    Layout({}, measurePolicy = EmptyBoxMeasurePolicy, modifier = modifier)
}
既然作用于 Box 上不行,那能不能作用于 State 上呢,Compose 是数据驱动 UI 刷新,通过数据状态改变重组 UI 实现界面的刷新,把上面的 top 提取为一个 State 再通过 ObjectAnimator 去改变是否可行呢?改造代码实验一下:
class MainActivity : ComponentActivity() {
    override fun onCreate(savedInstanceState: Bundle?) {
        super.onCreate(savedInstanceState)

        val topPadding:MutableState = mutableStateOf(10)

        val animator = ObjectAnimator.ofInt(topPadding, "value", 10, 100)
        animator.duration = 1000

        setContent {
            Box(Modifier.padding(start = 10.dp, top = topPadding.value.dp)
                .size(100.dp)
                .background(Color.Blue)
                // 添加点击事件
                .clickable {
                    // 启动动画
                    animator.start()
                }
            )
        }
    }
}
改造如下:
- 将之前 top 的固定值提取成了一个 State 变量 topPadding,当 topPadding 的值发生改变时会重组界面从而让界面刷新
- 声明了 ObjectAnimator 的 animator 变量,作用于 topPadding 的 value 属性上,并设置动画值从 10 到 100,动画时长 1000ms
- 给 Box 添加点击监听事件启动动画
实际上写完这段代码,编辑器就已经有报错提示了,提示如下:
说没有找到带 Int 参数的 setValue方法,那来看看 MutableState是否有 setValue 方法:
interface MutableState: State { override var value: T operator fun component1(): T operator fun component2(): (T) -> Unit }
可以发现 MutableState 中是有一个 var 修饰的 value 变量的,说明是有 setValue 方法的,但是错误提示是找不到带 Int 参数的 setValue 方法,实际上 MutableState 的 setValue 的定义应该是这样的:
fun setValue(value:T){
    this.value = value
}
这里参数类型是泛型 T,而 ObjectAnimator 找的是明确的 Int 类型参数的方法,所以找不到。那怎么办呢?是不是就意味着在 Compose 中无法使用 ObjectAnimator 了呢?
直接使用确实是不行,那我们能不能对其进行封装,不是找不到对应的 setValue 方法嘛,那我封装一下提供一个 setValue 方法不就行了。定义一个 IntState类,再提供一个 mutableIntStateOf方法:
class IntState(private val state: MutableState){
    var value : Int = state.value
        get() = state.value
        set(value) {
            field = value
            state.value = value
        }
}
fun mutableIntStateOf(value: Int, policy: SnapshotMutationPolicy = structuralEqualityPolicy()) : IntState{
    val state = mutableStateOf(value, policy)
    return IntState(state)
}
IntState构造方法传入一个 MutableState 类型的 state 参数,然后提供一个 value 变量,get 方法返回 state.value ,set 方法将传入值设置给 state.value,这样 IntState 就有了一个明确的 setValue(value:Int) 的方法。
为了便于使用,封装一个 mutableIntStateOf方法,实现里先采用 Compose 提供的 mutableStateOf 方法获取一个 MutableState ,然后用其构建一个 IntState 进行返回。
再改造一下上面动画实现代码将 mutableStateOf替换成 mutableIntStateOf:
class MainActivity : ComponentActivity() {
    override fun onCreate(savedInstanceState: Bundle?) {
        super.onCreate(savedInstanceState)
        // 替换为 mutableIntStateOf
        val topPadding = mutableIntStateOf(10)
        // 创建 ObjectAnimator 目标为 topPadding,作用属性为 value,值从 10 变化到 100
        val animator = ObjectAnimator.ofInt(topPadding, "value", 10, 100)
        // 设置动画时长 1s
        animator.duration = 1000

        setContent {
            Box(Modifier.padding(start = 10.dp, top = topPadding.value.dp)
                .size(100.dp)
                .background(Color.Blue)
                // 添加点击事件
                .clickable {
                    // 启动动画
                    animator.start()
                }
            )
        }
    }
}
现在不报错了,运行一下看看是否有动画效果:
效果符合预期,说明这种办法是可行,也说明 ObjectAnimator 在 Compose 中也是可以使用的,只是不能像传统 Android 开发那样直接作用于 View 组件上,而是需要进行二次封装后使用。
ValueAnimator 使用探索
ObjectAnimator 使用探索完了,那么 ValueAnimator能否使用呢?Compose 以声明式的方式通过数据驱动界面刷新,而ValueAnimator主要用于数据的改变,好像很契合的样子,使用 ValueAnimator 不断改变 State 的值理论上就可以实现动画效果。还是上面的例子,改造成使用 ValueAnimator来实现:
class MainActivity : ComponentActivity() {
    override fun onCreate(savedInstanceState: Bundle?) {
        super.onCreate(savedInstanceState)
        // 使用 mutableStateOf 创建 topPadding 的 State
        var topPadding by mutableStateOf(10)
        // 创建 ValueAnimator 从 10 变化到 100
        val animator = ValueAnimator.ofInt(10, 100)
        // 动画时长 1s
        animator.duration = 1000
        // 设置监听,当动画改变时动态修改 topPadding 的值
        animator.addUpdateListener {
            topPadding = it.animatedValue as Int
        }
        setContent {
            Box(Modifier.padding(start = 10.dp, top = topPadding.dp)
                .size(100.dp)
                .background(Color.Blue)
                .clickable {
                    animator.start()
                }
            )
        }
    }
}
是否有效果呢?运行一下看看效果:
跟上面使用 ObjectAnimator 实现的效果一致,说明 ValueAnimator 在 Compose 中实现动画是可行的,只是需要手动去监听 ValueAnimator 值的变化然后去动态更新 State 的值,稍微麻烦了一点,实际上我们也可以对其进行封装简化其使用。
通过上面的代码发现,如果要在 Compose 中使用 ValueAnimator 来实现动画,对动画数值的改变进行监听并动态更新 State 的值是必不可少的一步,那么我们就可以将其提取进行封装。
/**
 * @param state 动画作用的目标 State
 * @param values 动画的变化值,可变参数
 */
fun animatorOfInt(state:MutableState, vararg values: Int) : ValueAnimator{
    // 创建 ValueAnimator ,参数为传入的 values
    val animator = ValueAnimator.ofInt(*values)
    // 添加监听
    animator.addUpdateListener {
        // 更新 state 的 value 值
        state.value = it.animatedValue as Int
    }
    return animator
}
然后将上面的创建动画替换成使用 animatorOfInt 创建:
class MainActivity : ComponentActivity() {
    override fun onCreate(savedInstanceState: Bundle?) {
        super.onCreate(savedInstanceState)

        val topPadding = mutableStateOf(10)
        // 使用封装的 animatorOfInt 方法创建动画
        val animator = animatorOfInt(topPadding, 10, 100)
        animator.duration = 1000
        setContent {
            Box(Modifier.padding(start = 10.dp, top = topPadding.value.dp)
                .size(100.dp)
                .background(Color.Blue)
                .clickable {
                    animator.start()
                }
            )
        }
    }
}
使用是不是要简单很多,不需要手动去处理动画值变化的监听了,有点使用 ObjectAnimator 的感觉,只是不需要指定目标属性。运行效果跟上面一致就不贴图了。
Compose 函数中使用属性动画
前面在 Compose 中使用的动画都是创建在 Compose 函数外面的,如果我们想把这个组件封装成一个独立的 Compose 组件就需要将动画的创建放到 Compose 函数里面,比如将上面的效果封装成一个 AnimationBox组件:
@Composable
fun AnimationBox(){
    val topPadding = mutableStateOf(10)
    val animator = animatorOfInt(topPadding, 10, 100)
    animator.duration = 1000
    Box(modifier = Modifier.padding(start = 10.dp, top = topPadding.value.dp)
        .size(100.dp)
        .background(Color.Blue)
        .clickable {
            animator.start()
        })
}
首先 mutableStateOf 会报错:
意思是在组合过程中创建 state 需要使用 remember,原因是当 state 里的值发生变化时 Compose 会进行重组导致函数重新执行,如果 mutableStateOf 不加 remember则会每次重组都重新创建 state,导致 UI 上使用的值每次都是初始值而得不到刷新。
既然报错那就给他加上 remember:
@Composable
fun AnimationBox(){
    val topPadding = remember { mutableStateOf(10) }
    ...
}
然后在使用的地方直接使用 AnimationBox() 即可:
setContent {
    AnimationBox()
}
运行后发现效果跟之前一样,那是不是就可以了呢?
实际上上面的代码是还存在问题的,前面说在 Compose 重组时会重新执行 Compose 组件的代码,也就是在界面刷新时会多次重复创建动画对象,我们在 animatorOfInt 函数里添加一个日志再看看运行时的日志输出:
fun  animatorOfInt(state:MutableState, vararg values: Int) : ValueAnimator{
    println("-------call animatorOfInt--------")
  ...
}
输出结果:
I/System.out: -------call animatorOfInt--------
I/System.out: -------call animatorOfInt--------
I/System.out: -------call animatorOfInt--------
I/System.out: -------call animatorOfInt--------
I/System.out: -------call animatorOfInt--------
I/System.out: -------call animatorOfInt--------
I/System.out: -------call animatorOfInt--------
I/System.out: -------call animatorOfInt--------
I/System.out: -------call animatorOfInt--------
I/System.out: -------call animatorOfInt--------
I/System.out: -------call animatorOfInt--------
I/System.out: -------call animatorOfInt--------
I/System.out: -------call animatorOfInt--------
I/System.out: -------call animatorOfInt--------
I/System.out: -------call animatorOfInt--------
日志确实输出了多次,意味着动画确实创建了多次,那怎么解决呢?
前面说了 remember可以解决重组时重复创建的问题,所以只需在创建动画上套上 remember即可,如下:
val animator = remember { animatorOfInt(topPadding, 10, 100) }
修改后再看日志,发现就只在第一次进行了创建,动画执行过程中并没有再次创建。
为了方便使用,可以再封装一个 rememberAnimatorOfInt方法:
@Composable
fun rememberAnimatorOfInt(state:MutableState, vararg values: Int) : ValueAnimator{
   return remember { animatorOfInt(state, *values) }
}
在 animatorOfInt 上套了一个 remember,这样使用时就可以直接使用 rememberAnimatorOfInt 方法:
val animator = rememberAnimatorOfInt(topPadding, 10, 100)
remember 是 Compose 提供的在 Compose 函数中缓存状态的方法,解决在 Compose 重组时重复创建的问题,关于 remember 更多使用大家可以自行查询相关资料,本专栏主要讲解动画的使用就不过多赘述。
实战
前面介绍了属性动画在 Compose 中的运用,那在实际开发中到底好不好用呢?接下来我们通过一个实例来看看。
先看一下最终实现的效果:
一个上传按钮的动画效果,动画主要分为三阶段:
- 上传开始
- 按钮从圆角矩形变成圆形
- 按钮颜色从蓝色变成中间白色,边框灰色
- 文字逐渐消失
- 上传进度
- 边框根据进度变为蓝色
- 上传完成
- 按钮从圆形变成圆角矩形
- 按钮颜色变成红色
- 文字逐渐显示,且文字变为 “Success”
上传开始动画
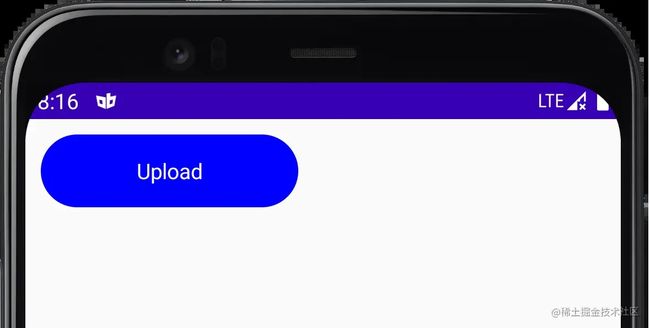
先把按钮的初始状态使用 Compose 实现:
@Composable
fun UploadButton() {
    Box(
        modifier = Modifier
            .padding(start = 10.dp, top = 10.dp)
            .width(180.dp),
        contentAlignment = Alignment.Center
    ) {
        Box(
            modifier = Modifier
                .clip(RoundedCornerShape(24.dp))
                .background(Color.Blue)
                .size(180.dp, 48.dp),
            contentAlignment = Alignment.Center,
        ) {
            Text("Upload", color = Color.White)
        }
    }
}
运行效果如下:
下面就为这按钮添加动画,前面讲了动画主要作用于 State 上,所以需要先将使用到的数据提取成对应的状态:
@Composable
fun UploadButton() {
    val originWidth = 180.dp
    val circleSize = 48.dp
    var text by remember { mutableStateOf("Upload") }
    val textAlpha = remember { mutableStateOf(1.0f) }
    val backgroundColor = remember { mutableStateOf(Color.Blue) }
    val boxWidth = remember { mutableStateOf(originWidth) }
    Box(
        modifier = Modifier
            .padding(start = 10.dp, top = 10.dp)
            .width(originWidth),
        contentAlignment = Alignment.Center
    ) {
        Box(
            modifier = Modifier
                .clip(RoundedCornerShape(height/2))
                .background(backgroundColor.value)
                .size(boxWidth.value, height),
            contentAlignment = Alignment.Center,
        ) {
            Text(text, color = Color.White, modifier = Modifier.alpha(textAlpha.value))
        }
    }
}
创建开始上传的动画:
@Composable
fun UploadButton() {
  ...
    val uploadStartAnimator = remember {
        // 创建 AnimatorSet
        val animatorSet = AnimatorSet()
        // 按钮宽度变化动画
        val widthAnimator = animatorOfDp(boxWidth, arrayOf(originWidth, circleSize))
        // 文字消失动画
        val textAnimator = animatorOfFloat(textAlpha, 1f, 0.0f)
        // 按钮颜色动画
        val colorAnimator = animatorOfColor(backgroundColor, arrayOf(Color.Blue, Color.Gray))
        // 动画添加到 AnimatorSet
        animatorSet.playTogether(widthAnimator, textAnimator, colorAnimator)
        animatorSet
    }
    Box(...) {
        Box(
            modifier = Modifier
                ...
                .clickable {
                    // 点击执行动画
                    uploadStartAnimator.start()
                },
            ...
        )
    }
}
分别创建按钮宽度、按钮颜色和文字 alpha 值变化的动画,因需同时执行多个动画,这里使用 AnimatorSet 进行同时执行,然后在按钮上添加点击事件进行动画执行。
上面的 animatorOfDp、animatorOfFloat、animatorOfColor都是自定义封装的函数,封装方法与上面介绍的 animatorOfInt基本相同,源码可通过文章最后附的源码地址进行查看。
运行效果如下:
好像还差点,中间应该是白色的,在 Box 下再添加一个白色圆形的 Box,默认 alpha 是 0,上传开始时 alpha 从 0 变成 1 :
@Composable
fun UploadButton() {
    ...
    val progressAlpha = remember { mutableStateOf(0.0f) }
    val uploadStartAnimator = remember {
        ...
        // 中间白色透明度变化动画
        val centerAlphaAnimator = animatorOfFloat(progressAlpha, 0.0f, 1f)
        animatorSet.playTogether(widthAnimator, textAnimator, colorAnimator, centerAlphaAnimator)
        animatorSet
    }
    Box(...) {
        Box(...) {
            // 白色圆形
            Box(
                modifier = Modifier.size(40.dp).clip(RoundedCornerShape(20.dp))
                    .alpha(progressAlpha.value).background(Color.White)
            )
            Text(text, color = Color.White, modifier = Modifier.alpha(textAlpha.value))
        }
    }
}
运行效果如下:
上传进度动画
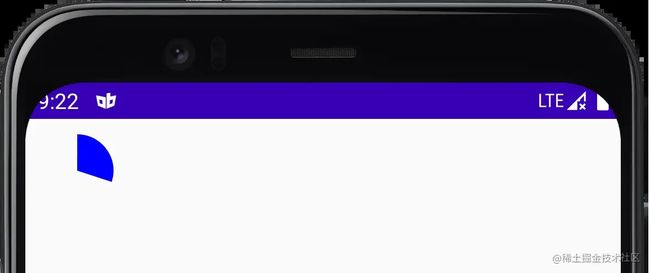
这里通过自定义 clip 的一个弧形的 shape 来实现进度,自定义代码如下:
class ArcShape(private val progress: Int) : Shape {
    override fun createOutline(
        size: Size,
        layoutDirection: LayoutDirection,
        density: Density
    ): Outline {
        val path = Path().apply {
            moveTo(size.width / 2f, size.height / 2f)
            arcTo(Rect(0f, 0f, size.width, size.height), -90f, progress / 100f * 360f, false)
            close()
        }
        return Outline.Generic(path)
    }
}
传入一个进度值(0-100),然后根据进度值算出一个绘制的弧度,使用这个自定义的 ArcShape 代码如下:
Box(Modifier.size(48.dp).clip(ArcShape(30)).background(Color.Blue))
效果:
所以只需动态改变 ArcShape 的 progress 参数的值就能实现上传进度效果,修改代码如下:
@Composable
fun PreviewUploadButton() {
    ...
    val progress = remember { mutableStateOf(0) }
    //上传进度动画
    val progressAnimator = remember {
        val animator = animatorOfInt(progress, 0, 100)
        animator.duration = 1000
        animator
    }
    val uploadStartAnimator = remember {
        ...
        // 添加动画监听,完成后执行进度动画
        animatorSet.addListener(onEnd = {
            progressAnimator.start()
        })
        animatorSet
    }
    Box(...) {
        Box(...) {
            // 进度 Box
            Box(
                modifier = Modifier.size(height).clip(ArcShape(progress.value))
                    .alpha(progressAlpha.value).background(Color.Blue)
            )
            ...
        }
    }
}
运行效果:
上传完成动画
最后是上传完成动画就很简单了,基本就是开始动画的反向,只是按钮颜色从蓝色变成了红色,动画在上传进度动画完成时执行:
@Composable
fun PreviewUploadButton() {
    ...

    val endAnimatorSet = remember {
        val animatorSet = AnimatorSet()
        val widthAnimator = animatorOfDp(boxWidth, arrayOf(circleSize, originWidth))
        val centerAnimator = animatorOfFloat(progressAlpha, 1f, 0f)
        val textAnimator = animatorOfFloat(textAlpha, 0f, 1f)
        val colorAnimator = animatorOfColor(backgroundColor, arrayOf(Color.Blue, Color.Red))
        animatorSet.playTogether(widthAnimator, centerAnimator, textAnimator, colorAnimator)
        animatorSet.addListener(onStart = {
            text = "Success"
        })
        animatorSet
    }
    val progressAnimator = remember {
        val animator = animatorOfInt(progress, 0, 100)
        animator.duration = 1000
        animator.addListener(onEnd = {
            endAnimatorSet.start()
        })
        animator
    }
    ...
}
最终效果:
最后
通过本篇文章的探索可以发现属性动画在 Compose 中确实是可以使用的,虽然跟传统 UI 开发中使用属性动画有所区别,但确实能用,而且通过一个简单的实战示例发现好像还挺好用的。好了,我已经学会 Compose 的动画开发了,什么?Compose 还单独提供了一套动画 API ?
属性动画这不是挺好使的么,这不是多此一举么,难道 Compose 的动画 API 比属性动画还好用、还强大?如果感兴趣请关注本专栏,从下一篇开始带你真正走进 Compose 的动画世界。
源码地址:ComposeAnimationDemo
以上就是Android Compose 属性动画使用探索详解的详细内容,更多关于Android Compose 属性动画的资料请关注脚本之家其它相关文章!


