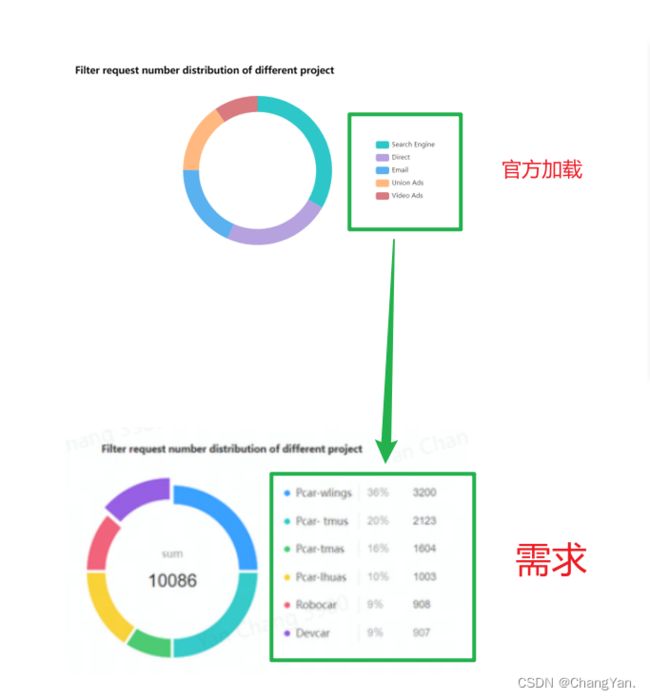
最近要完成显示一个饼图,使用echarts组件,先用官方给定的模板加载出样式,然后修改为自定义的样式。如下图是要自定义legend。
先放上官方加载出的代码
      this.chart.setOption({
        title: {
          text: "Filter request number distribution of different project",
          textStyle: {
            color: 'black',
            fontWeight: 'bold'
          }
        },
        tooltip: {
          trigger: 'item'
        },
        legend: {       //对图形的解释部分
          orient: 'vertical',
          right: 10,
          y: 'center'
        },
        series: [
          {
            name: 'Access From',
            type: 'pie',
            radius: ['55%', '70%'],
            avoidLabelOverlap: false,
            label: {
              show: false,
              position: 'center'
            },
            emphasis: {
              label: {
                show: true,
                fontSize: '20',
                fontWeight: 'bold'
              }
            },
            labelLine: {
              show: false
            },
            data: data // 需要加载的数据
          }
        ]
      })
对于需要加载的数据如下:
            data: [
              { value: 1048, name: 'Search Engine' },
              { value: 735, name: 'Direct' },
              { value: 580, name: 'Email' },
              { value: 484, name: 'Union Ads' },
              { value: 300, name: 'Video Ads' }
            ]
然后在此基础上进行修改。
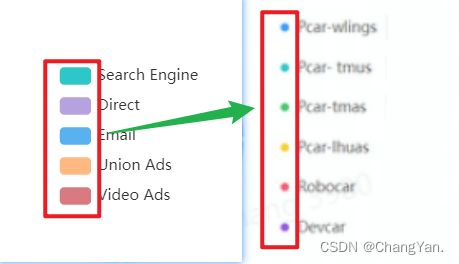
首先可以看到,图标默认是长方形,而需求是小圆点。
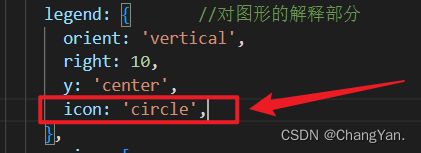
在此处设置就可以变为小圆点
如果需要其它图标,可以参看下图
接着就是右边一段文字到三段文字的显示,不止要展示出name,还要展示出百分比和数量。
这个就要用到legend.formatter进行设置,还要用到legend.textStyle. rich,在 rich 里面,可以自定义富文本样式,使三列文字的中间那一列展示为灰色,两边文字为黑色。
具体官网样式设置教程:https://echarts.apache.org/zh/option.html#legend.formatter
具体分析过程如下:
首先把文字分为3段,a表示name,b表示百分比, c表示value数量。
然后在textStyle里设置各自的样式,设置后的代码如下,注意备注【添加】的地方是主要更改
      this.chart.setOption({
        title: {
          text: 'Filter request number distribution of different project',
          textStyle: {
            color: 'black',
            fontWeight: 'bold'
          }
        },
        tooltip: {
          trigger: 'item'
        },
        legend: { // 对图形的解释部分
          orient: 'vertical',
          right: 10,
          y: 'center',
          icon: 'circle',			// 添加
          formatter: function(name) {	// 添加
            let total = 0
            let target
            for (let i = 0; i < data.length; i++) {
              total += data[i].value
              if (data[i].name === name) {
                target = data[i].value
              }
            }
            var arr = [
              '{a|' + name + '}',
              '{b|' + ((target / total) * 100).toFixed(2) + '%}',
              '{c|' + target + '}'
            ]
            return arr.join('  ')
          },
          textStyle: {	// 添加
            padding: [8, 0, 0, 0],
            rich: {
              a: {
                fontSize: 15,
                width: 110
              },
              b: {
                fontSize: 15,
                width: 70,
                color: '#c1c1c1'
              },
              c: {
                fontSize: 15
              }
            }
          }
        },
        series: [
          {
            name: 'Access From',
            type: 'pie',
            radius: ['55%', '70%'],
            center: ['30%', '50%'],
            avoidLabelOverlap: false,
            label: {
              show: false,
              position: 'center'
            },
            emphasis: {
              label: {
                show: true,
                fontSize: '20',
                fontWeight: 'bold'
              }
            },
            labelLine: {
              show: false
            },
            data: data
          }
        ]
      })
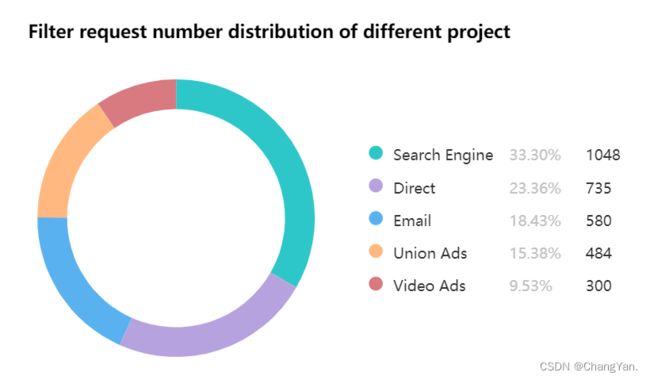
最后加载出的样式如图
大功告成!
总结
到此这篇关于echarts自定义legend样式的文章就介绍到这了,更多相关echarts自定义legend样式内容请搜索脚本之家以前的文章或继续浏览下面的相关文章希望大家以后多多支持脚本之家!


