Web Service 开发系列文章之三(一个较小的契约优先的Web Service例子,用JavaApplication发布)
Web Service 学习第三期
1、编写纯WSDL的web服务
1.1、新建目录及WSDL文件
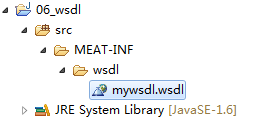
1.2、编写WSDL
1.2.1、编写type
<wsdl:types>
<xsd:schema targetNamespace="http://www.example.org/mywsdl/">
<!-- 自己定义了两个方法,两对儿元素 -->
<xsd:element name="add" type="tns:add"/>
<xsd:element name="addResponse" type="tns:addResponse"/>
<xsd:element name="divide" type="tns:divide"/>
<xsd:element name="divideResponse" type="tns:divideResponse"/>
<!-- 下面要为元素定义具体的类型 -->
<xsd:complexType name="add">
<xsd:sequence>
<xsd:element name="a" type="xsd:int"/>
<xsd:element name="b" type="xsd:int"/>
</xsd:sequence>
</xsd:complexType>
<xsd:complexType name="addResponse">
<xsd:sequence>
<xsd:element name="addResult" type="xsd:int"/>
</xsd:sequence>
</xsd:complexType>
<xsd:complexType name="divide">
<xsd:sequence>
<xsd:element name="num1" type="xsd:int"/>
<xsd:element name="num2" type="xsd:int"/>
</xsd:sequence>
</xsd:complexType>
<xsd:complexType name="divideResponse">
<xsd:sequence>
<xsd:element name="divideResult" type="xsd:int"/>
</xsd:sequence>
</xsd:complexType>
</xsd:schema>
</wsdl:types>
1.2.2、编写message
<wsdl:message name="add">
<wsdl:part name="add" element="tns:add"/>
</wsdl:message>
<wsdl:message name="addResponse">
<wsdl:part name="addResponse" element="tns:addResponse"></wsdl:part>
</wsdl:message>
<wsdl:message name="divide">
<wsdl:part name="divide" element="tns:divide"/>
</wsdl:message>
<wsdl:message name="divideResponse">
<wsdl:part name="divideResponse" element="tns:divideResponse"></wsdl:part>
</wsdl:message>
1.2.3、编写portTypes
<!-- 指定接口和方法(portType是对象的接口,所以下面的name为IMyService)-->
<wsdl:portType name="IMyService">
<wsdl:operation name="add">
<wsdl:input message="tns:add"/>
<wsdl:output message="tns:addResponse"/>
</wsdl:operation>
<wsdl:operation name="divide">
<wsdl:input message="tns:divide"/>
<wsdl:output message="tns:divideResponse"/>
</wsdl:operation>
</wsdl:portType>
1.2.4、编写binding
<wsdl:binding name="myServiceSOAP" type="tns:IMyService"> <!-- type是与上面wsdl:portType name="IMyService"的name相关联-->
<soap:binding style="document" transport="http://schemas.xmlsoap.org/soap/http"/>
<wsdl:operation name="add">
<!-- <soap:operation soapAction="http://www.example.org/mywsdl/NewOperation"/>-->
<wsdl:input>
<soap:body use="literal"/>
</wsdl:input>
<wsdl:output>
<soap:body use="literal"/>
</wsdl:output>
</wsdl:operation>
<wsdl:operation name="divide">
<!-- <soap:operation soapAction="http://www.example.org/mywsdl/NewOperation"/>-->
<wsdl:input>
<soap:body use="literal"/>
</wsdl:input>
<wsdl:output>
<soap:body use="literal"/>
</wsdl:output>
</wsdl:operation>
</wsdl:binding>
1.2.5、编写service
<!-- 下面的wsdl:service name="MyServiceImplService"的name
与文档开头的命名空间xmlns:xsd="http://www.w3.org/2001/XMLSchema" name="MyServiceImplService"中的 name对应-->
<wsdl:service name="MyServiceImplService">
<!-- wsdl:port binding="tns:myServiceSOAP"中的binging与上面wsdl:binding name="myServiceSOAP"中的name一致 -->
<wsdl:port binding="tns:myServiceSOAP" name="MyServiceImplPort">
<!-- 下面的地址是发布到网上的地址 -->
<soap:address location="http://localhost:8989/ms"/>
</wsdl:port>
</wsdl:service>
1.3、通过编写好的WSDL生成服务接口
1.3.1、生成接口
进入WSDL的目录,用wsimport根据WSDL文件生成一个客户端
wsimport -d D:\wsimport\06 -keep mywsdl.wsdl

将生成的代码拷贝到项目中
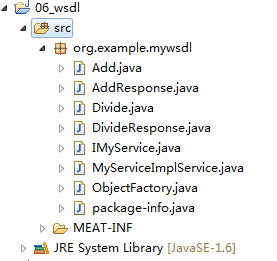
除了IMyservice.java其余文件可以删除
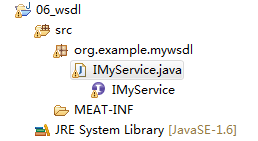
之后编写这个文件的实现类
其实这个接口也可以不要,直接把实现类发布成Web Service,但是通过接口发布可以通过加Annotation来控制WSDL中变量的名称
1.4、编写刚刚生成的服务接口的实现类
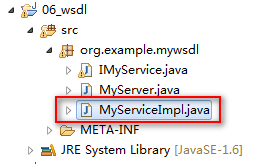
package org.example.mywsdl;
import javax.jws.WebService;
@WebService(endpointInterface="org.example.mywsdl.IMyService",
targetNamespace = "http://www.example.org/mywsdl/",
wsdlLocation = "META-INF/wsdl/mywsdl.wsdl")//指定WSDL的位置
public class MyServiceImpl implements IMyService {
@Override
public int add(int a, int b) {
System.out.println(a + b);
return a + b;
}
@Override
public int divide(int num1, int num2) {
System.out.println(num1 / num2);
return num1 / num2;
}
}
在实现类上指定自定义的WSDL的位置,之后产生类(自己理解应该是产生调用接口的.class)的时候就会根据WSDL文件产生,而不会根据实现类中的方法产生,实现类中的方法是具体执行的实现
具体指定WSDL的做法:wsdlLocation = "META-INF/wsdl/mywsdl.wsdl"(上面程序中的)
1.5、启动服务
1.5.1、创建一个MyServer
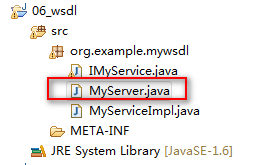
package org.example.mywsdl;
import javax.xml.ws.Endpoint;
public class MyServer {
public static void main(String[] args) {
Endpoint.publish("http://localhost:8989/ms", new MyServiceImpl());
}
}
注意上面程序中的服务地址是自定义的WSDL中
<wsdl:service name="MyServiceImplService">
<!-- wsdl:port binding="tns:myServiceSOAP"中的binging与上面wsdl:binding name="myServiceSOAP"中的name一致 -->
<wsdl:port binding="tns:myServiceSOAP" name="MyServiceImplPort">
<!-- 下面的地址是发布到网上的地址 -->
<soap:address location="http://localhost:8989/ms"/>
</wsdl:port>
</wsdl:service>
现在只要修改WSDL,http://localhost:8989/ms?wsdl 地址下的内容就会相应的改变
1.6、生成客户端,执行WSDL
wsimport -d D:\wsimport\061 -keep http://localhost:8989/ms?wsdl
生成了客户端代码
新建客户端项目
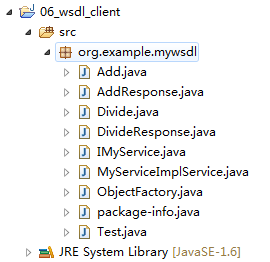
编写Test.java测试类
package org.example.mywsdl;
public class Test {
public static void main(String[] args) {
MyServiceImplService mis = new MyServiceImplService();
IMyService ms = mis.getMyServiceImplPort();
System.out.println(ms.add(9, 3));
}
}
1.7、大总结
1.7.1、对于服务端的一些PS
项目结构
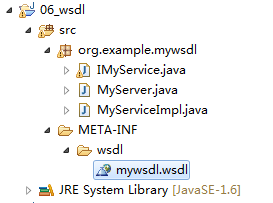
手动开发的:META-INF-wsdl-mywsdl.wsdl
通过编写好的wsdl生成的接口:IMyService.java(1.3.1节),
生成的这个接口中有丰富的Annotation,这些Annotation是完全符合我们自己定义的wsdl的,这些Annotation能够很好地格式化来往的SOAP消息标签名。
编写的实现类:MyServiceImpl.java,为了说明它与IMyService.java的关系,在此将MyServiceImpl.java代码列在下面,注意加了背景颜色的部分,有了endpointInterface=…那句话就将实现类与根据我们自己定义的WSDL生成的接口联系在了一起,也就等于在实现类加上了那些Annotation,如果不加endpointInterface那句话,自己手动在实现类的函数上加上诸如@WebResult、@WebParam等Annotation效果也是一样的;不过wsimport可以帮我们自动通过我们定义的WSDL生成这个"带有Annotation的契约的集合---IMyService接口"
package org.example.mywsdl;
import javax.jws.WebService;
@WebService(endpointInterface="org.example.mywsdl.IMyService",
targetNamespace = "http://www.example.org/mywsdl/",
wsdlLocation = "META-INF/wsdl/mywsdl.wsdl")
public class MyServiceImpl implements IMyService {
@Override
public int add(int a, int b) {
System.out.println(a + b);
return a + b;
}
@Override
public int divide(int num1, int num2) {
System.out.println(num1 / num2);
return num1 / num2;
}
}
1.7.2、关于wsimport
对于服务端的接口是用本地的自己定义的WSDL文件生成的
wsimport -d D:\wsimport\06 -keep mywsdl.wsdl
对于客户端,是通过对外发布的WSDL(URL)生成的
wsimport -d D:\wsimport\061 -keep http://localhost:8989/ms?wsdl
1.8、增加头信息
1.8.1、添加一个类型(下面第二部分)
<xsd:element name="divideResponse" type="tns:divideResponse"/>
<!-- 定义头信息类型,给下面的message使用 -->
<xsd:element name="licenseInfo" type="xsd:string"/>
1.8.2、添加一个message(下面第二部分)
<wsdl:message name="divide">
<wsdl:part name="divide" element="tns:divide"/>
</wsdl:message>
<wsdl:message name="divideResponse">
<wsdl:part name="divideResponse" element="tns:divideResponse"></wsdl:part>
</wsdl:message>
<!-- 定义头信息的message -->
<wsdl:message name="licenseInfo">
<wsdl:part name="licenseInfo" element="tns:licenseInfo"></wsdl:part>
</wsdl:message>
1.8.3、将头信息加在add里
<wsdl:operation name="add">
<!-- <soap:operation soapAction="http://www.example.org/mywsdl/NewOperation"/>-->
<wsdl:input>
<soap:body use="literal"/>
<!-- 加头信息 -->
<soap:header use="literal" part="licenseInfo" message="tns:licenseInfo"></soap:header>
</wsdl:input>
<wsdl:output>
<soap:body use="literal"/>
</wsdl:output>
</wsdl:operation>
1.8.4、重新导出客户端
1.8.5、在服务端生成的接口IMyService中给add方法添加参数用来接收头信息
public int add(
@WebParam(name = "a", targetNamespace = "")
int a,
@WebParam(name = "b", targetNamespace = "")
int b,
@WebParam(name = "licenseInfo", header = true)
String licenseInfo);
之后相应地在实现类MyServiceImpl里也增加同样的参数
@Override
public int add(int a, int b, String licenseInfo) {
System.out.println(licenseInfo);
System.out.println(a + b);
return a + b;
}
之后重新发布,从浏览器中看WSDL完全没有变化。
依赖的不是我们的代码
1.8.6、在Test中用SOAP加头信息
package org.example.mywsdl;
import java.net.URL;
import javax.xml.namespace.QName;
import javax.xml.soap.MessageFactory;
import javax.xml.soap.SOAPBody;
import javax.xml.soap.SOAPBodyElement;
import javax.xml.soap.SOAPEnvelope;
import javax.xml.soap.SOAPHeader;
import javax.xml.soap.SOAPMessage;
import javax.xml.ws.Dispatch;
import javax.xml.ws.Service;
public class Test {
public static void main(String[] args) throws Exception{
String ns = "http://www.example.org/mywsdl/";
QName name = new QName(ns, "MyServiceImplService");
URL url = new URL("http://localhost:8989/ms?wsdl");
// MyServiceImplService mis = new MyServiceImplService();
// IMyService ms = mis.getMyServiceImplPort();
// System.out.println(ms.add(9, 3));
Service service = Service.create(url, name);
//<wsdl:port binding="tns:myServiceSOAP" name="MyServiceImplPort">
QName pname = new QName(ns, "MyServiceImplPort");
//创建dispatch
Dispatch<SOAPMessage> dis = service.createDispatch(pname, SOAPMessage.class, Service.Mode.MESSAGE);
//组建SOAP
SOAPMessage msg = MessageFactory.newInstance().createMessage();
SOAPEnvelope enev = msg.getSOAPPart().getEnvelope();
SOAPHeader header = enev.getHeader();
SOAPBody body = enev.getBody();
if(header == null) {
enev.addHeader();
}
QName hName = new QName(ns, "licenseInfo", "ns");
header.addHeaderElement(hName).setValue("asdf1234");
QName hName2 = new QName(ns, "licenseInfo22222", "nswwwww1111111");
header.addHeaderElement(hName2).setValue("222222");
//header.addHeaderElement(hName).setValue("222222");
System.out.println("head 组装信息");
msg.writeTo(System.out);
QName bname = new QName(ns, "add", "ns");
SOAPBodyElement ele = body.addBodyElement(bname);
ele.addChildElement("a").setValue("12");
ele.addChildElement("b").setValue("33");
System.out.println("body组装信息");
msg.writeTo(System.out);
System.out.println("\n invoking...");
SOAPMessage rep = dis.invoke(msg);
System.out.println("回复信息");
rep.writeTo(System.out);
}
}