springBoot中使用mybatis操作MySQL数据库-springboot学习笔记
这篇文章将介绍怎样在springboot中整合mybatis完成对MySQL数据库的操作,主要完成对student表的增删改查
首先,打开idea,建立springboot项目
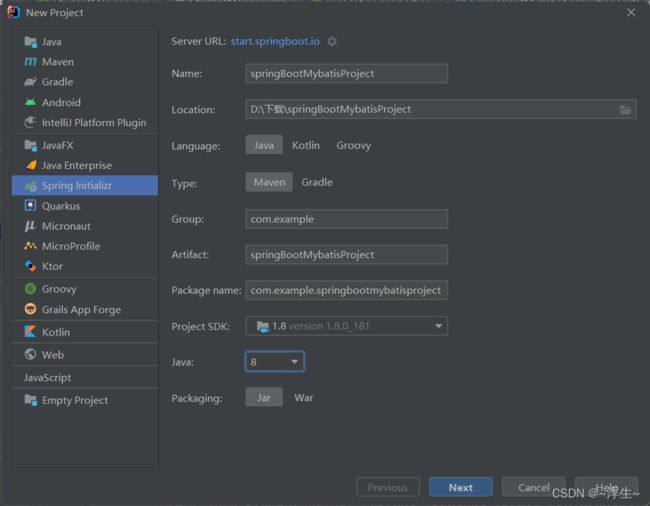
选择项目依赖,这里只测试数据库,如下图:

点击finish,项目结构如下:

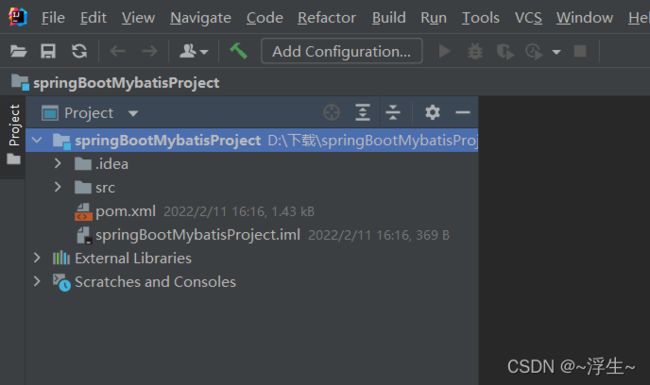
删除多余的文件,删除后如下:
在resources文件夹下的application.properties文件添加mybatis相关配置:
# mapper.xml配置文件的路径
MyBatis.mapper-locations=classpath:/mapper/*.xml
MyBatis.type-aliases-package=com.example.springBootMybatisProject.entity
# 数据库连接
spring.datasource.url=jdbc:mysql://localhost:3306/MyBatis_test?serverTimezone=UTC&useUnicode=true&characterEncoding=utf-8&useSSL=true
spring.datasource.username=root
spring.datasource.password=123123
spring.datasource.driver-class-name=com.mysql.cj.jdbc.Driver
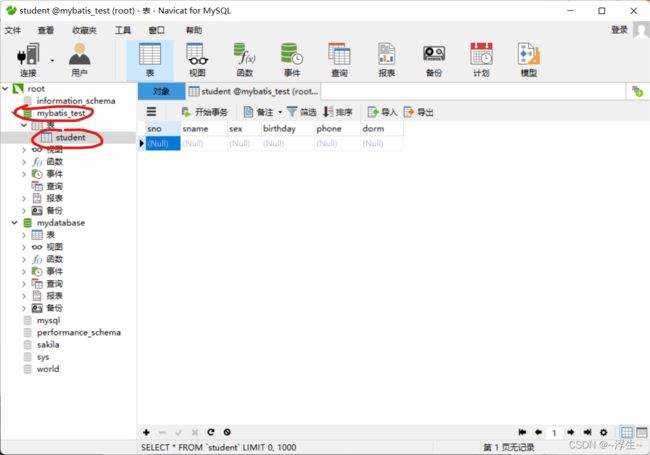
将数据库的用户名和密码修改成你自己的,然后建立MyBatis_test数据库和student表,代码如下:
create database MyBatis_test;
CREATE TABLE student(
sno VARCHAR(20) PRIMARY KEY,
sname varchar(20),
sex varchar(20),
birthday VARCHAR(20),
phone varchar(20),
dorm VARCHAR(20)
);
如下图:
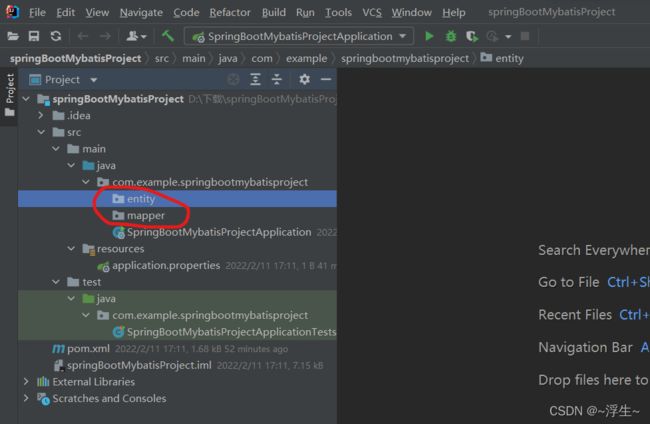
创建如下图所示的两个包:
在entity包下,建立Student实体类:
代码如下:
package com.example.springbootmybatisproject.entity;

public class Student {
    private String sno;
    private String sname;
    private String sex;
    private String birthday;
    private String phone;
    private String dorm;

    public Student() {
    }

    public Student(String sno, String sname, String sex, String birthday, String phone, String dorm) {
        this.sno = sno;
        this.sname = sname;
        this.sex = sex;
        this.birthday = birthday;
        this.phone = phone;
        this.dorm = dorm;
    }

    @Override
    public String toString() {
        return "Student{" +
                "sno='" + sno + '\'' +
                ", sname='" + sname + '\'' +
                ", sex='" + sex + '\'' +
                ", birthday='" + birthday + '\'' +
                ", phone='" + phone + '\'' +
                ", dorm='" + dorm + '\'' +
                '}';
    }

    public String getSno() {
        return sno;
    }

    public void setSno(String sno) {
        this.sno = sno;
    }

    public String getSname() {
        return sname;
    }

    public void setSname(String sname) {
        this.sname = sname;
    }

    public String getSex() {
        return sex;
    }

    public void setSex(String sex) {
        this.sex = sex;
    }

    public String getBirthday() {
        return birthday;
    }

    public void setBirthday(String birthday) {
        this.birthday = birthday;
    }

    public String getPhone() {
        return phone;
    }

    public void setPhone(String phone) {
        this.phone = phone;
    }

    public String getDorm() {
        return dorm;
    }

    public void setDorm(String dorm) {
        this.dorm = dorm;
    }
}
添加mapper接口和映射文件
在建立的mapper包下建立StudentMapper接口,代码如下:
package com.example.springbootmybatisproject.mapper;

import com.example.springbootmybatisproject.entity.Student;

import java.util.List;

public interface StudentMapper {
//    添加学生
    public void addStudent(Student student);
//    删除学生
    public void deleteStudent(String sno);
//    修改学生
    public void updateStudent(Student student);
//    查询某个学生
    public Student selectOne(String sno);
//    查询全部学生
    public List<Student> selectAll();
}
在resources文件夹下建立mapper文件夹,然后在下面建立StudentMapper.xml文件,代码如下:
DOCTYPE mapper PUBLIC "-//mybatis.org//DTD Mapper 3.0//EN" "http://mybatis.org/dtd/mybatis-3-mapper.dtd">
<mapper namespace="com.example.springbootmybatisproject.mapper.StudentMapper">

    <resultMap id="BaseResultMap" type="com.example.springbootmybatisproject.entity.Student">
        <result column="sno" jdbcType="VARCHAR" property="sno">result>
        <result column="sname" jdbcType="VARCHAR" property="sname">result>
        <result column="sex" jdbcType="VARCHAR" property="sex">result>
        <result column="birthday" jdbcType="VARCHAR" property="birthday">result>
        <result column="phone" jdbcType="VARCHAR" property="phone">result>
        <result column="dorm" jdbcType="VARCHAR" property="dorm">result>
    resultMap>

    <insert id="addStudent" parameterType="Student">
        insert into student values (#{sno},#{sname},#{sex},#{birthday},#{phone},#{dorm});
    insert>

    <delete id="deleteStudent" parameterType="String">
        delete from student where sno=#{sno};
    delete>

    <update id="updateStudent" parameterType="Student">
        update Student set
        <if test="sname!=null">sname = #{sname},if>
        <if test="sex!=null">sex = #{sex},if>
        <if test="birthday!=null">birthday = #{birthday},if>
        <if test="phone!=null">phone = #{phone},if>
        <if test="dorm!=null">dorm = #{dorm}if>
        where sno=#{sno}
    update>

    <select id="selectOne" resultMap="BaseResultMap" parameterType="String">
        select * from student where sno=#{sno};
    select>

    <select id="selectAll" resultMap="BaseResultMap">
        select * from student;
    select>
mapper>
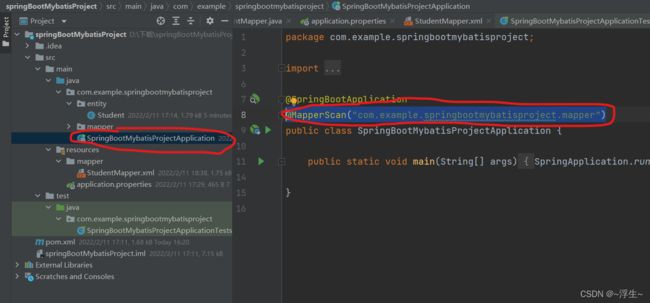
在启动类中添加对Mapper包的扫描注解@MapperScan,Spring Boot启动时会自动加载包路径下的Mapper。
如下图:
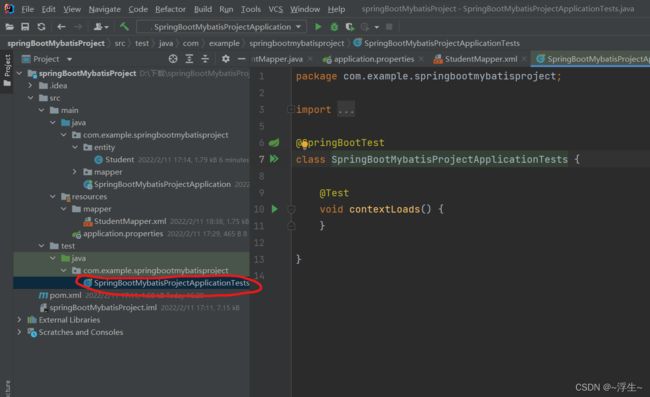
然后,打开测试类,如下图:
测试代码如下:
package com.example.springbootmybatisproject;
import com.example.springbootmybatisproject.entity.Student;
import com.example.springbootmybatisproject.mapper.StudentMapper;
import org.junit.jupiter.api.Test;
import org.springframework.beans.factory.annotation.Autowired;
import org.springframework.boot.test.context.SpringBootTest;
@SpringBootTest
class SpringBootMybatisProjectApplicationTests {
@Autowired
private StudentMapper studentMapper;
@Test
void contextLoads() {
Student student1=new Student("1001","浮生","男","2001-1-1","231241414","123");
Student student2=new Student("1002","张三","女","2002-2-2","222121212","123");
Student student3=new Student("1001","123","女","123","123","123");
Student student4=new Student("1003","333","女","333","333","333");
studentMapper.addStudent(student1);
studentMapper.addStudent(student2);
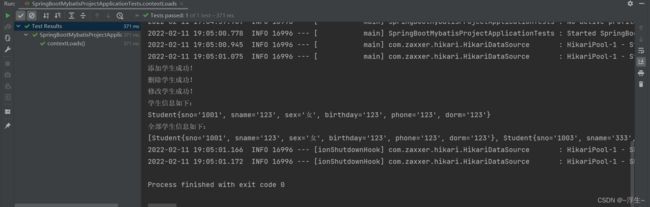
System.out.println("添加学生成功!");
studentMapper.deleteStudent("1002");
System.out.println("删除学生成功!");
studentMapper.updateStudent(student3);
System.out.println("修改学生成功!");
System.out.println("学生信息如下:");
System.out.println(studentMapper.selectOne("1001"));
studentMapper.addStudent(student4);
System.out.println("全部学生信息如下:");
System.out.println(studentMapper.selectAll());
}
}
运行结果如下:
数据库如下:

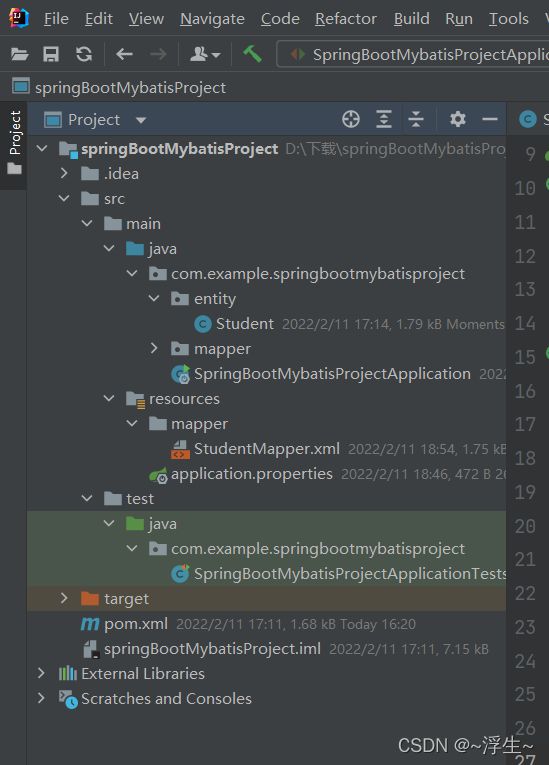
项目整体结构如下: