DOTA数据集+YOLOV5
一、数据集准备
-
OBB和HBB标注方式:
a. HBB ,是指标注任意四边形;顶点按顺时针顺序排列,通常表示为{x,y,w,h}
b. OBB,是指标注任意四边形;顶点按顺时针顺序排列,通常表示为 {x,w,h, θ \theta θ } -
现有数据集的标注方式为OBB,在数据集中,每个对象都由一个定向边界框 (OBB) 注释,该边界框可以表示 ( x 1 , y 1 , x 2 , y 2 , x 3 , y 3 , x 4 , y 4 ) (x_1,y_1,x_2,y_2,x_3,y_3,x_4,y_4) (x1,y1,x2,y2,x3,y3,x4,y4) , 其中 ( x i , y i ) (x_i,y_i) (xi,yi) 表示 OBB 的第 i 个顶点。顶点按顺时针顺序排列。如图1所示,黄色点表示起点,表示:(a) 平面的左上角,(b) 大型车辆钻石的左上角,(c) 棒球钻石的中心。 除了 OBB 之外,每个实例还标有类别和困难,指示实例是否难以检测(1 表示困难,0 表示不困难)。图像的批注保存在具有相同文件名的文本文件中。每行表示一个实例。以下是图像的示例批注:
x1, y1, x2, y2, x3, y3, x4, y4, category, difficult
x1, y1, x2, y2, x3, y3, x4, y4, category, difficult
...
图1 -
YOLO标注格式
1 0.339041 0.215267 0.426941 0.210687
1 0.339041 0.215267 0.426941 0.210687
分别指所标注内容的类别标签(从0开始)、归一化后的中心点x坐标,归一化后的中心点y坐标,归一化后的目标框宽度w,归一化后的目标况高度h(此处归一化指的是除以图片宽和高)
具体计算方式可参考https://blog.csdn.net/m0_56654441/article/details/120959449
-
标注格式转换OBB→YOLO
参考:
https://zhuanlan.zhihu.com/p/356416158
https://github.com/hukaixuan19970627/DOTA_devkit_YOLO (YOLO_Transform.py,dota_utils.py )
HBB: id x y w h
import dota_utils as util
import os
import numpy as np
from PIL import Image
import cv2
import random
import shutil
import matplotlib.pyplot as plt
from shapely.geometry import Polygon, MultiPoint # 多边形
import time
import argparse

## trans dota format to format YOLO(darknet) required
def dota2Darknet(imgpath, txtpath, dstpath, extractclassname):
"""
:param imgpath: the path of images
:param txtpath: the path of txt in dota format
:param dstpath: the path of txt in YOLO format
:param extractclassname: the category you selected
:return:
txt format: id x y w h
"""
if os.path.exists(dstpath):
shutil.rmtree(dstpath) # delete output folder
os.makedirs(dstpath) # make new output folder
filelist = util.GetFileFromThisRootDir(txtpath) # fileist=['/.../P0005.txt', ..., /.../P000?.txt]
for fullname in filelist: # fullname='/.../P000?.txt'
objects = util.parse_dota_poly(fullname)
'''
objects =
[{'name': 'ship',
'difficult': '1',
'poly': [(1054.0, 1028.0), (1063.0, 1011.0), (1111.0, 1040.0), (1112.0, 1062.0)],
'area': 1159.5
},
...
]
'''
name = os.path.splitext(os.path.basename(fullname))[0] # name='P000?'
img_fullname = os.path.join(imgpath, name + '.png') # img_fullname='/.../P000?.png'
img = Image.open(img_fullname)
img_w, img_h = img.size
# print img_w,img_h
with open(os.path.join(dstpath, name + '.txt'), 'w') as f_out:
for obj in objects:
poly = obj['poly'] # poly=[(x1,y1),(x2,y2),(x3,y3),(x4,y4)]
bbox = np.array(util.dots4ToRecC(poly, img_w, img_h)) # bbox=[x y w h]
if (sum(bbox <= 0) + sum(bbox >= 1)) >= 1: # 若bbox中有<=0或>= 1的元素则将该box排除
continue
if (obj['name'] in extractclassname):
id = extractclassname.index(obj['name']) # id=类名的索引 比如'plane'对应id=0
else:
continue
outline = str(id) + ' ' + ' '.join(list(map(str, bbox))) # outline='id x y w h'
f_out.write(outline + '\n') # 写入txt文件中并加上换行符号 \n
另外还可以转换为旋转框,具体代码见YOLO_Transform.py中dota2LongSideFormat函数
-
数据集
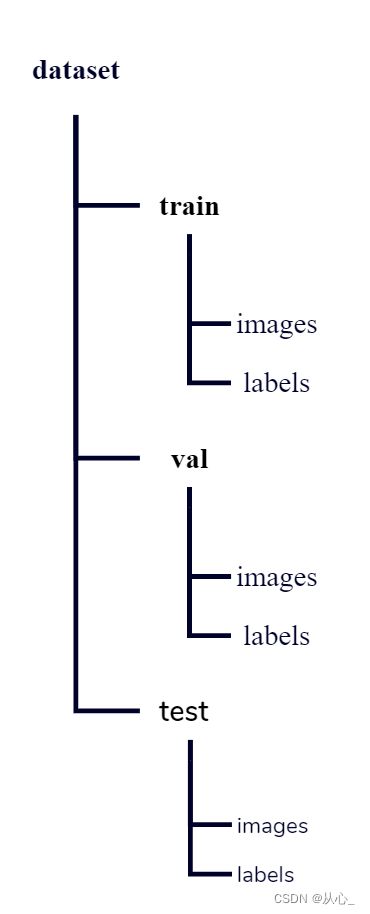
a. 已有数据集dataset目录如下
yolov5s训练
-
train.py
a. 参数解析def parse_opt(known=False): parser = argparse.ArgumentParser() #预训练权重路径 parser.add_argument('--weights', type=str, default=ROOT / 'yolov5s.pt', help='initial weights path') #模型配置文件路径,指定了参数信息和backbone信息,ps:注意修改类别数 parser.add_argument('--cfg', type=str, default='', help='model.yaml path') #数据集配置文件路径,包含训练、验证、测试集的路径,类别数和类别标签 parser.add_argument('--data', type=str, default=ROOT / 'data/coco128.yaml', help='dataset.yaml path') #指定超参数文件的路径,超参数文件包含了大量的模型参数信息,data/hyps下有5个超参配置文件 parser.add_argument('--hyp', type=str, default=ROOT / 'data/hyps/hyp.scratch-low.yaml', help='hyperparameters path') #训练的轮数 parser.add_argument('--epochs', type=int, default=300) #每批次输入的数据量 parser.add_argument('--batch-size', type=int, default=16, help='total batch size for all GPUs, -1 for autobatch') #输入图片大小 parser.add_argument('--imgsz', '--img', '--img-size', type=int, default=640, help='train, val image size (pixels)') #是否采用矩阵推理的方式去训练模型,矩阵推理就是不再要求你训练的图片是正方形,矩阵推理会加速模型的推理过程,减少一些冗余信息 parser.add_argument('--rect', action='store_true', help='rectangular training') #断点续训:即是否在之前训练的一个模型基础上继续训练,值默认是 False parser.add_argument('--resume', nargs='?', const=True, default=False, help='resume most recent training') #是否只保存最后一轮的pt文件,默认是保存best.pt和last.pt两个的 parser.add_argument('--nosave', action='store_true', help='only save final checkpoint') #是否只在最后一轮测试,正常情况下每个epoch都会计算mAP,但如果开启了这个参数,那么就只在最后一轮上进行测试 parser.add_argument('--noval', action='store_true', help='only validate final epoch') #是否禁用自动锚框,默认是开启的,自动锚点的好处是可以简化训练过程。在yolov5 中自动锚定框选项,训练开始前,会自动计算数据集标注信息针对默认锚定框的最佳召回率,当最佳召回率大于等于0.98时,则不需要更新锚定框;如果最佳召回率小于0.98,则需要重新计算符合此数据集的锚定框 parser.add_argument('--noautoanchor', action='store_true', help='disable AutoAnchor') #画图 parser.add_argument('--noplots', action='store_true', help='save no plot files') #遗传超参数进化:yolov5使用遗传超参数进化,提供的默认参数是通过在COCO数据集上使用超参数进化得来的,由于超参数进化会耗费大量的资源和时间,因此建议不要动这个参数 parser.add_argument('--evolve', type=int, nargs='?', const=300, help='evolve hyperparameters for x generations') #谷歌云盘:通过这个参数可以下载谷歌云盘上的一些资料 parser.add_argument('--bucket', type=str, default='', help='gsutil bucket') #是否提前缓存图片到内存,以加快训练速度,默认False;开启这个参数就会对图片进行缓存,从而更好的训练模型 parser.add_argument('--cache', type=str, nargs='?', const='ram', help='--cache images in "ram" (default) or "disk"') #是否启用加权图像策略(默认是不开启的),主要是为了解决样本不平衡问题;开启后会对于上一轮训练效果不好的图片,在下一轮中增加一些权重 parser.add_argument('--image-weights', action='store_true', help='use weighted image selection for training') #gpu设备选择:指定硬件设备的,系统会自己判断 parser.add_argument('--device', default='', help='cuda device, i.e. 0 or 0,1,2,3 or cpu') #是否启用多尺度训练,默认是不开启的;多尺度训练是指设置几种不同的图片输入尺度,训练时每隔一定iterations随机选取一种尺度训练,这样训练出来的模型鲁棒性更强 parser.add_argument('--multi-scale', action='store_true', help='vary img-size +/- 50%%') #设定训练数据集是单类别还是多类别,默认为 False多类别 parser.add_argument('--single-cls', action='store_true', help='train multi-class data as single-class') #选择优化器:默认为SGD,可选SGD,Adam,AdamW parser.add_argument('--optimizer', type=str, choices=['SGD', 'Adam', 'AdamW'], default='SGD', help='optimizer') #是否开启跨卡同步BN:开启参数后即可使用 SyncBatchNorm多 GPU 进行分布式训练 parser.add_argument('--sync-bn', action='store_true', help='use SyncBatchNorm, only available in DDP mode') #dataloader中的最大work数(线程个数) parser.add_argument('--workers', type=int, default=8, help='max dataloader workers (per RANK in DDP mode)') #指定训练好的模型的保存路径:默认在runs/train parser.add_argument('--project', default=ROOT / 'runs/train', help='save to project/name') #设定保存的模型文件夹名:默认在exp parser.add_argument('--name', default='exp', help='save to project/name') #每次预测模型的结果是否保存在原来的文件夹:如果指定了这个参数的话,那么本次预测的结果还是保存在上一次保存的文件夹里;如果不指定就是每次预测结果保存一个新的文件夹下 parser.add_argument('--exist-ok', action='store_true', help='existing project/name ok, do not increment') #数据处理方式,dataloader取数据时, 是否使用collate\_fn4代替collate\_fn,四合一 parser.add_argument('--quad', action='store_true', help='quad dataloader') #是否开启余弦学习率 parser.add_argument('--cos-lr', action='store_true', help='cosine LR scheduler') #是否对标签进行平滑处理,默认是不启用的 parser.add_argument('--label-smoothing', type=float, default=0.0, help='Label smoothing epsilon') #早停:如果模型在default值轮数里没有提升,则停止训练模型 parser.add_argument('--patience', type=int, default=100, help='EarlyStopping patience (epochs without improvement)') #指定冻结层数量:可以在yolov5s.yaml中查看主干网络层数 parser.add_argument('--freeze', nargs='+', type=int, default=[0], help='Freeze layers: backbone=10, first3=0 1 2') #用于设置多少个epoch保存一下checkpoint parser.add_argument('--save-period', type=int, default=-1, help='Save checkpoint every x epochs (disabled if < 1)') parser.add_argument('--seed', type=int, default=0, help='Global training seed') #用于单机多卡训练,单GPU设备不需要设置 parser.add_argument('--local_rank', type=int, default=-1, help='Automatic DDP Multi-GPU argument, do not modify') # Weights & Biases arguments #在线可视化工具,类似于tensorboard parser.add_argument('--entity', default=None, help='W&B: Entity') #是否上传dataset到wandb tabel(将数据集作为交互式dsviz表在浏览器中查看、查询、筛选和分析数据集) 默认为False parser.add_argument('--upload_dataset', nargs='?', const=True, default=False, help='W&B: Upload data, "val" option') #设置界框图像记录间隔 Set bounding-box image logging interval for W&B 默认-1 parser.add_argument('--bbox_interval', type=int, default=-1, help='W&B: Set bounding-box image logging interval') parser.add_argument('--artifact_alias', type=str, default='latest', help='W&B: Version of dataset artifact to use') opt = parser.parse_known_args()[0] if known else parser.parse_args() return optb. cfg(yolov5s.yaml) https://zhuanlan.zhihu.com/p/296592676
# parameters
nc: 80 # number of classes 类别数
depth_multiple: 0.33 # model depth multiple 模型深度 控制模块的数量,当模块的数量number不为1时,模块的数量 = number * depth
width_multiple: 0.50 # layer channel multiple 模型的宽度 控制卷积核的数量 ,卷积核的数量 = 数量 * width

# anchors
anchors:
- [10,13, 16,30, 33,23] # P3/8 检测小目标 10,13是一组尺寸,一共三组
- [30,61, 62,45, 59,119] # P4/16
- [116,90, 156,198, 373,326] # P5/32 检测大目标
yolov5已经在yaml预设好了输入图像为640*640分辨率对应的anchor尺寸,yolov5的anchor也是在大特征图上检测小目标,在小特征图上检测大目标。三个特征图,每个特征图上的格子有三种尺寸的anchor。
# YOLOv5 backbone
backbone:
# from 第一列 输入来自哪一层 -1代表上一层, 4代表第4层
# number 第二列 卷积核的数量 最终数量需要乘上width
# module 第三列 模块名称 包括:Conv Focus BottleneckCSP SPP
# args 第四列 模块的参数
# [from, number, module, args]
[[-1, 1, Focus, [64, 3]], # 0-P1/2
[-1, 1, Conv, [128, 3, 2]], # 1-P2/4 卷积核的数量 = 128 * wedith = 128*0.5=64
[-1, 3, BottleneckCSP, [128]], 模块数量 = 3 * depth =3*0.33=1
[-1, 1, Conv, [256, 3, 2]], # 3-P3/8
[-1, 9, BottleneckCSP, [256]], 模块数量 = 9 * depth =9*0.33=3
[-1, 1, Conv, [512, 3, 2]], # 5-P4/16
[-1, 9, BottleneckCSP, [512]],
[-1, 1, Conv, [1024, 3, 2]], # 7-P5/32
[-1, 1, SPP, [1024, [5, 9, 13]]],
[-1, 3, BottleneckCSP, [1024, False]], # 9
]
i. Focus:对特征图的切片操作,模块参数args分析: [[-1, 1, Focus, [64, 3]] 中的 [64, 3] 解析得到[3, 32, 3] ,输入为3(RGB),输出为640.5 = 32,3是卷积核 33
ii. Conv:这里的Conv由conv+Bn+Leaky_relu激活函数三者组成,模块参数args分析:[-1, 1, Conv, [128, 3, 2]]中的128 是卷积核数量,最终数量需要乘上width = 128 0.5 = 64,3是卷积核 33,2是步长。
iii. BottleneckCSP:借鉴CSPNet网络结构,由三个卷积层和X个Res unint模块Concate组成,如果带有False参数就是没有使用Res unint模块,而是采用conv+Bn+Leaky_relu
iv. SPP:采用1×1,5×5,9×9,13×13的最大池化的方式,进行多尺度融合。# YOLOv5 head head: [[-1, 1, Conv, [512, 1, 1]], [-1, 1, nn.Upsample, [None, 2, 'nearest']], 上采样 [[-1, 6], 1, Concat, [1]],#cat backbone P4 [-1, 6]代表cat上一层和第6层 [-1, 3, BottleneckCSP, [512, False]], # 13 第13层 [-1, 1, Conv, [256, 1, 1]], [-1, 1, nn.Upsample, [None, 2, 'nearest']], 上采样 [[-1, 4], 1, Concat, [1]],#cat backbone P3 [-1,4]代表cat上一层和第4层 [-1, 3, BottleneckCSP, [256, False]], # 17 (P3/8-small) 第17层 [-1, 1, Conv, [256, 3, 2]], [[-1, 14], 1, Concat, [1]], #cat head P4 [-1,14]代表cat上一层和第14层 [-1, 3, BottleneckCSP, [512, False]], # 20 (P4/16-medium) 第20层 [-1, 1, Conv, [512, 3, 2]], [[-1, 10], 1, Concat, [1]], #cat head P5 [-1,10]代表cat上一层和第10层 [-1, 3, BottleneckCSP, [1024, False]], # 23 (P5/32-large) 第23层 [[17, 20, 23], 1, Detect, [nc, anchors]], # Detect(P3, P4, P5) ]#Detect [17, 20, 23] 代表输入的层数17和20和23Yolov5 Head 包括 Neck 和 Detector head 两部分,Neck部分使用了PANet的结构, Detector head使用和yolov3一样的head。其中,BottleneckCSP带有False参数说明没有使用Res unit结构而是采用了conv+Bn+Leaky_relu。
c. 超参设置
# YOLOv5  by Ultralytics, GPL-3.0 license
# Hyperparameters for medium-augmentation COCO training from scratch
# python train.py --batch 32 --cfg yolov5m6.yaml --weights '' --data coco.yaml --img 1280 --epochs 300
# See tutorials for hyperparameter evolution [https://github.com/ultralytics/yolov5#tutorials](https://github.com/ultralytics/yolov5#tutorials)

#优化器相关
lr0: 0.01 # initial learning rate (SGD=1E-2, Adam=1E-3) 学习率
lrf: 0.1 # final OneCycleLR learning rate (lr0 * lrf)
momentum: 0.937 # SGD momentum/Adam beta1 学习率动量
weight_decay: 0.0005 # optimizer weight decay 5e-4 权重衰减系数

#warmup相关
warmup_epochs: 3.0 # warmup epochs (fractions ok)
warmup_momentum: 0.8 # warmup initial momentum
warmup_bias_lr: 0.1 # warmup initial bias lr

# 损失函数相关
box: 0.05 # box loss gain giou损失的权重
cls: 0.3 # cls loss gain 分类损失的权重
cls_pw: 1.0 # cls BCELoss positive_weight 分类BCELoss中正样本的权重
obj: 0.7 # obj loss gain (scale with pixels) # 有无目标损失的系数 - 翻转
obj_pw: 1.0 # obj BCELoss positive_weight 有无目标BCELoss中正样本的权重
iou_t: 0.20 # IoU training threshold 标签与anchors的iou阈值
anchor_t: 4.0 # anchor-multiple threshold
# anchors: 3 # anchors per output layer (0 to ignore)
fl_gamma: 0.0 # focal loss gamma (efficientDet default gamma=1.5)

#数据增强——色彩转换
hsv_h: 0.015 # image HSV-Hue augmentation (fraction)色调
hsv_s: 0.7 # image HSV-Saturation augmentation (fraction)饱和度
hsv_v: 0.4 # image HSV-Value augmentation (fraction)明度

#数据增强——旋转、平移、扭曲
degrees: 0.0 # image rotation (+/- deg)旋转角度
translate: 0.1 # image translation (+/- fraction)水平和垂直平移
scale: 0.9 # image scale (+/- gain)缩放
shear: 0.0 # image shear (+/- deg)剪切
perspective: 0.0 # image perspective (+/- fraction), range 0-0.001 透视变换参数

#数据增强——翻转
flipud: 0.0 # image flip up-down (probability)上下翻转
fliplr: 0.5 # image flip left-right (probability)左右翻转

#数据增强
mosaic: 1.0 # image mosaic (probability) 进行mosaic的概率
mixup: 0.1 # image mixup (probability) 进行mixup的概率
copy_paste: 0.0 # segment copy-paste (probability)
d. data(coco128.yaml)
# YOLOv5  by Ultralytics, GPL-3.0 license
# COCO128 dataset [https://www.kaggle.com/ultralytics/coco128](https://www.kaggle.com/ultralytics/coco128) (first 128 images from COCO train2017) by Ultralytics
# Example usage: python train.py --data coco128.yaml
# parent
# ├── yolov5
# └── datasets
# └── coco128 ← downloads here (7 MB)


# Train/val/test sets as 1) dir: path/to/imgs, 2) file: path/to/imgs.txt, or 3) list: [path/to/imgs1, path/to/imgs2, ..]
# 可以是图片的文件夹,也可以是写有图片路径的txt,或者是list
path: ../datasets/coco128 # dataset root dir 数据集根路径
train: images/train2017 # train images (relative to 'path') 128 images 训练集
val: images/train2017 # val images (relative to 'path') 128 images 验证集
test: # test images (optional) 测试集

# Classes
nc: 80 # number of classes
names: ['person', 'bicycle', 'car', 'motorcycle', 'airplane', 'bus', 'train', 'truck', 'boat', 'traffic light',
'fire hydrant', 'stop sign', 'parking meter', 'bench', 'bird', 'cat', 'dog', 'horse', 'sheep', 'cow',
'elephant', 'bear', 'zebra', 'giraffe', 'backpack', 'umbrella', 'handbag', 'tie', 'suitcase', 'frisbee',
'skis', 'snowboard', 'sports ball', 'kite', 'baseball bat', 'baseball glove', 'skateboard', 'surfboard',
'tennis racket', 'bottle', 'wine glass', 'cup', 'fork', 'knife', 'spoon', 'bowl', 'banana', 'apple',
'sandwich', 'orange', 'broccoli', 'carrot', 'hot dog', 'pizza', 'donut', 'cake', 'chair', 'couch',
'potted plant', 'bed', 'dining table', 'toilet', 'tv', 'laptop', 'mouse', 'remote', 'keyboard', 'cell phone',
'microwave', 'oven', 'toaster', 'sink', 'refrigerator', 'book', 'clock', 'vase', 'scissors', 'teddy bear',
'hair drier', 'toothbrush'] # class names


# Download script/URL (optional)
download: [https://ultralytics.com/assets/coco128.zip](https://ultralytics.com/assets/coco128.zip)
e. 执行训练
python train.py --img 640 --batch 16 --epochs 100 --data fruit.yaml --weights yolov5.pt --cfg yolov5s.yaml -
训练输出结果含义
a. result.txt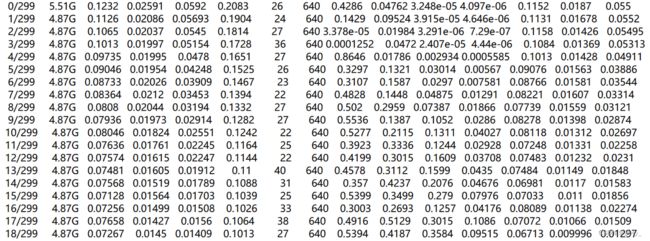
第一列:epoch,
第二列:gpu_mem GPU消耗,
第三列:box边界框损失,越小方框越准
第四列:obj目标检测损失,越小目标检测越准
第五列:cls分类损失,越小分类越准
第六列:total
第七列:labels 目标数量
第八列:img size
第九列 :Precision 精度 表示分类器检测为正确正样本占所有正样本的百分比,即在所有的真值边界框中,检测到正确正样本边界框所占的比例, P r e c i s i o n = T P T P + F P Precision=\frac{TP}{TP+FP} Precision=TP+FPTP
第十列:Recall 表示分类器检测为正确正样本占所有正样本的百分比,即在所有的真值边界框中,检测到正确正样本边界框所占的比例, R e c a l l = T P T P + F N Recall=\frac{TP}{TP+FN} Recall=TP+FNTP
十一列:[email protected] 表示在IoU阈值为0.5时的mAP值变化曲线
十二列:[email protected]:.95 表示在IoU阈值以0.05的步长从0.5到0.95变化时的mAP值变化曲线,即IoU阈值取0.5、0.55、0.6、0.65、0.7、0.75、0.8、0.85、0.9、0.95时的平均mAP
十三列:验证集val box
十四列:val obj
十五列:val cls
-
tensorboard可视化loss精度等曲线
tensorboard --logdir=./runs