YOLOv5预处理高性能实现

目录

      • 前言
      • 1. YOLOv5推理
      • 2. 高性能预处理
      • 结语
      • 下载链接
      • 参考

前言

梳理下YOLOv5预处理和后处理流程,并实现GPU版预处理(仅供自己参考)

视频讲解:抖音/手写AI

代码参考:preprocess_kernel.cu

1. YOLOv5推理

YOLOv5推理包括预处理和后处理两部分,其中预处理主要包括warpAffine和双线性插值,不了解的可以查看here,后处理主要包括decode解码和NMS两部分。

废话少说直接上代码

import numpy as np
import cv2

def preprocess(img, dst_width=640, dst_height=640):
    '''
    :param img: 输入的图片
    :param dst_width: 预处理后的图像宽
    :param dst_height: 预处理后的图像高
    :return: 预处理后的图片,仿射变换矩阵的逆变换矩阵IM
    '''
    scale = min((dst_width / img.shape[1]), (dst_height / img.shape[0]))
    ox = (-scale * img.shape[1] + dst_width)  / 2
    oy = (-scale * img.shape[0] + dst_height) / 2
    M  = np.array([
        [scale, 0, ox],
        [0, scale, oy]
    ], dtype=np.float32)
    # img_pre为仿射变换后的图即原始图像缩放到[dst_width,dst_height]
    img_pre = cv2.warpAffine(img, M, dsize=[dst_width, dst_height], flags=cv2.INTER_LINEAR,
                             borderMode=cv2.BORDER_CONSTANT, borderValue=(114,114,114))
    IM = cv2.invertAffineTransform(M)
    # -----------------------------------------------------------------------#
    #   需要进行的预处理
    #   1. BGR -> RGB
    #   2. /255.0
    #   3. 通道数变换 H,W,C -> C,H,W
    #   4. 添加batch维度 C,H,W -> B,C,H,W
    # -----------------------------------------------------------------------#
    img_pre = (img_pre[...,::-1] / 255.0).astype(np.float32)
    img_pre = img_pre.transpose(2,0,1)[None]
    return img_pre, IM

def iou(box1, box2):
    def area_box(box):
        return (box[2] - box[0]) * (box[3] - box[1])
    # box -> [x1,y1,x2,y2,...]
    left, top = max(box1[:2], box2[:2])
    right, bottom = min(box1[2:4], box2[2:4])
    union = max((right-left), 0) * max((bottom-top), 0)
    cross = area_box(box1) + area_box(box2) - union
    if cross == 0 or union == 0:
        return 0
    return union / cross

def NMS(boxes, iou_thresh=0.45):
    '''
    :param boxes: decode解码排序后的boxes [n,7] 7 = x1,y1,x2,y2,conf,img_id,label
    :param iou_thresh: iou阈值
    :return: 经过NMS的boxes
    '''
    # 利用remove_flags标记需要去除的box
    remove_flags = [False] * len(boxes)
    # 保留下的box
    keep_boxes = []
    for i in range(len(boxes)):
        if remove_flags[i]:
            continue
        ibox = boxes[i]
        keep_boxes.append(ibox)
        for j in range(len(boxes)):
            if remove_flags[j]:
                continue
            jbox = boxes[j]
            # 只有同一张图片中的同一个类别的box才计算iou
            if ibox[5] != jbox[5] or ibox[6] != jbox[6]:
                continue
            # 计算iou,若大于阈值则标记去除
            if iou(ibox, jbox) > iou_thresh:
                remove_flags[j] = True
    return keep_boxes


def postprocess(pred, IM, iou_thresh=0.45, conf_thresh=0.25):
    '''
    :param pred: 模型推理的结果 [1,25200,85] 85 = cx,cy,w,h,conf + 80
    :param IM: 仿射变换矩阵的逆变换,主要用来将box映射回原图
    :param iou_thresh: iou阈值
    :param cof_thresh: 置信度阈值
    :return: 经过NMS的boxes
    '''
    # 保存decode解码后的boxes
    boxes = []
    for img_id, box_id in zip(*np.where(pred[...,4] >= conf_thresh)):
        item = pred[img_id][box_id]
        cx, cy, w, h, obj_conf = item[:5]
        label = item[5:].argmax()
        confidence = obj_conf * item[5+label]
        if confidence < conf_thresh:
            continue
        left = cx  - w * 0.5
        top  = cy  - h * 0.5
        right  = cx  + w * 0.5
        bottom = cy  + h * 0.5
        boxes.append([left, top, right, bottom, confidence, img_id, label])
    # 利用IM将box映射回原图
    boxes = np.array(boxes)
    lr = boxes[..., [0, 2]]
    tb = boxes[..., [1, 3]]
    boxes[..., [0, 2]] = lr * IM[0][0] + IM[0][2]
    boxes[..., [1, 3]] = tb * IM[1][1] + IM[1][2]
    # 将boxes按照置信度高低排序
    boxes = sorted(boxes.tolist(), key= lambda x : x[4], reverse=True)
    # 将排序后的boxes作NMS
    return NMS(boxes, iou_thresh=iou_thresh)

if __name__ == '__main__':
    img = cv2.imread("bus.jpg")
    # 预处理
    img_pre, IM = preprocess(img, dst_width=640, dst_height=640)
    # 加载模型推理的结果
    pred = np.load("pred.npz")['arr_0']
    # 后处理
    boxes = postprocess(pred, IM)
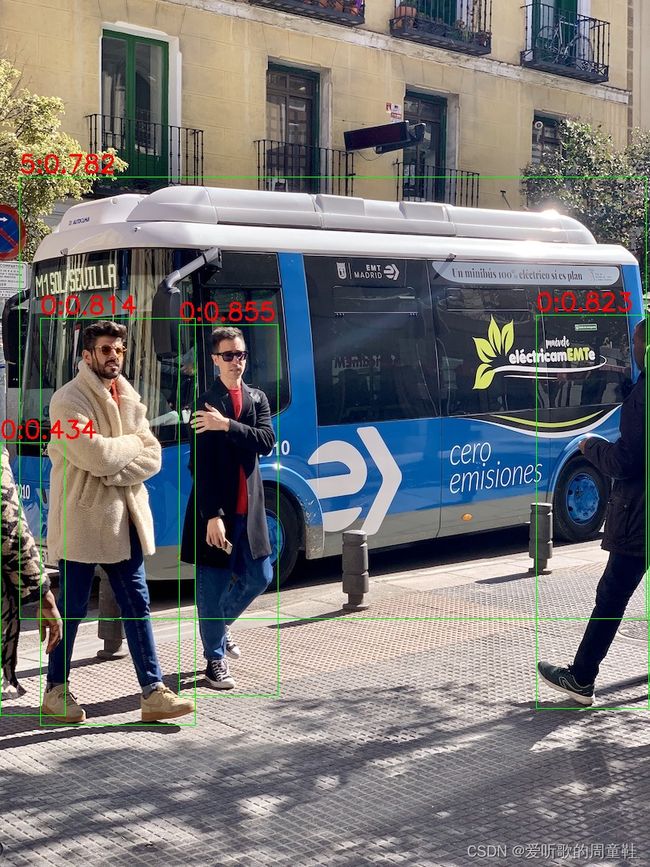
    for obj in boxes:
        x1, y1, x2, y2 = map(int, obj[:4])
        label = int(obj[6])
        confidence = obj[4]
        cv2.rectangle(img, (x1, y1), (x2, y2), (0,255,0), 1, 8)
        cv2.putText(img, f"{label}:{confidence:.3f}", (x1, y1-6), 0, 1, (0,0,255), 2, 8)
    cv2.imshow("img_pre", img)
    cv2.waitKey(0)

效果如下图

YOLOv5预处理高性能实现_第1张图片

2. 高性能预处理

主要将YOLOv5的预处理(即warpAffine和双线性插值)以核函数的形式实现,代码如下

#include 

#define min(a, b) ((a) < (b) ? (a) : (b))

typedef unsigned char uint8_t;
struct Size{
    int width = 0, height = 0;
    
    Size() = default;
    Size(int w, int h): width(w), height(h) {}
};

// 3.AffineMatrix
struct AffineMatrix{
    float i2d[6];
    float d2i[6];
    
    void compute(const Size& src, const Size& dst){
        float scale_x = dst.width / (float)src.width;
        float scale_y = dst.height / (float)src.height;
        float scale = min(scale_x, scale_y);
        
        float ox = (-scale * src.width + dst.width + scale - 1) / 2;
        float oy = (-scale * src.height + dst.height + scale - 1) / 2;
        
        i2d[0] = scale; i2d[1] =     0; i2d[2] = ox;
        i2d[3] =     0; i2d[4] = scale; i2d[5] = oy;
        
        invertAffineTransform(i2d, d2i);
    }
    
    void inverAffineTransorm(float i2d[6], float d2i[6]){
        float i00 = i2d[0]; float i01 = i2d[1]; float i02 = i2d[2];
        float i10 = i2d[3]; float i11 = i2d[4]; float i12 = i2d[5];
        
        // 计算行列式
        float D = i00 * i11 - i01 * i10;
        D = D == 0 ? 0 : 1.0 / D;
        
        // 计算伴随矩阵除行列式
        float A00 = i11 * D;
        float A01 = -i10 * D;
        float A02 = 0;
        float A10 = -i01 * D;
        float A11 = i01 * D;
        float A12 = 0;
        float A20 = (i01 * i12 - i02 * i11) * D;
        float A21 = -(i00 * i12 - i10 * i02) * D;
        float A22 = (i00 * i11 - i01 * i10) * D;
        d2i[0] = A00; d2i[1] = A10; d2i[2] = A20;
        d2i[3] = A01; d2i[4] = A11; d2i[5] = A21; 
    }
};

__device__ void affine_project(float* IM, int x, int y, float* proj_x, float* proj_y){
    *proj_x = IM[0] * x + IM[1] * y + IM[2];
    *proj_y = IM[3] * x + IM[4] * y + IM[5];
}

// 2.核函数
__global__ void warp_affine_bilinear_kernel(
    uint8_t* src, int src_line_size, int src_width, int src_height,
	uint8_t* dst, int dst_line_size, int dst_width, int dst_height,
	uint8_t fill_value, AffineMatrix M){
    
    int dx = blockIdx.x * blockDim.x + threadIdx.x;
    int dy = blockIdx.y * blockDim.y + threadIdx.y;
    if (dx >= dst_width || dy >= dst_height) return;
    
    float c0 = fill_value, c1 = fill_value, c2 = fill_value;
    float src_x = 0; float src_y = 0;
    affine_project(M.d2i, dx, dy, &src_x, &src_y);  // IM
    
    if(src_x < -1 || src_x >= src_width || src_y < -1 || src_y >= src_height){
        
    }else{
        int y_low = floorf(src_y);
        int x_low = floorf(src_x);
        int y_high = y_low + 1;
        int x_high = x_low + 1;
        
        uint8_t const_values[] = {fill_value, fill_value, fill_value};
        uint8_t* v1 = const_values;
        uint8_t* v2 = const_values;
        uint8_t* v3 = const_values;
        uint8_t* v4 = const_values;
        float ly = src_y - y_low;
        float lx = src_x - x_low;
        float hy = 1 - ly;
        float hx = 1 - lx;
        float w1 = hy * hx;
        float w2 = hy * lx;
        float w3 = ly * hx;
        float w4 = ly * lx;
        
        if(x_low >=0 && y_low >= 0) v1 = src + y_low * src_line_size + x_low * 3;
        if(x_high < src_width && y_low >= 0 ) v2 = src + y_low * src_line_size + x_high * 3;
        if(x_high < src_width && y_high < src_height) v3 = src + y_high * src_line_size + x_high * 3;
        if(x_low >=0 && y_high < src_height) v4 = src + y_high * src_line_size + x_low * 3;
    
        c0 = floorf(w1*v1[0] + w2*v2[0] + w3*v3[0] + w4*v4[0] + 0.5f);
    	c1 = floorf(w1*v1[1] + w2*v2[1] + w3*v3[1] + w4*v4[1] + 0.5f);
    	c2 = floorf(w1*v1[2] + w2*v2[2] + w3*v3[2] + w4*v4[2] + 0.5f);
    }
    
    uint8_t* pdst = dst + dy * dst_line_size + dx * 3;
    pdst[0] = c0; pdst[1] = c1; pdst[1] = c2;
}

// 1.warp_affine核函数调用
void warp_affine_bilinear(uint8_t* src, int src_line_size, int src_width, int src_height,
                          uint8_t* dst, int dst_line_size, int dst_width, int dst_height,
                          uint8 fill_value){
    dim3 block_size(32, 32);
    dim3 grid_size((dst_width+31)/32, (dst_height+31)/32);
    AffineMatrix M; // M矩阵
    M.compute(Size(src_width, src_height), Size(dst_width, dst_height));	// M矩阵
    
    warp_affine_bilinear_kernel<<<grid_size, block_size, 0, nullptr>>>(
    	src, src_line_size, src_width, src_height,
        dst, dst_line_size, dst_width, dst_height,
        fill_value, M
    );
}

结语

代码仅供自己参考,大家也可查看对应的小视频观看讲解,后续有时间再和大家详细分享。

下载链接

  • 高性能预处理[password:yolo]

参考

  • 抖音/手写AI
  • preprocess_kernel.cu
  • 图像预处理之warpaffine与双线性插值

你可能感兴趣的:(python,计算机视觉,opencv)