基于线性代数+opencv+tensorflow2.x智能小车寻迹解决方案
概述
这篇文章的写作是最近正在重新学习线性代数后,想到的一个简单的应用。也是对OpenCV+TensorFlow简单的机器小车传统视觉寻迹这一篇文章的一个新的思路和比较。
在使用的技术工具上为opencv和tensorflow。opencv不过多介绍,在图像处理方法是一个非常好用的库了。使用tensorflow是用来做矩阵运算,并没有涉及到更深层次的人工智能的处理。因此如果你接触过pytorch也可以平替。
这篇文章末尾会附上测试所有代码。
训练素材&最终效果
训练素材
静态素材
动态素材
有点遗憾,本人没参加过飞思卡尔智能车大赛和电赛。因此没有实际的参赛视频来进行检测。我这里引用的B站up的参赛视频作为这次的验证。
17届小三轮上位机看元素补线情况
训练素材放在以下的百度网盘链接中,有需要的朋友自提一下。
链接:https://pan.baidu.com/s/1F0NYZfDFpAFIZHU_cBv53g?pwd=rlpu
提取码:rlpu
最终结果
静态素材
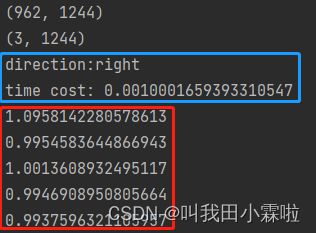
测试图片的大小为962*1244 。
使用传统的对图片的每一个像素进行扫描判断。蓝色为使用矩阵进行计算。红色框体为进行5次的传统像素扫描时间。可以看出确确实实快了1000倍。
动态测试
生成动态图像抽帧比较严重。由于处理速度可以忽略不计,因此真实观测的与原视频相无几。此时图像的观测几乎受限于视屏帧数。
关键讲解
矩阵的设计
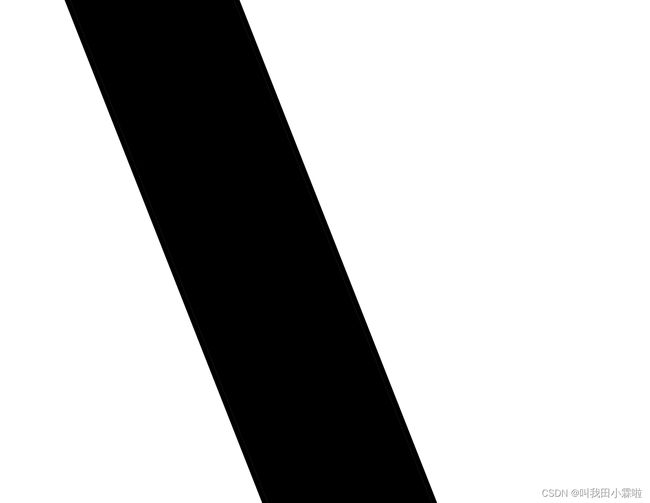
这里大致的将小车的运动分为左转、直行、右转。因此,我这里选择了3个向量来对图像内容进行打分。根据打分高低来进行选择出最高分(赛道为白色,背景为黑色)或者最低分(赛道为黑色,背景为白色)。以下用静态图片进行说明(shape:962 * 1244, 赛道为黑色,背景为白色)
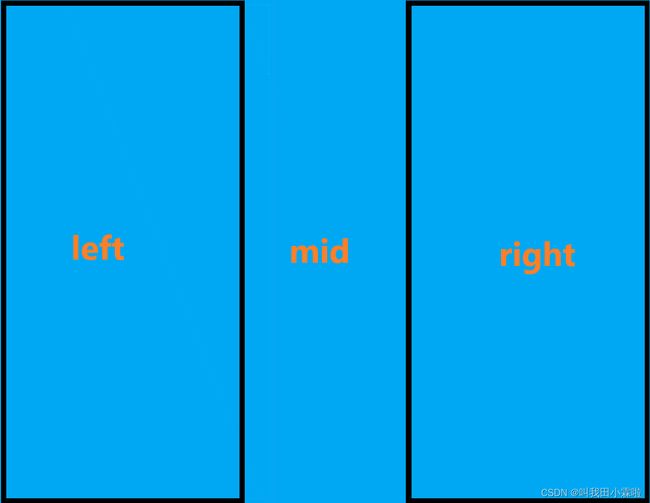
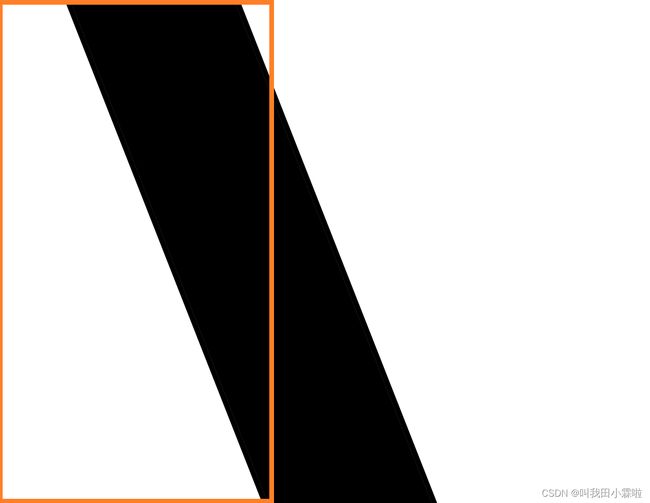
我们将图片分为3个部分,那么轨迹在哪个部分的面积最大,那么就是要设置的方向。
左转可以理解为在右侧的轨迹更多,因此左侧的评分会低。同理对直行以及右转也是相同的道理。所以我对这三个判断向量由0和1构成。
zero_fill = tf.zeros([1, int(matrix.shape[1]/4)])
one_fill = tf.ones([1, int(matrix.shape[1] * 3 / 8)])

left_judge = tf.zeros([1, matrix.shape[1] - one_fill.shape[1] - zero_fill.shape[1]])
left_judge = tf.concat([one_fill, zero_fill, left_judge], axis=1)

one_fill = tf.ones([1, int(matrix.shape[1]/4)])
zero_fill = tf.zeros([1, int(matrix.shape[1] * 3 / 8)])

mid_judge = tf.zeros([1, matrix.shape[1] - one_fill.shape[1] - zero_fill.shape[1]])
mid_judge = tf.concat([zero_fill, one_fill, mid_judge], axis=1)

right_judge = tf.ones([1, matrix.shape[1] - 2 * zero_fill.shape[1]])
right_judge = tf.concat([zero_fill, zero_fill, right_judge], axis=1)

judge_matrix = tf.concat([left_judge, mid_judge, right_judge], axis=0)
直观理解就是:
- 行向量,大小为:1*图片的列数。这里是1*1244。
- 左转判断向量,构成为前3/8全为1,其余为0 。
- 直行判断向量,构成为中间1/4为1,两边为0。
- 右转判断向量,构成为右边3/8为1,其余为0。
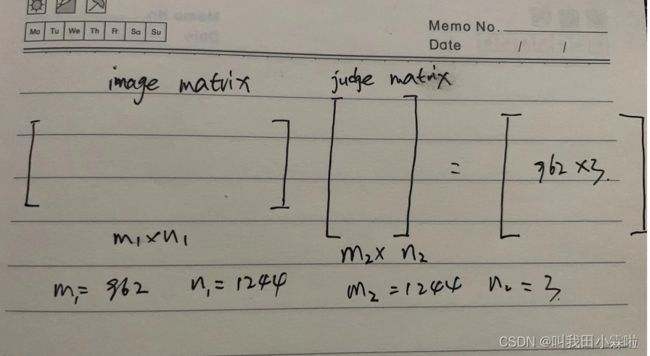
- 最后进行合并成一个3*1244的判断矩阵
这里的比例大家可以自己调整,找到合适的比例。接下来就是将怎么进行计算了。
图像是二值化图像,用image_matrix表示。然后还需要将判断矩阵进行转置,从3*1244变为1244*3。根据矩阵的点乘就可以得到每一行对应的三个方向的白色像素点的个数。假设这个962*3的矩阵为A,那么A[300,2]就表示图像的第301行落在右转判断区间的白色像素点的个数。
最后我们只要在做乘一个1*962的全1向量就能统计出该图像落在这3个区域的白色像素点的个数了。
有效视野
这只是比较简单的方法,使用了矩阵计算来代替用for循环来进行判断的一个方法。但是这个方法也同样是具有局限性,以及可以对其进行优化的。
第一个问题是由于智能车的速度并不慢,因此在获取到的图像时可能就会造成的下面的一部分其实是无效的,并且也是干扰项。
matrix = tf.split(matrix, 2, axis=0)[0]这里我就将图像的下面的一半直接去掉了。从执行效率上看,虽然看起来去掉50%,但是矩阵的运行速度十分快,根本不会对整体代码执行构成影响。
完整代码
静态测试代码
# 开发作者  : Tian.Z.L
# 开发时间  : 2022/8/9 16:54
# 文件名称  : static_picture_compare.py
# 开发工具  : PyCharm
# @Function:
import time

import tensorflow as tf

try:
    import cv2
except:
    import cv2.cv2 as cv2

direct = ['left', 'straight', 'right']

image = cv2.imread('right.png', 0)
matrix = tf.convert_to_tensor(image, dtype=tf.float32)

zero_fill = tf.zeros([1, int(matrix.shape[1] / 4)])
one_fill = tf.ones([1, int(matrix.shape[1] * 3 / 8)])

left_judge = tf.zeros([1, matrix.shape[1] - one_fill.shape[1] - zero_fill.shape[1]])
left_judge = tf.concat([one_fill, zero_fill, left_judge], axis=1)

one_fill = tf.ones([1, int(matrix.shape[1] / 4)])
zero_fill = tf.zeros([1, int(matrix.shape[1] * 3 / 8)])

mid_judge = tf.zeros([1, matrix.shape[1] - one_fill.shape[1] - zero_fill.shape[1]])
mid_judge = tf.concat([zero_fill, one_fill, mid_judge], axis=1)

right_judge = tf.ones([1, matrix.shape[1] - 2 * zero_fill.shape[1]])
right_judge = tf.concat([zero_fill, zero_fill, right_judge], axis=1)

judge_matrix = tf.concat([left_judge, mid_judge, right_judge], axis=0)

final = tf.ones([1, matrix.shape[0]])

print(matrix.shape)
print(judge_matrix.shape)
for i in range(200):
    # start_time = time.time()
    judge = tf.matmul(final, tf.matmul(matrix, tf.transpose(judge_matrix)))
    result = tf.argmax(judge, axis=1)
    result = result.numpy()[0]
    # print('direction:'+direct[result])
    # print('time cost:', time.time() - start_time)
start_time = time.time()
matrix = tf.split(matrix, 2, axis=0)[0]
final = tf.ones([1, matrix.shape[0]])
judge = tf.matmul(final, tf.matmul(matrix, tf.transpose(judge_matrix)))
result = tf.argmin(judge, axis=1)
result = result.numpy()[0]
print('direction:' + direct[result])
print('time cost:', time.time() - start_time)
#
mid_index = int(image.shape[1] / 2)
for i in range(5):
    stat_time = time.time()
    avg_col_value = 0
    avg_col_num = 0
    for row in range(image.shape[0]):
        for col in range(image.shape[1]):
            if image[row, col] == 0:
                avg_col_value += col
                avg_col_num += 1
    avg_col_value = avg_col_value / avg_col_num
    if abs(mid_index - avg_col_value) < 50:
        print("直行")
    print(time.time() - stat_time)
动态测试代码
# 开发作者  : Tian.Z.L
# 开发时间  : 2022/8/9 9:46
# 文件名称  : compare.py
# 开发工具  : PyCharm
# @Function: 测试矩阵运算速度和循环
import time

import tensorflow as tf
try:
    import cv2
except:
    import cv2.cv2 as cv2

video = cv2.VideoCapture(r'C:\Users\User\Downloads\556169918-1-16.mp4')

direct = ['left', 'straight', 'right']

ret, image = video.read()
image = cv2.cvtColor(image, cv2.COLOR_BGR2GRAY)
# image = cv2.imread('left.png', 0)
matrix = tf.convert_to_tensor(image, dtype=tf.float32)
matrix = tf.split(matrix, 2, axis=0)[0]

zero_fill = tf.zeros([1, int(matrix.shape[1]/4)])
one_fill = tf.ones([1, int(matrix.shape[1] * 3 / 8)])

left_judge = tf.zeros([1, matrix.shape[1] - one_fill.shape[1] - zero_fill.shape[1]])
left_judge = tf.concat([one_fill, zero_fill, left_judge], axis=1)

one_fill = tf.ones([1, int(matrix.shape[1]/4)])
zero_fill = tf.zeros([1, int(matrix.shape[1] * 3 / 8)])

mid_judge = tf.zeros([1, matrix.shape[1] - one_fill.shape[1] - zero_fill.shape[1]])
mid_judge = tf.concat([zero_fill, one_fill, mid_judge], axis=1)

right_judge = tf.ones([1, matrix.shape[1] - 2 * zero_fill.shape[1]])
right_judge = tf.concat([zero_fill, zero_fill, right_judge], axis=1)

judge_matrix = tf.concat([left_judge, mid_judge, right_judge], axis=0)

final = tf.ones([1, matrix.shape[0]])

print(matrix.shape)
print(judge_matrix.shape)
cv2.imshow('video', image)
cv2.waitKey(0)
while True:
    ret2, image = video.read()
    image = cv2.cvtColor(image, cv2.COLOR_BGR2GRAY)
    if not ret2:
        break
    matrix = tf.convert_to_tensor(image, dtype=tf.float32)
    matrix = tf.split(matrix, 2, axis=0)[0]
    judge = tf.matmul(final, tf.matmul(matrix, tf.transpose(judge_matrix)))
    result = tf.argmax(judge, axis=1)
    result = result.numpy()[0]
    cv2.putText(image, direct[result], (image.shape[1]//2-5, image.shape[0]-5), cv2.FONT_HERSHEY_SIMPLEX, 0.75, (0, 0, 255), 2)
    cv2.imshow('video', image)
    if cv2.waitKey(20) & 0xff == ord('q'):
        break

video.release()
#
#
# mid_index = int(image.shape[1]/2)
# for i in range(200):
#     stat_time = time.time()
#     avg_col_value = 0
#     avg_col_num = 0
#     for row in range(image.shape[0]):
#         for col in range(image.shape[1]):
#             if image[row, col] == 0:
#                 avg_col_value += col
#                 avg_col_num += 1
#     avg_col_value = avg_col_value/avg_col_num
#     if abs(mid_index - avg_col_value) < 50:
#         print("直行")
#     print(time.time() - stat_time)
# matrix = tf.ones([800, 800])

