对于pointnet配置相关bug的解决
Pointnet参考链接
Pointnet和Pointnet++的pytorch版源码链接参考
https://github.com/yanx27/Pointnet_Pointnet2_pytorch
visualizer文件部分问题解决
1、win10系统下build.sh文件运行问题
安装git–>安装g++
安装git:https://so.csdn.net/so/search?q=%E5%AE%89%E8%A3%85git&t=&u=
安装g++: http://c.biancheng.net/view/8077.html

可通过linux系统或者已安装的git中bash环境运行build.sh脚本
安装完毕g++之后可通过sh build.sh运行,见上图
2、win10系统下download_data.sh文件运行问题
该文件位于链接https://github.com/KuangenZhang/ldgcnn的part_seg的文件夹下
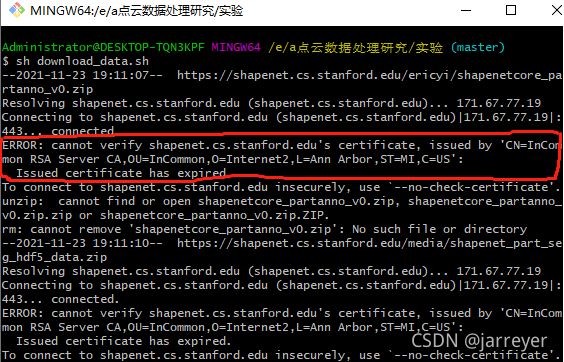
对于sh download_data运行问题的错误,主要原因为Issued certificate has expired,win10系统下解决方案为:通过记事本打开sh文件,wget指令后添加–no-check-certificate
若显示无–no-check-certificate参数,参考https://blog.csdn.net/topsogn/article/details/121217646?spm=1001.2014.3001.5501
def download():
    BASE_DIR = os.path.dirname(os.path.abspath(__file__))
    DATA_DIR = os.path.join(BASE_DIR, 'data')
    if not os.path.exists(DATA_DIR):
        os.mkdir(DATA_DIR)
    if not os.path.exists(os.path.join(DATA_DIR, 'modelnet40_ply_hdf5_2048')):
        www = 'https://shapenet.cs.stanford.edu/media/modelnet40_ply_hdf5_2048.zip'
        zipfile = os.path.basename(www)
        os.system('wget --no-check-certificate %s' % (www))
        os.system('unzip %s' % (zipfile))
        os.system('mv %s %s' % (zipfile[:-4], DATA_DIR))
        os.system('rm %s' % (zipfile))
若显示unzip不是内部或外部命令,也不是可运行的程序或批处理文件。则可通过在系统环境变量中添加windows下的zip.exe和unzip.exe的路径
3、 raise OSError(“no file with expected extension”)问题
在运行PointNet的可视化程序时,作者只提供了linux平台下的动态链接库程序源码,自己的windows平台下无法调用。发现是动态链接库的文件格式不对,遂学习如何将.so文件转换成.dll文件
3.1 安装viusal studio
3.2 新建C++动态链接库项目

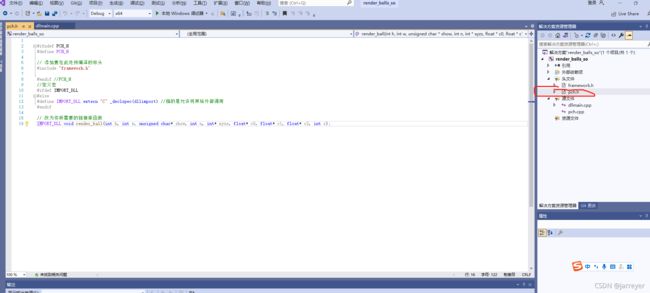
3.3 修改头文件pch.h
#ifndef PCH_H
#define PCH_H

// 添加要在此处预编译的标头
#include "framework.h"

#endif //PCH_H
//定义宏
#ifdef IMPORT_DLL
#else
#define IMPORT_DLL extern "C" _declspec(dllimport) //指的是允许将其给外部调用
#endif

// 改为你所需要的链接库函数
IMPORT_DLL void render_ball(int h, int w, unsigned char* show, int n, int* xyzs, float* c0, float* c1, float* c2, int r);
3.4 重写dllmain.cpp文件
// dllmain.cpp : 定义 DLL 应用程序的入口点。
#include "pch.h"
#include 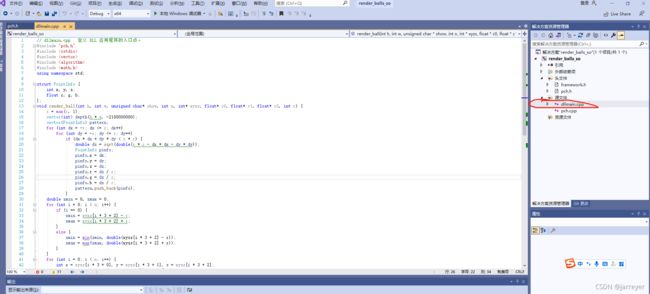
转载链接:https://blog.csdn.net/Moringstarluc/article/details/105702543
注: 若pycharm调试时出现OSError: [WinError 193] %1 不是有效的 Win32 应用程序 的问题
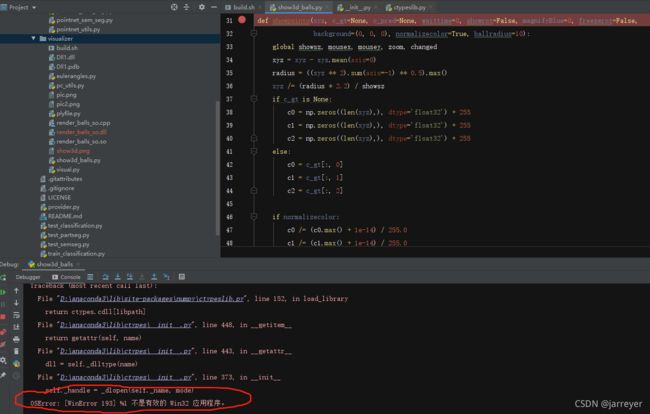
原因为visual调试时的 配置: Debug Win32,需修改为Win64,解决方案见下图,修改为x64即可
