目标检测:使用mmdetection对比centernet与yolov3的性能
前情概要
上一篇博客,我通过mmdetection实现的源码解释了centernet的原理,并分析了该算法的一些优缺点,本篇博客我将讲解如何通过mmdetection运行centernet,并基于一个x光数据集对比centernet与yolov3的性能。
本文使用数据集介绍
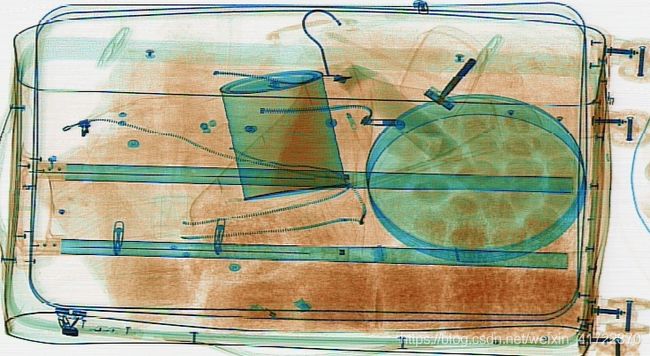
本文使用的数据集是安检x光的数据集,数据集大小为3600张图片和对应标注,样例图片如下

而需要检测的物体label有10个:knife、scissors、lighter、zippooil、pressure、slingshot、handcuffs、nailpolish、powerbank、firecrackers。都是一些危险品,可以看出这个数据集还是很有实际意义的。数据标注采用的是xml的形式,因此在后面的网络训练中我将数据集按照voc2007的数据集格式进行了整理,方便模型的配置。
mmdetection训练、测试CenterNet模型
安装cuda pytorch
这部分网上很多教程,我这里使用的是colab,这些环境是配置好的。安装好了之后可以通过以下命令查看是否安装成功。

安装mmdetection相关的依赖库
不得不说openmmlab还是非常人性化的,环境的配置非常的方便,直接安装openmim,之后通过mim安装mmdet,这样就能将mmdetection中需要的所有以来都安装好,包括mmcv-full
!pip install openmim
!mim install mmdet
数据集准备
mmdetection支持的数据集类型包含VOC、COCO两种标准类型,由于这个数据集是xml格式标注的,所以我把整个数据集整理成了voc2007的格式。mmdetection的工程设计的非常巧妙,我们可以实现自己的Dataset类,并将其注册进mmdetection的DATASETS中。由于我们这个已经是VOCDataset的形式,只需继承VOCDataset,并修改CLASSES变量即可。
import copy
import os.path as osp

import mmcv
import numpy as np

from mmdet.datasets.builder import DATASETS
from mmdet.datasets.voc import VOCDataset

@DATASETS.register_module()
class XRAYDataset(VOCDataset):
    CLASSES = ('knife', 'scissors', 'lighter', 'zippooil', 'pressure', 'slingshot', 'handcuffs', 'nailpolish','powerbank', 'firecrackers')
之后来到mmdetection/mmdet/core/evaluation下找到class_names.py将voc_classes的返回值更改成当前数据集的类别。这样的话在验证集上做验证的时候会显示正确的类别名,这个配置在我自己训练的时候就忽略了,导致验证时类别名称不对,但是这个配置不会影响inference的时候类别名的显示结果。
修改配置文件
mmdetection中是通过configs文件夹下的配置文件来将整个目标检测器“连接”起来的,在这里可以设置model、dataset信息、train pipline等等,总之这一步是非常核心的部分。我们来到configs/centernet文件夹下,将centernet_resnet18_dcnv2_140e_coco.py复制一份,将coco改成voc,因为我们使用的是voc的数据集了,之后再把__base__列表里的COCO_detection.py 修改成VOC0712.py 文件。其他的一些配置信息,可以通过代码的形式进行修改,非常的方便。在本文的实践中未使用dcn模块并且没有使用pretrain模型,batch size设置为16,共训练100个epoch。
from mmcv import Config
cfg = Config.fromfile('./configs/centernet/centernet_resnet18_dcnv2_140e_voc.py')
from mmdet.apis import set_random_seed

# Modify dataset type and path
cfg.dataset_type = 'XRAYDataset'
cfg.data_root = './xray/VOCdevkit/'

cfg.data.test.type = 'XRAYDataset'
cfg.data.test.ann_file = cfg.data_root+'VOC2007/ImageSets/Main/test.txt'
cfg.data.test.img_prefix = cfg.data_root+'VOC2007/'

cfg.data.train.dataset.type = 'XRAYDataset'
cfg.data.train.dataset.ann_file = cfg.data_root+'VOC2007/ImageSets/Main/train.txt'
cfg.data.train.dataset.img_prefix = cfg.data_root+'VOC2007/'

cfg.data.val.type = 'XRAYDataset'
cfg.data.val.ann_file = cfg.data_root + 'VOC2007/ImageSets/Main/val.txt'
cfg.data.val.img_prefix = cfg.data_root + 'VOC2007/'

# # modify num classes of the model in box head
cfg.model.bbox_head.num_classes = 10
# # We can still use the pre-trained Mask RCNN model though we do not need to
# # use the mask branch
# cfg.load_from = 'checkpoints/centernet_resnet18_140e_coco_20210705_093630-bb5b3bf7.pth'

# # Set up working dir to save files and logs.
cfg.work_dir = './tutorial_exps'

# # Change the evaluation metric since we use customized dataset.
cfg.evaluation.metric = 'mAP'
# # We can set the evaluation interval to reduce the evaluation times
cfg.evaluation.interval = 12
# # We can set the checkpoint saving interval to reduce the storage cost
cfg.checkpoint_config.interval = 12

# # Set seed thus the results are more reproducible
cfg.seed = 0
set_random_seed(0, deterministic=False)
cfg.gpu_ids = range(1)
cfg.data.samples_per_gpu = 16
cfg.data.workers_per_gpu=1

cfg.model.neck.use_dcn=False
cfg.runner.max_epochs=100
# # We can initialize the logger for training and have a look
# # at the final config used for training
print(f'Config:\n{cfg.pretty_text}')
运行代码后就能够看到完整的配置信息。
训练
训练部分没什么好说的,就是按照mmdetection的demo,使用mmdetection提供的函数进行模型训练就好。
import sys
from mmdet.datasets import build_dataset
from mmdet.models import build_detector
from mmdet.apis import train_detector


# Build dataset
datasets = [build_dataset(cfg.data.train)]

# Build the detector
model = build_detector(
    cfg.model, train_cfg=cfg.get('train_cfg'), test_cfg=cfg.get('test_cfg'))
# Add an attribute for visualization convenience
model.CLASSES = datasets[0].CLASSES

# Create work_dir
mmcv.mkdir_or_exist(osp.abspath(cfg.work_dir))
train_detector(model, datasets, cfg, distributed=False, validate=True)
我从上午10:30左右开始训练,训练到晚上23:55,训练好了100epoch,最终在验证集上的map达到0.72。

忽略class那一列,因为之前提到的问题,验证时候类别名字出现了问题,可以顺序对应本数据集的类别名称进行查看。可以看到对于以下尺寸小的物体来说,centernet的效果并不是很好。
模型测试
测试了几张图片,查看效果,总体来说效果还是非常好的。

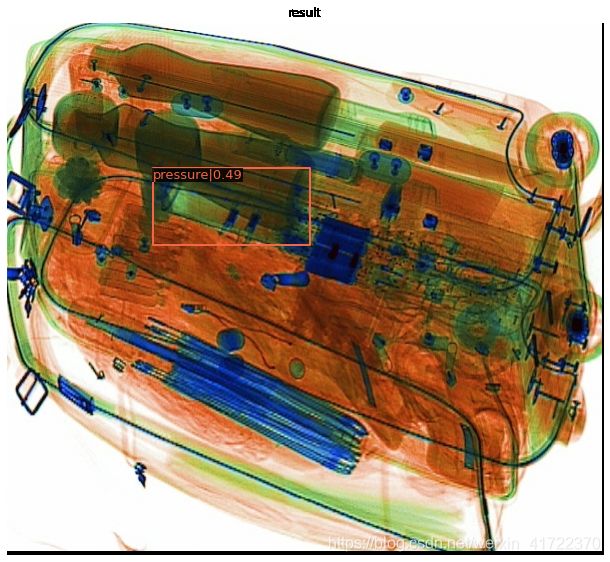
可以看出centernet对于分布相对密集的物品检测效果也是比较好的,而且最后一张图片中间那个背包中的那把刀,人眼真的是很难看到,不知道安检人员是不是做过很多培训,我作为一个普通人确实是很难在那么短的时间内看到这么隐蔽的危险物品。。所以我觉得这个x光危险物品检测还是很有价值的,之后期望自己勤快点,做个相应的小应用出来玩一玩。
为了和centernet做一个对比,我使用了yolov3-darknet53-608来训练了这个数据集,最终效果差强人意,相较于centernet的0.72,yolov3竟然只得到了map0.457。而且模型打戏哦啊方面centernet由于简单的模型结构,只有108.6MB。yolov3的模型大小是其四倍。
其实我当初选择这个数据集,有一部分原因是想证明验证一下centernet的缺点,就是当两个物体的预测中心点重叠了,最终模型只会回馈其中一个物体,而x光确实会很大概率出现这种中心点重合的情况。但实践下来,centernet的效果出乎意料的不错,而且因为其简单的结构模型也比较的轻量,感觉之后我会更多的使用这个模型。
结语
当然,我这次的实验只是想简单的跑下centernet,但是针对这个数据集其实可以做的事还很多,因为经过统计这个数据集有非常严重的类别不均衡的现象,所以实际训练不可能这么“随意”。之后有时间我会尝试更好的训练这个数据集看看效果,并且打算做个小应用出来玩~