使用PyTables读写HDF5文件小记
前言
HDF(Hierarchical Data File)是美国国家高级计算应用中心(National Center for Supercomputing Application,NCSA)为了满足各种领域研究需求而研制的一种能高效存储和分发科学数据的新型数据格式 。HDF是一种功能强大,广泛运用于科学领域的文件格式。
研究它的组织结构特别是HDF5 的组织结构对于处理和管理地理信息系统的海量图形数据和属性数据具有一定的借鉴作用。掌握和运用NCSA提供的API 提取影像数据 ,可以节省时间, 提高程序编写效率。
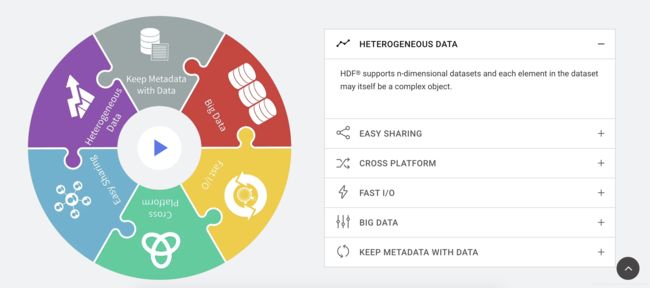
HDF5是HDF族中最常见的一种跨平台数据储存文件类型,可以存储不同类型的图像和数码数据,并且可以在不同类型的机器上传输,同时还有统一处理这种文件格式的函数库。具有很好的特性,特别是支持大数据量、跨平台、快速IO读写等。

Python平台下的HDF5
Python平台下有两个主要的库可以用来使用HDF5,分别是h5py 和 tables(PyTables)。
安装
最简单的方式是通过pip安装,注意名称是tables:
$ pip install tables
其他安装方式可以参考官网。
使用
(1)打开一个已经存在的hdf5文件(文件名后缀一般是.h5或.hdf5)sample.h5
import tables
h5file = tables.open_file("sample.h5", driver="H5FD_CORE")
此时sample.h5被打开并被加载进内存,之后所有的读操作都不再是硬盘I/O操作。
(2)新建一个hdf5文件
import tables
h5file = tables.open_file("new_sample.h5", "w", driver="H5FD_CORE")
import numpy
a = h5file.create_array(h5file.root, "array", numpy.zeros((300, 300)))
h5file.close()#此时文件被写入硬盘
需要注意的是写操作是硬盘I/O操作,比较费时,写速度和文件大小以及磁盘I/O速度有关。
注:往hdf5中写入数组一般分为三种:
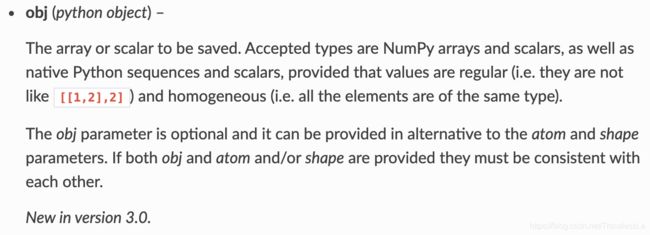
①Create a new array(数组)
File.create_array(where, name, obj=None, title='', byteorder=None, createparents=False, atom=None, shape=None, track_times=True)[source]
②Create a new chunked array(分块数组)
File.create_carray(where, name, atom=None, shape=None, title='', filters=None, chunkshape=None, byteorder=None, createparents=False, obj=None, track_times=True)
③Create a new enlargeable array(可扩展数组)
File.create_earray(where, name, atom=None, shape=None, title='', filters=None, expectedrows=1000, chunkshape=None, byteorder=None, createparents=False, obj=None, track_times=True)
(3)写入和读取enlargeable array
import tables
import numpy as np
import time

# 生成随机数据
data = np.random.random((1000, 4096))

hdf5_path = "test_data.hdf5"
# 和普通文件操作类似,'w'、'r'、'a' 分别表示写数据、读数据、追加数据
hdf5_file = tables.open_file(hdf5_path, mode='w')
# 设定压缩级别和压缩方法
filters = tables.Filters(complevel=5, complib='blosc')
earray = hdf5_file.create_earray(
	hdf5_file.root,
	'data', # 数据名称,之后需要通过它来访问数据
	tables.Atom.from_dtype(data.dtype), # 设定数据格式(和data格式相同)
	shape=(0, 4096), # 第一维的 0 表示数据可沿行扩展
	filters=filters,
	expectedrows=1000000 # 完整数据大约规模,可以帮助程序提高时空利用效率
)
# 将data添加进earray
earray.append(data)
# 写完之后记得关闭文件
hdf5_file.close()
hdf5_path = "test_data.hdf5"
hdf5_file = tables.open_file(hdf5_path, mode='r')
# 数据名称为'data',可以通过.root.data访问到它
hdf5_data = hdf5_file.root.data
print(hdf5_data[12:24].shape)
hdf5_file.close()
(4)将视频的所有帧数组imgs_array写入hdf5
def write_hdf5(imgs_array, hdf5_path, frames):
    hdf5_file = tables.open_file(hdf5_path, mode='w')
    # filters = tables.Filters(complevel=5, complib='blosc')
    carray = hdf5_file.create_carray(
    	hdf5_file.root,
    	'data',
    	tables.Atom.from_dtype(imgs_array.dtype),
        imgs_array.shape#,
    	# filters=filters
    )
    carray[:] = imgs_array
    hdf5_file.close()
(5)将OpenCV读取的视频帧添加进可扩展数组HDF5文件中
import cv2
import tables

def opencvReadVideo_to_hdf5(video_file_path, hdf5_path):
    """
    Load a full list of frames in memory.
    """
    hdf5_file = tables.open_file(hdf5_path, mode='w')

    cap = cv2.VideoCapture(video_file_path)
    frame_width = int(cap.get(cv2.CAP_PROP_FRAME_WIDTH))
    frame_height = int(cap.get(cv2.CAP_PROP_FRAME_HEIGHT))
    fps = cap.get(cv2.CAP_PROP_FPS)
    res = []
    ret, frame = cap.read()
    f_shape = frame.shape
    print(frame_width)
    print(frame_height)
    print(frame.dtype)
    print(f_shape)
    earray = hdf5_file.create_earray(
    	hdf5_file.root,
    	'data',
    	tables.UInt8Atom(),
    	shape=(0, f_shape[0], f_shape[1], f_shape[2])# 第一维的 0 表示数据可沿行扩展
    )
    earray.append(frame[None])
    while True:
        ret, frame = cap.read()
        if ret is False:
            break
        earray.append(frame[None])
    cap.release()
    hdf5_file.close()
其他
tables.UInt8Atom()属于Atom Sub-classes,可以参阅官网:

后记
有关HDF5的使用内容很丰富,本文仅对自己用到的一些功能做了记录,更多内容移步官网,官网解释是最详尽的。

参考资料
[1] THE HDF5® LIBRARY & FILE FORMAT
[2] HDF5 数据文件简介
[3] h5py - HDF5 for Python
[4] 百度百科 - HDF
[5] 图片转换成HDF5文件(加载,保存)
[6] Docs » PyTables Cookbook » In-memory HDF5 files
[7] PyTables 3.0.0rc2 documentation » PyTables User’s Guide »
[8] 当Python遇上HDF5–性能优化实战
[9] pytables - Atom Sub-classes


