rtsp 服务器搭建
rtsp 服务器搭建:
今天我们搭建这个 rtsp 服务器的名称叫做:ZLMediaKit,它是一个基于 C++11 的高性能运营级流媒体服务框架,类似我之前给大家搭建的 rtmp 服务器(srs 流媒体服务器),当然它两者肯定是有区别的,这里我们就不做比较。
它也是一个开源项目,该开源项目的介绍,大家可以看官网介绍,在 github 和 gitee 都有:
github 网址:
https://github.com/xia-chu/ZLMediaKit
复制代码
gitee 网址:
https://gitee.com/xia-chu/ZLMediaKit
复制代码
官网上有介绍该项目的特点:
-
基于 C++11 开发,避免使用裸指针,代码稳定可靠,性能优越。
-
支持多种协议(RTSP/RTMP/HLS/HTTP-FLV/WebSocket-FLV/GB28181/HTTP-TS/WebSocket-TS/HTTP-fMP4/WebSocket-fMP4/MP4/WebRTC),支持协议互转。
-
使用多路复用/多线程/异步网络 IO 模式开发,并发性能优越,支持海量客户端连接。
-
代码经过长期大量的稳定性、性能测试,已经在线上商用验证已久。
-
支持 linux、macos、ios、android、windows 全平台。
-
支持画面秒开、极低延时(500 毫秒内,最低可达 100 毫秒)。
-
提供完善的标准 C API,可以作 SDK 用,或供其他语言调用。
-
提供完整的 MediaServer 服务器,可以免开发直接部署为商用服务器。
-
提供完善的 restful api 以及 web hook,支持丰富的业务逻辑。
-
打通了视频监控协议栈与直播协议栈,对 RTSP/RTMP 支持都很完善。
-
全面支持 H265/H264/AAC/G711/OPUS。

功能图
如果你想了解更多关于这个服务器的功能和代码,可以去官网查看,这里我就不多说了,下面开始基于此搭建这个服务器;首先说明的是,我这里使用的环境是 ubuntu16.04,其实也可以用其它的环境搭建,在官网的 wiki 教程中有详细的介绍:
https://github.com/xia-chu/ZLMediaKit/wiki/%E5%BF%AB%E9%80%9F%E5%BC%80%E5%A7%8B
复制代码
1、获取代码:
rtsp 服务器搭建视频文档资料地址:https://docs.qq.com/doc/DWHhNTlVtaFJId0ht
国内⽤户推荐从同步镜像⽹站 gitee 下载:
git clone --depth 1 https://gitee.com/xia-chu/ZLMediaKit
root@txp-virtual-machine:/home/txp/share# mkdir rtsp

root@txp-virtual-machine:/home/txp/share# cd rtsp/
root@txp-virtual-machine:/home/txp/share/rtsp# ls
root@txp-virtual-machine:/home/txp/share/rtsp# git clone --depth 1 https://gitee.com/xia-chu/ZLMediaKit.git
Cloning into 'ZLMediaKit'...
remote: Enumerating objects: 548, done.
remote: Counting objects: 100% (548/548), done.
remote: Compressing objects: 100% (499/499), done.
remote: Total 548 (delta 60), reused 213 (delta 21), pack-reused 0
Receiving objects: 100% (548/548), 6.81 MiB | 132.00 KiB/s, done.
Resolving deltas: 100% (60/60), done.
Checking connectivity... done.
然后切换到 ZLMediaKit 目录下,记得执行下面这条语句:
root@txp-virtual-machine:/home/txp/share/rtsp# cd ZLMediaKit/
root@txp-virtual-machine:/home/txp/share/rtsp/ZLMediaKit# ls
3rdpart  AUTHORS                 build_for_linux.sh  CMakeLists.txt  docker   postman       server  www
Android  benchmark.md            build_for_mac.sh    conf            LICENSE  README_en.md  src
api      build_docker_images.sh  cmake               _config.yml     package  README.md     tests

root@txp-virtual-machine:/home/txp/share/rtsp/ZLMediaKit# git submodule update --init
Submodule 'ZLToolKit' (https://gitee.com/xia-chu/ZLToolKit) registered for path '3rdpart/ZLToolKit'
Submodule '3rdpart/media-server' (https://gitee.com/xia-chu/media-server) registered for path '3rdpart/media-server'
Cloning into '3rdpart/ZLToolKit'...
remote: Enumerating objects: 1203, done.
remote: Counting objects: 100% (1203/1203), done.
remote: Compressing objects: 100% (1081/1081), done.
remote: Total 5951 (delta 884), reused 161 (delta 120), pack-reused 4748
Receiving objects: 100% (5951/5951), 31.25 MiB | 120.00 KiB/s, done.
Resolving deltas: 100% (4406/4406), done.
Checking connectivity... done.
Submodule path '3rdpart/ZLToolKit': checked out '1df5d6823fc48598c23fd425c5187b0c417a734f'
Cloning into '3rdpart/media-server'...
remote: Enumerating objects: 10370, done.
remote: Counting objects: 100% (10370/10370), done.
remote: Compressing objects: 100% (3708/3708), done.
remote: Total 10370 (delta 7635), reused 9114 (delta 6544), pack-reused 0
Receiving objects: 100% (10370/10370), 2.78 MiB | 144.00 KiB/s, done.
Resolving deltas: 100% (7635/7635), done.
Checking connectivity... done.
Submodule path '3rdpart/media-server': checked out 'ec171caa4b28db0f6ea47bca2c0c9530f345698a'
注意:在编译这个代码之前,你的安装环境一定要安装 cmake 和 gcc 版本在 4.8 以上,不然的话,可能会出现问题。
关注+私信我,领取2022最新最全学习提升资料,内容包括(C/C++,Linux,FFmpeg ,webRTC ,rtmp ,hls ,rtsp ,ffplay ,srs)

2、安装依赖库:
ZLMediaKit 可选依赖一些第三方库,这些库都不是必选的;在构建 ZLMediaKit 时,cmake 能查找系统路径中的这些库,并根据安装情况选择是否开启相关特性,你可以选择安装这些依赖并启用相关特性:
-
openssl
flash player 在播放 rtmp 时,采用的是复杂握手模式,如果不安装该库,flash player 将播放不了 zlmediakit 提供的 rtmp url.
同时 ZLMediaKit 的 https/rtsps 相关功能需要使用 openssl 才能开启。
-
ffmpeg
zlmediakit 可以通过 fork ffmpeg 进程的方式实现多种协议的拉流,编译时不需要安装 FFmpeg。
-
sdl、avcodec、avutil
这 3 个库供 ZLMediaKit 的 test_player 测试程序使用,你通常不需要安装这 3 个库。
#除了openssl,其他其实都可以不安装sudo apt-get install libssl-devsudo apt-get install libsdl-devsudo apt-get install libavcodec-devsudo apt-get install libavutil-devsudo apt-get install ffmpeg
3、开始编译:
-
先建立一个 build 目录,然后切换到该目录下去:
root@txp-virtual-machine:/home/txp/share/rtsp/ZLMediaKit# mkdir buildroot@txp-virtual-machine:/home/txp/share/rtsp/ZLMediaKit# cd build
-
cmake
-
-- The C compiler identification is GNU 5.4.0 -- The CXX compiler identification is GNU 5.4.0 -- Check for working C compiler: /usr/bin/cc -- Check for working C compiler: /usr/bin/cc -- works -- Detecting C compiler ABI info -- Detecting C compiler ABI info - done -- Detecting C compile features -- Detecting C compile features - done -- Check for working CXX compiler: /usr/bin/c++ -- Check for working CXX compiler: /usr/bin/c++ -- works -- Detecting CXX compiler ABI info -- Detecting CXX compiler ABI info - done -- Detecting CXX compile features -- Detecting CXX compile features - done -- Debug版本 -- found library:/usr/lib/x86_64-linux-gnu/libssl.so;/usr/lib/x86_64-linux-gnu/libcrypto.so,ENABLE_OPENSSL defined -- Performing Test HAVE_MYSQL_OPT_EMBEDDED_CONNECTION -- Performing Test HAVE_MYSQL_OPT_EMBEDDED_CONNECTION - Failed -- MySQL not found. -- ENABLE_HLS defined -- ENABLE_MP4 defined -
开始正式编译:make -j4:
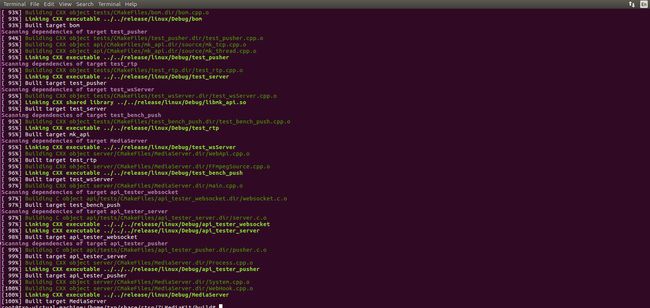
编译过程
4、开始运行:
ZLMediaKit 工程主要生成 3 种二进制目标文件,他们的生成的路径在 release 目录下,这些目标文件主要分为(这里我只介绍一种,另外一种感兴趣的朋友可以查看官网介绍哈!):
MediaServer 进程:
这是 ZLMediaKit 作为服务器的主进程,该进程可以在免去开发的情况下直接作为测试流媒体服务器使用,如果你需要更复杂的业务逻辑,可以通过 Web HOOK 和 RESTful API 实现,同时你可以通过配置文件控制其参数。
root@txp-virtual-machine:/home/txp/share/rtsp/ZLMediaKit/release# cd linux/Debug/
root@txp-virtual-machine:/home/txp/share/rtsp/ZLMediaKit/release/linux/Debug# ls
api_tester_pusher     libflv.a      libmpeg.a        tab               test_httpApi     test_rtcp    test_wsClient
api_tester_server     libjsoncpp.a  libzlmediakit.a  test_bench_proxy  test_httpClient  test_rtp     test_wsServer
api_tester_websocket  libmk_api.so  libzltoolkit.a   test_bench_pull   test_pusher      test_server
bom                   libmov.a      MediaServer      test_bench_push   test_pusherMp4   test_sortor
我们可以通过./MediaServer -h 了解启动参数:
root@txp-virtual-machine:/home/txp/share/rtsp/ZLMediaKit/release/linux/Debug# ./MediaServer -h
  -h  --help     无参  默认:null                                                            选填  打印此信息
  -d  --daemon   无参  默认:null                                                            选填  是否以Daemon方式启动
  -l  --level    有参  默认:0                                                               选填  日志等级,LTrace~LError(0~4)
  -m  --max_day  有参  默认:7                                                               选填  日志最多保存天数
  -c  --config   有参  默认:/home/txp/share/rtsp/ZLMediaKit/release/linux/Debug/config.ini  选填  配置文件路径
  -s  --ssl      有参  默认:/home/txp/share/rtsp/ZLMediaKit/release/linux/Debug/ssl.p12     选填  ssl证书文件或文件夹,支持p12/pem类型
  -t  --threads  有参  默认:2                                                               选填  启动事件触发线程数
  -v  --version  无参  默认:null                                                            选填  显示版本号
开始运行:
root@txp-virtual-machine:/home/txp/share/rtsp/ZLMediaKit/release/linux/Debug# ./MediaServer -d &


[1] 57310
root@txp-virtual-machine:/home/txp/share/rtsp/ZLMediaKit/release/linux/Debug# 2021-04-18 21:41:11.260 D MediaServer[57310-139825250957120] System.cpp:100 startDaemon | 启动子进程:57313
2021-04-18 21:41:11.260 I MediaServer[57313-139825250957120] System.cpp:130 systemSetup | core文件大小设置为:18446744073709551615
2021-04-18 21:41:11.269 I MediaServer[57313-139825250957120] System.cpp:139 systemSetup | 文件最大描述符个数设置为:1048576
2021-04-18 21:41:11.270 I MediaServer[57313-139825250957120] config.cpp:34 loadIniConfig | dump ini file to:/home/txp/share/rtsp/ZLMediaKit/release/linux/Debug/config.ini
2021-04-18 21:41:11.438 W MediaServer[57313-139825250957120] SSLUtil.cpp:98 loadPublicKey | error:02001002:system library:fopen:No such file or directory
2021-04-18 21:41:11.438 W MediaServer[57313-139825250957120] SSLUtil.cpp:126 loadPrivateKey | error:2006D080:BIO routines:BIO_new_file:no such file
2021-04-18 21:41:11.440 D MediaServer[57313-139825143346944] util.cpp:340 operator() | Stamp thread started!
2021-04-18 21:41:11.442 I MediaServer[57313-139825250957120] EventPoller.cpp:467 EventPollerPool | 创建EventPoller个数:2
2021-04-18 21:41:11.445 I MediaServer[57313-139825250957120] TcpServer.h:320 start_l | TCP Server listening on 0.0.0.0:554
2021-04-18 21:41:11.456 I MediaServer[57313-139825250957120] TcpServer.h:320 start_l | TCP Server listening on 0.0.0.0:332
2021-04-18 21:41:11.457 I MediaServer[57313-139825250957120] TcpServer.h:320 start_l | TCP Server listening on 0.0.0.0:1935
2021-04-18 21:41:11.458 I MediaServer[57313-139825250957120] TcpServer.h:320 start_l | TCP Server listening on 0.0.0.0:19350
2021-04-18 21:41:11.458 I MediaServer[57313-139825250957120] TcpServer.h:320 start_l | TCP Server listening on 0.0.0.0:80
2021-04-18 21:41:11.459 I MediaServer[57313-139825250957120] TcpServer.h:320 start_l | TCP Server listening on 0.0.0.0:443
2021-04-18 21:41:11.459 I MediaServer[57313-139825250957120] TcpServer.h:320 start_l | TCP Server listening on 0.0.0.0:9000
2021-04-18 21:41:11.461 I MediaServer[57313-139825250957120] TcpServer.h:320 start_l | TCP Server listening on 0.0.0.0:10000
2021-04-18 21:41:11.462 I MediaServer[57313-139825250957120] main.cpp:339 start_main | 已启动http api 接口
2021-04-18 21:41:11.463 I MediaServer[57313-139825250957120] main.cpp:341 start_main | 已启动http hook 接口
注意:上面的两条报错,没有关系,我们现在已经真正开启了 rtsp 服务器了。
测试 rtsp 服务器:
(C/C++,Linux,FFmpeg ,webRTC ,rtmp ,hls ,rtsp ,ffplay ,srs)最全学习提升资料地址:https://docs.qq.com/doc/DWHhNTlVtaFJId0ht
我们现在来把本地媒体文件推流到这个服务器上,然后再进行拉流播放试试,你可以使用 obs 或者 ffmpeg 命令来进行,这里我使用了 ffmpeg 来进行推流,我电脑本地的媒体文件 test.mp4 路径如下:

本地的 test.mp4 媒体文件
开始使用 ffmpeg 进行推流:
ffmpeg -re -i test.mp4 -vcodec h264 -acodec aac -f rtsp -rtsp_transport tcp rtsp://192.168.32.128/live/test
注意:后面的 ip 地址是你 ubuntu 搭建服务器的 ip 地址,这个千万不要弄错了,不然试验不会成功的哈!
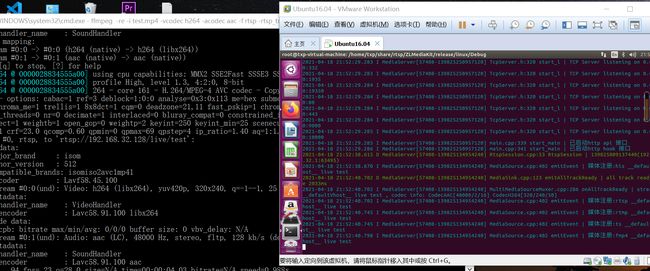
推流过程
现在我来开始拉流播放,这里使用 ffplay 进行拉流播放:
ffplay -rtsp_transport tcp rtsp://192.168.32.128/live/test
复制代码
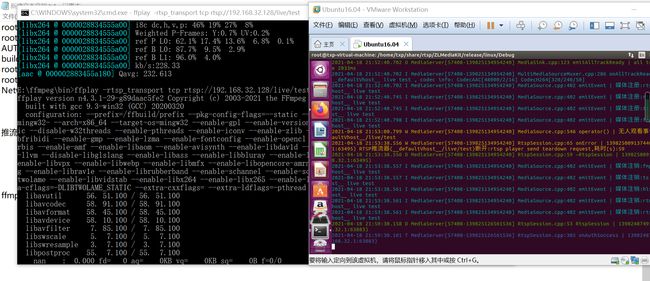
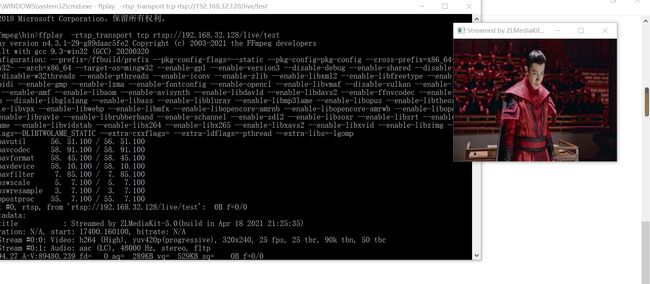
拉流播放成功
上面是基于 rtsp 协议进行拉流的,我们也可以用 rtmp 来进行拉流播放;
ffplay rtmp:://192.168.32.128/live/test
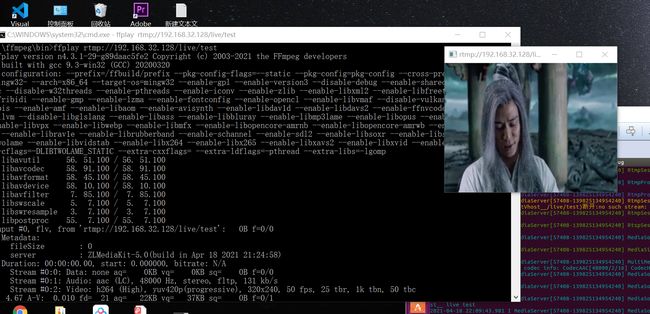
rtmp 协议拉流播放
接着我们使用 udp 的方式来进行拉流,你会发现速度非常快:
ffplay -rtsp_transport udp rtsp://192.168.32.128/live/test

udp 方式拉流
更多测试实验也可以参考官方手册:
https://github.com/xia-chu/ZLMediaKit/wiki/ZLMediaKit%E6%8E%A8%E6%B5%81%E6%B5%8B%E8%AF%95