springboot配合VbenAdmin实现用户CURD
svbadmin学习日志
本学习日志是使用Springboot和Vue来搭建的后台管理系统:
演示地址:http://118.31.68.110:8081/index.html
账号:root
密码:123
所有代码可以在gitbub上找到,切换到相应分支即可。【代码传送门】
正篇
第一节 spring boot 模块化构建项目
第二节 整合mybatisplus完成用户增删改查
第三节 整合springsecurity实现基于RBAC的用户登录
第四节 springsecurity结合jwt实现前后端分离开发
第五节 使用ResponseBodyAdvice格式化接口输出
第六节 springboot结合redis实现缓存策略
第七节 springboot结合rabbitmq实现队列消息
第八节 springboot结合rabbitmq实现异步邮件发送
第九节 利用springboot的aop实现行为日志管理
第十节 利用Quartz实现数据库定时备份
第十一节 springboot配置log输出到本地文件
第十二节 使用flyway对数据库进行版本管理
第十三节 springboot配合VbenAdmin实现前端登录
第十四节 springboot配合VbenAdmin实现用户CURD
第十五节 基于RBAC的权限管理VbenAdmin前端实现
第十六节 springboot 打包vue代码实现前后端统一部署
番外
2.1 数据库设计原则
3.1 配置apifox自动获取登录的token
13.1 springboot 全局捕捉filter中的异常
14.1 springsecurity整合mybatisplus出现isEnable的问题和解决方案
前言
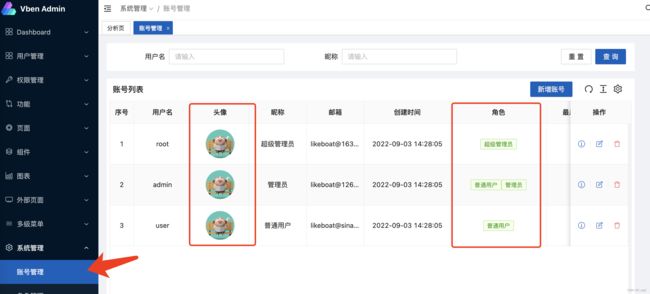
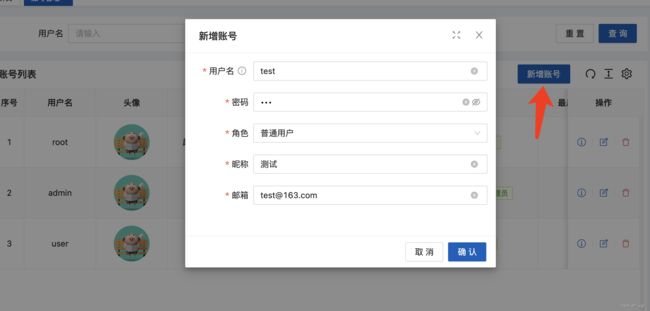
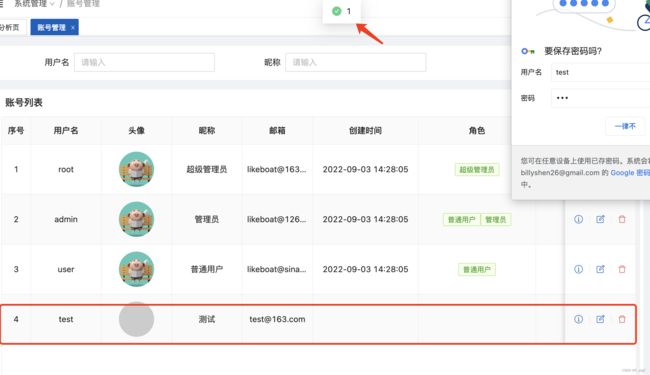
登录后,我们来做一个列表页,对用户进行增删改查。调用第二节写好的restful服务来实现user表的CURD。Vben里面帮我们做好了一组系统管理的界面,包括账号管理,角色管理,菜单管理等,我们可以直接借用。不过里面的部门管理暂时不用了,后面如果要做SAAS平台的话,可以用起来。
一、springboot改动
- 加入了RoleController相关
- 引入了spring-boot-starter-validation 用于校验
- 更改了enabled字段为activated,这个有待会写篇番外
- 优化了全部捕捉异常
- sql中补充了一些权限,记得重启应用前,手动删除所有表
二、Vben改动
1.文件改动
主要涉及到 src/views/demo/system/account 中的相关页面和数据,以及 src/api/demo 中接口的改动
2. 核心知识点
也算对vben的学习,因为作者已经做了很多例子,我们直接复用就行了。这里建议大家直接下载完整版的来开发,不要用精简版。
接口调用
以修改账号接口为例
export const editAccount = (
  id: string,
  username: string,
  role: number,
  email: string,
  nickname: string,
  password: string,
) =>
  defHttp.put(
    { url: Api.AccountList + '/' + id, params: { username, role, email, nickname, password } },
    { errorMessageMode: 'none' },
  );
editAccount(
 rowId.value,
  values.username,
  values.role,
  values.email,
  values.nickname,
  values.password,
)
  .then(() => {
    createMessage.success(`2`);
  })
  .catch(() => {
    createMessage.error('3');
  })
  .finally(() => {
    console.log(values);
    closeModal();
    emit('success', {
      isUpdate: unref(isUpdate),
      values: { ...values, id: rowId.value },
    });
  });
自定义列表内容
头像和多个角色
<template v-if="column.key === 'avatar'">
  <Avatar :size="60" :src="record.avatar" />
</template>
<template v-else-if="column.key === 'roles'">
  <template v-for="item in record.roles" :key="item.name">
    <Tag color="green">
      {{ item.alias }}
    </Tag>
  </template>
</template>
三、看下效果
总结
- 接下来对Vben的改动会越来越多,这样就代码链接会给到两个地址。 前后端需要同步跟进。
- 前端现在的技术框架不比后端简单,建议初学者还是多看看里面的例子,直接使用,效率会高很多。
问题
- 碰到的主要问题还是isXXX和mybatis有冲突的问题,最简单的解决方案就是把enabled字段为activated
代码地址
Springboot 代码
VbenAdmin 代码
参考文档:
Spring Boot 数据校验


