fast guided filter代码实现与测试
公式推导
参考:https://blog.csdn.net/bby1987/article/details/128138418
(一篇博客的字数好像有限制,只能把原理和公式分开两篇写)
代码实现
算法代码
下面代码起名为fastguidedfilter.py
需特别注意:guide_filter_color模式比guide_filter_gray模式的计算量大很多倍。。。
# -*- coding: utf-8 -*-
import cv2
import numpy as np


def boxfilter(image, radius):
    ksize = (2 * radius + 1, 2 * radius + 1)
    filtered_image = cv2.boxFilter(image, -1, ksize,
                                   borderType=cv2.BORDER_REPLICATE)
    return filtered_image


def guide_filter_gray(I, P, radius, step, eps):
    """
    Fast guide filter for gray-scale guidance image

    Parameters
    ----------
    I: gray-scale guidance image (single channel)
    P: input image, may be gray-scale or colorful
    radius: radius for box-filter
    step: step for down sample
    eps: regularization factor
    """
    # check parameters
    I = np.squeeze(I)
    P = np.squeeze(P)
    if I.ndim != 2:
        raise ValueError("guidance image must be gray-scale.")

    # cache original data type
    original_data_type = P.dtype

    # change data type to float32
    I = np.float32(I)
    P = np.float32(P)

    # initialize output
    result = P.copy()

    # if P is color image, repeat I by 3 times in channel dim
    # because ndarray can NOT be broadcasted from [H, W] to [H, W, C]
    if P.ndim == 3 and P.shape[2] >= 3:
        I = np.expand_dims(I, axis=2).repeat(3, axis=2)
        if P.shape[2] > 3:
            P = P[..., :3]

    # down sample
    height, width = I.shape[:2]
    down_size = (width // step, height // step)
    I_down = cv2.resize(I, dsize=down_size, fx=None, fy=None,
                        interpolation=cv2.INTER_NEAREST)
    P_down = cv2.resize(P, dsize=down_size, fx=None, fy=None,
                        interpolation=cv2.INTER_NEAREST)
    radius_down = radius // step

    # guide filter
    mean_I = boxfilter(I_down, radius_down)
    mean_P = boxfilter(P_down, radius_down)
    corr_I = boxfilter(I_down * I_down, radius_down)
    corr_IP = boxfilter(I_down * P_down, radius_down)

    var_I = corr_I - mean_I * mean_I
    cov_IP = corr_IP - mean_I * mean_P

    a = cov_IP / (var_I + eps)
    b = mean_P - a * mean_I

    mean_a = boxfilter(a, radius_down)
    mean_b = boxfilter(b, radius_down)

    # up sample
    mean_a_up = cv2.resize(mean_a, dsize=(width, height), fx=None,
                           fy=None, interpolation=cv2.INTER_LINEAR)
    mean_b_up = cv2.resize(mean_b, dsize=(width, height), fx=None,
                           fy=None, interpolation=cv2.INTER_LINEAR)

    # linear filter model
    gf_result = mean_a_up * I + mean_b_up
    if P.ndim == 3 and P.shape[2] > 3:
        result[..., :3] = gf_result
    else:
        result = gf_result

    # post process data type
    if original_data_type == np.uint8:
        result = np.clip(np.round(result), 0, 255).astype(np.uint8)
    return result


def guide_filter_color(I, P, radius, step, eps):
    """
    Fast guide filter for colorful guidance image

    Parameters
    ----------
    I: colorful guidance image (3 channels)
    P: input image, may be gray-scale or colorful
    radius: radius for box-filter
    step: step for down sample
    eps: regularization factor
    """
    # check parameters
    I = np.squeeze(I)
    P = np.squeeze(P)
    if I.ndim < 3 or I.shape[2] != 3:
        raise ValueError("guidance image must have 3 channels.")

    # cache original data type
    original_data_type = P.dtype

    # change data type to float32
    I = np.float32(I)
    P = np.float32(P)

    # initialize result
    result = P.copy()
    if result.ndim == 2:
        result = np.expand_dims(result, axis=2)

    # down sample
    height, width = I.shape[:2]
    down_size = (width // step, height // step)
    I_down = cv2.resize(I, dsize=down_size, fx=None, fy=None,
                        interpolation=cv2.INTER_NEAREST)
    P_down = cv2.resize(P, dsize=down_size, fx=None, fy=None,
                        interpolation=cv2.INTER_NEAREST)
    radius_down = radius // step

    # guide filter - processing guidance image I
    mean_I = boxfilter(I_down, radius_down)

    var_I_00 = boxfilter(I_down[..., 0] * I_down[..., 0], radius_down) - \
               mean_I[..., 0] * mean_I[..., 0] + eps
    var_I_11 = boxfilter(I_down[..., 1] * I_down[..., 1], radius_down) - \
               mean_I[..., 1] * mean_I[..., 1] + eps
    var_I_22 = boxfilter(I_down[..., 2] * I_down[..., 2], radius_down) - \
               mean_I[..., 2] * mean_I[..., 2] + eps
    var_I_01 = boxfilter(I_down[..., 0] * I_down[..., 1], radius_down) - \
               mean_I[..., 0] * mean_I[..., 1]
    var_I_02 = boxfilter(I_down[..., 0] * I_down[..., 2], radius_down) - \
               mean_I[..., 0] * mean_I[..., 2]
    var_I_12 = boxfilter(I_down[..., 1] * I_down[..., 2], radius_down) - \
               mean_I[..., 1] * mean_I[..., 2]

    inv_00 = var_I_11 * var_I_22 - var_I_12 * var_I_12
    inv_11 = var_I_00 * var_I_22 - var_I_02 * var_I_02
    inv_22 = var_I_00 * var_I_11 - var_I_01 * var_I_01
    inv_01 = var_I_02 * var_I_12 - var_I_01 * var_I_22
    inv_02 = var_I_01 * var_I_12 - var_I_02 * var_I_11
    inv_12 = var_I_02 * var_I_01 - var_I_00 * var_I_12

    det = var_I_00 * inv_00 + var_I_01 * inv_01 + var_I_02 * inv_02

    inv_00 = inv_00 / det
    inv_11 = inv_11 / det
    inv_22 = inv_22 / det
    inv_01 = inv_01 / det
    inv_02 = inv_02 / det
    inv_12 = inv_12 / det

    # guide filter - filter input image P for every single channel
    mean_P = boxfilter(P_down, radius_down)
    if mean_P.ndim == 2:
        mean_P = np.expand_dims(mean_P, axis=[2])
        P_down = np.expand_dims(P_down, axis=[2])

    channels = np.min([3, mean_P.shape[2]])
    for ch in range(channels):
        mean_P_channel = mean_P[..., ch:ch + 1]
        P_channel = P_down[..., ch:ch + 1]
        mean_Ip = boxfilter(I_down * P_channel, radius_down)
        cov_Ip = mean_Ip - mean_I * mean_P_channel

        a0 = inv_00 * cov_Ip[..., 0] + inv_01 * cov_Ip[..., 1] + \
             inv_02 * cov_Ip[..., 2]
        a1 = inv_01 * cov_Ip[..., 0] + inv_11 * cov_Ip[..., 1] + \
             inv_12 * cov_Ip[..., 2]
        a2 = inv_02 * cov_Ip[..., 0] + inv_12 * cov_Ip[..., 1] + \
             inv_22 * cov_Ip[..., 2]
        b = mean_P[..., ch] - a0 * mean_I[..., 0] - a1 * mean_I[..., 1] - \
            a2 * mean_I[..., 2]
        a = np.concatenate((a0[..., np.newaxis], a1[..., np.newaxis],
                            a2[..., np.newaxis]), axis=2)

        mean_a = boxfilter(a, radius_down)
        mean_b = boxfilter(b, radius_down)

        mean_a_up = cv2.resize(mean_a, dsize=(width, height), fx=None,
                               fy=None, interpolation=cv2.INTER_LINEAR)
        mean_b_up = cv2.resize(mean_b, dsize=(width, height), fx=None,
                               fy=None, interpolation=cv2.INTER_LINEAR)
        gf_one_channel = np.sum(mean_a_up * I, axis=2) + mean_b_up
        result[..., ch] = gf_one_channel

    # post process data type
    result = np.squeeze(result)
    if original_data_type == np.uint8:
        result = np.clip(np.round(result), 0, 255).astype(np.uint8)
    return result
应用举例
去噪
测试数据使用的是开源数据集FFHQ中的一张图,00116.png,包含如下元素:
- 人像/人脸
- 彩噪
- 衣服上的格子及毛绒纹理
- 色彩条带
- 平坦区域:墙面,窗户,人脸等
- 高梯度边缘:窗户棱,人脸边缘,衣服边缘等
(因为最大允许上传的图片是5M,所以处理后再转为jpg,可能有一些压缩痕迹)
-
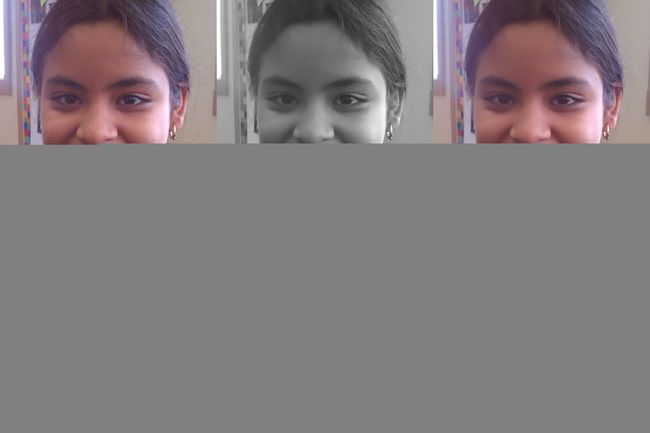
rgb系列的输出如下:
上排依次是:原图 —— 引导=灰度,输入=灰度 —— 引导=灰度,输入=rgb
下排一次是:引导=rgb,输入=灰度 —— 引导=rgb,输入=rgb —— rgb各通道分别对应滤波
(文件名的含义需要在下面代码里面对应起来看)

-
yuv系列的输出如下:
上排依次是:原图 —— yuv只对y通道做滤波
下排依次是:引导=yuv,输入=yuv —— yuv各通道分别对应滤波

结论: -
guidefilter在降噪的同时边缘保持确实不错,图像中窗户棱,人脸边缘,衣服纹理等没有发生明显模糊。
-
yuv各通道分别对应滤波(yuv结果右下)在效果和计算量方面综合最优。 -
引导=rgb,输入=rgb需要的计算量非常大,而其效果虽好,但相比yuv各通道分别对应滤波没有明显优势。 -
当引导图是多通道时,比如
引导图=rgb或yuv,比灰度引导图带来的保边效果更好,特别的,引导=灰度,输入=rgb情况下会带来严重色偏(观察rgb结果右上的色彩条带)。 -
rgb各通道分别对应滤波,或者yuv只对y通道做滤波不能压制彩噪。
# -*- coding: utf-8 -*-
import cv2
from fastguidedfilter import guide_filter_gray
from fastguidedfilter import guide_filter_color


def rgb_gray_guidance():
    scale = 255
    step = 4
    radius = 16
    eps = 0.02 * 0.02 * scale * scale

    image = cv2.imread(r"00116.png", cv2.IMREAD_UNCHANGED)

    I = cv2.cvtColor(image, cv2.COLOR_BGR2GRAY)
    P_gray = I.copy()
    P_color = image.copy()

    gray_scale_gf = guide_filter_gray(I, P_gray, radius, step, eps)
    color_gf = guide_filter_gray(I, P_color, radius, step, eps)

    cv2.imwrite("gray_guidance_gray_input.png", gray_scale_gf)
    cv2.imwrite("gray_guidance_rgb_input.png", color_gf)


def rgb_color_guidance():
    scale = 255
    step = 4
    radius = 16
    eps = 0.02 * 0.02 * scale * scale

    image = cv2.imread(r"00116.png", cv2.IMREAD_UNCHANGED)

    I = image.copy()
    P_gray = cv2.cvtColor(image, cv2.COLOR_BGR2GRAY)
    P_color = image.copy()

    gray_scale_gf = guide_filter_color(I, P_gray, radius, step, eps)
    color_gf = guide_filter_color(I, P_color, radius, step, eps)

    cv2.imwrite("rgb_guidance_gray_input.png", gray_scale_gf)
    cv2.imwrite("rgb_guidance_rgb_input.png", color_gf)


def rgb_channel_wise():
    scale = 255
    step = 4
    radius = 16
    eps = 0.02 * 0.02 * scale * scale

    image = cv2.imread(r"00116.png", cv2.IMREAD_UNCHANGED)

    for ch in range(3):
        channel = image[..., ch]
        gf_channel = guide_filter_gray(channel, channel, radius, step, eps)
        image[..., ch] = gf_channel

    cv2.imwrite("rgb_channel_wise.png", image)


def yuv_y_channel():
    scale = 255
    step = 4
    radius = 16
    eps = 0.02 * 0.02 * scale * scale

    image = cv2.imread(r"00116.png", cv2.IMREAD_UNCHANGED)
    image = cv2.cvtColor(image, cv2.COLOR_BGR2YUV)
    Y = image[..., 0]

    Y_gf = guide_filter_gray(Y, Y, radius, step, eps)

    image[..., 0] = Y_gf
    image = cv2.cvtColor(image, cv2.COLOR_YUV2BGR)
    cv2.imwrite("yuv_y_channel.png", image)


def yuv_3_channels():
    scale = 255
    step = 4
    radius = 16
    eps = 0.02 * 0.02 * scale * scale

    image = cv2.imread(r"00116.png", cv2.IMREAD_UNCHANGED)
    image = cv2.cvtColor(image, cv2.COLOR_BGR2YUV)

    image = guide_filter_color(image, image, radius, step, eps)

    image = cv2.cvtColor(image, cv2.COLOR_YUV2BGR)
    cv2.imwrite("yuv_3_channels.png", image)


def yuv_channel_wise():
    scale = 255
    step = 4
    radius = 16
    eps = 0.02 * 0.02 * scale * scale

    image = cv2.imread(r"00116.png", cv2.IMREAD_UNCHANGED)
    image = cv2.cvtColor(image, cv2.COLOR_BGR2YUV)

    for ch in range(3):
        channel = image[..., ch]
        gf_channel = guide_filter_gray(channel, channel, radius, step, eps)
        image[..., ch] = gf_channel

    image = cv2.cvtColor(image, cv2.COLOR_YUV2BGR)
    cv2.imwrite("yuv_channel_wise.png", image)


if __name__ == '__main__':
    rgb_gray_guidance()
    rgb_color_guidance()
    rgb_channel_wise()
    yuv_y_channel()
    yuv_3_channels()
    yuv_channel_wise()
磨皮
保边滤波器很适合用来磨皮,因为在保留大的边缘结构的同时,可以抹除细节纹理,特别是平坦区域的细节纹理,而皮肤又属于相对平坦的区域。
注意想要改变磨皮程度,改正则化参数eps比改半径radius更合适。
仍然使用开源数据集FFHQ中的00276.png。
结果如下:
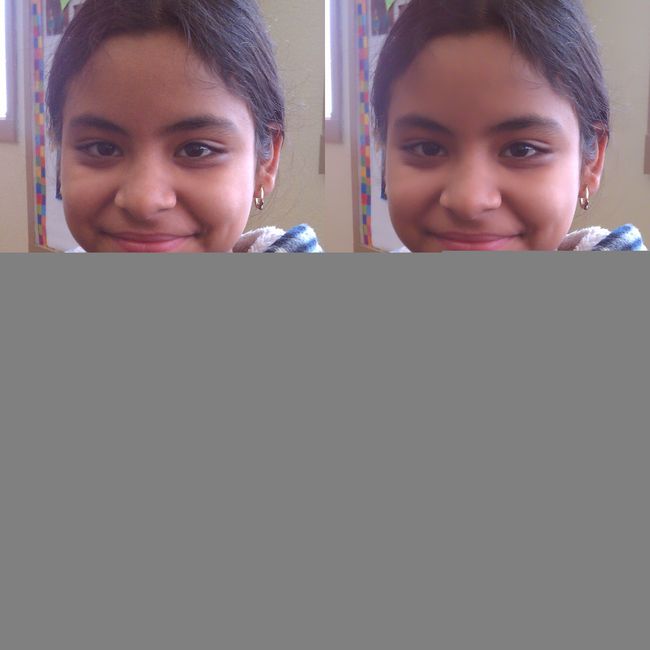
上排依次是:原图 —— eps=0.02*0.02
下排依次是:eps=0.04*0.04 —— eps=0.08*0.08

代码如下:
# -*- coding: utf-8 -*-
import cv2
import numpy as np
from fastguidedfilter import guide_filter_color


def smooth_skin():
    xmin, ymin, xmax, ymax = 1400, 0, 3200, 2000
    scale = 255
    step = 4
    radius = 16

    image = cv2.imread(r"00276.png", cv2.IMREAD_UNCHANGED)

    eps = 0.02 * 0.02 * scale * scale
    gf_002 = guide_filter_color(image, image, radius, step, eps)

    eps = 0.04 * 0.04 * scale * scale
    gf_004 = guide_filter_color(image, image, radius, step, eps)

    eps = 0.08 * 0.08 * scale * scale
    gf_008 = guide_filter_color(image, image, radius, step, eps)

    image = image[ymin:ymax, xmin:xmax]
    gf_002 = gf_002[ymin:ymax, xmin:xmax]
    gf_004 = gf_004[ymin:ymax, xmin:xmax]
    gf_008 = gf_008[ymin:ymax, xmin:xmax]

    image_up = np.concatenate([image, gf_002], axis=1)
    image_down = np.concatenate([gf_004, gf_008], axis=1)
    image_all = np.concatenate([image_up, image_down], axis=0)
    cv2.imwrite(r'./smooth_skin.jpg', image_all)


if __name__ == '__main__':
    smooth_skin()
图像融合 - 亮度调整
有时候我们做图像融合后,为了使结果图像的亮度不发生整体变化,需要再调节回来,这时候可以用guidedfilter来实现。
比如下面例子,想要把一个卷帘门的纹理融合到兰陵王里面(左上融合到右上中),直接以乘法融合得到左下角,图像亮度发生整体变暗,此时使用左下作为引导图,右上作为输入图,以非常大的radius,小eps实施guidedfilter,就可以得到右下角这种亮度没有整体变化,又融合了纹理的结果。

代码如下:
注意:radius要非常大,radius小了的话会破坏纹理结构;eps要很小,甚至为0,eps大了会导致模糊。
# -*- coding: utf-8 -*-
import cv2
import numpy as np
from fastguidedfilter import guide_filter_color


def make_data():
    scale = 255.
    step = 4
    radius = 1000
    eps = 0

    image = cv2.imread(r'lanlingwang.png')
    image = cv2.resize(image, dsize=None, fx=0.5, fy=0.5,
                       interpolation=cv2.INTER_LINEAR)
    height, width = image.shape[:2]
    texture = cv2.imread(r'texture.jpg')
    texture = cv2.resize(texture, dsize=(width, height),
                       interpolation=cv2.INTER_LINEAR)
    image_up = np.concatenate([texture, image], axis=1)

    image = image / scale
    texture = texture / scale
    fused_image = image * texture

    gf = guide_filter_color(fused_image, image, radius, step, eps)

    fused_image = np.clip(np.round(fused_image * 255), 0, 255).astype(np.uint8)
    gf = np.clip(np.round(gf * 255), 0, 255).astype(np.uint8)

    image_down = np.concatenate([fused_image, gf], axis=1)
    image_all = np.concatenate([image_up, image_down], axis=0)
    cv2.imwrite(r'./make_data.jpg', image_all)


if __name__ == '__main__':
    make_data()