元学习第一步:下载数据集(Omniglot)以及代码修正和详解
数据集Omniglot下载地址:
https://gitcode.net/mirrors/brendenlake/omniglot?utm_source=csdn_github_accelerator
Omniglot数据集由50种字母表(每种字母表的字符数不同),每种字母表包括不同字符,比如常见的Latin拉丁字母表即abcdefg,共26个字母,还有韩语,日语,共1623种字符,每个字符又是有20个人不同的写法,每个写法是一张108*108的图像,即该数据集的大小是1623*20
文件images_background为训练集,30种字母表
文件images_evaluation为测试集,20种字母表
small1和small2是小样本学习,有五种字母表
strokes则是对应字符的轨迹坐标
下载之后即可直接解压观看,现附上网上流传的代码的修正和详解,
代码为
import glob
from PIL import Image

def plot_image(alphabet):
    #image_path = f'../omniglot/*/{alphabet}/*/'
    image_path = f'images_background/{alphabet}/*'
    characters = glob.glob(image_path)
    image_files = []
    for character in characters:
        img = glob.glob(f"{character}/*.png")[1]
        image_files.append(Image.open(img))

    W, H = 105, 105
    ROW, COL = 2, 13
    target = Image.new("RGB", (W * COL, H *ROW))
    print(image_files)
    for row in range(ROW):
        for col in range(COL):
            #target.show()
            target.paste(image_files[COL*row+col], (0 + W*col, 0 + H*row))

    target.save(f"{alphabet}_patchs.png", quality=80)

if __name__ == '__main__':
    plot_image("Latin")
课新建项目,复制运行,没有特殊包,运行结果为
若要换一种字母表,则需要修改
plot_image("Latin")
之外,还需要修改
ROW, COL = 2, 13
因为拉丁字母是26个,所以是2*13,如果换别的字母则需要对应修改,否则会运行不成功
程序麻烦的地方在于获取文件列表信息种匹配的问题,即
mage_path = f'images_background/{alphabet}/*'
characters = glob.glob(image_path)
target.paste(image_files[COL*row+col], (0 + W*col, 0 + H*row))
代码是将image_files[COL*row+col]粘贴在target里,位置是(0 + W*col, 0 + H*row)
可以自行百度glob的用法
python标准库模块——glob(获取需求文件夹或文件路径列表) - 知乎 (zhihu.com)
数据集种的demo本人未发现问题,运行成功
#.
#├── demo.py # 举例展示数据集的部分数据
#├── images_background_small1.zip # images_background的一部分,用于`minimal`学习
#├── images_background_small2.zip # mages_background的一部分,用于`minimal`学习
#├── images_background.zip # 训练数据
#├── images_evaluation.zip # 测试数据
#├── strokes_background_small1.zip # 对应的笔画(x,y,t)
#├── strokes_background_small2.zip # 对应的笔画(x,y,t)
#├── strokes_background.zip # 对应的笔画(x,y,t)
#└── strokes_evaluation.zip # 对应的笔画(x,y,t)


import numpy as np
import os
import random
from sys import platform as sys_pf
import matplotlib
if sys_pf == 'darwin':
	matplotlib.use("TkAgg")
from matplotlib import pyplot as plt
# ---
# Demo for how to load image and stroke data for a character
# ---

# Plot the motor trajectory over an image
#
# Input
#  I [105 x 105 nump] grayscale image
#  drawings: [ns list] of strokes (numpy arrays) in motor space
#  lw : line width
def plot_motor_to_image(I,drawing,lw=2):
	drawing = [d[:,0:2] for d in drawing] # strip off the timing data (third column)
	drawing = [space_motor_to_img(d) for d in drawing] # convert to image space
	plt.imshow(I,cmap='gray')
	ns = len(drawing)
	for sid in range(ns): # for each stroke
		plot_traj(drawing[sid],get_color(sid),lw)
	plt.xticks([])
	plt.yticks([])

# Plot individual stroke
#
# Input
#  stk: [n x 2] individual stroke
#  color: stroke color
#  lw: line width
def plot_traj(stk,color,lw):
	n = stk.shape[0]
	if n > 1:
		plt.plot(stk[:,0],stk[:,1],color=color,linewidth=lw)
	else:
		plt.plot(stk[0,0],stk[0,1],color=color,linewidth=lw,marker='.')

# Color map for the stroke of index k
def get_color(k):
    scol = ['r','g','b','m','c']
    ncol = len(scol)
    if k < ncol:
       out = scol[k]
    else:
       out = scol[-1]
    return out

# convert to str and add leading zero to single digit numbers
def num2str(idx):
	if idx < 10:
		return '0'+str(idx)
	return str(idx)

# Load binary image for a character
#
# fn : filename
def load_img(fn):
	I = plt.imread(fn)
	I = np.array(I,dtype=bool)
	return I

# Load stroke data for a character from text file
#
# Input
#   fn : filename
#
# Output
#   motor : list of strokes (each is a [n x 3] numpy array)
#      first two columns are coordinates
#	   the last column is the timing data (in milliseconds)
def load_motor(fn):
	motor = []
	with open(fn,'r') as fid:
		lines = fid.readlines()
	lines = [l.strip() for l in lines]
	for myline in lines:
		if myline =='START': # beginning of character
			stk = []
		elif myline =='BREAK': # break between strokes
			stk = np.array(stk)
			motor.append(stk) # add to list of strokes
			stk = []
		else:
			arr = np.fromstring(myline,dtype=float,sep=',')
			stk.append(arr)
	return motor

#
# Map from motor space to image space (or vice versa)
#
# Input
#   pt: [n x 2] points (rows) in motor coordinates
#
# Output
#  new_pt: [n x 2] points (rows) in image coordinates
def space_motor_to_img(pt):
	pt[:,1] = -pt[:,1]
	return pt
def space_img_to_motor(pt):
	pt[:,1] = -pt[:,1]
	return

if __name__ == '__main__':
	img_dir = 'images_background'
	stroke_dir = 'strokes_background'
	nreps = 20 # number of renditions for each character
	nalpha = 5 # number of alphabets to show

	alphabet_names = [a for a in os.listdir(img_dir) if a[0] != '.'] # get folder names
	alphabet_names = random.sample(alphabet_names,nalpha) # choose random alphabets

	for a in range(nalpha): # for each alphabet
		print('generating figure ' + str(a+1) + ' of ' + str(nalpha))
		alpha_name = alphabet_names[a]

		# choose a random character from the alphabet
		character_id = random.randint(1,len(os.listdir(os.path.join(img_dir,alpha_name))))

		# get image and stroke directories for this character
		img_char_dir = os.path.join(img_dir,alpha_name,'character'+num2str(character_id))
		stroke_char_dir = os.path.join(stroke_dir,alpha_name,'character'+num2str(character_id))

		# get base file name for this character
		fn_example = os.listdir(img_char_dir)[0]
		fn_base = fn_example[:fn_example.find('_')]

		plt.figure(a,figsize=(10,8))
		plt.clf()
		for r in range(1,nreps+1): # for each rendition
			plt.subplot(4,5,r)
			fn_stk = stroke_char_dir + '/' + fn_base + '_' + num2str(r) + '.txt'
			fn_img = img_char_dir + '/' + fn_base + '_' + num2str(r) + '.png'
			motor = load_motor(fn_stk)
			I = load_img(fn_img)
			plot_motor_to_image(I,motor)
			if r==1:
				plt.title(alpha_name[:15] + '\n character ' + str(character_id))
		plt.tight_layout()
	plt.show()
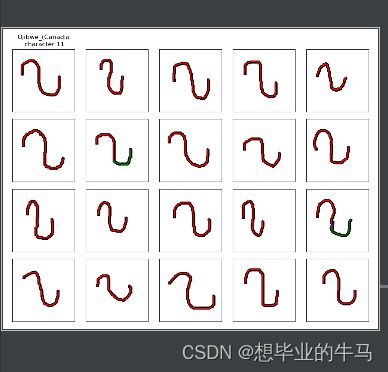
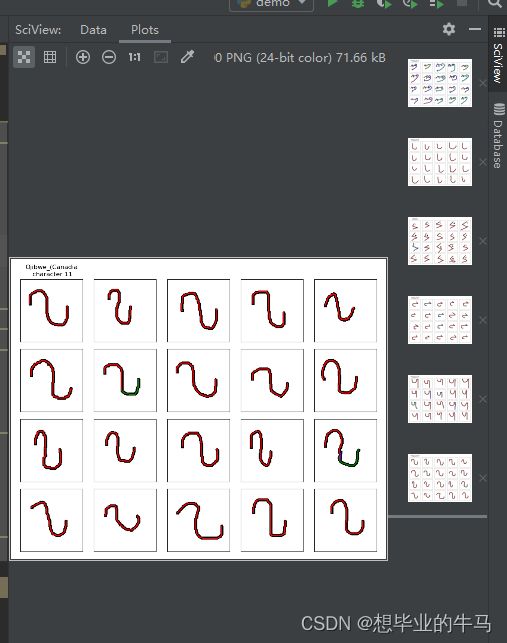
该代码是选择五个字符显示,运行结果为


