TensorFlow2.0 实现 ESPCN
1.数据处理 dataset.py
训练集选用T91, 测试集选用Set5
低分辨图片(x)切割成17x17,高分辨图片(y)切割成17scale x 17scale
import cv2
import glob
import numpy as np
import tensorflow as tf
from keras import backend as k


def psnr(y_true, y_pred):
    # assume RGB image

    return 10.0 * k.log(1.0 / (k.mean(k.square(y_pred - y_true)))) / k.log(10.0)


# 将图片裁剪成放大倍数的整数倍
def Cropping(img, scale=3):
    x, y = img.shape[0], img.shape[1]
    x = x - np.mod(x, scale)  # 取余
    y = y - np.mod(y, scale)
    img = img[0:x, 0:y]
    return img


# 数据处理
def get_lr_hr(img, scale):

    hr = img / 255.    # 归一化
    # 先缩小再放大 得到低分辨图片
    lr = cv2.resize(hr, (hr.shape[1] // scale, hr.shape[0] // scale), interpolation=cv2.INTER_CUBIC)
    return lr, hr


def load_data(path, scale=3, cut_size=17, stride=17):
    LR = []  # 切片后的lr
    HR = []  # 切片后的hr
    size = []  # (nx, ny)切片次数
    for i in path:
        img = cv2.imread(i)  # 读取图片
        img = cv2.cvtColor(img, cv2.COLOR_BGR2YCrCb)[:, :, 0]   # 格式转换 取Y通道
        imgmod = Cropping(img, scale)  # 尺寸处理
        lr, hr = get_lr_hr(imgmod, scale)  # 获取lr和hr

        # 开切
        h, w = lr.shape[0], lr.shape[1]
        nx, ny = 0, 0
        for x in range(0, h - cut_size + 1, stride):
            nx += 1
            for y in range(0, w - cut_size + 1, stride):
                ny += 1
                sub_lr = lr[x:x + cut_size, y:y + cut_size]  # (17, 17)
                sub_hr = hr[x * scale:(x + cut_size) * scale,
                            y * scale:(y + cut_size) * scale]  # (51, 51)

                # 转换为便于训练的格式
                sub_input = sub_lr.reshape([cut_size, cut_size, 1])
                sub_label = sub_hr.reshape([cut_size * scale, cut_size * scale, 1])

                LR.append(sub_input)
                HR.append(sub_label)

        size.append((nx, ny // nx))

    x_train = np.array(LR)
    y_train = np.array(HR)

    return x_train, y_train, size


# 合并
def merge(images, size):
    (nx, ny) = size[0]
    _, h, w, d = images.shape
    img = np.zeros((h * nx, w * ny, d))
    for idx, image in enumerate(images):
        i = idx % ny     # 取余
        j = idx // ny    # 取整
        img[j * h:j * h + h, i * w:i * w + w, :] = image
    return img


if __name__ == "__main__":
    # 训练集
    train_path = '../train/*.bmp'
    train_path_list = glob.glob(train_path)
    # 测试集
    test_path = '../test/Set5/*.bmp'
    test_path_list = glob.glob(test_path)

    # 放大倍数
    scale = 3
    cut_size = 17
    stride = 17

    x_train, y_train, size = load_data(train_path_list, scale=scale, stride=stride)

    print(x_train.shape)
    print(y_train.shape)

    # img = merge(y_train, size)
    a = np.uint8(x_train[50] * 255)
    b = np.uint8(y_train[50] * 255)
    # cv2.namedWindow('1', cv2.WINDOW_NORMAL)
    cv2.imshow('1', a)
    # cv2.namedWindow('2', cv2.WINDOW_NORMAL)
    cv2.imshow('2', b)
    cv2.waitKey(0)
    cv2.destroyAllWindows()
x_train.shape y_train.shape


2.搭建模型 model.py
第一层:5x5x64
第二层:3x3x32
第三层:3x3x(scalescalechannel)
scale为放大倍数,channel为输入图片的通道数

最后一层是亚像素卷积,用tf.nn.depth_to_space实现
import numpy as np
import tensorflow as tf
from tensorflow.keras.models import Model
from tensorflow.keras.layers import Conv2D, Activation


class ESPCN(Model):
    def __init__(self, scale, channel):
        super(ESPCN, self).__init__()
        self.scale = scale
        self.channel = channel

        self.c1 = Conv2D(filters=64, kernel_size=5, strides=1, padding='same')
        self.a1 = Activation('relu')

        self.c2 = Conv2D(filters=32, kernel_size=3, strides=1, padding='same')
        self.a2 = Activation('relu')

        self.c3 = Conv2D(filters=self.scale * self.scale * self.channel, kernel_size=3, strides=1, padding='same')

        self.d2s = tf.nn.depth_to_space
        self.a3 = Activation('tanh')

    def call(self, inputs, training=None, mask=None):
        x = self.c1(inputs)
        x = self.a1(x)

        x = self.c2(x)
        x = self.a2(x)

        x = self.c3(x)

        x = self.d2s(x, self.scale, data_format='NHWC')
        y = self.a3(x)

        return y
3.训练 + 测试
import glob
import numpy as np
import tensorflow as tf
from model import ESPCN
from dataset import load_data, psnr, Cropping
import cv2
from skimage.measure import compare_psnr, compare_ssim
# 训练集
train_path = '../291/*.bmp'
train_path_list = glob.glob(train_path)
# 放大倍数 输入图片尺寸 输出图片尺寸 移动步长
scale = 3
channel = 1
cut_size = 17
stride = 7
# 获取数据
x_train, y_train, train_size = load_data(train_path_list,
scale=scale,
cut_size=cut_size,
stride=stride)
test_path = '../test/Set5/*.bmp'
test_path_list = glob.glob(test_path)
x_test, y_test, test_size = load_data(test_path_list,
scale=scale,
cut_size=cut_size,
stride=stride)
# 网络
model = ESPCN(scale=scale, channel=channel)
# 配置
model.compile(optimizer=tf.keras.optimizers.Adam(0.01),
loss=tf.keras.losses.MSE,
metrics=[psnr])
# 调整学习率
reduce_lr = tf.keras.callbacks.ReduceLROnPlateau(monitor='val_loss', factor=0.99, patience=2, mode='auto')
# 保存参数
checkpoint_save_path = './ESPCN2_checkpoint/ESPCN.ckpt'
# model.load_weights(checkpoint_save_path)
cp_callback = tf.keras.callbacks.ModelCheckpoint(
monitor='val_psnr',
filepath=checkpoint_save_path,
save_weights_only=True,
save_best_only=True
)
print(x_train.shape)
model.fit(x_train, y_train,
batch_size=64,
epochs=250,
validation_data=(x_test, y_test),
validation_freq=1,
callbacks=[reduce_lr, cp_callback])
i = 2
# 读取图片 转换YCrCb 规则化
img = cv2.imread(test_path_list[i])
img = Cropping(img, scale)
YCC = cv2.cvtColor(img, cv2.COLOR_BGR2YCrCb)
Y = YCC[:, :, 0]
color = YCC[:, :, 1:3]
# 压缩图片
lr = cv2.resize(YCC, (YCC.shape[1] // scale, YCC.shape[0] // scale), interpolation=cv2.INTER_CUBIC)
lr_bgr = cv2.cvtColor(lr, cv2.COLOR_YCrCb2BGR)
# 预测
h, w = lr.shape[0], lr.shape[1]
dt = lr[:, :, 0].reshape([1, h, w, 1]) / 255.
y_pre = model.predict(dt)
y_pre = y_pre.squeeze()
y_pre = y_pre * 255
# 合并
result = np.zeros([YCC.shape[0], YCC.shape[1], 3], dtype=np.uint8)
result[:, :, 0] = y_pre
result[:, :, 1:3] = color
result = cv2.cvtColor(result, cv2.COLOR_YCrCb2BGR)
# bicubic
bicubic = cv2.resize(lr_bgr, (YCC.shape[1], YCC.shape[0]), interpolation=cv2.INTER_CUBIC)
yB = cv2.cvtColor(bicubic, cv2.COLOR_BGR2YCrCb)[:, :, 0]
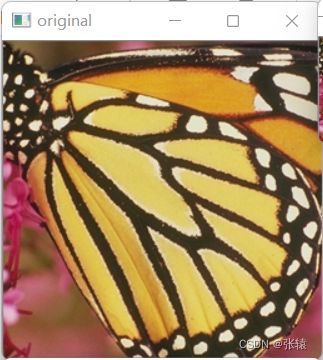
cv2.imshow('original', img)
cv2.imshow('input', lr_bgr)
cv2.imshow('output1', result)
cv2.imshow('output2', bicubic)
cv2.waitKey(0)
cv2.destroyAllWindows()
print('-' * 50)
psnr1 = compare_psnr(Y, y_pre, 255)
psnr2 = compare_psnr(Y, yB, 255)
print(psnr1, psnr2) # 23.180898231092254 21.97495909635292
print('-' * 50)
ssim1 = compare_ssim(Y, y_pre, win_size=11, data_range=255, multichannel=True)
ssim2 = compare_ssim(Y, yB, win_size=11, data_range=255, multichannel=True)
print(ssim1, ssim2) # 0.8354814229799264 0.791309318119287
原图
输入

双插值

ESPCN

psnr

ssim
