树莓派-Opencv-DNN
前置条件
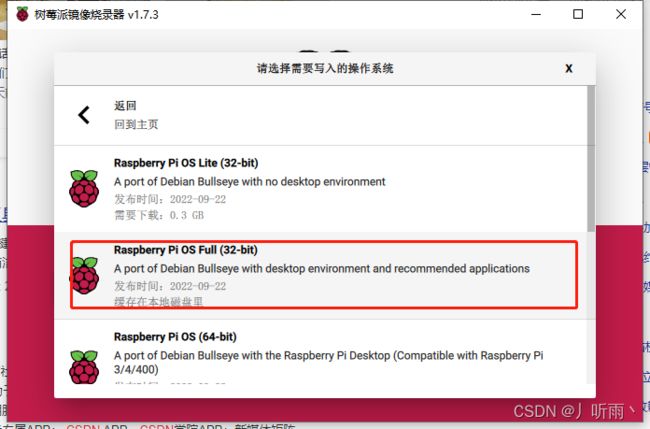
树莓派系统版本
系统自带信息
python3.9
pip 20.3.4
python3调用dnn程序
import numpy as np
import cv2 as cv
import os
import time

yolo_dir = 'G:/yolo3/yolov3'  # YOLO文件路径 G:\vs2017Project\yolov2-tiny-voc
yolo_dir_name = 'G:/yolo3/yolov3/data'  # YOLO文件路径
weightsPath = os.path.join(yolo_dir, 'yolov3.weights')  # 权重文件
configPath = os.path.join(yolo_dir, 'yolov3.cfg')  # 配置文件
labelsPath = os.path.join(yolo_dir_name, 'obj.names')  # label名称

def decode_image():
    imgPath = os.path.join(yolo_dir, 'test.jpg')  # 测试图像
    CONFIDENCE = 0.5  # 过滤弱检测的最小概率
    THRESHOLD = 0.4  # 非最大值抑制阈值

    # 加载网络、配置权重
    net = cv.dnn.readNetFromDarknet(configPath, weightsPath)  # #  利用下载的文件
    # net.setPreferableBackend(cv.dnn.DNN_BACKEND_OPENCV)
    # net.setPreferableTarget(cv.dnn.DNN_TARGET_OPENCL)
    # net.setPreferableBackend(cv.dnn.DNN_BACKEND_OPENCV)
    # net.setPreferableTarget(cv.dnn.DNN_TARGET_CPU)

    net.setPreferableBackend(cv.dnn.DNN_BACKEND_CUDA)
    net.setPreferableTarget(cv.dnn.DNN_TARGET_CUDA)
    print("[INFO] loading YOLO from disk...")  # # 可以打印下信息

    # 加载图片、转为blob格式、送入网络输入层
    img = cv.imread(imgPath)
    blobImg = cv.dnn.blobFromImage(img, 1.0/255.0, (416, 416), None, True, False)   # # net需要的输入是blob格式的,用blobFromImage这个函数来转格式
    net.setInput(blobImg)  # # 调用setInput函数将图片送入输入层

    # 获取网络输出层信息(所有输出层的名字),设定并前向传播
    outInfo = net.getUnconnectedOutLayersNames()  # # 前面的yolov3架构也讲了,yolo在每个scale都有输出,outInfo是每个scale的名字信息,供net.forward使用
    start = time.time()
    layerOutputs = net.forward(outInfo)  # 得到各个输出层的、各个检测框等信息,是二维结构。
    end = time.time()
    print("[INFO] YOLO took {:.6f} seconds".format(end - start))  # # 可以打印下信息

    # 拿到图片尺寸
    (H, W) = img.shape[:2]
    # 过滤layerOutputs
    # layerOutputs的第1维的元素内容: [center_x, center_y, width, height, objectness, N-class score data]
    # 过滤后的结果放入:
    boxes = [] # 所有边界框(各层结果放一起)
    confidences = [] # 所有置信度
    classIDs = [] # 所有分类ID

    # # 1)过滤掉置信度低的框框
    for out in layerOutputs:  # 各个输出层
        for detection in out:  # 各个框框
            # 拿到置信度
            scores = detection[5:]  # 各个类别的置信度
            classID = np.argmax(scores)  # 最高置信度的id即为分类id
            confidence = scores[classID]  # 拿到置信度

            # 根据置信度筛查
            if confidence > CONFIDENCE:
                box = detection[0:4] * np.array([W, H, W, H])  # 将边界框放会图片尺寸
                (centerX, centerY, width, height) = box.astype("int")
                x = int(centerX - (width / 2))
                y = int(centerY - (height / 2))
                boxes.append([x, y, int(width), int(height)])   # 框
                confidences.append(float(confidence))           # 置信度
                classIDs.append(classID)                        # 分类ID

    # # 2)应用非最大值抑制(non-maxima suppression,nms)进一步筛掉
    idxs = cv.dnn.NMSBoxes(boxes, confidences, CONFIDENCE, THRESHOLD) # boxes中,保留的box的索引index存入idxs
    # 得到labels列表
    with open(labelsPath, 'rt') as f:
        labels = f.read().rstrip('\n').split('\n')
    # 应用检测结果
    np.random.seed(42)
    COLORS = np.random.randint(0, 255, size=(len(labels), 3), dtype="uint8")  # 框框显示颜色,每一类有不同的颜色,每种颜色都是由RGB三个值组成的,所以size为(len(labels), 3)
    if len(idxs) > 0:
        for i in idxs.flatten():  # indxs是二维的,第0维是输出层,所以这里把它展平成1维
            (x, y) = (boxes[i][0], boxes[i][1])
            (w, h) = (boxes[i][2], boxes[i][3])

            color = [int(c) for c in COLORS[classIDs[i]]]
            cv.rectangle(img, (x, y), (x+w, y+h), color, 2)  # 线条粗细为2px
            text = "{}: {:.4f}".format(labels[classIDs[i]], confidences[i])
            cv.putText(img, text, (x, y-5), cv.FONT_HERSHEY_SIMPLEX, 0.5, color, 2)  # cv.FONT_HERSHEY_SIMPLEX字体风格、0.5字体大小、粗细2px
    cv.imshow('detected image-zxl', img)
    cv.waitKey(0)

if __name__ == "__main__":
    decode_image();
    # conndb();
注意:请把两个路径换成自己yolo框架的路径信息。
安装库
pip3 install opencv-python
报错整理
安装完成后执行python文件会报错
报错1
libcblas.so.3 cannot open shared object file:no such file or directory
分析:缺少库
解决:
sudo apt-get install libatlas-base-dev
sudo apt-get install libjasper-dev
报错2
Runtime Error:module compiled against Api version 0xe but this version of numpy is 0xd
numpy.core.multiarray failed to import
分析:numpy版本低
解决
pip show numpy 查看numpy的版本,应该是 1.19.5
pip install numpy --upgrade
树莓派4B+识别时间记录
yoloV3: 10.1s
yoloV4: 10.1s
yoloV2: 5.6s
yoloV3-tiny: 1.05s
yolov2-tiny: 1.01s
