Mask R-CNN实例分割模型在遥感灾害检测上的应用
Mask R-CNN实例分割模型热力图+可视化
文章目录
- Mask R-CNN实例分割模型热力图+可视化
- 前言
- 一、Mask R-CNN
- 二、代码详解
-
- 1.环境配置
- 2.数据集下载
- 3.代码修改
- 4.进阶代码
前言
实例分割(Instance Segmentation)是视觉经典四个任务中相对最难的一个,它既具备语义分割(Semantic Segmentation)的特点,需要做到像素层面上的分类,也具备目标检测(Object Detection)的一部分特点,即需要定位出不同实例,即使它们是同一种类。本次介绍二阶段实例分割的代表性方法Mask R-CNN
一、Mask R-CNN
Mask R-CNN算法的主要步骤为:
- 首先,将输入图片送入到特征提取网络得到特征图。
- 然后对特征图的每一个像素位置设定固定个数的ROI(也可以叫Anchor),然后将ROI区域送入RPN网络进行二分类(前景和背景)以及坐标回归,以获得精炼后的ROI区域。
- 对上个步骤中获得的ROI区域执行论文提出的ROIAlign操作,即先将原图和feature map的pixel对应起来,然后将feature map和固定的feature对应起来。
- 最后对这些ROI区域进行多类别分类,候选框回归和引入FCN生成Mask,完成分割任务。
Mask R-CNN利用R-CNN得到的物体框来区分各个实例,然后针对各个物体框对其中的实例进行分割。显而易见的问题便是,如果框不准,分割结果也会不准。因此对于一些边缘精度要求高的任务而言,这不是一个较好的方案。同时由于依赖框的准确性,这也容易导致一些非方正的物体效果比较差。
二、代码详解
这是代码的链接(Tensorflow版本):https://github.com/matterport/Mask_RCNN
配置文件安装和数据集下载就不再赘述,详细过程可以参考上面的连接。
1.环境配置
- Python 3.4+
- TensorFlow 1.3+
- Keras 2.0.8+
- Jupyter Notebook
- Numpy, skimage, scipy, Pillow, cython, h5py
2.数据集下载
实验选用xBD遥感数据集,该数据集可以到xView2官网上进行下载。
3.代码修改
配置文件信息config.py
class InferenceConfig(coco.CocoConfig):
    # Set batch size to 1 since we'll be running inference on
    # one image at a time. Batch size = GPU_COUNT * IMAGES_PER_GPU
    GPU_COUNT = 1
    IMAGES_PER_GPU = 1
config = InferenceConfig()
config.display()

Configurations:
BACKBONE_SHAPES                [[256 256]
 [128 128]
 [ 64  64]
 [ 32  32]
 [ 16  16]]
BACKBONE_STRIDES               [4, 8, 16, 32, 64]
BATCH_SIZE                     1
BBOX_STD_DEV                   [ 0.1  0.1  0.2  0.2]
DETECTION_MAX_INSTANCES        100
DETECTION_MIN_CONFIDENCE       0.5
DETECTION_NMS_THRESHOLD        0.3
GPU_COUNT                      1
IMAGES_PER_GPU                 1
IMAGE_MAX_DIM                  1024
IMAGE_MIN_DIM                  800
IMAGE_PADDING                  True
IMAGE_SHAPE                    [1024 1024    3]
LEARNING_MOMENTUM              0.9
LEARNING_RATE                  0.002
MASK_POOL_SIZE                 14
MASK_SHAPE                     [28, 28]
MAX_GT_INSTANCES               100
MEAN_PIXEL                     [ 123.7  116.8  103.9]
MINI_MASK_SHAPE                (56, 56)
NAME                           xBD
NUM_CLASSES                    6
POOL_SIZE                      7
POST_NMS_ROIS_INFERENCE        1000
POST_NMS_ROIS_TRAINING         2000
ROI_POSITIVE_RATIO             0.33
RPN_ANCHOR_RATIOS              [0.5, 1, 2]
RPN_ANCHOR_SCALES              (32, 64, 128, 256, 512)
RPN_ANCHOR_STRIDE              2
RPN_BBOX_STD_DEV               [ 0.1  0.1  0.2  0.2]
RPN_TRAIN_ANCHORS_PER_IMAGE    256
STEPS_PER_EPOCH                1000
TRAIN_ROIS_PER_IMAGE           128
USE_MINI_MASK                  True
USE_RPN_ROIS                   True
VALIDATION_STEPS               50
WEIGHT_DECAY                   0.0001
类别信息demo.py
# In[4]:
# Index of the class in the list is its ID. For example, to get ID of
# the teddy bear class, use: class_names.index('teddy bear')
class_names = ['no-damage','minor-damage','major-damage','destoryed','un-classified']
模型权重加载
# Create Model and Load Trained Weights
model = modellib.MaskRCNN(mode="inference", model_dir=MODEL_DIR, config=config)

# Load weights trained on MS-COCO
model.load_weights(COCO_MODEL_PATH, by_name=True)
图像处理代码及结果输出
# In[4]:
# # Run detection
results = model.detect([image], verbose=1)

# Visualize results
r = results[0]
print(r['class_ids'])
visualize.display_instances(image, r['rois'], r['masks'], r['class_ids'],
                            class_names, r['scores
4.进阶代码
绘制precision-recall曲线
AP, precisions, recalls, overlaps = utils.compute_ap(gt_bbox, gt_class_id, gt_mask,
                                           r['rois'], r['class_ids'], r['scores'], r['masks'])
visualize.plot_precision_recall(AP, precisions, recalls)
visualize.plot_overlaps(gt_class_id, r['class_ids'], r['scores'],
                      overlaps, dataset_test.class_names)
特征层可视化
activations = model.run_graph([image], [
    ("input_image",        model.keras_model.get_layer("input_image").output),
    ("res4w_out",          model.keras_model.get_layer("bn_conv1").output),  # 这里的bn_conv1是提取的层名,不同层可直接修改哦
    ("rpn_bbox",           model.keras_model.get_layer("rpn_bbox").output),
    ("roi",                model.keras_model.get_layer("ROI").output),
])
# Backbone feature map
display_images(np.transpose(activations["res4w_out"][0,:,:,:1], [2, 0, 1]))
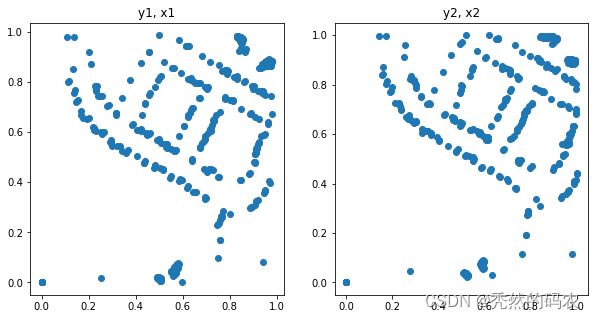
plt.figure(figsize=(10, 5))
plt.subplot(1, 2, 1)
plt.title("y1, x1")
plt.scatter(activations["roi"][0,:,0], activations["roi"][0,:,1])
plt.subplot(1, 2, 2)
plt.title("y2, x2")
plt.scatter(activations["roi"][0,:,2], activations["roi"][0,:,3])
plt.show()
plt.figure(figsize=(12, 3))
plt.subplot(1, 4, 1)
plt.title("dy")
_ = plt.hist(activations["rpn_bbox"][0,:,0], 50)
plt.subplot(1, 4, 2)
plt.title("dx")
_ = plt.hist(activations["rpn_bbox"][0,:,1], 50)
plt.subplot(1, 4, 3)
plt.title("dw")
_ = plt.hist(activations["rpn_bbox"][0,:,2], 50)
plt.subplot(1, 4, 4)
plt.title("dh")
_ = plt.hist(activations["rpn_bbox"][0,:,3], 50)
display_images(det_mask_specific[:4] * 255, cmap="Blues", interpolation="none")


