from mmseg.apis import inference_segmentor, init_segmentor
import mmcv
import cv2
import time
from matplotlib import pyplot as plt
import numpy as np


def deployNet(resized_img,config_file, checkpoint_file):
    # 通过配置文件和模型权重文件构建模型
    model = init_segmentor(config_file, checkpoint_file, device='cuda:0')
    # 对单张图片进行推理并展示结果
    # img = 'test.jpg'  # or img = mmcv.imread(img), which will only load it once
    time_start = time.time()
    result = inference_segmentor(model, resized_img)
    time_end = time.time()
    print(f"time_end={time_end - time_start}")
    # 你可以修改 opacity 在(0,1]之间的取值来改变绘制好的分割图的透明度
    img = model.show_result(resized_img, result, opacity=1)
    return img, time_end - time_start

def coverLabelToGroup6(seg):
    seg=np.max(seg,axis=2)
    palette = [[0, 0, 0], [0, 128, 0], [255, 255, 0], [255, 128, 0], [255, 0, 0], [0, 0, 128]]
    color_seg = np.zeros((seg.shape[0], seg.shape[1], 3), dtype=np.uint8)
    for label, color in enumerate(palette):
        color_seg[seg == label, :] = color
    return color_seg

img = mmcv.imread(r'C:\Users\63108\Desktop\GANav-offroad-main\tools\creek_00156.png')
dim = (688, 550)
resized_img = cv2.resize(img, dim, interpolation=cv2.INTER_AREA)
label = cv2.imread(r'C:\Users\63108\Desktop\GANav-offroad-main\data\rugd\RUGD_annotations\creek\creek_00156_group6.png')
label=coverLabelToGroup6(label)


# ganav_rugd_6 yure
config_file = r'C:\Users\63108\Desktop\GANav-offroad-main\trained_models\rugd_group6\ganav_rugd_6.py'
checkpoint_file = r'C:\Users\63108\Desktop\GANav-offroad-main\trained_models\rugd_group6\ganav_rugd_6.pth'
img1, time1 = deployNet(resized_img,config_file, checkpoint_file)
img1 = img1[..., ::-1]


# mogai_rugd6
config_file = r'C:\Users\63108\Desktop\GANav-offroad-main\work_dirs\mogai_rugd_6\mogai_rugd6.py'
checkpoint_file = r'C:\Users\63108\Desktop\GANav-offroad-main\work_dirs\mogai_rugd_6\best_mIoU_iter_104000.pth'
img2, time2 = deployNet(resized_img,config_file, checkpoint_file)
img2 = img2[..., ::-1]
# lpsnet
config_file = r'C:\Users\63108\Desktop\GANav-offroad-main\configs\lps-net\lpsnet.py'
checkpoint_file = r'C:\Users\63108\Desktop\GANav-offroad-main\work_dirs\lspnet_rugd6\best_mIoU_iter_28800.pth'
img3, time3 = deployNet(resized_img,config_file, checkpoint_file)
img3 = img3[..., ::-1]

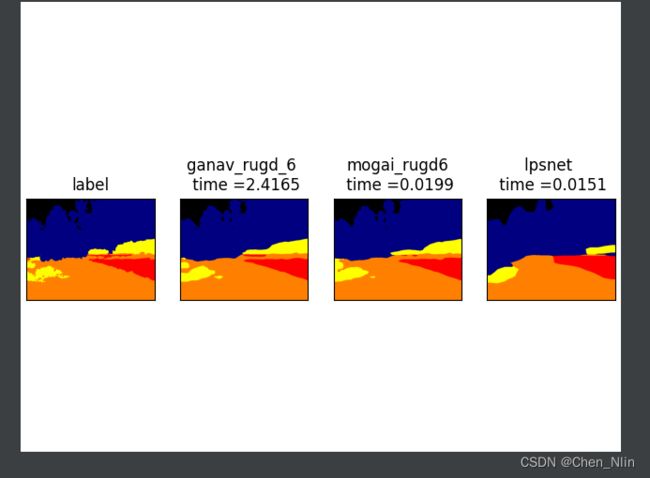
# 画对比图
plt.subplots_adjust(bottom=0, left=.01, right=.99, top=.90, hspace=.35)
plt.subplot(1,4,1)
plt.imshow(label)
plt.xticks(())
plt.yticks(())
plt.title("label")
plt.subplot(1,4,2)
plt.imshow(img1)
plt.xticks(())
plt.yticks(())
plt.title("ganav_rugd_6 \n time ={}".format(round(time1,4)))
plt.subplot(1,4,3)
plt.imshow(img2)
plt.xticks(())
plt.yticks(())
plt.title("mogai_rugd6\n time ={}".format(round(time2,4)))
plt.subplot(1,4,4)
plt.xticks(())
plt.yticks(())
plt.title("lpsnet \n time ={}".format(round(time3,4)))
plt.imshow(img3)
plt.show()

