HALCON双目三维重建实验
下面是标定双目并进行双目标定的halcon代码,我使用的图片分辨率太高了,所以笔记本无法运行,使用台式机测试成功,但是图片需要拍得比较好才行。这里进行了三维重建。标定图片省略。
不用理解代码的布置方式:总结一下三维重建的代码
当时的试验记录:
1,复制图片以及重命名的时候一定要对比一下顺序是否正确,如果重命名的时候出现顺序错乱,会出现calibrate_cameras报错,
如果单目采集完在标定助手下面运行没问题这里的标定一般也不会出问题。
2,两个图片路径需要注意,程序这里都使用了绝对路径
3,图片数量需要注意,多了没事少了会报错,最好修改
4,使用别的方式保存图片比如halcon的时候要注意大小和格式,要按照原分辨率大小和比例以及bmp格式保存,保存完后查看属性检查一下
5,现在低分辨率相机像素6.9um,距离0.3m,焦距16mm,光圈使用最大2.8,计算出来景深13.5913mm左右,如果距离0.6m,计算出来景深54.45mm
6,如果选择相机像素2.4um,距离0.6m,光圈最大2.8,焦距16mm,计算出来景深18.9047mm左右,如果光圈最小22,景深148.5mm.
7,生成相机内参矩阵的时候,像素点大小2.4需要注意
8,threshold函数里面这个值需要对应修改,可以设置断点,再看Z的范围,如果不在范围内会最后得到空的值,后面运行会报通道不对的错(重建)
9,两幅图像的光照对结果影响比较大,所以如果光照差距比较大,会出现无法匹配的结果(重建)
10,基线(两只相机的间距)对测量距离有影响,正相关
11,不适用于特征不明显的目标,会出现匹配不上的情况
12,建议提前计算一下景深,一方面熟悉公式,一方面不至于拍摄出一些问题
13,HALCON保存图片如果是“保存所有”,需要在英文路径下进行,默认保存为png格式
14,保存图片的时候注意是什么格式
15,角度比较大并且距离比较近的时候,可能会出现标志点对不上焦的问题
16,相机参数官网:https://www.hikrobotics.com/cn/machinevision/productdetail?id=2116&pageNumber=1&pageSize=50
17,镜头参数官网:https://www.hikrobotics.com/cn/machinevision/productdetail?id=7444&pageNumber=1&pageSize=50
18,计算景深网址:http://www.ooidea.com/tools/depth.html
代码如下:
*set_calib_data_calib_object (CalibDataID, 0, CalTabFile)
ImgPath := 'H:/multicam_rebuild/pic9_12/'
* Read the first images to get their size
Index := 1
read_image (ImageL, ImgPath + 'l' + Index$'02d')
read_image (ImageR, ImgPath + 'r' + Index$'02d')
* Reopen the windows with an appropriate size
dev_close_window ()
dev_update_off ()
get_image_size (ImageL, WidthL, HeightL)
dev_open_window (0, 0, WidthL, HeightL, 'black', WindowHandle1)
dev_set_draw ('margin')
dev_set_color ('green')
set_display_font (WindowHandle1, 14, 'mono', 'true', 'false')
get_image_size (ImageR, WidthR, HeightR)
dev_open_window (0, WidthL+10, WidthL, HeightL, 'black', WindowHandle2)
dev_set_draw ('margin')
dev_set_color ('green')

* Set the initial values for the internal camera parameters
gen_cam_par_area_scan_division (0.016, 0, 3.75e-6, 3.75e-6, WidthL / 2.0, HeightL / 2.0, WidthL, HeightL, StartCamParL)
StartCamParR := StartCamParL

* Read the model calibration points.
*create_caltab(26, 30, 0.003, [12, 4, 4, 20, 20], [14, 4, 24, 4, 24], 'light_on_dark', 'D:/教学/课程/机器人视觉技术/材料/caltab200.descr', 'D:/caltab200.ps')
CalTabFile := 'H:/multicam_rebuild/7mm.descr'

create_calib_data ('calibration_object', 2, 1, CalibDataID)
* Set the camera type used
set_calib_data_cam_param (CalibDataID, 0, [], StartCamParL)
set_calib_data_cam_param (CalibDataID, 1, [], StartCamParR)
* Set the calibration object
set_calib_data_calib_object (CalibDataID, 0, CalTabFile)
* Start the loop over the calibration images
* Set the optimization method to be used
set_calib_data (CalibDataID, 'model', 'general', 'optimization_method', 'nonlinear')


* Start the loop over the calibration images
for I := 1 to 12 by 1
    * Read and display the calibration images
    read_image (ImageL, ImgPath + 'l' + I$'02d')
    read_image (ImageR, ImgPath + 'r' + I$'02d')
    dev_set_window (WindowHandle1)
    dev_display (ImageL)
    dev_set_window (WindowHandle2)
    dev_display (ImageR)
    * Find the calibration plate and store observations
    * in the calibration data model
    find_calib_object (ImageL, CalibDataID, 0, 0, I, [], [])
    find_calib_object (ImageR, CalibDataID, 1, 0, I, [], [])
    * Visualize the extracted calibration marks and the
    * coordinate system defined by the estimated pose.

    visualize_observation_results (ImageL, CalibDataID, 0, I, WindowHandle1)
    visualize_observation_results (ImageR, CalibDataID, 1, I, WindowHandle2)
    wait_seconds (.2)
endfor
* Perform the actual calibration
calibrate_cameras (CalibDataID, Errors)
* Get the calibrated camera parameters
get_calib_data (CalibDataID, 'camera', 0, 'params', CamParamL)
get_calib_data (CalibDataID, 'camera', 1, 'params', CamParamR)
* Since the left camera is the reference camera for the
* calib data model, the pose of the right camera is its
* pose relative to the left camera
get_calib_data (CalibDataID, 'camera', 1, 'pose', cLPcR)
* Store the results into files. Here, you can either store the
* individual results
write_cam_par (CamParamL, 'cam_left-125.dat')
write_cam_par (CamParamR, 'cam_right-125.dat')
write_pose (cLPcR, 'pos_right2left.dat')
* or you store the complete camera setup model and thus enable
* the later access to all contained parameters
get_calib_data (CalibDataID, 'model', 'general', 'camera_setup_model', CameraSetupModelID)
write_camera_setup_model (CameraSetupModelID, 'stereo_camera_setup.csm')
* Generate the rectification maps
gen_binocular_rectification_map (MapL, MapR, CamParamL, CamParamR, cLPcR, 1, 'geometric', 'bilinear', RectCamParL, RectCamParR, CamPoseRectL, CamPoseRectR, RectLPosRectR)
* Read in a stereo image pair, acquired with the stereo camera system,
* which has been calibrated, just now.
read_image (ImageL, ImgPath + 'la_4')
read_image (ImageR, ImgPath + 'ra_4')
rgb1_to_gray(ImageL,ImageL)
rgb1_to_gray(ImageR,ImageR)

* Rectify the stereo images and display them
map_image (ImageL, MapL, ImageRectifiedL)
map_image (ImageR, MapR, ImageRectifiedR)
* Check the epipolar constraint on the rectified images,
* (the differences of the features' row coordinates should be small)
* and visualize the result (including some corresponding epipolar lines)
dev_close_window ()
dev_close_window ()
*get_image_size (ImageRectifiedL, WidthL, HeightL)
*上面这个因为把图像斜着摆放会放大窗口尺寸所以还是保持原状
dev_open_window (0, 0, WidthL, HeightL, 'white', WindowHandle1)
set_display_font (WindowHandle1, 11, 'mono', 'true', 'false')
dev_display (ImageRectifiedL)
disp_message (WindowHandle1, 'Left rectified image', 'window', 10, 10, 'black', 'true')
*
* Display the right recitified image
dev_open_window (0, WidthL + 10, WidthL, HeightL, 'white', WindowHandle2)
set_display_font (WindowHandle2, 11, 'mono', 'true', 'false')
dev_display (ImageRectifiedR)
disp_message (WindowHandle2, 'Right rectified image', 'window', 10, 10, 'black', 'true')
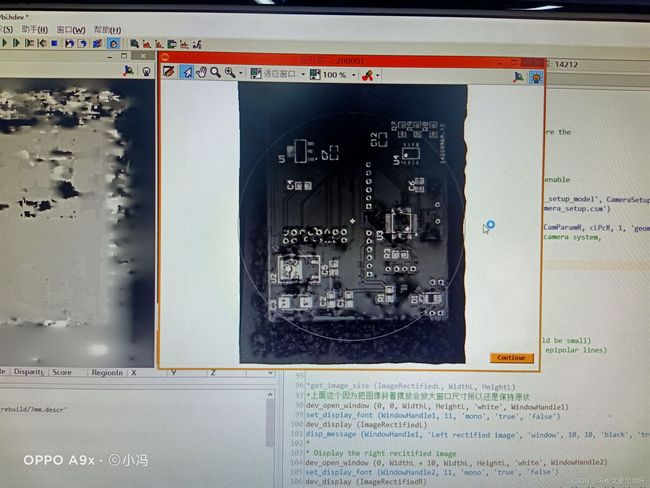
disp_continue_message (WindowHandle2, 'black', 'true')
stop ()
binocular_disparity (ImageRectifiedL, ImageRectifiedR, DisparityImage, Score, 'ncc', 17, 17, 5, 10, 40, 1, 0.1, 'left_right_check', 'none')
*
* Fill the gaps in the disparity image
get_domain (DisparityImage, RegionInpainting)
complement (RegionInpainting, RegionInpainting)
full_domain (DisparityImage, DisparityImage)
harmonic_interpolation (DisparityImage, RegionInpainting, DisparityImage, 0.001)
*
* Display the disparity image
dev_set_window (WindowHandle1)
dev_display (DisparityImage)
disp_message (WindowHandle1, 'Disparity image', 'window', 10, 10, 'black', 'true')
*
* Compute the 3D coordinates
* *******************************************
*
* Transform the disparity image into images X, Y and Z.
* The gray values in X, Y and Z represent the x, y, and z
* coordinates of the pixels (Row, Column).
disparity_image_to_xyz (DisparityImage, X, Y, Z, RectCamParL, RectCamParR, RectLPosRectR)
*
* Visualize the 3D points in the 3D space
* *******************************************
*
* Scale Z (for better visualization)
scale_image (Z, Z, 2, 0)
*
* Reduce impact of inaccuracies in visualization
threshold (Z, Regions, 0.3, 0.7)
reduce_domain (Z, Regions, ZThresholded)
*
* Add the gray values to the point cloud.
xyz_attrib_to_object_model_3d (X, Y, ZThresholded, ImageRectifiedL,'&gray', ObjectModel3D)
*
* Visualize the result
prepare_object_model_3d (ObjectModel3D, 'segmentation', 'true', 'max_area_holes', 100)
create_pose (-0.05, -0.45, 1.7, 300, 12, 180, 'Rp+T', 'gba', 'point', Pose)
visualize_object_model_3d (WindowHandle2, ObjectModel3D, [], Pose, 'color_attrib', '&gray', [], [], [], PoseOut)
clear_object_model_3d (ObjectModel3D)
视差图:

