Python numpy函数与矩阵
Python numpy函数与矩阵
1. 一维矩阵
使用函数说明:
numpy.ones() 函数返回给定形状大小的数组,其中元素的值设置为1。
numpy.shape() 函数返矩阵或者数组的维数。
>>> a=np.ones(3) //生成了一维矩阵,长度为3
>>> a
array([1., 1., 1.])
//元素的默认数据类型为float。 这就是数组中1.的原因

>>> a.shape
(3,)
>>> np.shape(a) //两种方式使用shape函数
(3,)
>>> a.shape[0]  //读取矩阵第一维度的长度
3
一维矩阵作为最简单的结构,矩阵内部是由单一的数组成,如a[1],b[2],c[3]…
2. 二维矩阵
首先观察此例
>>> b=np.ones((3,0)) //生成二维矩阵,一维度长度为3,二维度长度为0
>>> b
array([], shape=(3, 0), dtype=float64)
>>> b.shape
(3, 0)


>>> c=np.ones((3))  //生成二维矩阵,一维度长度为3,二维度默认长度为0
>>> c
array([1., 1., 1.]) //结果与a一样,但是通过shape可见维度数不同
>>> c.shape
(3,)

>>> e=np.ones((3,2))
>>> e
array([[1., 1.],
      [1., 1.],
      [1., 1.]])
从上例可见,在python中,维度数根据“[]”的层数进行确定
二维矩阵,不再是单一的数值,而是一个个有序实数对,在几何上则对应二维平面上的点。如a[1][2],b[3][4]…
3. 三维矩阵
>>> d=np.ones(((1,2,3)))
>>> d
array([[[1., 1., 1.],
       [1., 1., 1.]]])
对于一个有m*n个像素的图片,表示为三维矩阵就是(m, n, 3),其中m表示高,n表示宽,3表示该元素的RGB色彩值
补充: 可以通过reshape函数转换矩阵维度
>>> np.reshape(b,(1,2,3))
array([[[1., 1., 1.],
       [1., 1., 1.]]])
矩阵转换成图片
from PIL import Image
import numpy as np
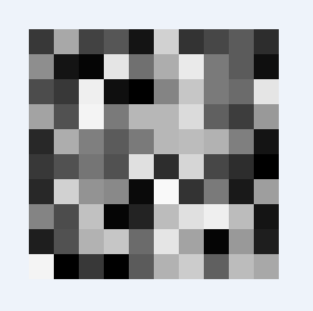
narry=np.random.randint(0,50,(10,10))
#生成一个数组,维度为100*100
#narry=np.array([range(10000)],dtype='int')
#narry=narry.reshape([100,100])
#调用Image库,数组归一化
img=Image.fromarray(narry*255.0/50)
#转换成灰度图
#img=img.convert('L')
#可以调用Image库下的函数了,比如show()
img.show()
print (narry)
结果1
[[ 0  1  2  3  4  5  6  7  8  9]
 [10 11 12 13 14 15 16 17 18 19]
 [20 21 22 23 24 25 26 27 28 29]
 [30 31 32 33 34 35 36 37 38 39]
 [40 41 42 43 44 45 46 47 48 49]
 [50 51 52 53 54 55 56 57 58 59]
 [60 61 62 63 64 65 66 67 68 69]
 [70 71 72 73 74 75 76 77 78 79]
 [80 81 82 83 84 85 86 87 88 89]
 [90 91 92 93 94 95 96 97 98 99]]

结果2
[[11 33 13 17  4 41 10 14 18  9]
 [28  4  1 45 22 34 46 24 18  3]
 [15 11 47  3  0 26 39 24 21 45]
 [32 16 48 24 36 36 43 19 12 30]
 [ 8 34 25 18 24 36 37 35 25  4]
 [11 16 23 16 44  9 42 14  9  0]
 [ 8 41 29 27  2 49 10 24  5 31]
 [26 15 38  1  7 37 44 47 37  4]
 [ 6 16 35 39 21 45 32  1 30  6]
 [48  0 11  0 18 35 40 19 37 33]]
图片转换成矩阵
// coding=gbk
from PIL import Image
import numpy as np
// import scipy
import matplotlib.pyplot as plt

def ImageToMatrix(filename):
    // 读取图片
    im = Image.open(filename)

    width,height = im.size
    im = im.convert("L") //转换成灰度图
    data = im.getdata()
    data = np.matrix(data,dtype='float')/255.0
    #new_data = np.reshape(data,(width,height))
    new_data = np.reshape(data,(height,width))
    print (new_data)
    return new_data
//     new_im = Image.fromarray(new_data)
//      显示图片
//     new_im.show()
def MatrixToImage(data):
    data = data*255
    new_im = Image.fromarray(data.astype(np.uint8))
    return new_im

filename = 'C:/Users/Troye Sivan/Desktop/123.jpg'
data = ImageToMatrix(filename)
new_im = MatrixToImage(data)
plt.imshow(data, cmap=plt.cm.gray, interpolation='nearest')
new_im.show()
new_im.save('123.bmp')
结果


from PIL import Image
import numpy as np
生成三维数组
narry=np.random.random((3,1,1))

#调用Image库,数组归一化
img=Image.fromarray(narry*255.0/50)
#转换成灰度图
#img=img.convert('L')
#可以调用Image库下的函数了,比如show()
img.show()

print (narry)
