计算机视觉框架OpenMMLab开源学习(五):目标检测实战
✨写在前面:强烈推荐给大家一个优秀的人工智能学习网站,内容包括人工智能基础、机器学习、深度学习神经网络等,详细介绍各部分概念及实战教程,通俗易懂,非常适合人工智能领域初学者及研究者学习。➡️点击跳转到网站。
目标检测实战
前言:本篇主要偏向目标检测实战部分,使用MMDetection工具进行代码应用,最后对水果进行检测实战演示,本次环境和代码配置部分省略,具体内容建议参考前一篇文章:
计算机视觉框架OpenMMLab开源学习(四):目标检测基础
本节内容:
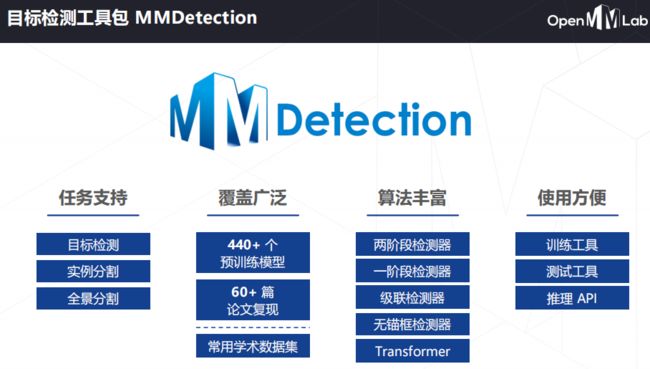
MMDetection项目概览
MMDetection运行环境搭建
使用MMDetection进行模型推理
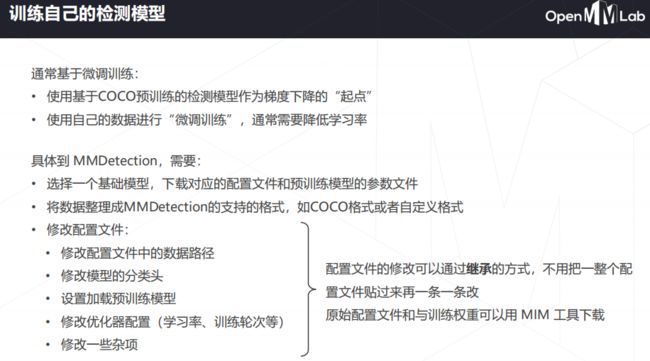
使用MMDetection训练模型,检测图像中水果
一、MMDetection介绍:
MMDetection 3.0.0rc5 文档
二、项目实战
步骤 1. 使用 MIM 安装 MMEngine 和 MMCV。
pip install -U openmim
mim install mmengine
mim install "mmcv>=2.0.0rc1" 步骤 #注意这里的mmcv是2.x
步骤 2. 安装 MMDetection
git clone https://github.com/open-mmlab/mmdetection.git -b 3.x # "-b 3.x"表示切换到 `3.x` 分支。
cd mmdetection
pip install -v -e .
# "-v" 指详细说明,或更多的输出 # "-e" 表示在可编辑模式下安装项目,因此对代码所做的任何本地修改都会生效,从而无需重新安装。
验证安装
步骤 1. 下载配置文件和模型权重文件。
mim download mmdet --config yolov3_mobilenetv2_8xb24-320-300e_coco --dest .下载完成后在当前文件夹中发现两个文件 yolov3_mobilenetv2_8xb24-320-300e_coco.py 和 yolov3_mobilenetv2_320_300e_coco_20210719_215349-d18dff72.pth。
步骤 2. 推理验证
方案 a:如果你通过源码安装的 MMDetection,那么直接运行以下命令进行验证:
python demo/image_demo.py demo/demo.jpg \
       yolov3_mobilenetv2_8xb24-320-300e_coco.py \
       yolov3_mobilenetv2_320_300e_coco_20210719_215349-d18dff72.pth \
       --device cpu --out-file result.jpg
在当前文件夹中看到一个新的图像 result.jpg,图像中包含有网络预测的检测框。
可视化图片和预测结果
mmdet3.x引入visualizer, 使用前需要配合模型先注册再使用(model.cfg.visualizer),且对于一个模型,只要注册一次就行了,注册多个visualizer实例会有报错
from mmdet.registry import VISUALIZERS

# Init visualizer
visualizer = VISUALIZERS.build(model.cfg.visualizer)
# The dataset_meta is loaded from the checkpoint and
# then pass to the model in init_detector
visualizer.dataset_meta = model.dataset_meta
# Test a single image and show the results

# Show the results
visualizer.add_datasample(
    'result',
    img,
    data_sample=result,
    draw_gt=False,
    show=True)
# visualizer.show()
测试视频: 使用相同的模型和展示结果
同样的,这个可视化也是很依赖model的,model.cfg.test_dataloader.dataset.pipeline , 需要进行一定的配置来建立pipeline
result = inference_detector(model, frame, test_pipeline=test_pipeline) 这一行其实和对单张图片的检测是一样的,frame是一帧,可以看为一张图片,只不过多了 test_pipeline
import cv2
from mmcv.transforms import Compose
from mmengine.utils import track_iter_progress

# Test a video and show the results
# Build test pipeline
model.cfg.test_dataloader.dataset.pipeline[0].type = 'LoadImageFromNDArray'
test_pipeline = Compose(model.cfg.test_dataloader.dataset.pipeline)

# # Init visualizer
# visualizer = VISUALIZERS.build(model.cfg.visualizer)
# # The dataset_meta is loaded from the checkpoint and
# # then pass to the model in init_detector
visualizer.dataset_meta = model.dataset_meta

# The interval of show (s), 0 is block
wait_time = 1

video_reader = mmcv.VideoReader('demo/demo.mp4')

cv2.namedWindow('video', 0)

for frame in track_iter_progress(video_reader):
    result = inference_detector(model, frame, test_pipeline=test_pipeline)
    visualizer.add_datasample(
        name='video',
        image=frame,
        data_sample=result,
        draw_gt=False,
        show=False)
    frame = visualizer.get_image()
    mmcv.imshow(frame, 'video', wait_time)

cv2.destroyAllWindows()
未更完!!!!


