Python+ChatGPT制作一个AI实用百宝箱
目录
- 一、注册OpenAI
-
- 二、搭建网站及其框架
-
- 三、AI聊天机器人
-
- 四、AI绘画机器人
ChatGPT 最近在互联网掀起了一阵热潮,其高度智能化的功能能够给我们现实生活带来诸多的便利,可以帮助你写文章、写报告、写周报、做表格、做策划甚至还会写代码。只要与文字相关的工作,它几乎都能给出一份满意的答卷。
一、注册OpenAI
首先需要注册OpenAI,这样就可以使用ChatGPT
二、搭建网站及其框架
那么这里我们需要用到这几个库,用pip命令来下载
# 安装streamlit和openai
pip install -i https://pypi.tuna.tsinghua.edu.cn/simple streamlit
pip install -i https://pypi.tuna.tsinghua.edu.cn/simple streamlit_option_menu
pip install -i https://pypi.tuna.tsinghua.edu.cn/simple openai
那么首先网页的左侧有一个工具栏,其中罗列了一系列的功能,我们这里简单的囊括了几个,包括了“简介”、“AI聊天”、“AI绘画”,大家感兴趣的后期可以继续往里面添加,例如“AI配音”,代码如下
with st.sidebar:
    choose = option_menu("工具栏", ["简介","AI聊天", "AI绘画"],
                         icons=['house', 'person lines fill', 'app-indicator'],
                         menu_icon="list", default_index=0,
                         styles={
                             "container": {"padding": "5!important", "background-color": "#fafafa"},
                             "icon": {"color": "orange", "font-size": "25px"},
                             "nav-link": {"font-size": "16px", "text-align": "left", "margin": "0px",
                                          "--hover-color": "#eee"},
                             "nav-link-selected": {"background-color": "#24A608"},
                         }
                         )
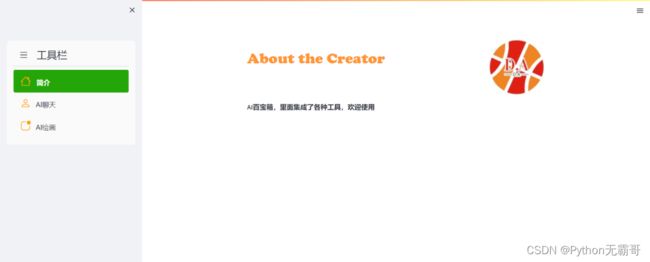
那么在“简介”这一栏当中,顾名思义就是对该网页简单的介绍,我们简单的写一些介绍,代码如下
if choose == "简介":
col1, col2 = st.columns([0.8, 0.2])
with col1: # To display the header text using css style
st.markdown(""" """, unsafe_allow_html=True)
st.markdown('About the Creator
', unsafe_allow_html=True)
with col2: # To display brand log
logo = Image.open("wechat_logo.jpg")
st.image(logo, width=130)
st.markdown('**AI百宝箱,里面集成了各种工具,欢迎使用**')
三、AI聊天机器人
那么首先我们需要在个人设置里面去获取一个秘钥,
然后选择一个模型,这里我们选择text-davinci-003模型,相比其他而言,性能更好,然后我们调用OpenAI里面的方法来生成回答
def ChatGPT(user_query):
    completion = openai.Completion.create(
        engine=model_engine,
        prompt=user_query,
        max_tokens=1024,
        n=1,
        temperature=0.5,
    )
    response = completion.choices[0].text
    return response
然后我们调用该函数结合streamlit当中的输入框,代码如下
elif choose == "AI聊天":
    st.title("AI聊天机器人")
    # 设置密匙
    model_engine = "text-davinci-003"

    def ChatGPT(user_query):
        completion = openai.Completion.create(
            engine=model_engine,
            prompt=user_query,
            max_tokens=1024,
            n=1,
            temperature=0.5,
        )
        response = completion.choices[0].text
        return response

    user_query = st.text_input("在这里输入问题,回车查询", "Python是什么?")
    if user_query != ":q" or user_query != "":
        # 将问题提交给ChatGPT, 返回结果
        response = ChatGPT(user_query)
        st.write(f"{response}")
四、AI绘画机器人
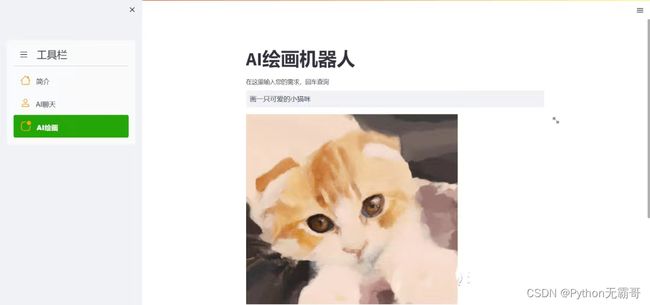
而在“AI绘画”的模块中,代码逻辑也是相类似的,这边需要调用与绘画相关的API,代码如下
def image_generate(user_demand):
    completion = openai.Image.create(
        prompt=user_demand,
        n=2,
        size="1024x1024"
    )
    response = completion.get("data")
    return response[0].get("url")
由于返回给我们的是一个URL,因此还需要保存到本地,然后再通过Image模块打开,代码如下
image_url = image_generate(user_query)
response = requests.get(image_url, stream=True)
try:
    with open("./image/01.png", 'wb') as f:
        for chunk in response:
            f.write(chunk)
        f.close()
        print("Download done!!")
except Exception as e:
    print(e)
  #Python交流群:748989764
img1 = Image.open(r'./image/01.png')
st.image(img1, width=500, caption='Image by OpenAI')
最后就可以在终端运行下面的代码了,
streamlit run example.py
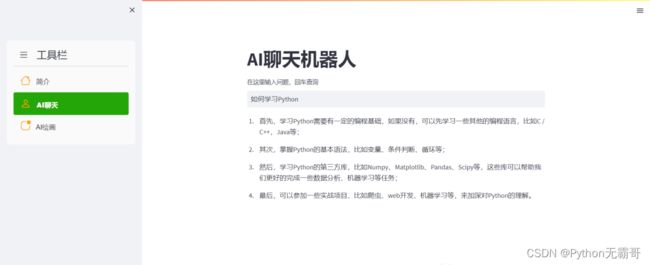
我们在浏览器中打开页面,例如我们点击进入“AI聊天”这个模块,我们可以看到右上角处于RUNNING的状态,表示正在运行中,等会儿之后就能看到结果


