原生嵌入flutter模块(ios篇)
方式一:需要xcode 、cocopad 、flutter
同级目录下:
iOS项目:MyApp 子目录 Podfile文件
flutter模块:flutter create --template module my_flutter
Podfile文件
platform:ios,'11.0'

flutter_application_path = '../my_flutter'
load File.join(flutter_application_path, '.ios', 'Flutter', 'podhelper.rb')

post_install do |installer|
  flutter_post_install(installer) if defined?(flutter_post_install)
end

target 'MyApp' do
  install_all_flutter_pods(flutter_application_path)
end
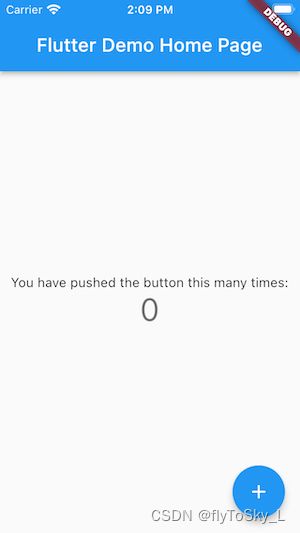
在flutter module下执行flutter run,可运行demo
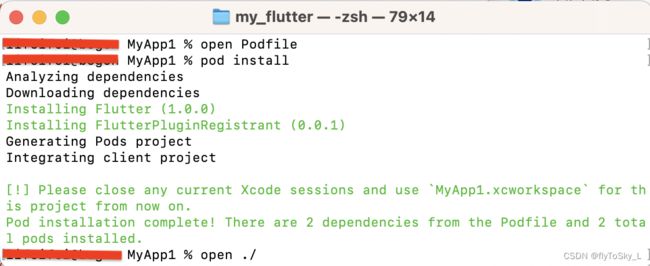
在 Xcode项目下执行 pod install,效果如下
iOS代码启动flutter页面:
swift代码
import UIKit
import FlutterPluginRegistrant

@main
class AppDelegate: UIResponder, UIApplicationDelegate {

//    lazy var flutterEngine = FlutterEngine(name: "my flutter engine")

    func application(_ application: UIApplication, didFinishLaunchingWithOptions launchOptions: [UIApplication.LaunchOptionsKey: Any]?) -> Bool {
        // Override point for customization after application launch.
//        flutterEngine.run()
        return true
    }


}
import UIKit
import Flutter

class ViewController: UIViewController {

    lazy var flutterEngine = FlutterEngine(name: "my flutter engine")
    override func viewDidLoad() {
        super.viewDidLoad()
        view.backgroundColor = UIColor.green

        // Do any additional setup after loading the view.
    }
    override func touchesBegan(_ touches: Set, with event: UIEvent?) {
//        let flutterEngine = (UIApplication.shared.delegate as! AppDelegate).flutterEngine
//
        flutterEngine.run()
        let flutterViewController = FlutterViewController.init(engine: flutterEngine, nibName: nil, bundle: nil)
//        let flutterViewController = FlutterViewController(project: nil, nibName: nil, bundle: nil)需要在 AppDelegate 中代码 实现 flutterEngine
        flutterViewController.view.backgroundColor = .cyan
        present(flutterViewController, animated: true, completion: nil)

    }


}
oc代码:
#import "ViewController.h"
#import
@interface ViewController ()
{
    FlutterEngine *_eng;
}
@end

@implementation ViewController

- (void)viewDidLoad {
    [super viewDidLoad];
    // Do any additional setup after loading the view.
    self.view.backgroundColor = [UIColor redColor];
}
-(void)touchesBegan:(NSSet *)touches withEvent:(UIEvent *)event{
    _eng = [[FlutterEngine alloc]initWithName:@"my flutter module"];
    [_eng run];
    FlutterViewController *vc = [[FlutterViewController alloc]initWithEngine:_eng nibName:nil bundle:nil];
    vc.view.backgroundColor = [UIColor blueColor];
    [self presentViewController:vc animated:YES completion:nil];
}

@end
方式二:通过framework,xocde 即可,不需要flutter、cocopad
仍是同级目录
iOS项目:MyApp 子目录 不需要Podfile文件
flutter模块:flutter create --template module my_flutter,执行flutter run 可见页面正常运行
在flutter目录下执行 flutter build ios-framework --output=/xxx/MyApp/Flutter
可见MyApp新增如下目录结构:
MyApp
  └── Flutter/
        ├── Debug/
        │   ├── Flutter.xcframework
        │   └── App.xcframework
        ├── Profile/
        │   ├── Flutter.xcframework
        │   └── App.xcframewor
        └── Release/
            ├── Flutter.xcframework
            └── App.xcframewor
在MyApp中,进行配置
- 拉入FlutterApp ,MyApp——Target——General——Frameworks,Libraries,and Embedded Content + 添加
- App.xcframework
- Flutter.xcframework
- MyApp——Target——Build Setting —— Other Librarian Flags 添加
- "$(SRCROOT)/Flutter/$(CONFIGURATION)/App.xcframework"
- "$(SRCROOT)/Flutter/$(CONFIGURATION)/Flutter.xcframework"
- MyApp——Target——Build Setting —— Frameworks Search Paths 添加
- $(PROJECT_DIR)/Flutter/$(CONFIGURATION)
代码:
import UIKit
import Flutter

class ViewController: UIViewController {
    lazy var flutterEngine = FlutterEngine(name: "my flutter module")
    override func viewDidLoad() {
        super.viewDidLoad()
        // Do any additional setup after loading the view.
        view.backgroundColor = UIColor.yellow
        flutterEngine.run()
    }

    override func touchesBegan(_ touches: Set, with event: UIEvent?) {
//        let eng = FlutterEngine.init(name: "my flutter module")
//        eng.run()
        let vc = FlutterViewController.init(engine: flutterEngine, nibName: nil, bundle: nil)
        vc.view.backgroundColor = UIColor.cyan
        present(vc, animated: true, completion: nil)

    }
} 方法三:通过Flutter.podspec 嵌入flutter框架
步骤同方法一类似,但是不再是导出framework。
在my_flutter目录下执行“()”部分可不添加,
flutter build ios-framework --cocoapods (--xcframework --no-universal ) --output=../MyApp/Flutter/
导出目录如下图结构所示:
MyApp
  └── Flutter/
        ├── Debug/
        │   ├── Flutter.podspec
        │   └── App.xcframework
        ├── Profile/
        │   ├── Flutter.podspec
        │   └── App.xcframewor
        └── Release/
            ├── Flutter.podspec
            └── App.xcframewor
在MyApp的Podfile文件中添加:
pod 'Flutter', :podspec => './Flutter/Debug/Flutter.podspec'
并在,MyApp——Target——General——Frameworks,Libraries,and Embedded Content + 添加
App.xcframework即可
这里如果遇到提示--cocoapods 报错
--cocoapods is only supported on the dev, beta, or stable channels. Detected version is xxxx-pre.xxx
切换flutter,
flutter切换命令:
查看 :flutter channel
切换到beta: flutter channel beta
此外,模拟器不能进行Release 运行,因为dart目前不支持
Your app does not run on a simulator in Release mode because Flutter does not yet support outputting x86/x86_64 ahead-of-time (AOT) binaries for your Dart code. You can run in Debug mode on a simulator or a real device, and Release on a real device.
总结:方法一是podhelper.rb 脚本会把你的 plugins, Flutter.framework,和 App.framework 集成到你的项目中,这里需要flutter环境和cocoapods的依赖,每次更改Flutter plugin,需要在flutter module下执行flutter pub get ,再在MyApp目录下pod install ;方法二是将flutter module 以framework形式添加到项目中,这里不需要flutter环境、cocoapods的依赖,每次变动flutter module 代码,都需要更新framework;方法三,介于方法一和方法二之间,方法三不需要flutter环境,但需要cocoapods管理项目,flutter module 变动,需要更新Flutter.podspec。