Springmvc拦截器实现用户登录权限验证
实现用户登录权限验证
先看一下我的项目的目录,我是在intellij idea 上开发的

1、先创建一个User类
package cn.lzc.po;

public class User {
    private Integer id;//id
    private String username;//用户名
    private String password;//密码

    public Integer getId() {
        return id;
    }

    public void setId(Integer id) {
        this.id = id;
    }

    public String getUsername() {
        return username;
    }

    public void setUsername(String username) {
        this.username = username;
    }

    public String getPassword() {
        return password;
    }

    public void setPassword(String password) {
        this.password = password;
    }
}
`
2、创建一个UserController类
 package cn.lzc.controller;

import cn.lzc.po.User;
import org.springframework.stereotype.Controller;
import org.springframework.ui.Model;
import org.springframework.web.bind.annotation.RequestMapping;
import org.springframework.web.bind.annotation.RequestMethod;

import javax.servlet.http.HttpSession;

@Controller
public class UserController {
    /**
     * 向用户登录页面跳转
     */
    @RequestMapping(value = "/login",method = RequestMethod.GET)
    public String toLogin(){
        return  "login";
    }

    /**
     * 用户登录
     * @param user
     * @param model
     * @param session
     * @return
     */
    @RequestMapping(value = "/login",method = RequestMethod.POST)
    public String login(User user, Model model, HttpSession session){
        //获取用户名和密码
        String username=user.getUsername();
        String password=user.getPassword();
        //些处横板从数据库中获取对用户名和密码后进行判断
        if(username!=null&&username.equals("admin")&&password!=null&&password.equals("admin")){
            //将用户对象添加到Session中
            session.setAttribute("USER_SESSION",user);
            //重定向到主页面的跳转方法
            return "redirect:main";
        }
        model.addAttribute("msg","用户名或密码错误,请重新登录!");
        return "login";
    }

    @RequestMapping(value = "/main")
    public String toMain(){
        return "main";
    }

    @RequestMapping(value = "/logout")
    public String logout(HttpSession session){
        //清除session
        session.invalidate();
        //重定向到登录页面的跳转方法
        return "redirect:login";
    }

}
3、创建一个LoginInterceptor类
package cn.lzc.interceptor;

import cn.lzc.po.User;
import org.springframework.web.servlet.HandlerInterceptor;
import org.springframework.web.servlet.ModelAndView;

import javax.servlet.http.HttpServletRequest;
import javax.servlet.http.HttpServletResponse;
import javax.servlet.http.HttpSession;

public class LoginInterceptor implements HandlerInterceptor {

    @Override
    public boolean preHandle(HttpServletRequest request, HttpServletResponse response, Object o) throws Exception {
        //获取请求的RUi:去除http:localhost:8080这部分剩下的
        String uri = request.getRequestURI();
        //UTL:除了login.jsp是可以公开访问的,其他的URL都进行拦截控制
        if (uri.indexOf("/login") >= 0) {
            return true;
        }
        //获取session
        HttpSession session = request.getSession();
        User user = (User) session.getAttribute("USER_SESSION");
        //判断session中是否有用户数据,如果有,则返回true,继续向下执行
        if (user != null) {
            return true;
        }
        //不符合条件的给出提示信息,并转发到登录页面
        request.setAttribute("msg", "您还没有登录,请先登录!");
        request.getRequestDispatcher("/WEB-INF/jsp/login.jsp").forward(request, response);
        return false;
    }

    @Override
    public void postHandle(HttpServletRequest httpServletRequest, HttpServletResponse httpServletResponse, Object o, ModelAndView modelAndView) throws Exception {

    }

    @Override
    public void afterCompletion(HttpServletRequest httpServletRequest, HttpServletResponse httpServletResponse, Object o, Exception e) throws Exception {

    }
}
4、看一下springmvc-config.xml中配置的拦截器
<?xml version="1.0" encoding="UTF-8"?>
<beans xmlns="http://www.springframework.org/schema/beans"
xmlns:xsi="http://www.w3.org/2001/XMLSchema-instance"
xmlns:tx="http://www.springframework.org/schema/tx"
xmlns:context="http://www.springframework.org/schema/context"
xmlns:mvc="http://www.springframework.org/schema/mvc"
xsi:schemaLocation="http://www.springframework.org/schema/beans
http://www.springframework.org/schema/beans/spring-beans-3.2.xsd
http://www.springframework.org/schema/tx
http://www.springframework.org/schema/tx/spring-tx-3.2.xsd
http://www.springframework.org/schema/context
http://www.springframework.org/schema/context/spring-context-3.2.xsd
http://www.springframework.org/schema/mvc
http://www.springframework.org/schema/mvc/spring-mvc-3.2.xsd">
<!--定义组件扫描包-->
<context:component-scan base-package="cn.lzc.controller"/>
<!--配置器处理器映射器,配置处理器适配器-->
<mvc:annotation-driven/>
<!--定义视图解析器-->
<bean id="viewResolver" class="org.springframework.web.servlet.view.InternalResourceViewResolver">
<property name="prefix" value="/WEB-INF/jsp/"/>
<property name="suffix" value=".jsp"/>
</bean>
<!--配置拦截器-->
<mvc:interceptors>
<!-- <bean class="cn.lzc.interceptor.CustomInterceptor"></bean>--><!--拦截所有请求-->
<!-- <mvc:interceptor>
<mvc:mapping path="/**"/>
<mvc:exclude-mapping path="/" /><<!–配置了mapping 这个 将不再起作用–>
<bean class="cn.lzc.interceptor.CustomInterceptor"></bean>
</mvc:interceptor>-->
<!--<mvc:interceptor>-->
<!--<mvc:mapping path="/hello" /><!–配置拦截hello结尾的–>-->
<!--<bean class="cn.lzc.interceptor.CustomInterceptor"/>-->
<!--</mvc:interceptor>-->
<!--登录拦截器-->
<mvc:interceptor>
<mvc:mapping path="/**"/>
<bean class="cn.lzc.interceptor.LoginInterceptor"/>
</mvc:interceptor>
</mvc:interceptors>
</beans>
5、看下web.xml的配置
<?xml version="1.0" encoding="UTF-8"?>
<web-app xmlns="http://xmlns.jcp.org/xml/ns/javaee"
         xmlns:xsi="http://www.w3.org/2001/XMLSchema-instance"
         xsi:schemaLocation="http://xmlns.jcp.org/xml/ns/javaee http://xmlns.jcp.org/xml/ns/javaee/web-app_4_0.xsd"
         version="4.0">
    <!--配置编码过滤器-->
    <filter>
        <filter-name>CharacterEncodingFilter</filter-name>
        <filter-class>org.springframework.web.filter.CharacterEncodingFilter</filter-class>
        <init-param>
            <param-name>encoding</param-name>
            <param-value>utf-8</param-value>
        </init-param>
    </filter>
    <filter-mapping>
        <filter-name>CharacterEncodingFilter</filter-name>
        <url-pattern>/*


        springmvc
        org.springframework.web.servlet.DispatcherServlet

            contextConfigLocation
            classpath:springmvc-config.xml

        1


        springmvc
        /
6、WEB-INF目录下的main.jsp
<%--
  Created by IntelliJ IDEA.
  User: admin
  Date: 2018-04-07
  Time: 13:02
  To change this template use File | Settings | File Templates.
--%>
<%@ page contentType="text/html;charset=UTF-8" language="java" %>
<html>
<head>
    <title>系统主页</title>
</head>
<body>
    当前用户:${USER_SESSION.username}
    <a href="${pageContext.request.contextPath}/logout">退出</a>
</body>
</html>
7、WEB-INF目录下的login.jsp
<%--
Created by IntelliJ IDEA.
User: admin
Date: 2018-04-07
Time: 13:04
To change this template use File | Settings | File Templates.
--%>
<%@ page contentType="text/html;charset=UTF-8" language="java" %>
<html>
<head>
<title>用户登录</title>
</head>
<body>
${msg}
<form action="${pageContext.request.contextPath}/login" method="post">
用户名:<input type="text" name="username"><br>
密 码:
<input type="password" name="password"><br>
<input type="submit" value="登录">
</form>
</body>
</html>
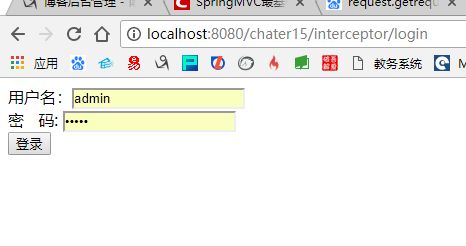
8、启动tomcat,可以访问了 http://localhost:8080/chater15/interceptor/login

