快速创建springboot+springcloud项目(nacos,seata,sentinel,gateway,openfeign)
一、创建一个maven项目
1.file->new->project

2.创建maven项目

3.删除src文件夹

4.在pom.xml文件中引入springboot和cloudAlibaba依赖
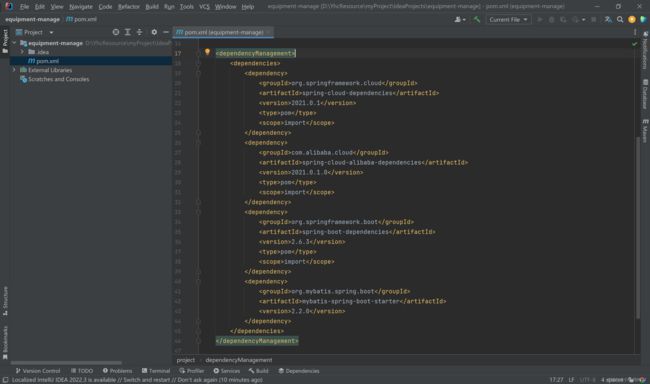
<dependencyManagement>
        <dependencies>
            <dependency>
                <groupId>org.springframework.cloud</groupId>
                <artifactId>spring-cloud-dependencies</artifactId>
                <version>2021.0.1</version>
                <type>pom</type>
                <scope>import</scope>
            </dependency>
            <dependency>
                <groupId>com.alibaba.cloud</groupId>
                <artifactId>spring-cloud-alibaba-dependencies</artifactId>
                <version>2021.0.1.0</version>
                <type>pom</type>
                <scope>import</scope>
            </dependency>
            <dependency>
                <groupId>org.springframework.boot</groupId>
                <artifactId>spring-boot-dependencies</artifactId>
                <version>2.6.3</version>
                <type>pom</type>
                <scope>import</scope>
            </dependency>
            <dependency>
                <groupId>org.mybatis.spring.boot</groupId>
                <artifactId>mybatis-spring-boot-starter</artifactId>
                <version>2.2.0</version>
            </dependency>
        </dependencies>
    </dependencyManagement>
注意:这里springboot和springcloud版本号要相匹配
不清楚可以去官网官网查询

二、创建公共服务(manage-common)
用于放置其他微服务共同的文件资源以及工具类
1.项目名右键->new->Module


2.引入公共依赖
根据自己情况而定
	<dependencies>

		<dependency>
            <groupId>org.springframework.boot</groupId>
            <artifactId>spring-boot-starter</artifactId>
        </dependency>

        <dependency>
            <groupId>org.springframework.boot</groupId>
            <artifactId>spring-boot-starter-web</artifactId>
        </dependency>
        <dependency>
            <groupId>org.mybatis.spring.boot</groupId>
            <artifactId>mybatis-spring-boot-starter</artifactId>
        </dependency>
		<dependency>
            <groupId>org.projectlombok</groupId>
            <artifactId>lombok</artifactId>
            <version>1.18.22</version>
        </dependency>

        <dependency>
            <groupId>mysql</groupId>
            <artifactId>mysql-connector-java</artifactId>
            <version>8.0.27</version>
        </dependency>
        <dependency>
            <groupId>org.mybatis.spring.boot</groupId>
            <artifactId>mybatis-spring-boot-starter</artifactId>
        </dependency>

        <dependency>
            <groupId>com.alibaba</groupId>
            <artifactId>fastjson</artifactId>
            <version>1.2.78</version>
        </dependency>
    </dependencies>

三、创建一个微服务(manage-system)
1.步骤和创建common公共服务一样

2.引入起步依赖和公共服务

	<dependencies>
        <dependency>
            <groupId>org.example</groupId>
            <artifactId>manage-common</artifactId>
            <version>1.0-SNAPSHOT</version>
        </dependency>
    </dependencies>
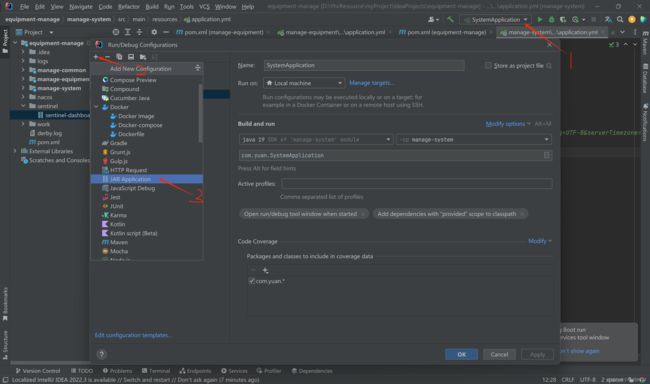
3.创建启动类
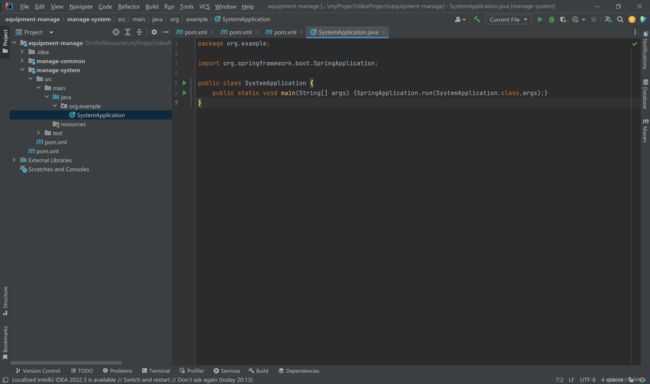
引入启动类依赖@SpringBootApplication

4.创建配置文件,根据自己项目进行完善内容

5.创建contoller,service,mapper等文件及代码实现业务

6.运行这个微服务
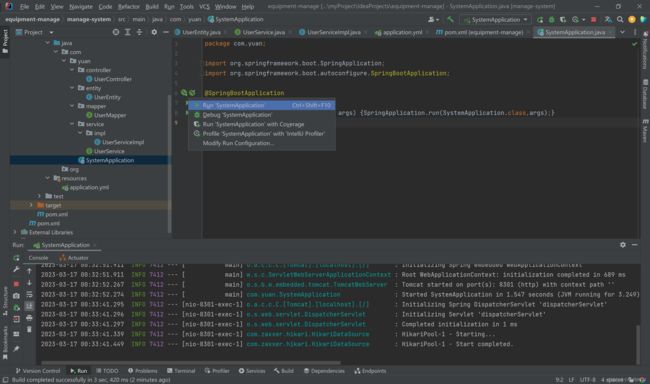
7.随便访问一个该微服务的接口,调用成功即可

四、创建另一个微服务(manage-equipment)


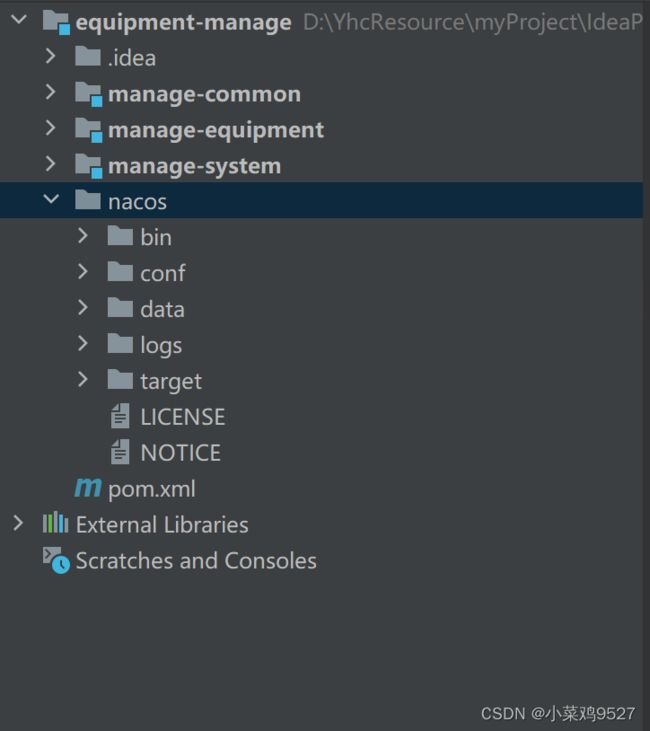
五、创建和配置nacos服务
1.下载并将nacos文件加入项目中

2.添加nacos运行配置


3.运行nacos服务(run),并访问首页

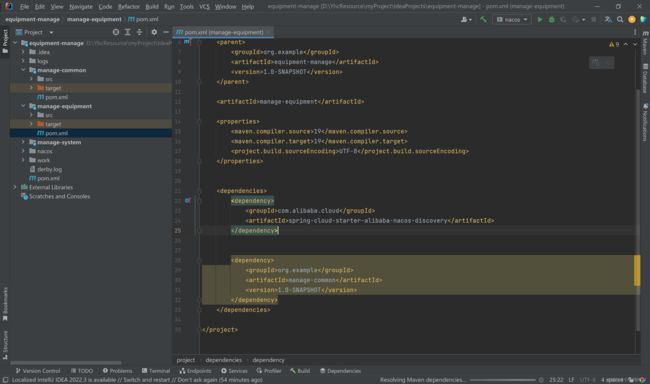
4.在需要用到nacos的服务中引入依赖(manage-equipment,manage-system)
<dependency>
    <groupId>com.alibaba.cloud</groupId>
    <artifactId>spring-cloud-starter-alibaba-nacos-discovery</artifactId>
</dependency>
5.在对应服务的application.yml文件中增加配置
  cloud:
    nacos:
      discovery:
        # 配置Nacos注册中心地址
        server-addr: localhost:8848

6.启动相关服务后在nacos查看是否成功注册

7.配置管理,创建配置
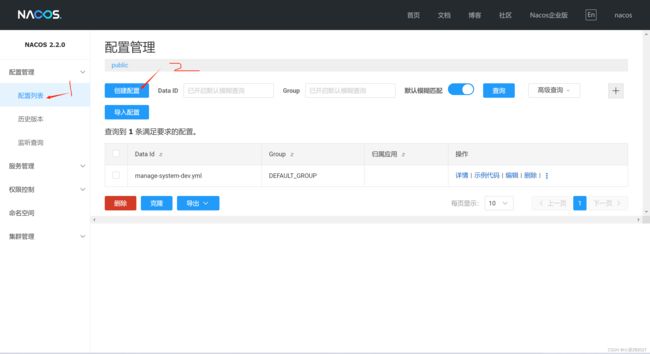
自定义文件名,其内容则将项目中application,yml中想要放到nacos管理的内容copy进来即可

8.对应服务中导入依赖
<dependency>
    <groupId>org.springframework.cloud</groupId>
    <artifactId>spring-cloud-starter-bootstrap</artifactId>
</dependency>
<dependency>
    <groupId>com.alibaba.cloud</groupId>
    <artifactId>spring-cloud-starter-alibaba-nacos-config</artifactId>
</dependency>

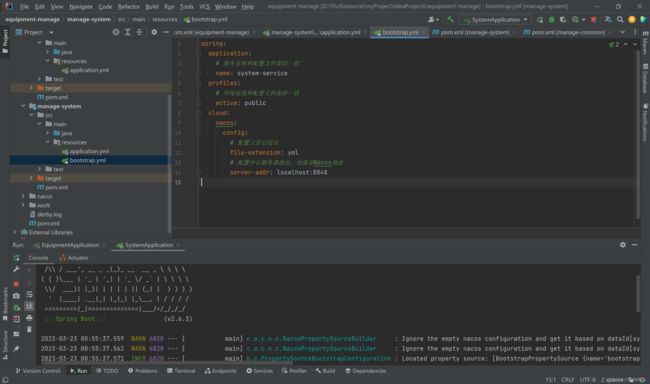
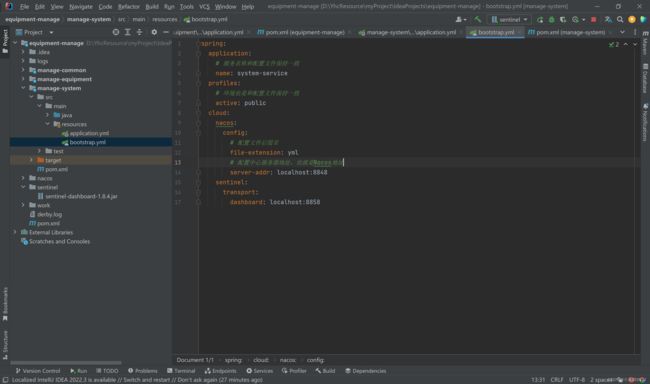
9.创建bootstrap.yml文件,注释掉application.yml中的内容(因为我在nacos中将其中所有内容都已copy过去,所以我这里全都注释掉)
spring:
  application:
    # 服务名称和配置文件保持一致
    name: system-service
  profiles:
    # 环境也是和配置文件保持一致
    active: public
  cloud:
    nacos:
      config:
        # 配置文件后缀名
        file-extension: yml
        # 配置中心服务器地址,也就是Nacos地址
        server-addr: localhost:8848

10.启动服务依旧成功即可

六、创建和配置sentinel
1.下载并把文件放入项目中

2.创建配置应用

3.启动服务并访问首页

4.在对应的服务里导入依赖
<dependency>
    <groupId>com.alibaba.cloud</groupId>
    <artifactId>spring-cloud-starter-alibaba-sentinel</artifactId>
</dependency>

5.对应服务配置文件中添加配置
    sentinel:
      transport:
        dashboard: localhost:8858
6.此时再启动配置好的服务后,去sentinel界面查看
如果没有加载出来就先访问一下对应服务的随便一个接口后再刷新试试

七、openfeign远程调用
1.导入依赖
        <!-- openfeign 远程调用 -->
        <dependency>
            <groupId>org.springframework.cloud</groupId>
            <artifactId>spring-cloud-starter-openfeign</artifactId>
        </dependency>
2.启动类加注解
@EnableDiscoveryClient
@EnableFeignClients
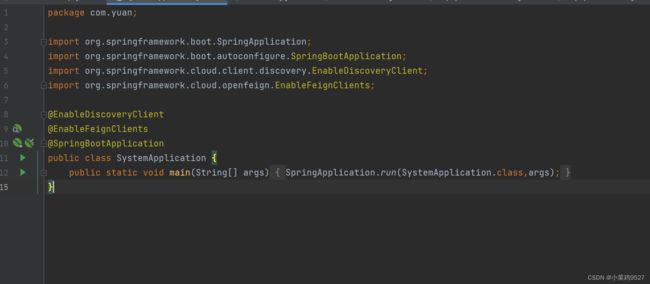
3.编写接口,要加 @FeignClient注解

4.业务中需要调用时直接使用即可

八、seata服务
1.下载并将seata文件放入项目

2.创建配置服务

3.对涉及的服务导入依赖
<dependency>
    <groupId>com.alibaba.cloud</groupId>
    <artifactId>spring-cloud-starter-alibaba-seata</artifactId>
</dependency>
<dependency>
     <groupId>io.seata</groupId>
     <artifactId>seata-spring-boot-starter</artifactId>
     <version>1.6.1</version>
</dependency>

4.结合nacos整合seata
参考这篇博客
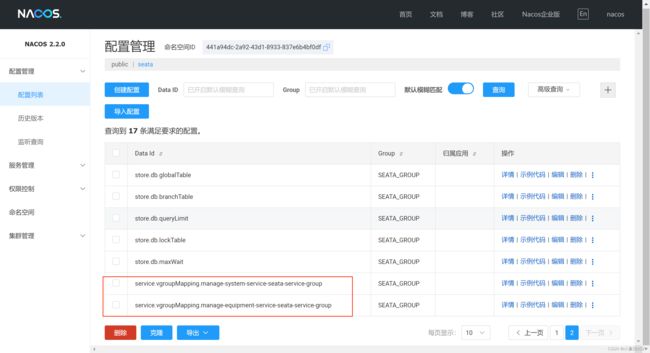
5.在seata命名空间中添加对应的事务组映射配置

6.在对应微服务中添加seata配置
seata:
  #注册
  registry:
    type: nacos
    nacos:
      # 使用Seata的命名空间,这样才能正确找到seata服务,由于组使用的是SEATA_GROUP,默认配置就是,就不用配了
      namespace: 441a94dc-2a92-43d1-8933-837e6b4bf0df
      username: root
      password:
  # 配置
  config:
    type: nacos
    nacos:
      namespace: 441a94dc-2a92-43d1-8933-837e6b4bf0df
      username: root
      password:

7.启动seata服务后在nacos查看

8.业务中所有方法增加“@Transactional”,只有发起者增加“@GlobalTransactional”

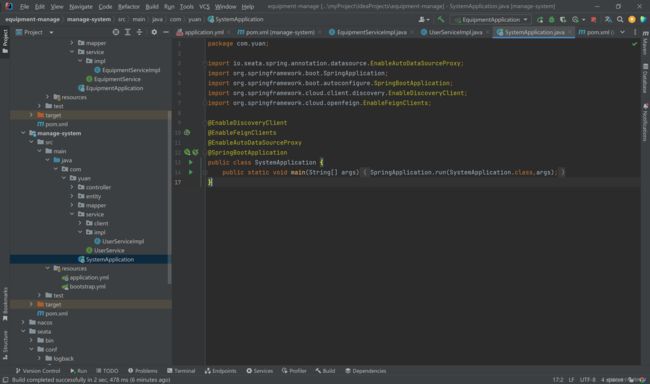
9.在微服务启动类上面加上@EnableAutoDataSourceProxy注解
10.在涉及的数据库中都加上undo_log表
SET NAMES utf8mb4;
SET FOREIGN_KEY_CHECKS = 0;

-- ----------------------------
-- Table structure for undo_log
-- ----------------------------
DROP TABLE IF EXISTS `undo_log`;
CREATE TABLE `undo_log`  (
  `branch_id` bigint(20) NOT NULL COMMENT '分支事务ID',
  `xid` varchar(100) CHARACTER SET utf8 COLLATE utf8_general_ci NOT NULL COMMENT '全局事务ID',
  `context` varchar(128) CHARACTER SET utf8 COLLATE utf8_general_ci NOT NULL COMMENT '上下文',
  `rollback_info` longblob NOT NULL COMMENT '回滚信息',
  `log_status` int(11) NOT NULL COMMENT '状态,0正常,1全局已完成',
  `log_created` datetime(6) NOT NULL COMMENT '创建时间',
  `log_modified` datetime(6) NOT NULL COMMENT '修改时间',
  UNIQUE INDEX `ux_undo_log`(`xid`, `branch_id`) USING BTREE
) ENGINE = InnoDB CHARACTER SET = utf8 COLLATE = utf8_general_ci COMMENT = 'AT transaction mode undo table' ROW_FORMAT = Compact;

SET FOREIGN_KEY_CHECKS = 1;
九、gateway配置
1.创建一个子模块gateway

2.导入依赖
<dependency>
            <groupId>org.springframework.cloud</groupId>
            <artifactId>spring-cloud-starter-gateway</artifactId>
        </dependency>

        <dependency>
            <groupId>com.alibaba.cloud</groupId>
            <artifactId>spring-cloud-starter-alibaba-nacos-discovery</artifactId>
        </dependency>

        <dependency>
            <groupId>org.springframework.cloud</groupId>
            <artifactId>spring-cloud-starter-loadbalancer</artifactId>
        </dependency>

2.编写配置文件
server:
  port: 8000
spring:
  application:
    name: service-gateway
  cloud:
    nacos:
      discovery:
        server-addr: 127.0.0.1:8848
    gateway:
      routes: # 网关路由配置
        - id: system_route #指定服务id,随便取,但是不能重复
          uri: lb://manage-system # 路由的目标地址 http就是固定地址
          #uri: http://localhost:8010
          predicates:
            - Path=/gateway/**
          filters:
            - RewritePath=/gateway/(?.*),/system/$\{segment}


logging:
  level:
    org.springframework.cloud.gateway: DEBUG

3.编写主启动类

4.启动gateway服务,去nacos页面查看
