Windows 10 系统PowerShell美化 IDEA终端、VsCode终端以及Windows Terminal的PowerShell
Windows PowerShell 美化
文章目录
- Windows PowerShell 美化
-
- 前言
- 下载并安装 Windows Terminal(Windows 11直接跳过)
- 下载并安装 PowerShell 7
- 问题
- 解决
- 下载并安装 Oh-My-Posh
- 下载并安装 oh-my-posh 需要的字体
- 配置 Windows Terminal 使用 Powershell 7
- 配置oh-my-posh
- 配置 PowerShell 7
- 配置并美化IDEA的 PowerShell 7
- 配置并美化VsCode的PowerShell 7
前言
Linux 和 macOS 上的 PowerShell 使用 .NET Core,即 Microsoft Windows 上的完整 .NET Framework 的子集。 这非常重要,因为 PowerShell 提供对基础框架类型和方法的直接访问。 因此,在 Windows 上运行的脚本可能无法在非 Windows 平台上运行,因为框架之间存在差异。
Windows 终端程序是一款新式、快速、高效、强大且高效的终端应用程序,适用于命令行工具和命令提示符,PowerShell和 WSL 等 Shell 用户。主要功能包括多个选项卡、窗格、Unicode、和 UTF-8 字符支持,GPU 加速文本渲染引擎以及自定义主题、样式和配置。
本文将 .Net Core的PowerShell 用 PowerShell 7 代替
参考:
.NET Framework PowerShell和 .NET Core PowerShell的区别: https://learn.microsoft.com/zh-cn/powershell/scripting/whats-new/differences-from-windows-powershell?view=powershell-7.3
Windows Terminal简介: https://apps.microsoft.com/store/detail/windows-terminal/9N0DX20HK701?hl=zh-cn&gl=cn
下载并安装 Windows Terminal(Windows 11直接跳过)
- Github下载
- 使用Windows 10自带的Microsoft Store也可以下载(建议)
下载并安装 PowerShell 7
- Github下载 (建议下载msi结尾的 Windows Installer 安装包文件,可以安装到其他盘,不用手动设置环境变量。并且可以选择添加到右键菜单。)
- 使用Windows 10自带的 Microsoft Store 也可以下载 (不用配置Windows Terminal)
改变安装路径

将PowerShell 7添加到右键菜单,选择如图所示的选项


问题
Windows Terminal和安装的PowerShell 7以管理员运行的时候会出现 Windows无法访问指定设备、路径、或文件,你可能没有适当的权限访问该项目。
解决
在C:\Program Files目录中有个WindowsApps文件夹,该文件夹是隐藏的,需要开启查看隐藏文件及文件夹的功能,该文件夹是Windows Store下载程序的文件夹,更改文件夹权限 右键该文件夹的属性–>安全->高级–>更改–>高级–>立即查找–>选择自己电脑的用户名–>确定–>勾选替换子容器和对象的所有者–>确定,开启文件夹的继承权 右键该文件夹的属性–>安全–>高级–>启用继承
下载并安装 Oh-My-Posh
- Github下载
- PowerShell命令下载并安装
Set-ExecutionPolicy Bypass -Scope Process -Force; Invoke-Expression ((New-Object System.Net.WebClient).DownloadString('https://ohmyposh.dev/install.ps1'))
参考:https://ohmyposh.dev/docs/installation/windows
下载并安装 oh-my-posh 需要的字体
- Nerd Fonts (建议下载DejaVuSansMono Nerd Fonts字体)
- PowerLine-Fonts
本文安装以下两个字体:

安装字体直接双击打开点击安装
配置 Windows Terminal 使用 Powershell 7
Ctrl+, 快捷键直接打开设置

PowerShell 图标链接

点击保存
打卡 Windows Terminal --> 点击刚才配置的文件 --> 外观(在其他设置里,如果窗口小了,可以下滑鼠标滚轮,就可以看到了)
设置主题:

选择刚才安装的字体

选择光标形状

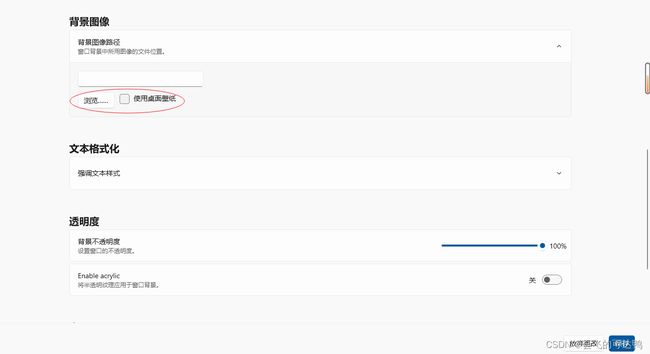
设置背景图像(根据自己的爱好选择)
点击保存,就配置好了
配置oh-my-posh
PowerShell中输入
oh-my-posh init pwsh --config "$env:USERPROFILE\AppData\Local\Programs\oh-my-posh\themes\1_shell.omp.json" | Invoke-Expression
或
oh-my-posh init pwsh --config "$env:POSH_THEMES_PATH\1_shell.omp.json" | Invoke-Expression
oh-my-posh自带的主题在:C:\Users\UserName\AppData\Local\Programs\oh-my-posh\themes\
官网显示的主题样式和对应的主题名:https://ohmyposh.dev/docs/themes
使用 Get-PoshThemes Powershell命令也可以查看对应的主题样式和主题名
配置PowerShell 7环境变量
if(!(Test-Path -Path $PROFILE)){ New-Item -ItemType file -Path $PROFILE -Force} & notepad $PROFILE

最后在记事本中输入以下PowerShell命令
选择自己喜欢的主题,替换下面的主题名
oh-my-posh init pwsh --config "$env:POSH_THEMES_PATH\主题名.omp.json" | Invoke-Expression
然后输入以下PowerShell命令,使配置文件立即生效
. $PROFILE
保存退出
展示

配置 PowerShell 7
WIN+R 输入pwsh进入PowerShell 7–>鼠标左键点击左上角的PowerShell图标–>点击属性–>字体选择安装好的
–>颜色不透明度设置为90%(根据自己的喜好设置)

展示

配置并美化IDEA的 PowerShell 7
- 配置IDEA使用PowerShell 7
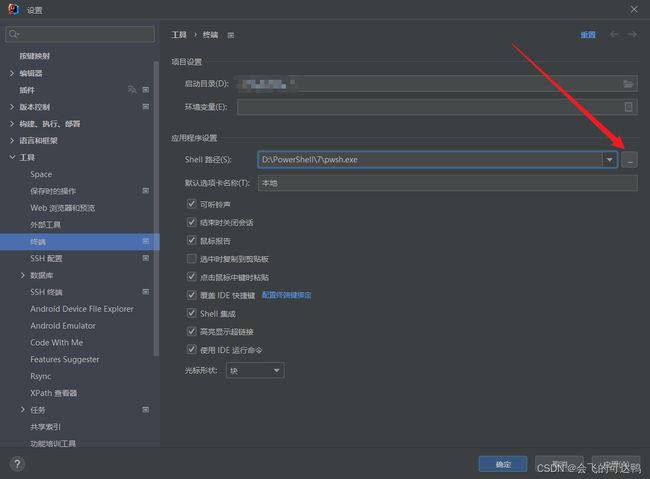
文件(File)–>设置(Settings)–>工具(Tools)–>终端(Terminal)
选择自己安装的PowerShell 7
Microsoft Store安装的在 C:\Users\windy\AppData\Local\Microsoft\WindowsApps\pwsh.exe
Github下载安装的在安装时你自己选择的目录
- 配置IDEA的PowerShell 7终端字体
Ctrl+Alt+S 快捷键打开IDEA设置(Settings)–>编辑器(Editor)–>配色方案(Color Scheme)–>控制台字体(Console Font)–>选择使用控制台字体,而不是默认(Use console font instead of the default)–>选择安装好的字体

展示

配置并美化VsCode的PowerShell 7
- 配置 VsCode 的默认终端
文件(File)–>首选项(Preferences)–>设置(Settings)–>搜索(Search settings) Profile: Window -->点击在Settings.json中编辑(Edit in settings.json)


复制以下json代码并覆盖图中选中的json代码
"terminal.integrated.profiles.windows": {
    "PowerShell 7": {
        "path": [
        	// 安装PowerShell 7的路径,粘贴到json文件之后,要删除这行
            "D:\\powershell\\7\\pwsh.exe"
        ],
        "args": [
            "-NoLogo"
        ]
    }
},
"terminal.integrated.defaultProfile.windows": "PowerShell 7",
Ctrl+S 保存settings.json
参考:https://code.visualstudio.com/docs/terminal/profiles
- 配置 VsCode 的 PowerShell 7 终端字体
Windows设置(WIN+I)–>个性化–>字体–>搜索字体名
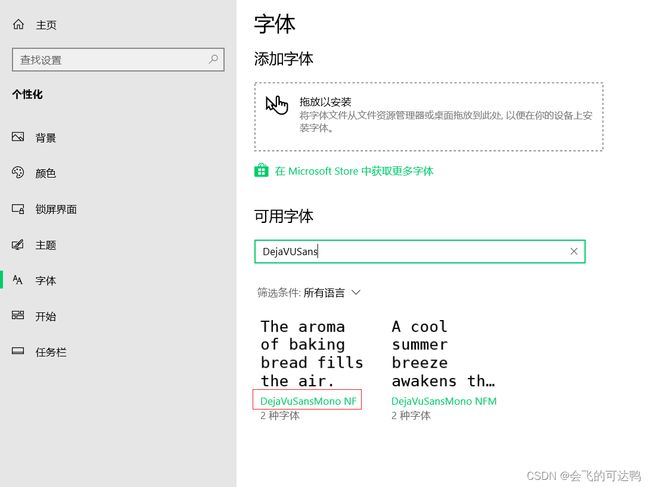
VsCode设置中搜索 Editor: Font Family
在其余的字体后加上查看的字体名,字体直接用英文逗号分隔。 注意:字体之间有空格的名称,要在字体名的两边加上英文单引号!)

展示
