- 基于用户画像的商品推荐系统
Dush32
机器学习人工智能python推荐算法
随着人工智能和大数据技术的进步,产品推荐系统成为了现代广告与电商平台中不可或缺的部分。通过深度挖掘用户的行为数据,能够为广告主提供精准的用户画像,从而更高效地推荐相关产品,提升购买转化率。本项目基于科大讯飞AI营销云大赛的赛题,目的是利用用户画像进行产品推荐,预测用户是否会购买相应商品。我们使用了机器学习的二分类模型,通过分析用户的性别、年龄、常驻地、机型等信息,来判断用户的付费行为。项目目标:本
- InfluxDB 数据模型:桶、测量、标签与字段详解(一)
计算机毕设定制辅导-无忧
#InfluxDBdb
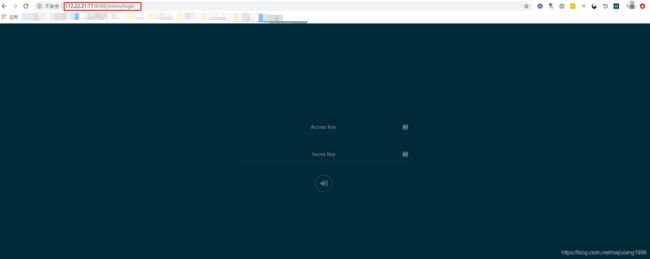
一、引言**在大数据和物联网蓬勃发展的当下,时间序列数据的处理需求呈爆发式增长。InfluxDB作为一款高性能的开源时序数据库,凭借其卓越的特性,在时序数据库领域占据了重要地位,被广泛应用于各种场景。InfluxDB专为时间序列数据设计,拥有高效的存储和查询性能。它采用独特的存储引擎,能够快速写入大量带有时间戳的数据,并支持灵活的查询操作。其核心设计针对时间序列数据的特点进行了优化,包括时间索引、
- Kafka 集群架构与高可用方案设计(一)
计算机毕设定制辅导-无忧
#Kafkakafka架构分布式
Kafka集群架构与高可用方案设计的重要性在大数据和分布式系统的广阔领域中,Kafka已然成为了一个中流砥柱般的存在。它最初由LinkedIn开发,后捐赠给Apache软件基金会并成为顶级项目,凭借其卓越的高吞吐量、可扩展性以及持久性,被广泛应用于日志收集、实时数据处理、流计算、数据集成等诸多关键领域。在日志收集场景下,以大型互联网公司为例,每天都会产生海量的日志数据,如用户的访问记录、系统操作日
- 大数据集成方案对比:Kafka vs Flume vs Sqoop
AI天才研究院
计算AI大模型应用入门实战与进阶AgenticAI实战大数据kafkaflumeai
大数据集成方案对比:KafkavsFlumevsSqoop关键词:大数据集成、Kafka、Flume、Sqoop、流处理、批量迁移、日志收集摘要:在大数据生态中,数据集成是连接数据源与数据处理平台的关键环节。本文深度对比Kafka、Flume、Sqoop三大主流集成工具,从核心架构、技术原理、适用场景到实战案例展开系统性分析。通过数学模型量化性能差异,结合实际项目经验总结选型策略,帮助开发者根据业
- 飞算科技:以创新科技引领数字化变革,旗下飞算 JavaAI 成开发利器
飞算JavaAI开发助手
科技
作为国家级高新技术企业,飞算科技专注于自主创新,在数字科技领域持续深耕,用前沿技术为各行业客户赋能,助力其实现数字化转型升级的飞跃。飞算科技凭借深厚的技术积累,将互联网科技、大数据、人工智能等技术与实际应用紧密融合。公司组建了一支由行业资深专家和技术精英构成的团队,他们在相关领域积累了多年实践经验,深刻理解不同行业客户在数字化进程中面临的痛点与挑战。基于这些洞察,飞算科技推出了一系列具有创新性和实
- Java 大视界 -- Java 大数据机器学习模型在金融市场情绪分析与投资策略制定中的应用
青云交
大数据新视界Java大视界java大数据机器学习情绪分析智能投资多源数据
Java大视界--Java大数据机器学习模型在金融市场情绪分析与投资策略制定中的应用)引言:正文:一、金融情绪数据的立体化采集与治理1.1多模态数据采集架构1.2数据治理与特征工程二、Java机器学习模型的工程化实践2.1情感分析模型的深度优化2.2强化学习驱动的动态投资策略三、顶级机构实战:Java系统的金融炼金术四、技术前沿:Java与金融科技的未来融合4.1量子机器学习集成4.2联邦学习在合
- Java 大视界 -- Java 大数据在影视内容推荐与用户兴趣挖掘中的深度实践(183)
青云交
大数据新视界Java大视界Java+Python双剑合璧:AI大数据实战通关秘籍大数据影视内容推荐用户兴趣挖掘协同过滤基于内容推荐数据可视化个性化推荐系统
亲爱的朋友们,热烈欢迎来到青云交的博客!能与诸位在此相逢,我倍感荣幸。在这飞速更迭的时代,我们都渴望一方心灵净土,而我的博客正是这样温暖的所在。这里为你呈上趣味与实用兼具的知识,也期待你毫无保留地分享独特见解,愿我们于此携手成长,共赴新程!全网(微信公众号/CSDN/抖音/华为/支付宝/微博):青云交一、欢迎加入【福利社群】点击快速加入1:青云交技术圈福利社群(NEW)点击快速加入2:2025CS
- Java 大视界 -- 基于 Java 的大数据分布式文件系统在科研数据存储与共享中的应用优化(187)
青云交
大数据新视界Java大视界Java+Python双剑合璧:AI大数据实战通关秘籍大数据大数据分布式文件系统科研数据存储科研数据共享应用优化HDFS数据分区
亲爱的朋友们,热烈欢迎来到青云交的博客!能与诸位在此相逢,我倍感荣幸。在这飞速更迭的时代,我们都渴望一方心灵净土,而我的博客正是这样温暖的所在。这里为你呈上趣味与实用兼具的知识,也期待你毫无保留地分享独特见解,愿我们于此携手成长,共赴新程!全网(微信公众号/CSDN/抖音/华为/支付宝/微博):青云交一、欢迎加入【福利社群】点击快速加入1:青云交技术圈福利社群(NEW)点击快速加入2:CSDN博客
- Python医疗大数据实战:基于Scrapy-Redis的医院评价数据分布式爬虫设计与实现
Python爬虫项目
python开发语言爬虫seleniumscrapy
摘要本文将详细介绍如何使用Python构建一个高效的医院评价数据爬虫系统。我们将从爬虫基础讲起,逐步深入到分布式爬虫架构设计,使用Scrapy框架结合Redis实现分布式爬取,并采用最新的反反爬技术确保数据采集的稳定性。文章包含完整的代码实现、性能优化方案以及数据处理方法,帮助读者掌握医疗大数据采集的核心技术。关键词:Python爬虫、Scrapy-Redis、分布式爬虫、医疗大数据、反反爬技术1
- flink-sql读写hive-1.13
第一片心意
flinkflinksqlhive
1.版本说明本文档内容基于flink-1.13.x,其他版本的整理,请查看本人博客的flink专栏其他文章。1.1.概述ApacheHive已经成为了数据仓库生态系统中的核心。它不仅仅是一个用于大数据分析和ETL场景的SQL引擎,同样也是一个数据管理平台,可用于发现,定义,和演化数据。Flink与Hive的集成包含两个层面。一是利用了Hive的MetaStore作为持久化的Catalog,用户可通
- 觉察与正念
佳佳的宝瓶子
今天因为交电费的事与妈妈沟通。在沟通的过程中,年届八十的母亲一直给我强调着过去怎么怎么。父母家的电费一直是银行代扣的,这样的模式自从可以通过银行代扣便开始了。可见那时候的父母还是蛮新潮的,能接受新事物的。至从有了智能手机,人类便进入了大数据时代。通过微信或支付宝来交电费方便得多。可惜父亲不在了,老母亲是连手机都坚决不用的人。(因为想要掩饰自己的不能、不敢,所以干脆拒绝!不愿意做任何的改变)。今年,
- Java大视界:Java大数据在智能医疗电子健康档案数据挖掘与健康服务创新>
Loving_enjoy
计算机学科论文创新点人工智能深度学习迁移学习经验分享
>本文通过完整代码示例,揭秘如何用Java大数据技术挖掘电子健康档案价值,实现疾病预测、个性化健康管理等创新服务。###一、智能医疗时代的数据金矿电子健康档案(EHR)作为医疗数字化的核心载体,包含海量患者全生命周期健康数据。据统计,全球医疗数据量正以每年**48%的速度增长**,单个三甲医院年数据量可达**PB级**。这些数据蕴藏着疾病规律、治疗效能的宝贵知识,但传统技术难以有效挖掘。**Jav
- 无人值守人工智能智慧系统数据分析:深度洞察与未来展望
呆码科技
人工智能数据分析数据挖掘
无人值守人工智能智慧系统数据分析:深度洞察与未来展望随着科技的飞速发展,人工智能(AI)技术已逐渐渗透到社会经济的各个领域,其中无人值守人工智能智慧系统作为AI技术应用的前沿阵地,正引领着一场深刻的行业变革。这类系统通过集成高级算法、大数据分析、物联网(IoT)及云计算等先进技术,实现了对复杂环境的自主监控、智能决策与高效管理,极大地提升了运营效率,降低了人力成本,并开启了数据驱动决策的新纪元。本
- 浮漂式水质监测设备:智能守护水环境的未来之眼
柏峰电子
人工智能
浮漂式水质监测设备:智能守护水环境的未来之眼柏峰【BF-FBSZ】随着全球水资源短缺和水污染问题日益严峻,水质监测技术正迎来前所未有的发展机遇。作为这一领域的创新突破,浮漂式水质监测设备凭借其实时性、智能化和网络化优势,正在重塑水资源管理的新格局。本文将深入探讨这一技术的原理、特点、应用场景及未来发展趋势。一、技术原理与系统架构浮漂式水质监测设备是一种集成了现代传感器技术、物联网和大数据分析的智能
- 基于蜣螂算法优化多头注意力机制的卷积神经网络结合双向长短记忆神经网络实现温度预测DBO-CNN-biLSTM-Multihead-Attention附matlab代码
matlab科研助手
神经网络算法cnn
✅作者简介:热爱科研的Matlab仿真开发者,修心和技术同步精进,代码获取、论文复现及科研仿真合作可私信。个人主页:Matlab科研工作室个人信条:格物致知。更多Matlab完整代码及仿真定制内容点击智能优化算法神经网络预测雷达通信无线传感器电力系统信号处理图像处理路径规划元胞自动机无人机物理应用机器学习内容介绍温度预测在气象学、农业、能源等领域具有重要的应用价值。随着大数据和人工智能技术的快速发
- 基于Socket来构建无界数据流并通过Flink框架进行处理
每天五分钟玩转人工智能
Flink技术实战flink大数据Flink分布式无界数据
本文重点随着大数据技术的不断发展,实时数据流处理已成为企业应对海量数据、实现快速决策的关键技术。ApacheFlink是一个开源的流处理框架,它能够对无界数据流进行高效的、精确的处理。本文将介绍如何通过Socket构建无界数据流,并利用Flink框架进行无界流处理。基于Socket构建无界数据无界数据指的是源源不断产生的数据,这些数据通常来自各种实时数据源,如用户行为日志、传感器数据等。Socke
- sgg大数据全套技术链接[plus]
原来是大华啊~
资源大数据
写在开头:感谢尚硅谷,尚硅谷万岁,我爱尚硅谷111个技术栈+43个项目,兄弟们,冲!最近小米又又又火了一把,致敬所有造福人民的企业和伟大的企业家,致敬雷军,小米,致敬马云,致敬尚硅谷,致敬所有为人民谋福的英雄人物和企业,再次献上我诚挚的敬意,致敬!尚硅谷大数据全套111个技术1.Java从入门到精通JDK版链接:https://pan.baidu.com/s/1GAc610SYSMmZBuOX4D
- 疫情下,我的健康码首次变成了黄码
唯我一心
3月中旬,老公在广州白云区接了一单生意,要很久才回来,就在那里租了一间房,带我和孩子一起住。房子在七楼,步梯,因孩子小,自己就很少下楼,都是他买菜回来,4月8号,订单完成,返程回了佛山。过了两天突然接到短信通知,白云区要大规模核酸筛查,又过一天收到短信:通过大数据分析,您近期行程涉及疫情防控重点区域,您的健康码将被赋予2次黄码并需开展2次核酸检测,请注意健康码状态,尽快凭码到附近黄码核酸检测点进行
- 到底应该怎么抓语文成绩
山东董纯
上学期期末考试,全区统一采用网上阅卷的形式。在这个大数据时代,在这个极为透明的数据时代,一旦采用这样网络统一阅卷的形式。那丑媳妇就要真的见公婆了。再这样一个要生源没生源。要学习积极性没有学习积极性的氛围里。想取得好的成绩是真的难上加难。尽管已经预料到跟其他兄弟学校有一定的差距。但是没有想到差距如此之大。领导们坐不住了,反复约谈备课组长。理由是其他科目差距不大,甚至有优势。为什么语文学科会有如此大的
- 告别内存焦虑!用Dask打开Python大数据并行计算的“任意门“
小张在编程
python大数据开发语言
引言当你在Jupyter里用Pandas读取20GB的CSV文件,看到内存占用率从10%飙升到90%,最后弹出"MemoryError"时;当你想对亿级数据做分组聚合,却发现单线程计算要等上半小时——这些场景是不是像极了用小推车搬运万吨货物?Python生态中,Dask库就像一台"并行计算推土机",能把大数据拆分成小块并行处理,让你的普通电脑也能拥有分布式计算的能力。本文将从原理到实战,带你掌握这
- python大数据论文_大数据环境下基于python的网络爬虫技术
weixin_39775976
python大数据论文
软件开发大数据环境下基于python的网络爬虫技术作者/谢克武,重庆工商大学派斯学院软件工程学院摘要:随着互联网的发展壮大,网络数据呈爆炸式增长,传统捜索引擎已经不能满足人们对所需求数据的获取的需求,作为搜索引擎的抓取数据的重要组成部分,网络爬虫的作用十分重要,本文首先介绍了在大数据环境下网络爬虫的重要性,接着介绍了网络爬虫的概念,工作原理,工作流程,网页爬行策略,python在编写爬虫领域的优势
- Redis性能测试:工具、参数与实战示例
Seal^_^
数据库专栏#数据库--Redisredis数据库Redis性能测试
Redis性能测试:工具、参数与实战示例1.Redis性能测试概述2.redis-benchmark基础使用2.1基本语法2.2简单示例3.性能测试参数详解4.实战测试示例4.1基础测试4.2指定命令测试4.3带随机key的测试4.4大数据测试4.5管道测试5.性能测试流程图6.测试结果分析与优化建议6.1结果解读6.2优化建议7.高级测试场景7.1持久化影响测试7.2集群测试7.3长时间稳定性测
- 2025年各细分产业链企业数据(汽车、数字经济、食品、制造业)
经管数据库
汽车智能手机数据分析
本数据包含2025年及之前的所有上中下游企业信息,67个细分产业。汽车专区、数字经济专区、数字创意专区、未来产业专区、高端装备专区、新能源专区、食品农业专区、传统制造业专区等71个文件。汽车专区:充电桩制造动力电池汽车材料制造汽车制造汽车制造设备汽车座椅制造驱动电机制造燃料电池汽车制造燃料电池系统制造新能源汽车制造智能驾驶智能视觉数字经济专区:5g边缘计算大数据类服务器光通信集成电路区块链人工智能
- C#语法基础总结(超级全面)(二)
inwith
C#语法基础c#开发语言
文章目录c#语法基本元素关键字操作符(operator)类型转换标识符(Identifier)语句try语句迭代语句(循环语句)索引器文本(字面值)五大数据类型引用类型:值类型:变量、对象与内存装箱和拆箱类类的实例化类的三大成员(属性、方法、事件)属性(property)方法(函数)方法参数值参数引用参数输出参数数组参数具名参数可选参数扩展方法(this参数)方法的重载构造器(constructo
- SQL 常用版本语法概览:标准演进与关键语法分析
一、引言SQL(StructuredQueryLanguage,结构化查询语言)是关系型数据库系统的核心语言,自1986年成为ANSI和ISO标准以来,经历了多次版本演进,不断增强语义表达能力以适应复杂的企业数据需求。随着数据库技术的不断发展,各大数据库厂商(如Oracle、SQLServer、PostgreSQL、MySQL等)在实现标准的基础上扩展了大量方言语法,使得掌握SQL的标准语法版本成
- 主流数据库语言语法对比
两圆相切
数据库
以下是五大数据库(MySQL、PostgreSQL、Oracle、SQLServer、SQLite)核心语法对比,涵盖DDL、DML、查询、函数、事务等全场景,包含底层原理差异和实用示例。##一、数据一、类型深度对比分类MySQLPostgreSQLOracleSQLServerSQLite整数TINYINT,INT,BIGINTSMALLINT,INT,BIGINTNUMBER(10)TIN
- Hadoop与云原生集成:弹性扩缩容与OSS存储分离架构深度解析
Hadoop与云原生集成的必要性Hadoop在大数据领域的基石地位作为大数据处理领域的奠基性技术,Hadoop自2006年诞生以来已形成包含HDFS、YARN、MapReduce三大核心组件的完整生态体系。根据CSDN技术社区的分析报告,全球超过75%的《财富》500强企业仍在使用Hadoop处理EB级数据,其分布式文件系统HDFS通过数据分片(默认128MB块大小)和三副本存储机制,成功解决了P
- 深入TA-Lib:量化技术指标详解
深入TA-Lib:量化技术指标详解本文系统讲解TA-Lib技术指标分析,涵盖基础、数据处理、趋势与动量指标、均量线、布林线等,并结合Python代码与大数据、机器学习实战案例,助力读者掌握量化交易实战技巧。本文系统梳理了TA-Lib技术指标分析的核心内容,包括TA-Lib基础、数据处理、趋势与动量指标、均量线、布林线等关键技术指标分析方法,并结合Python代码示例与大数据、机器学习的融合实战案例
- 大数据时代下的时序数据库选型指南:基于工业场景的IoTDB技术优势与适用性研究
Loving_enjoy
计算机学科论文创新点机器学习facebook经验分享课程设计
>在宝钢集团的智能工厂里,5万多个传感器每秒产生150万+数据点,传统数据库系统每天积压3TB未处理数据——这揭示了工业4.0时代的核心矛盾:**海量时序数据处理能力已成为智能制造的关键瓶颈**。###工业时序数据的四大特殊性工业场景下的时序数据与传统互联网数据存在本质差异:1.**高精度时间要求**-数控机床振动监测需微秒级时间戳-电网故障定位要求时间同步精度≤1μs2.**多源异构性**```
- 斗鱼大数据面试题及参考答案
大模型大数据攻城狮
大数据大数据面试hadoop面试spark面试flink面试手撕SQL手撕代码
GC(垃圾回收)相关知识一、常见的GC收集器SerialGCSerialGC是最基本的垃圾收集器,它是单线程的。在进行垃圾收集时,会暂停所有的用户线程,直到垃圾收集完成。它的工作过程比较简单,首先标记出所有的垃圾对象,然后将它们清除。例如,在一个小型的、对响应时间要求不高的Java应用程序中,如简单的命令行工具,SerialGC可以满足垃圾收集的需求。因为这种应用程序通常没有很高的并发要求,暂停用
- Java序列化进阶篇
g21121
java序列化
1.transient
类一旦实现了Serializable 接口即被声明为可序列化,然而某些情况下并不是所有的属性都需要序列化,想要人为的去阻止这些属性被序列化,就需要用到transient 关键字。
- escape()、encodeURI()、encodeURIComponent()区别详解
aigo
JavaScriptWeb
原文:http://blog.sina.com.cn/s/blog_4586764e0101khi0.html
JavaScript中有三个可以对字符串编码的函数,分别是: escape,encodeURI,encodeURIComponent,相应3个解码函数:,decodeURI,decodeURIComponent 。
下面简单介绍一下它们的区别
1 escape()函
- ArcgisEngine实现对地图的放大、缩小和平移
Cb123456
添加矢量数据对地图的放大、缩小和平移Engine
ArcgisEngine实现对地图的放大、缩小和平移:
个人觉得是平移,不过网上的都是漫游,通俗的说就是把一个地图对象从一边拉到另一边而已。就看人说话吧.
具体实现:
一、引入命名空间
using ESRI.ArcGIS.Geometry;
using ESRI.ArcGIS.Controls;
二、代码实现.
- Java集合框架概述
天子之骄
Java集合框架概述
集合框架
集合框架可以理解为一个容器,该容器主要指映射(map)、集合(set)、数组(array)和列表(list)等抽象数据结构。
从本质上来说,Java集合框架的主要组成是用来操作对象的接口。不同接口描述不同的数据类型。
简单介绍:
Collection接口是最基本的接口,它定义了List和Set,List又定义了LinkLi
- 旗正4.0页面跳转传值问题
何必如此
javajsp
跳转和成功提示
a) 成功字段非空forward
成功字段非空forward,不会弹出成功字段,为jsp转发,页面能超链接传值,传输变量时需要拼接。接拼接方式list.jsp?test="+strweightUnit+"或list.jsp?test="+weightUnit+&qu
- 全网唯一:移动互联网服务器端开发课程
cocos2d-x小菜
web开发移动开发移动端开发移动互联程序员
移动互联网时代来了! App市场爆发式增长为Web开发程序员带来新一轮机遇,近两年新增创业者,几乎全部选择了移动互联网项目!传统互联网企业中超过98%的门户网站已经或者正在从单一的网站入口转向PC、手机、Pad、智能电视等多端全平台兼容体系。据统计,AppStore中超过85%的App项目都选择了PHP作为后端程
- Log4J通用配置|注意问题 笔记
7454103
DAOapachetomcatlog4jWeb
关于日志的等级 那些去 百度就知道了!
这几天 要搭个新框架 配置了 日志 记下来 !做个备忘!
#这里定义能显示到的最低级别,若定义到INFO级别,则看不到DEBUG级别的信息了~!
log4j.rootLogger=INFO,allLog
# DAO层 log记录到dao.log 控制台 和 总日志文件
log4j.logger.DAO=INFO,dao,C
- SQLServer TCP/IP 连接失败问题 ---SQL Server Configuration Manager
darkranger
sqlcwindowsSQL ServerXP
当你安装完之后,连接数据库的时候可能会发现你的TCP/IP 没有启动..
发现需要启动客户端协议 : TCP/IP
需要打开 SQL Server Configuration Manager...
却发现无法打开 SQL Server Configuration Manager..??
解决方法: C:\WINDOWS\system32目录搜索framedyn.
- [置顶] 做有中国特色的程序员
aijuans
程序员
从出版业说起 网络作品排到靠前的,都不会太难看,一般人不爱看某部作品也是因为不喜欢这个类型,而此人也不会全不喜欢这些网络作品。究其原因,是因为网络作品都是让人先白看的,看的好了才出了头。而纸质作品就不一定了,排行榜靠前的,有好作品,也有垃圾。 许多大牛都是写了博客,后来出了书。这些书也都不次,可能有人让为不好,是因为技术书不像小说,小说在读故事,技术书是在学知识或温习知识,有些技术书读得可
- document.domain 跨域问题
avords
document
document.domain用来得到当前网页的域名。比如在地址栏里输入:javascript:alert(document.domain); //www.315ta.com我们也可以给document.domain属性赋值,不过是有限制的,你只能赋成当前的域名或者基础域名。比如:javascript:alert(document.domain = "315ta.com");
- 关于管理软件的一些思考
houxinyou
管理
工作好多看年了,一直在做管理软件,不知道是我最开始做的时候产生了一些惯性的思维,还是现在接触的管理软件水平有所下降.换过好多年公司,越来越感觉现在的管理软件做的越来越乱.
在我看来,管理软件不论是以前的结构化编程,还是现在的面向对象编程,不管是CS模式,还是BS模式.模块的划分是很重要的.当然,模块的划分有很多种方式.我只是以我自己的划分方式来说一下.
做为管理软件,就像现在讲究MVC这
- NoSQL数据库之Redis数据库管理(String类型和hash类型)
bijian1013
redis数据库NoSQL
一.Redis的数据类型
1.String类型及操作
String是最简单的类型,一个key对应一个value,string类型是二进制安全的。Redis的string可以包含任何数据,比如jpg图片或者序列化的对象。
Set方法:设置key对应的值为string类型的value
- Tomcat 一些技巧
征客丶
javatomcatdos
以下操作都是在windows 环境下
一、Tomcat 启动时配置 JAVA_HOME
在 tomcat 安装目录,bin 文件夹下的 catalina.bat 或 setclasspath.bat 中添加
set JAVA_HOME=JAVA 安装目录
set JRE_HOME=JAVA 安装目录/jre
即可;
二、查看Tomcat 版本
在 tomcat 安装目
- 【Spark七十二】Spark的日志配置
bit1129
spark
在测试Spark Streaming时,大量的日志显示到控制台,影响了Spark Streaming程序代码的输出结果的查看(代码中通过println将输出打印到控制台上),可以通过修改Spark的日志配置的方式,不让Spark Streaming把它的日志显示在console
在Spark的conf目录下,把log4j.properties.template修改为log4j.p
- Haskell版冒泡排序
bookjovi
冒泡排序haskell
面试的时候问的比较多的算法题要么是binary search,要么是冒泡排序,真的不想用写C写冒泡排序了,贴上个Haskell版的,思维简单,代码简单,下次谁要是再要我用C写冒泡排序,直接上个haskell版的,让他自己去理解吧。
sort [] = []
sort [x] = [x]
sort (x:x1:xs)
| x>x1 = x1:so
- java 路径 配置文件读取
bro_feng
java
这几天做一个项目,关于路径做如下笔记,有需要供参考。
取工程内的文件,一般都要用相对路径,这个自然不用多说。
在src统计目录建配置文件目录res,在res中放入配置文件。
读取文件使用方式:
1. MyTest.class.getResourceAsStream("/res/xx.properties")
2. properties.load(MyTest.
- 读《研磨设计模式》-代码笔记-简单工厂模式
bylijinnan
java设计模式
声明: 本文只为方便我个人查阅和理解,详细的分析以及源代码请移步 原作者的博客http://chjavach.iteye.com/
package design.pattern;
/*
* 个人理解:简单工厂模式就是IOC;
* 客户端要用到某一对象,本来是由客户创建的,现在改成由工厂创建,客户直接取就好了
*/
interface IProduct {
- SVN与JIRA的关联
chenyu19891124
SVN
SVN与JIRA的关联一直都没能装成功,今天凝聚心思花了一天时间整合好了。下面是自己整理的步骤:
一、搭建好SVN环境,尤其是要把SVN的服务注册成系统服务
二、装好JIRA,自己用是jira-4.3.4破解版
三、下载SVN与JIRA的插件并解压,然后拷贝插件包下lib包里的三个jar,放到Atlassian\JIRA 4.3.4\atlassian-jira\WEB-INF\lib下,再
- JWFDv0.96 最新设计思路
comsci
数据结构算法工作企业应用公告
随着工作流技术的发展,工作流产品的应用范围也不断的在扩展,开始进入了像金融行业(我已经看到国有四大商业银行的工作流产品招标公告了),实时生产控制和其它比较重要的工程领域,而
- vi 保存复制内容格式粘贴
daizj
vi粘贴复制保存原格式不变形
vi是linux中非常好用的文本编辑工具,功能强大无比,但对于复制带有缩进格式的内容时,粘贴的时候内容错位很严重,不会按照复制时的格式排版,vi能不能在粘贴时,按复制进的格式进行粘贴呢? 答案是肯定的,vi有一个很强大的命令可以实现此功能 。
在命令模式输入:set paste,则进入paste模式,这样再进行粘贴时
- shell脚本运行时报错误:/bin/bash^M: bad interpreter 的解决办法
dongwei_6688
shell脚本
出现原因:windows上写的脚本,直接拷贝到linux系统上运行由于格式不兼容导致
解决办法:
1. 比如文件名为myshell.sh,vim myshell.sh
2. 执行vim中的命令 : set ff?查看文件格式,如果显示fileformat=dos,证明文件格式有问题
3. 执行vim中的命令 :set fileformat=unix 将文件格式改过来就可以了,然后:w
- 高一上学期难记忆单词
dcj3sjt126com
wordenglish
honest 诚实的;正直的
argue 争论
classical 古典的
hammer 锤子
share 分享;共有
sorrow 悲哀;悲痛
adventure 冒险
error 错误;差错
closet 壁橱;储藏室
pronounce 发音;宣告
repeat 重做;重复
majority 大多数;大半
native 本国的,本地的,本国
- hibernate查询返回DTO对象,DTO封装了多个pojo对象的属性
frankco
POJOhibernate查询DTO
DTO-数据传输对象;pojo-最纯粹的java对象与数据库中的表一一对应。
简单讲:DTO起到业务数据的传递作用,pojo则与持久层数据库打交道。
有时候我们需要查询返回DTO对象,因为DTO
- Partition List
hcx2013
partition
Given a linked list and a value x, partition it such that all nodes less than x come before nodes greater than or equal to x.
You should preserve the original relative order of th
- Spring MVC测试框架详解——客户端测试
jinnianshilongnian
上一篇《Spring MVC测试框架详解——服务端测试》已经介绍了服务端测试,接下来再看看如果测试Rest客户端,对于客户端测试以前经常使用的方法是启动一个内嵌的jetty/tomcat容器,然后发送真实的请求到相应的控制器;这种方式的缺点就是速度慢;自Spring 3.2开始提供了对RestTemplate的模拟服务器测试方式,也就是说使用RestTemplate测试时无须启动服务器,而是模拟一
- 关于推荐个人观点
liyonghui160com
推荐系统关于推荐个人观点
回想起来,我也做推荐了3年多了,最近公司做了调整招聘了很多算法工程师,以为需要多么高大上的算法才能搭建起来的,从实践中走过来,我只想说【不是这样的】
第一次接触推荐系统是在四年前入职的时候,那时候,机器学习和大数据都是没有的概念,什么大数据处理开源软件根本不存在,我们用多台计算机web程序记录用户行为,用.net的w
- 不间断旋转的动画
pangyulei
动画
CABasicAnimation* rotationAnimation;
rotationAnimation = [CABasicAnimation animationWithKeyPath:@"transform.rotation.z"];
rotationAnimation.toValue = [NSNumber numberWithFloat: M
- 自定义annotation
sha1064616837
javaenumannotationreflect
对象有的属性在页面上可编辑,有的属性在页面只可读,以前都是我们在页面上写死的,时间一久有时候会混乱,此处通过自定义annotation在类属性中定义。越来越发现Java的Annotation真心很强大,可以帮我们省去很多代码,让代码看上去简洁。
下面这个例子 主要用到了
1.自定义annotation:@interface,以及几个配合着自定义注解使用的几个注解
2.简单的反射
3.枚举
- Spring 源码
up2pu
spring
1.Spring源代码
https://github.com/SpringSource/spring-framework/branches/3.2.x
注:兼容svn检出
2.运行脚本
import-into-eclipse.bat
注:需要设置JAVA_HOME为jdk 1.7
build.gradle
compileJava {
sourceCompatibilit
- 利用word分词来计算文本相似度
yangshangchuan
wordword分词文本相似度余弦相似度简单共有词
word分词提供了多种文本相似度计算方式:
方式一:余弦相似度,通过计算两个向量的夹角余弦值来评估他们的相似度
实现类:org.apdplat.word.analysis.CosineTextSimilarity
用法如下:
String text1 = "我爱购物";
String text2 = "我爱读书";
String text3 =