【C++】C++11:线程库和包装器
C++11最后一篇文章
文章目录
- 前言
- 一、线程库
- 二、包装器和绑定
- 总结
前言
上一篇文章中我们详细讲解了lambda表达式的使用,我们今天所用的线程相关的知识会大量的用到lambda表达式,所以对lambda表达式还模糊不清的可以先将上一篇文章看明白。
一、线程库
int main()
{
	size_t m;
	cin >> m;
	vector vth(m);
	for (int i = 0; i < m; i++)
	{
		size_t n = 0;
		cin >> n;
		vth[i] = thread([n,i]()
			{
				for (int j = 0; j < n; j++)
				{
					cout << "我是第" << i << "个线程,打印:" << j + 1 << endl;
				}
				cout << endl;
			});
	}
	for (auto& t : vth)
	{
		t.join();
	}
	return 0;
}
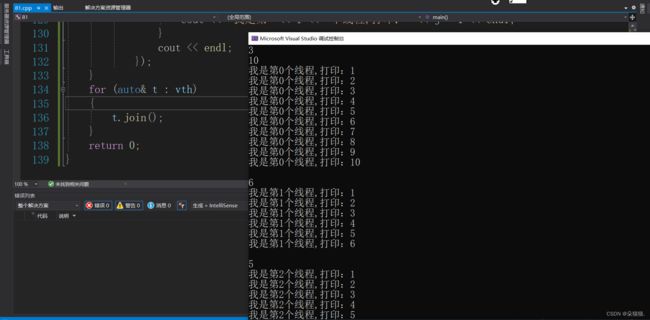
上述代码最巧妙的一点就是将线程放到了vector中,每次用一个匿名的线程对象利用lambda函数将这个线程要执行的函数给向量中的线程,然后完成用m个线程打印不同的n个数,在结束前一定要将线程等待回收了。下面我们运行起来:
可以看到成功完成了任务,在这个程序中我们用到了线程的构造函数和join函数,也体现了lambda函数的好用。
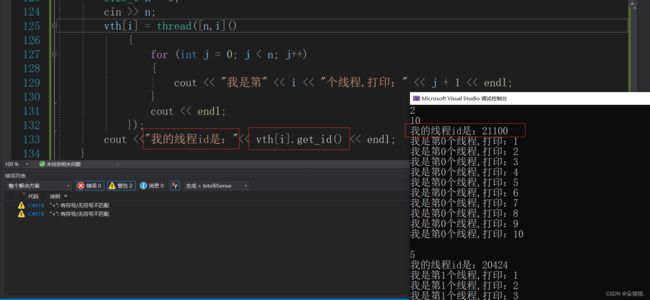 这样使用不知道大家会不会感到别扭呢,实际上在我们日常使用中是这样使用的:
this_thread是一个命名空间,在这个命名空间中也有线程先关的函数,并且这里的函数不依靠线程对象来调用,哪个线程调用这个函数就打印哪个线程的ID。下面我们可以再用用this_thread这个命名空间中的其他接口:
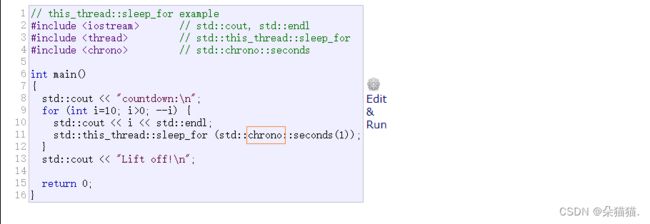
sleep_until是让这个线程休眠到某个时间,sleep_for是相对时间,这个接口是最常用的接口。下面我们演示一下sleep_for接口:
在官方文档演示中我们可以看到有一个chrono的命名空间:
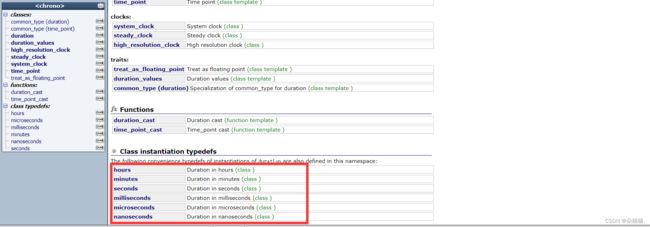
这个命名空间中主要是一些时间函数的使用:
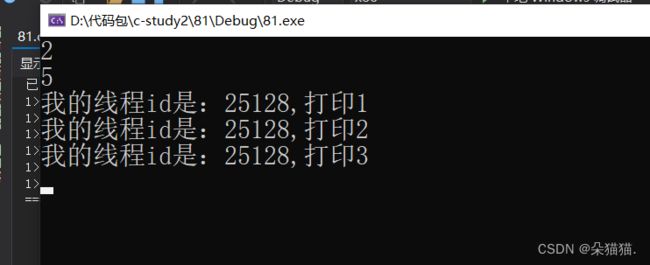
可以看到确实打印完成后等待2秒再运行下一句指令,我们再试试微秒:
这里就不再演示了,大家感兴趣的可以在自己的编译器上测试。yield接口是主动让出时间片,在无锁编程中会用到这个接口。
总结:
下面我们讲解原子性操作:
int x = 0;

void func(int n)
{
	for (int i = 0; i < n; i++)
	{
		++x;
	}
}
int main()
{
	thread t1(func, 10000);
	thread t2(func, 20000);
	t1.join();
	t2.join();
	cout << x << endl;
	return 0;
}
首先上面的代码中有一个全局变量x,然后两个线程都调用func函数让x++,在我们看来x最后的结果应该是30000才对,那么结果是不是这样呢我们看一下:
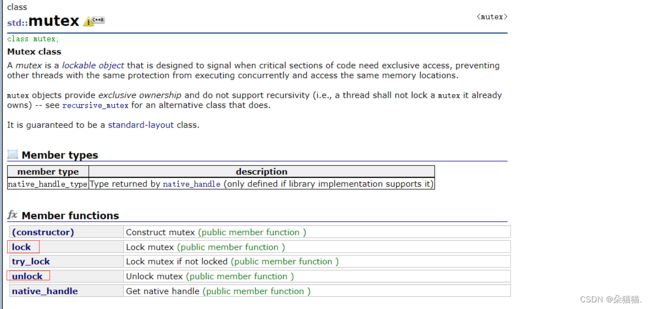
我们可以看到结果是不对的,这就是经典的线程安全问题。解决线程安全的方法有:CAS,加锁以及原子性操作,下面我们先用加锁演示一下:
#include
int x = 0;
mutex mtx;
void func(int n)
{
	mtx.lock();
	for (int i = 0; i < n; i++)
	{
		++x;
	}
	mtx.unlock();
}
int main()
{
	thread t1(func, 10000);
	thread t2(func, 20000);
	t1.join();
	t2.join();
	cout << x << endl;
	return 0;
}
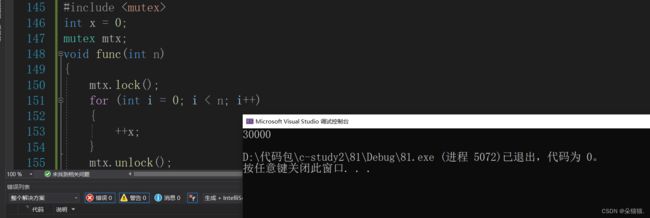
首先我们的锁一定是一个全局的,因为要让两个线程看到同一把锁,如果我们将锁放在func函数内部,那么两个线程用的两把锁是没作用的。
可以看到确实解决了刚刚的问题,当然我们也可以在进入循环的时候加锁:
void func(int n)
{
	for (int i = 0; i < n; i++)
	{
		mtx.lock();
		++x;
		mtx.unlock();
	}
}
那么这两种加锁方式有什么区别呢?首先我们刚刚演示的第一种方法是串行的,也就是说当一个线程时间片到了后才会让下一个线程进入for循环,第二个方法是并行的,两个线程都可以进入func函数,进入for循环后谁先申请到锁谁就可以++x变量,下面我们可以看看哪一种方法的效率高:
#include
int x = 0;
mutex mtx;
void func(int n)
{
	mtx.lock();
	for (int i = 0; i < n; i++)
	{
		++x;
	}
	mtx.unlock();
}
void func(int n)
{
	for (int i = 0; i < n; i++)
	{
		mtx.lock();
		++x;
		mtx.unlock();
	}
}
int main()
{
	int n = 100000;
	size_t begin = clock();
	thread t1(func, n);
	thread t2(func, n);
	t1.join();
	t2.join();
	size_t end = clock();
	cout << x << endl;
	cout << "--------------------------------" << endl;
	cout << end - begin << endl;
	return 0;
} 串行的方式是2秒
 并行的方式是30秒。为什么在这种情况下串行的效率更高呢?这是因为并行的方式每次解锁后都会频繁的切换线程的上下文,这会浪费很多的时间。
下面我们用lambda表达式改造一下刚刚的代码:
int main()
{
	int n = 100000;
	int x = 0;
	mutex mtx;
	size_t begin = clock();
	thread t1([&, n]()
		{
			mtx.lock();
			for (int i = 0; i < n; i++)
			{
				++x;
			}
			mtx.unlock();
		});
	thread t2([&, n]()
		{
			mtx.lock();
			for (int i = 0; i < n; i++)
			{
				++x;
			}
			mtx.unlock();
		});
	t1.join();
	t2.join();
	size_t end = clock();
	cout << end - begin << endl;
	return 0;
}
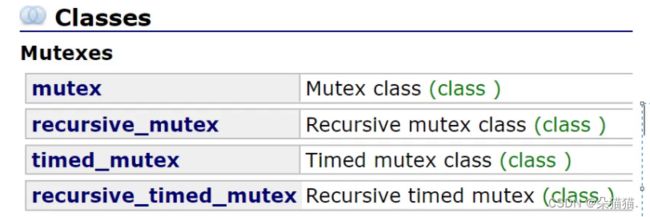
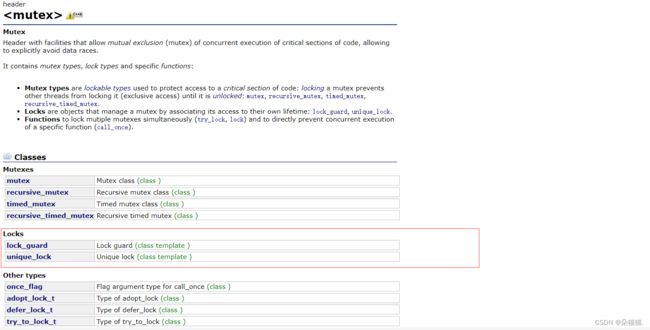
我们从文档中可以看到,c++中的锁有多种:
recursive_mutex是递归锁,下面我们演示一下:
int x = 0;
void func(int n)
{
	if (n == 0)
	{
		return;
	}
	++x;
	func(n - 1);
}
int main()
{
	thread t1(func, 1000);
	thread t2(func, 200);
	t1.join();
	t2.join();
	cout << x << endl;
	return 0;
}
在这种递归的情况下官方更推荐使用递归锁,如下图:
int x = 0;
recursive_mutex mtx;
void func(int n)
{
	if (n == 0)
	{
		return;
	}
	mtx.lock();
	++x;
	mtx.unlock();
	func(n - 1);
}
int main()
{
	thread t1(func, 1000);
	thread t2(func, 200);
	t1.join();
	t2.join();
	cout << x << endl;
	return 0;
}
注意:我们的锁一定不可以加到if判断语句前面
 因为一旦在判断语句前面加锁那么一定会有线程无法进入递归结束条件从而造成死递归。同样我们也不能在递归后(func(n-1))后面解锁,这样就造成了加锁后还没解锁就进入递归下一层栈帧,下一次进入此函数又重新加锁,这样就造成了死锁问题。
下面我们再看看抛异常期间出现的经典死锁问题:
int x = 0;
mutex mtx;
void func(int n)
{
	for (int i = 0; i < n; i++)
	{
		try
		{
			mtx.lock();
			++x;
			//抛异常
			if (rand() % 3 == 0)
			{
				throw exception("抛异常");
			}
			mtx.unlock();
		}
		catch (const exception& e)
		{
			cout << e.what() << endl;
		}
	}
}
int main()
{
	thread t1(func, 10000);
	thread t2(func, 20000);
	t1.join();
	t2.join();
	return 0;
}
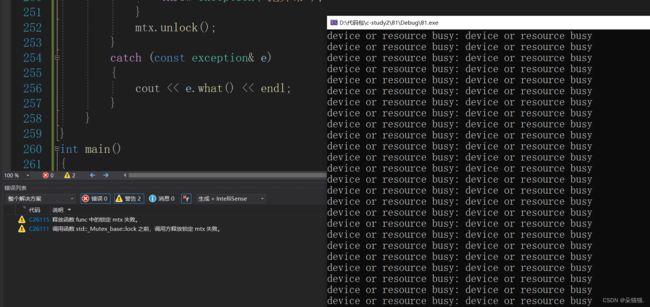
当线程进入func函数后,我们手动设置了一个异常只要随机数%3等于0就直接抛异常,在这之前我们刚刚加了锁,抛异常进入catch后跳过了解锁步骤导致死锁问题,下面我们运行一下看是不是这样:
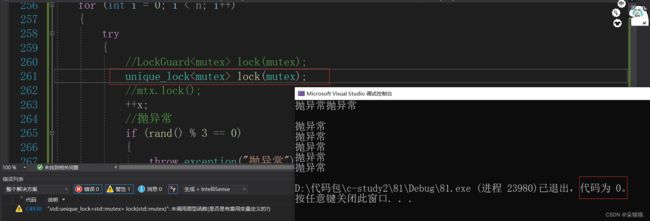
可以看到确实是这样,那么如何解决这样的问题呢?
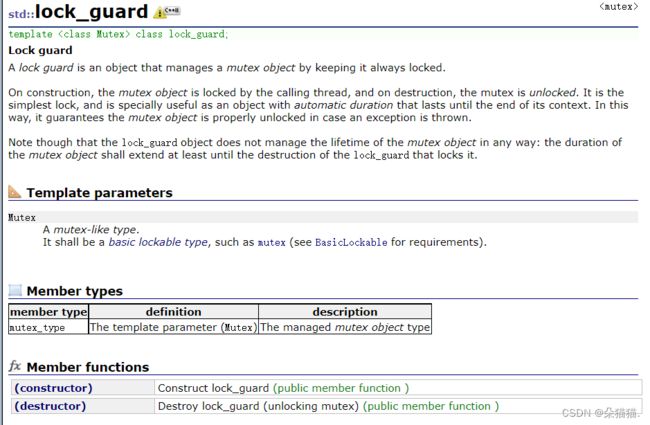
在锁的文档中我们可以看到有这样两个接口,lock_guard接口就能解决我们的问题:
lock_guard实际上就是一个创建了自动加锁,生命周期到了自动解锁的类对象,其实我们在讲linux线程的时候已经实现过了,感兴趣的可以看看我们linux多线程的文章。下面我们用一下这个借口:
template
class LockGuard
{
public:
	LockGuard(Lock& lk)
		:_lk(lk)
	{
		_lk.lock();
	}
	~LockGuard()
	{
		_lk.unlock();
	}
private:
	Lock _lk;
};
我们可以看到这次就不会死循环的打印了,解锁后自动退出程序了。解锁的原理的也很简单,当我们这个lock对象出了try这个作用域后就自动销毁解锁了,所以就解决了我们上面那个抛异常造成死锁的问题。
下面我们看看官网中atomic的接口:
atomic接口都是封装了CAS的接口,下面我们演示一下:
int main()
{
	atomic x = 0;
	int n = 10000;
	thread t1([&,n]()
		{
			for (int i = 0; i < n; i++)
			{
				++x;
			}
		});
	thread t2([&, n]()
		{
			for (int i = 0; i < n; i++)
			{
				++x;
			}
		});
	t1.join();
	t2.join();
	return 0;
}
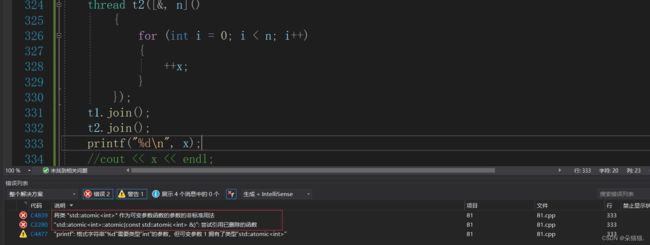
那么原子性的值该如何打印呢?
实际上对于原子的变量有一个load接口是专门用来打印的:
对于其他原子的接口我们就不在一一演示了,下面我们讲一个经典面试题:两个线程,一个线程打印奇数一个线程打印偶数交替打印。
在解决这个问题的时候我们需要用到条件变量,条件变量看过linux线程那篇文章的应该很熟悉,与那里是一模一样的,下面我们直接展示c++中条件变量的接口:
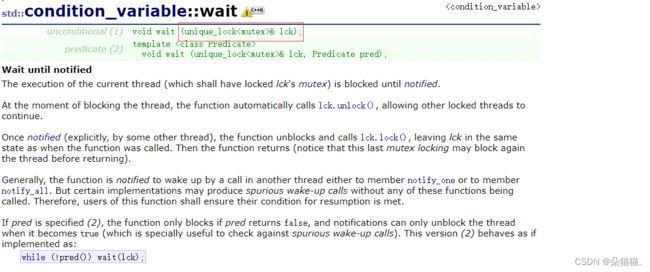
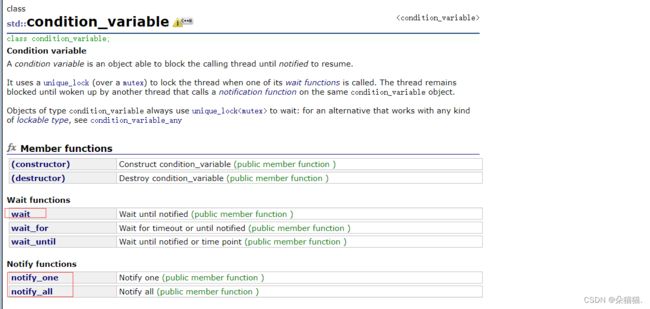 条件变量有3个常用的接口,wait是让一个线程进入休眠,休眠期间会释放锁。one是唤醒一个线程,唤醒后会自动恢复之前休眠期间释放的锁,all是唤醒所有休眠的线程。
通过文档我们可以看到条件变量是需要配合互斥锁使用的,因为条件变量本身并不是线程安全的,这里的条件变量的构造函数是用的unique_lock这个锁来初始化的,所以我们传参数的时候一定要看清楚。
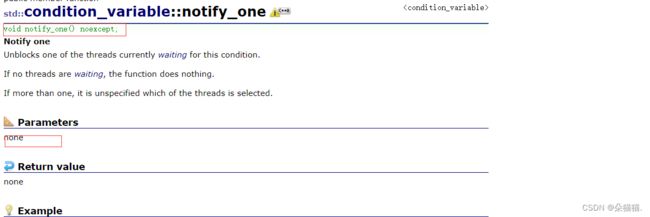
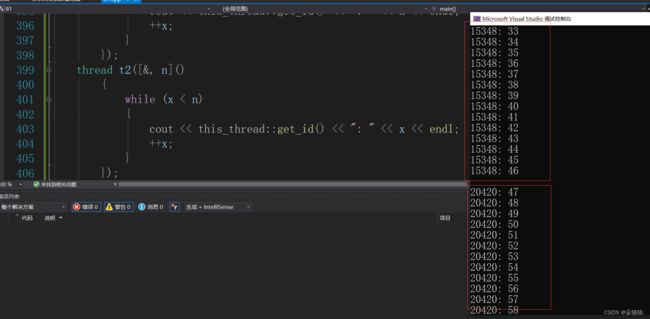
唤醒一个线程或者唤醒多个线程的接口是不需要参数的,直接使用接口就好,下面我们先写出交替打印奇偶数的框架:
int main()
{
	int n = 100;
	int x = 1;
	mutex mtx;
	thread t1([&, n]()
		{
			while (x < n)
			{
				cout << this_thread::get_id() << ": " << x << endl;
				++x;
			}
		});
	thread t2([&, n]()
		{
			while (x < n)
			{
				cout << this_thread::get_id() << ": " << x << endl;
				++x;
			}
		});
	t1.join();
	t2.join();
	return 0;
}
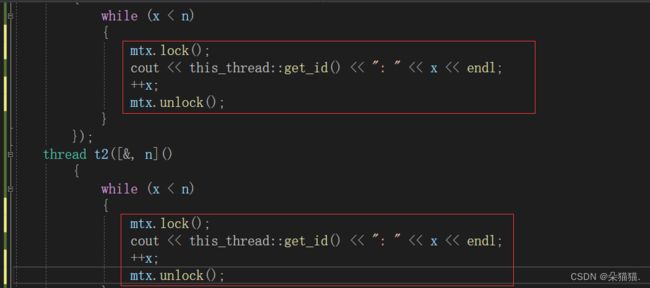
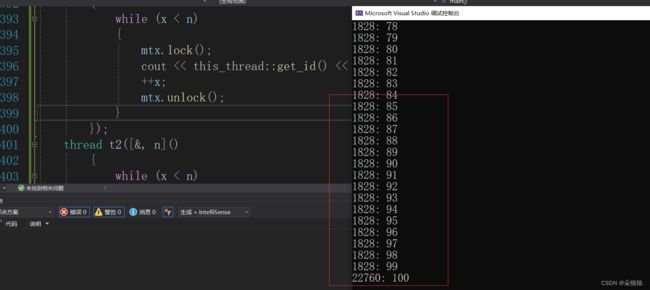
通过结果我们可以看到是完不成我们给的交替打印的任务的,那么我们在加锁试一下:
通过结果也可以看到是无法完成我们的任务的,下面我们就加上条件变量来试一下:
int main()
{
	int n = 100;
	int x = 1;
	mutex mtx;
	condition_variable cv;
	thread t1([&, n]()
		{
			while (x < n)
			{
				unique_lock lock(mtx);
				if (x % 2 == 0)  //偶数就进去等待
				{
					cv.wait(lock);
				}
				cout << this_thread::get_id() << ": " << x << endl;
				++x;
				//唤醒等待的线程
				cv.notify_one();
			}
		});
	thread t2([&, n]()
		{
			while (x < n)
			{
				unique_lock lock(mtx);
				if (x % 2 != 0)  //遇到奇数就等待
				{
					cv.wait(lock);
				}
				cout << this_thread::get_id() << ": " << x << endl;
				++x;
				//唤醒另一个休眠的线程
				cv.notify_one();
			}
		});
	t1.join();
	t2.join();
	return 0;
}
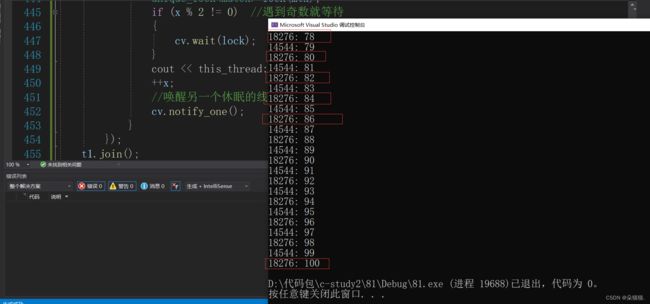
通过结果我们可以看到已经完成了交替打印的任务,通过这个程序可以让我们学习到条件变量的使用,下面我们讲解一下这个程序:
首先我们通过unique_lock来加锁保证了t1先运行,t2阻塞。为什么能保证呢?1.t1先抢到锁,t2后抢到锁,t1先运行,t2阻塞在锁上面。2.t2先抢到锁,t1后抢到锁,t2先运行,t1阻塞在锁上面,但是t2会被下一步wait阻塞,并且wait的时候会解锁,保证了t1先运行。
我们用if判断可以防止一个线程不断运行,下面我们分析一下:
假设t1先获取到锁,t2后获取到锁,t2阻塞在锁上面。然后t1打印奇数,++x,x变成偶数,然后t1唤醒,但是没有线程wait,然后t1出了作用域解锁,然后t1的时间片到了切了出去。然后t2获取到锁打印,然后notify,但是没有线程等待lock出作用域解锁。假设t2的时间片充足再次获取到锁,如果没有条件控制,就会导致t2连续打印。
当然我们的程序还有一个小风险,当我们数++到100的时候很有可能进不去while判断条件,所以我们修改一下:
int main()
{
	int n = 100;
	int x = 1;
	mutex mtx;
	condition_variable cv;
	thread t1([&, n]()
		{
			while (1)
			{
				unique_lock lock(mtx);
				if (x >= 100)
				{
					break;
				}
				if (x % 2 == 0)  //偶数就进去等待
				{
					cv.wait(lock);
				}
				cout << this_thread::get_id() << ": " << x << endl;
				++x;
				//唤醒等待的线程
				cv.notify_one();
			}
		});
	thread t2([&, n]()
		{
			while (1)
			{
				unique_lock lock(mtx);
				if (x > 100)
				{
					break;
				}
				if (x % 2 != 0)  //遇到奇数就等待
				{
					cv.wait(lock);
				}
				cout << this_thread::get_id() << ": " << x << endl;
				++x;
				//唤醒另一个休眠的线程
				cv.notify_one();
			}
		});
	t1.join();
	t2.join();
	return 0;
} 二、包装器
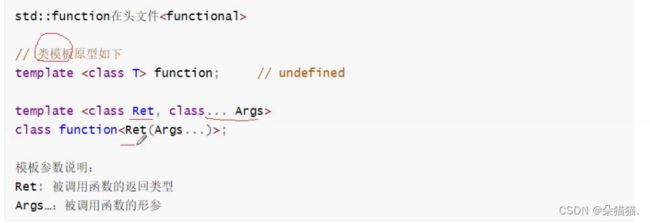
上图是包装器的声明,可以看到包装器的模板非常怪,下面我们就直接演示如何使用包装器了。
int f(int a, int b)
{
	return a + b;
}
struct Functor
{
public:
	int operator()(int a, int b)
	{
		return a + b;
	}
};
int main()
{
	int(*ptf)(int, int) = f;
	return 0;
}
首先像上面的代码我们用函数指针接收f函数会显得很麻烦,因为函数指针本身就很繁琐,下面我们看看包装器是如何接收的:
#include
int f(int a, int b)
{
	return a + b;
}
struct Functor
{
public:
	int operator()(int a, int b)
	{
		return a + b;
	}
};
int main()
{
	function f1 = f;
	function f2 = f;
	return 0;
}
我们可以看到使用非常简单,甚至还可以使用lambda:
 包装器的使用非常简单,就像函数一样。而且我们还可以将包装器当成函数声明:
int main()
{
	function f1 = f;
	function f2 = Functor();
	function f3 = [](int a, int b) { return a + b; };
	cout << f1(10, 20) << endl;
	cout << f2(30, 40) << endl;
	cout << f3(50, 50) << endl;
	map> sop;
	sop["函数指针"] = f1;
	sop["仿函数"] = f2;
	sop["lambda"] = f3;
	return 0;
}
下面我们演示一下包装器包装成员函数:
class Plus
{
public:
	static int plusi(int a, int b)
	{
		return a + b;
	}
	double plusd(double a, double b)
	{
		return a + b;
	}
};
int main()
{
	//静态成员函数
	function f1 = Plus::plusi;
	//普通成员函数
	function f2 = &Plus::plusd;
	return 0;
}
静态成员函数与刚刚的使用没有区别,主要是普通成员函数,因为普通成员函数参数多了一个this指针,并且语法是:域名前面必须加&
当然这里不仅可以传类对象,也可以传指针。
那么包装器的最大作用是什么呢?那就是统一类型。
int f(int a, int b)
{
	return a + b;
}
class Plus
{
public:
	int plusi(int a, int b)
	{
		return a + b;
	}
	double plusd(double a, double b)
	{
		return a + b;
	}
};
int main()
{
	Plus plus;
	function f2 = f;
	//正常对于成员函数需要多一个参数
	function f1 = &Plus::plusi;
	//和25行统一参数类型
	functionf3 = [&](int a, int b) {return plus.plusi(a,b); };
	return 0;
}
可以看到本来成员函数需要多一个参数的,但是我们直接捕捉了plus对象然后调用这个对象中的函数就完成了类型统一(都是int(int,int))
template
T useF(F f, T x)
{
	static int count = 0;
	cout << "count:" << ++count << endl;
	cout << "count:" << &count << endl;
	return f(x);
}
double f(double i)
{
	return i / 2;
}
struct Functor
{
	double operator()(double d)
	{
		return d / 3;
	}
};
int main()
{
	// 函数名
	cout << useF(f, 11.11) << endl;
	// 函数对象
	cout << useF(Functor(), 11.11) << endl;
	// lamber表达式
	cout << useF([](double d)->double { return d / 4; }, 11.11) << endl;
	return 0;
}
下面我们将上面的这段代码进行一下类型统一,让useF的类型都是相同的。
int main()
{
	cout << useF(function(f), 11.11) << endl;
	Functor func;
	cout << useF(function(func), 11.11) << endl;
	cout << useF(function([](double d) {return d / 4; }), 11.11);
	return 0;
}
可以看到我们useF使用起来参数都是相同这样在模板实例化的时候只会实例化一份而不是像上面那样一次实例化三个函数浪费多余的空间。
绑定
// 原型如下:
template
/* unspecified */ bind (Fn&& fn, Args&&... args);
// with return type (2)
template
/* unspecified */ bind (Fn&& fn, Args&&... args); int ssub(int a, int b)
{
return a - b;
}
class Sub
{
public:
int sub(int a, int b)
{
return a - b;
}
};
int main()
{
function f = bind(ssub, placeholders::_1, placeholders::_2);
cout << f(10, 20) << endl;
function f1 = bind(ssub, placeholders::_2, placeholders::_1);
cout << f1(10, 20) << endl;
return 0;
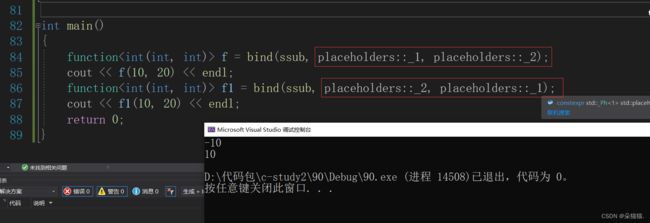
} 我们可以看到当我们将顺序改变后结果就不一样了,那么bind和placeholders是什么呢?
通过查询文档可以知道placeholders是一个命名空间:
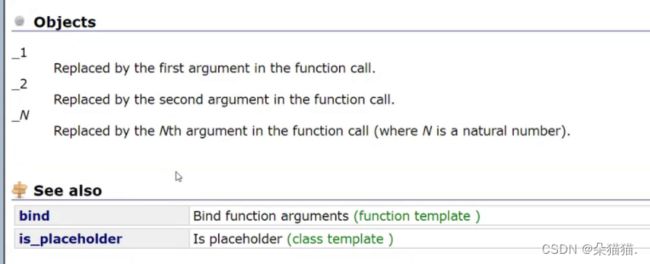 _1,_2这些代表一个个的占位对象,比如我们函数的第一个参数就应该放在_1中,当我们将占位对象的位置发生改变后函数参数的顺序也相应的发生改变。那么有什么作用呢?还记得我们sort这类排序需要仿函数控制,那么我们如果是小于的比较当我们将顺序互换后其实就变成相反的结果了:
int main()
{
	function f2 = bind(less(), placeholders::_1, placeholders::_2);
	cout << f2(1, 2) << endl;
	function f3 = bind(less(), placeholders::_2, placeholders::_1);
	cout << f3(1, 2) << endl;
	return 0;
}
当然我们在大多数情况下都不会去使用绑定的,所以大家只需要认识一下就可以了。当然对于成员函数我们需要有一些改变,如果我们不想在包装器中传第一个this指针参数的话那么可以直接绑定一下:
int main()
{
	function f = bind(&Sub::sub,Sub(), placeholders::_1, placeholders::_2);
	cout << f(10, 20) << endl;
	function f1 = bind(&Sub::sub,Sub(), placeholders::_2, placeholders::_1);
	cout << f1(10, 20) << endl;
	return 0;
}
以上就是包装器和绑定的所有内容了,这部分内容可以了解一下,当需要使用的时候查一下文档即可,因为日常会很少使用。
总结
本篇文章中最重要的部分就是线程库了,学过linux的都知道linux下的线程使用起来是比c++中麻烦的,而c++线程库中将很多东西进行了封装就像简单的锁我们不需要自己去释放,出了作用域这个锁就自动销毁了。
