简化YOLOv5的推理过程
模型为YOLOv5s(v7.0)
目录
基本流程:
一、导入库
二、完整代码
三、结果分析
总结
基本流程:
加载模型---动态resize图片大小---归一化---HWC转CHW---扩展维度---numpy转tensor---转float32---预测--NMS--将检测框缩放至原始图尺寸--你需要的功能(截图、画检测框等)
一、导入库
导入cv2和numpy、torch库,从general.py中导入non_max_suppression(NMS,用于去除重复框),scale_boxes(将检测框缩放至原图片上)。
import cv2
import numpy as np
import torch
from utils.general import non_max_suppression, scale_boxes
from utils.plots import save_one_box2  #自己写的,根据检测框保存截图
二、完整代码
import cv2
import numpy as np
import torch
from utils.general import non_max_suppression, scale_boxes
from utils.plots import save_one_box2  #自己写的,根据检测框保存截图
if __name__ == "__main__":
    device = torch.device('cuda:0' if torch.cuda.is_available() else 'cpu')  #检测是否有gpu,有则使用gpu
    weights = 'best.pt'                                             #模型权重地址
    img0 = cv2.imread('test/ori_images/9.jpg')  #读取图片
    w = str (weights)         #将权重地址转换为字符串
    #加载模型
    model=torch.load(w, map_location=device)['model'].float().fuse().eval()       #加载模型,float()转换为float32,fuse()融合模型加速推理,eval()评估模式
    ###############################动态调整图片大小##############################################
    height, width = img0.shape[:2]
    #比较宽和高大小,将最大的设为640
    if height > width:
        target = 640
        scale = target / height
        # 计算缩放后的尺寸,高度向下取整至32的倍数
        new_width = int(width * scale / 32) * 32
        new_height = target
    else:
        target= 640
        scale = target / width
        # 计算缩放后的尺寸,高度向下取整至32的倍数
        new_height= int(height * scale / 32) * 32
        new_width = target
    # 缩放图像
    img = cv2.resize(img0, (new_width,new_height ))
    ############################################################################################
    img = img / 255.                            #归一化至[0,1]
    img = img[:, :, ::-1].transpose((2, 0, 1))   #HWC转CHW
    img = np.expand_dims(img, axis=0)    #扩展维度至[1,3,new_height,new_width]
    img = torch.from_numpy(img.copy())   #numpy转tensor
    img = img.to(torch.float32)          #float64转换float32
    img = img.to(device)                 #cpu转gpu
    pred = model(img)
    # pred.clone().detach()
    pred = non_max_suppression(pred, 0.25, 0.45, None, False, max_det=1000)  #非极大值抑制,去除重复框
    for i, det in enumerate(pred):
        if len(det):
            det[:, :4] = scale_boxes(img.shape[2:], det[:, :4], img0.shape).round()  #将预测框缩放至原图尺寸
            for *xyxy, conf, cls in reversed(det):
                img0=cv2.rectangle(img0, (int(xyxy[0]), int(xyxy[1])), (int(xyxy[2]), int(xyxy[3])), (0, 0, 255), 2)
                img0=cv2.putText(img0, str(int(cls)), (int(xyxy[0]), int(xyxy[1])), cv2.FONT_HERSHEY_SIMPLEX, 1, (0, 0, 255), 2)
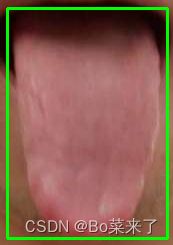
                save_one_box2(xyxy, img0, file='out2.jpg')
    cv2.imwrite('out.jpg', img0)
三、结果分析
使用动态resize
直接resize(img,(640,640))

