openeuler22.03 LTS 二进制部署MySQL 5.7
文章目录
- 一、获取MySQL软件包
- 二、MySQL二进制安装
一、获取MySQL软件包
企业版:Enterprise  , 互联网行业一般不选择.

社区版本:选择
            源码包 编译安装:  source code    .tar.gz
            通用二进制


公司用什么版本数据库? 具体什么小版本号?
5.6.20 5.6.34 5.6.36  5.6.38  5.6.40
5.7.18  5.7.20  5.7.22 5.7.39
通用二进制版本: 本文档采用此方式安装
https://dev.mysql.com/downloads/mysql/
点击“Looking for previous GA versions?”,跳转后依次选择“Linux-Generic”“Linux-Generic(glibc2.12)(x86,64-bit)”
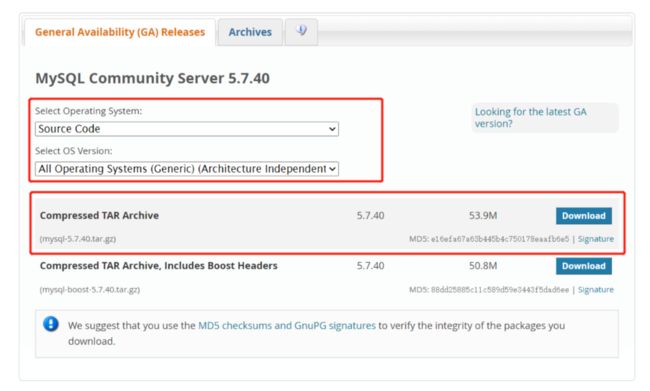
源码包 版本:过于复杂,一般有自定义需求才采用此方式
https://dev.mysql.com/downloads/mysql/点击“Looking for previous GA versions?”,跳转后依次选择“Source Code”“All Operating Systems(Generic)”
二、MySQL二进制安装
环境检查:
- 关闭防火墙
- 禁用selinux
[root@localhost application]# systemctl status firewalld
firewalld.service - firewalld - dynamic firewall daemon
     Loaded: loaded (/usr/lib/systemd/system/firewalld.service; disabled; vendor preset: enabled)
     Active: inactive (dead)
       Docs: man:firewalld(1)


[root@localhost application]# getenforce
Disabled
1、创建mysql工作目录:
[root@db01 ~]# mkdir -p /home/application/mysql
2、上传软件,并解压并改名为app
[root@db01 app]# tar -xf /root/mysql-5.7.39-linux-glibc2.12-x86_64.tar.gz
[root@db01 app]# mv mysql-5.7.39-linux-glibc2.12-x86_64 /home/application/mysql/app
[root@db01 app]# ls -l /home/application/mysql/app
total 36
drwxr-xr-x  2 root root   4096 Mar  4 14:55 bin
-rw-r--r--  1 7161 31415 17987 Sep 13  2017 COPYING
drwxr-xr-x  2 root root     55 Mar  4 14:55 docs
drwxr-xr-x  3 root root   4096 Mar  4 14:55 include
drwxr-xr-x  5 root root    229 Mar  4 14:55 lib
drwxr-xr-x  4 root root     30 Mar  4 14:55 man
-rw-r--r--  1 7161 31415  2478 Sep 13  2017 README
drwxr-xr-x 28 root root   4096 Mar  4 14:55 share
drwxr-xr-x  2 root root     90 Mar  4 14:55 support-files
3、修改环境变量:
[root@db01 ~]# vim /etc/profile #加入一行
export PATH=$PATH:/home/application/mysql/app/bin

[root@db01 bin]# source /etc/profile
4、建立mysql用户和组(如果有可忽略)
useradd -s /sbin/nologin mysql -M
5、创建mysql 数据目录,日志目录;并修改权限
mkdir -p /home/application/mysql/data

chown -Rf mysql.mysql /home/application/mysql/app
chown -Rf mysql.mysql /home/application/mysql/data
6、初始化数据(建库)
常见报错:
报错原因: Linux系统中缺少libaio-devel 软件包
解决:
yum install -y libaio-devel
初始化数据,初始化管理员的密码为空

# 如果已经初始化过了,就需要把数据目录数据情况,再次初始化 rm -rf  /home/application/mysql/data/*
[root@db01 ~]# mysqld --initialize-insecure  --user=mysql --basedir=/home/application/mysql/app --datadir=/home/application/mysql/data

2019-04-18T03:37:43.146018Z 0 [Warning] TIMESTAMP with implicit DEFAULT value is deprecated. Please use --explicit_defaults_for_timestamp server option (see documentation for more details).
2019-04-18T03:37:43.892132Z 0 [Warning] InnoDB: New log files created, LSN=45790
2019-04-18T03:37:43.970412Z 0 [Warning] InnoDB: Creating foreign key constraint system tables.
2019-04-18T03:37:44.029490Z 0 [Warning] No existing UUID has been found, so we assume that this is the first time that this server has been started. Generating a new UUID: 5378f3b3-618b-11e9-9164-000c294234c8.
2019-04-18T03:37:44.041469Z 0 [Warning] Gtid table is not ready to be used. Table 'mysql.gtid_executed' cannot be opened.
2019-04-18T03:37:44.042348Z 1 [Warning] root@localhost is created with an empty password ! Please consider switching off the --initialize-insecure option.


[root@db01 ~]# cd  /home/application/mysql/data/
[root@db01 mysql]# ll
total 110628
-rw-r----- 1 mysql mysql       56 Apr 18 11:37 auto.cnf
-rw-r----- 1 mysql mysql      419 Apr 18 11:37 ib_buffer_pool
-rw-r----- 1 mysql mysql 12582912 Apr 18 11:37 ibdata1
-rw-r----- 1 mysql mysql 50331648 Apr 18 11:37 ib_logfile0
-rw-r----- 1 mysql mysql 50331648 Apr 18 11:37 ib_logfile1
drwxr-x--- 2 mysql mysql     4096 Apr 18 11:37 mysql
drwxr-x--- 2 mysql mysql     8192 Apr 18 11:37 performance_schema
drwxr-x--- 2 mysql mysql     8192 Apr 18 11:37 sys
7、编写默认配置文件
vim /etc/my.cnf
[mysqld]
user=mysql
basedir=/home/application/mysql/app
datadir=/home/application/mysql/data
character_set_server=utf8
collation-server=utf8_general_ci


#只能用IP地址检查客户端的登录,不用主机名,跳过域名解析
skip-name-resolve=1

#日志时间
log_timestamps=SYSTEM


#binlog配置
server_id=17
log-bin=mysql-bin
max_binlog_size = 100M
binlog_format=row
log_slave_updates
expire_logs_days=7


port=3306
socket=/tmp/mysql.sock
max_connections=1000
sql_mode=STRICT_TRANS_TABLES,NO_ZERO_IN_DATE,NO_ZERO_DATE,ERROR_FOR_DIVISION_BY_ZERO,NO_AUTO_CREATE_USER,NO_ENGINE_SUBSTITUTION
max_allowed_packet=300M

[mysql]
socket=/tmp/mysql.sock
default-character-set=utf8
8、使用systemd管理mysql
注意: LimitNOFILE 为65535
vim /etc/systemd/system/mysqld.service
[Unit]
Description=MySQL Server
Documentation=man:mysqld(8)
Documentation=http://dev.mysql.com/doc/refman/en/using-systemd.html
After=network.target
After=syslog.target

[Install]
WantedBy=multi-user.target
[Service]
User=mysql
Group=mysql
ExecStart=/home/application/mysql/app/bin/mysqld --defaults-file=/etc/my.cnf
LimitNOFILE = 65535
systemd 管理相关命令
systemctl start/stop/restart/status mysqld
9、安装后的简单管理
#修改密码,

[root@db01 ~]# mysqladmin -uroot -p password openeuler@2023

Enter password: 直接回车

mysqladmin: [Warning] Using a password on the command line interface can be insecure. Warning: Since password will be sent to server in plain text, use ssl connection to ensure password safety.
10、使用新密码登录
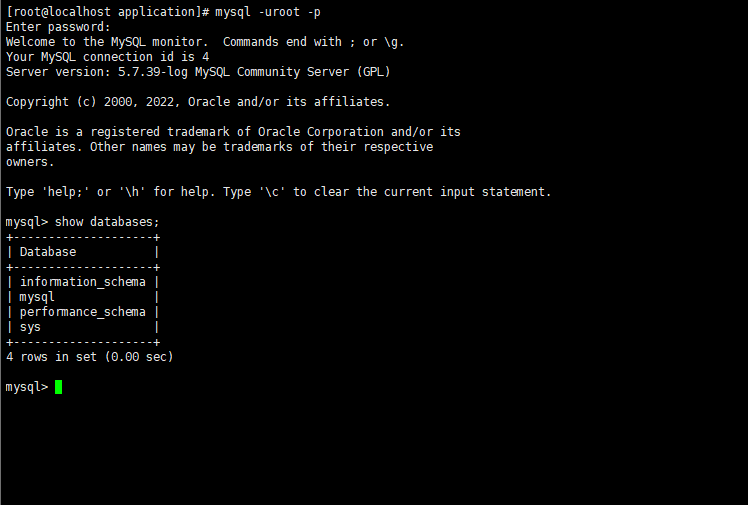
[root@db01 ~]# mysql -uroot -p openeuler@2023
11、常见问题
使用mysql 登录时候 报错,缺少libraries
mysql: error while loading shared libraries: libncurses.so.5: cannot open shared object file: No such file or directory
安装如下依赖:
yum install libaio
yum install ncurses-compat-libs
来源于fxkjnj.com
© 版权声明
文章版权归作者所有,未经允许请勿转载。


