安装 Jupyter 开发工具
Jupyter 是python交互式编辑器,即执行一行代码,就立刻显示结果。非常直观,是机器学习的专业人士不可少的工具。 本文档介绍 Jupyter的一步一步安装,从一台刚创建的虚拟机开始。
1. 版本和环境
本文档写于2021年4月2日,用的是centOS 8.1 版本。4核 8Gb内存。用的Anaconda安装包是 Anaconda3-2020.11-Linux-x86_64.sh,anaconda是python开发环境管理软件,可以从https://www.anaconda.com/下载 个人版本(Individual Edition).
2. 安装步骤
1. 在用户目录下,可以建立download目录,将 Anaconda3-2020.11-Linux-x86_64.sh 安装包放入download 目录下:然后,键入:
sh Anaconda3-2020.11-Linux-x86_64.sh遇到提问,如果是yes/no 的选择,都键入yes,如果是提问是否继续,键入 Enter(回车键), 遇到授权许可,按翻页键就是,总之,不要输入no。最后,提问时需不需要初始化base开发环境,输入yes。
2. 安装完毕,退出exit,然后重新登入。这时,会有以下 提示符出现,
(base) [jupyter@localhost ~]$注意,这里base就是开发环境名 base。Anaconda安装完之后,可以敲入以下命令列出所有开发环境:
(base) [jupyter@localhost ~]$ conda env list
# conda environments:
#
base                  *  /home/jupyter/anaconda3
目前只有一种开发环境 base。
3. 现在,让我们建立自己的开发环境,tutorial-ml,基于python 3.7的jupyter的开发环境,tutorial-ml,我们先创建tutorial目录,然后在tutorial目录下,创建文件 environment.yml, 内容如下:
name: tutorial-ml
channels:
  - conda-forge
  - pyviz
dependencies:
  - python=3.7
  - pip
  - numpy >= 1.18.5
  - pandas
  - holoviews >= 1.14
  - bokeh
  - jupyterlab
  - jupyter-server-proxy
  - nodejs
  - pip:
    - atoma
python,pip,numpy,pandas,nodejs,都是基本python模块,holoviews是笔者介绍的python比较新的可视化模块/软件包,bokeh是holoviews的依赖包,jupyterlab 和 jupyter-server-proxy就是笔者要介绍的jupyter工具的安装包,atoma 就是笔者放在那儿。enviroment.yml 格式在笔者的另一篇博客就介绍了。 这里不做重复介绍。
4. 有了environment.yml 文件后,开始一些Linux环境的配置,比如 DNS,加入nameserver,国内是114.114.114.114 dns服务器
(base) [jupyter@localhost ~]$sudo vi /etc/resolv.conf
nameserver 114.114.114.114
5. 现在开始建立开发环境 tutorial-ml,
(base) [jupyter@localhost ~]$ conda env create -f environment.yml
...
...
Installing pip dependencies: | Ran pip subprocess with arguments:
这需要耐心,安装至少需要30秒,可能1分钟,2分钟,反正只要不中断,就耐心一点。当您看到 Installing pip dependencies: | Ran pip subprocess with arguments: 时,其实开发环境已经建立起来,接下来是安装pip下的python安装包或模块,这个其实后续也可以自行再安装。
6. 确认环境tutorial-ml是否安装成功,可以敲入命令行,
(base) [jupyter@localhost ~]$ conda env list
# conda environments:
#
base                     /home/jupyter/anaconda3
tutorial-ml           *  /home/jupyter/anaconda3/envs/tutorial-ml
这时,您会看到tutorial-ml被列出来了。现在您就可以激活tutorial-ml开发环境
7. 激活tutorial-ml开发环境就只要敲入以下命令:
(base) [jupyter@localhost ~]$ conda activate tutorial-ml8. 有了tutorial-ml 环境,我们马上就完成安装了,但我们还有些linux的设置,比如IPv6的明确激活或不激活,防火墙的关闭,/etc/hosts 的IP地址添加,接下来,我们分别来做:
# 激活IPv6
sudo sysctl -w net.ipv6.conf.all.disable_ipv6=0
sudo sysctl -w net.ipv6.conf.default.disable_ipv6=0
激活IPv6后,关闭防火墙:
systemctl status firewalld
# 防火墙工作状态: active (running) since Fri 2021-03-19 10:17:27 CST; 4 days ago
# 拆卸防火墙: inactive (dead) since Tue 2021-03-23 10:58:10 CST; 3s ago

systemctl stop fiewalld
————————————————
版权声明:本文为CSDN博主「juhanishen」的原创文章,遵循CC 4.0 BY-SA版权协议,转载请附上原文出处链接及本声明。
原文链接:https://blog.csdn.net/juhanishen/article/details/115122169
,然后创建在/etc/hosts 文件里加入一条记录:
...
192.168.1.231 localhost
我的本地地址是192.168.1.231,读者可以根据自身实际情况更改IP地址。现在,您可以退出 exit linux,然后重新登入,别忘记进入tutorial目录,然后激活tutorial-ml环境,
(base) [jupyter@localhost ~]$ cd tutorial/
(base) [jupyter@localhost tutorial]$ conda activate tutorial-ml
(tutorial-ml) [jupyter@localhost tutorial]$
9. 最后启动 jupyter的服务器,
(tutorial-ml) [jupyter@localhost tutorial]$ jupyter lab

...
...

 Or copy and paste one of these URLs:
        http://localhost:8888/lab?token=cd63b51b8c44684572fd3a0861be913d49af5e316ddc07bb
     or http://127.0.0.1:8888/lab?token=cd63b51b8c44684572fd3a0861be913d49af5e316ddc07bb
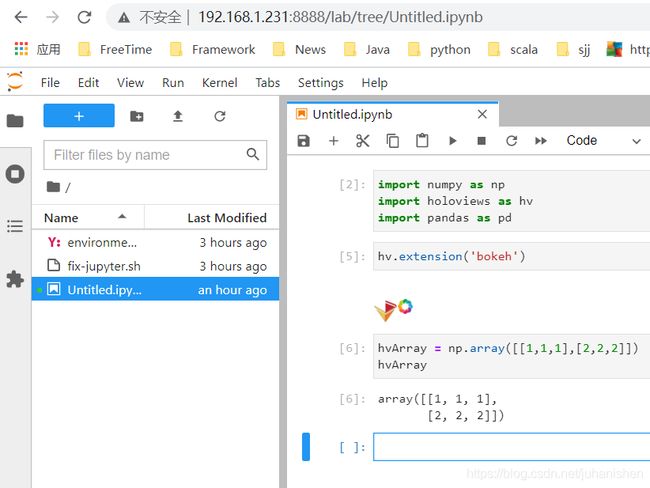
在本地局域网内的浏览器里,输入地址 http://192.168.1.231:8888/lab?token=cd63b51b8c44684572fd3a0861be913d49af5e316ddc07bb, 现在就可以在浏览器里看到jupyter的python开发工具了。
大功告成。现在,您就有交互式python开发工具了。
10. 安装其他python 工具包
如果开发环境还是tutorial-ml,先激活tutorial-ml开发环境,然后pip安装就可以。 国内可以用aliyun的镜像源:
#pip install -i https://mirrors.aliyun.com/pypi/simple/ 要下的包名

pip install -i https://mirrors.aliyun.com/pypi/simple/ ray[all]请注意不要用sudo pip install xxx。
3. 其他
本博客创建于2021年4月2日,未来更新日期会在文末附上。
第一次更新 2021年5月25日, 不要用sudo pip install xxx。
