vue3 + ts+element-plus学习笔记
子组件通过defineProps方法接收父组件传递过来的数据,是vue3中提供的方法,不需要引入,直接使用

方法的写法:
const onClick = (){
	...
}

自定义事件:


子组件点击事件


全局事件总线

mitt
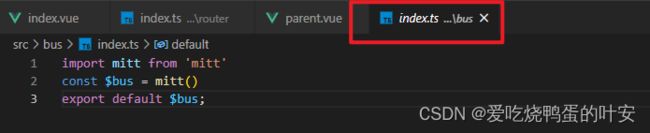
兄弟组件之间的事件(如下图)
通过$bus.emit触发事件,$bus.on接收

组件通讯-插槽
默认插槽、具名插槽

作用域插槽:可以传递数据的插槽,子组件可将数据回传给父组件,父组件可决定改数据以何种结构或外观在子组件内部去展示
用法如下:

搭建vue3+ts+element-plus+echarts商城管理项目
一、vite
1、vite 前端构建工具
二、项目准备、配置
从0开始搭建一个vue3版本的后台管理系统。一个项目要有统一的规范,需要使用eslint+stylelint+prettier来对代码质量做检测和修复,需要使用husky来做commit拦截,需要使用commitlint来统一提交规范,需要使用preinstall来统一包管理器工具;下面我们就用这一套规范来初始化我们的项目,继承一个规范的模板。
2.1、项目初始化
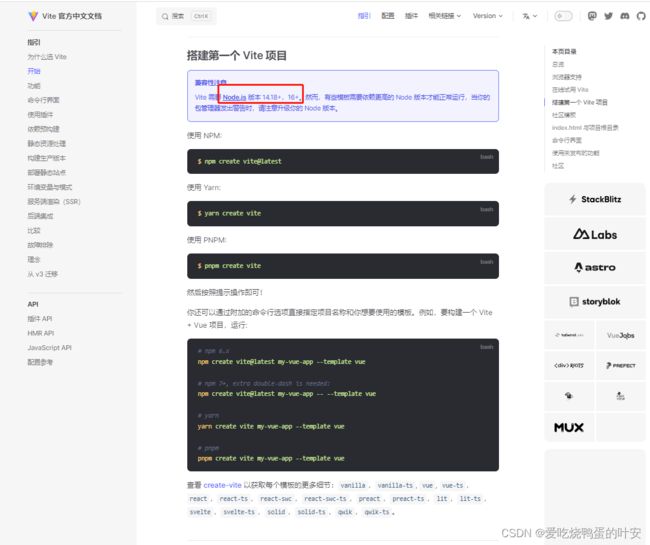
环境准备node v16.14.2、pnpm 8.6.10
pnpm安装指令:npm i -g pnpm
项目初始化: pnpm create vite
进入到根目录下pnpm install安装全部依赖,接着运行程序pnpm run dev,运行完可以在浏览器中 http://127.0.0.1:5173/ 访问项目。
2.2、项目配置
项目启动需要复制地址在浏览器中自行打开,可以在package.json中设置,启动后自动打开
添加--open

一、eslint配置
eslint中文官网:https://eslint.cn/
ESLint最初是由Nicholas C. Zakas 于2013年6月创建的开源项目。它的目标是提供一个插件化的javascript代码检测工具。
1. 安装依赖:
pnpm i eslint -D
2. 生成配置文件.eslintrc.cjs:
npx eslint --init,配置项选择如下:


3. vue3环境代码校验插件

安装指令
pnpm install -D eslint-plugin-import eslint-plugin-vue eslint-plugin-node eslint-plugin-prettier eslint-config-prettier eslint-plugin-node @babel/eslint-parser
4. 修改配置文件.eslintrc.cjs
// @see https://eslint.bootcss.com/docs/rules/
module.exports = {
env: {
browser: true,
es2021: true,
node: true,
jest: true,
},
/* 指定如何解析语法 */
parser: 'vue-eslint-parser',
/** 优先级低于 parse 的语法解析配置 */
parserOptions: {
ecmaVersion: 'latest',
sourceType: 'module',
parser: '@typescript-eslint/parser',
jsxPragma: 'React',
ecmaFeatures: {
jsx: true,
},
},
/* 继承已有的规则 */
extends: [
'eslint:recommended',
'plugin:vue/vue3-essential',
'plugin:@typescript-eslint/recommended',
'plugin:prettier/recommended',
],
plugins: ['vue', '@typescript-eslint'],
/*
* "off" 或 0 ==> 关闭规则
* "warn" 或 1 ==> 打开的规则作为警告(不影响代码执行)
* "error" 或 2 ==> 规则作为一个错误(代码不能执行,界面报错)
*/
rules: {
// eslint(https://eslint.bootcss.com/docs/rules/)
'no-var': 'error', // 要求使用 let 或 const 而不是 var
'no-multiple-empty-lines': ['warn', { max: 1 }], // 不允许多个空行
'no-console': process.env.NODE_ENV === 'production' ? 'error' : 'off',
'no-debugger': process.env.NODE_ENV === 'production' ? 'error' : 'off',
'no-unexpected-multiline': 'error', // 禁止空余的多行
'no-useless-escape': 'off', // 禁止不必要的转义字符
// typeScript (https://typescript-eslint.io/rules)
'@typescript-eslint/no-unused-vars': 'error', // 禁止定义未使用的变量
'@typescript-eslint/prefer-ts-expect-error': 'error', // 禁止使用 @ts-ignore
'@typescript-eslint/no-explicit-any': 'off', // 禁止使用 any 类型
'@typescript-eslint/no-non-null-assertion': 'off',
'@typescript-eslint/no-namespace': 'off', // 禁止使用自定义 TypeScript 模块和命名空间。
'@typescript-eslint/semi': 'off',
// eslint-plugin-vue (https://eslint.vuejs.org/rules/)
'vue/multi-word-component-names': 'off', // 要求组件名称始终为 “-” 链接的单词
'vue/script-setup-uses-vars': 'error', // 防止
使用组件:
import SvgIcon from '@/components/SvgIcon/index.vue'

也可以
在入口文件main.ts中导入并注册为全局组件
import SvgIcon from '@/components/SvgIcon/index.vue';
app.component('SvgIcon', SvgIcon)
还可以这样做;
将项目中的所有全局组件配置为一个对象,在入口文件引入自定义插件对象并安装,步骤如下
在components目录下新建index.ts文件,在此引入全部的全局组件,并对外暴露,通过循环注册全局组件,代码如下
// 引入项目中全部的“全局组件”
import SvgIcon from './SvgIcon/index.vue'

//全局对象
const allGloablComponent = { SvgIcon }

//对外暴露插件对象
export default {
    //务必叫install方法
    install(app) {
        //注册项目全部的全局组件
        Object.keys(allGloablComponent).forEach(key => {
            //注册为全局组件
            app.component(key, allGloablComponent[key])
        })
    }
}
在入口文件main.ts下引入并安装所有的全局组件
//引入自定义插件对象,注册整个项目的全局组件
import gloablComponent from '@/components'
//安装自定义插件
app.use(gloablComponent)
直接在文件中使用即可,全局组件无需再次引用

3.5 集成sass
目前项目组件内部已经可以使用scss样式,因为在配置eslint工具的时候,项目当中已经安装过sass sass-loder,所以在组件中可以使用scss语法,需要加上lang="scss"
在src下新建styles目录,创建index.scss文件,并引入清除默认样式的文件reset.scss
@import './reset.scss'
清除默认样式的参考官网https://www.npmjs.com/package/reset.scss
如下:
/**
 * ENGINE
 * v0.2 | 20150615
 * License: none (public domain)
 */
*,*:after,*:before {
    box-sizing: border-box;
    outline: none;
}
html,body,div,span,applet,object,iframe,h1,h2,h3,h4,h5,h6,p,blockquote,pre,a,abbr,acronym,address,big,cite,code,del,dfn,em,img,ins,kbd,q,
s,samp,small,strike,strong,sub,sup,tt,var,b,u,i,center,dl,dt,dd,ol,ul,li,fieldset,form,label,legend,table,caption,tbody,tfoot,thead,tr,
th,td,article,aside,canvas,details,embed,figure,figcaption,footer,header,hgroup,menu,nav,output,ruby,section,summary,time,mark,audio,
video {
    font: inherit;
    font-size: 100%;
    margin: 0;
    padding: 0;
    vertical-align: baseline;
    border: 0;
}
article,aside,details,figcaption,figure,footer,header,hgroup,menu,nav,section {
    display: block;
}
body {
    line-height: 1;
}
ol,ul {
    list-style: none;
}
blockquote,q {
    quotes: none;
    &:before,
    &:after {
        content: '';
        content: none;
    }
}
sub,sup {
    font-size: 75%;
    line-height: 0;
    position: relative;
    vertical-align: baseline;
}
sup {
    top: -.5em;
}
sub {
    bottom: -.25em;
}
table {
    border-spacing: 0;
    border-collapse: collapse;
}
input,textarea,button {
    font-family: inhert;
    font-size: inherit;
    color: inherit;
}
select {
    text-indent: .01px;
    text-overflow: '';
    border: 0;
    border-radius: 0;
    -webkit-appearance: none;
    -moz-appearance: none;
}
select::-ms-expand {
    display: none;
}
code,pre {
    font-family: monospace, monospace;
    font-size: 1em;
}
在scss文件中无法使用 变量,需要在项目中国引入全局变量 变量,需要在项目中国引入全局变量 变量,需要在项目中国引入全局变量
在styles/创建variable.scss
$color: red;
$theme-color: aquamarine
并在vite.config.ts中配置css全局变量
// scss全局变量配置 全局变量配置在/variable.scss
  css: {
    preprocessorOptions: {
      scss: {
        javascriptEnabled: true,
        additionalData: '@import "./src/styles/variable.scss";'
      }
    }
  }
位置如下:

@import "./src/styles/variable.less";后面的;不要忘记,不然会报错!
配置完毕你会发现scss提供这些全局变量可以在组件样式中使用了!!!

3.6 mock数据
安装依赖:https://www.npmjs.com/package/vite-plugin-mock
pnpm install -D vite-plugin-mock mockjs
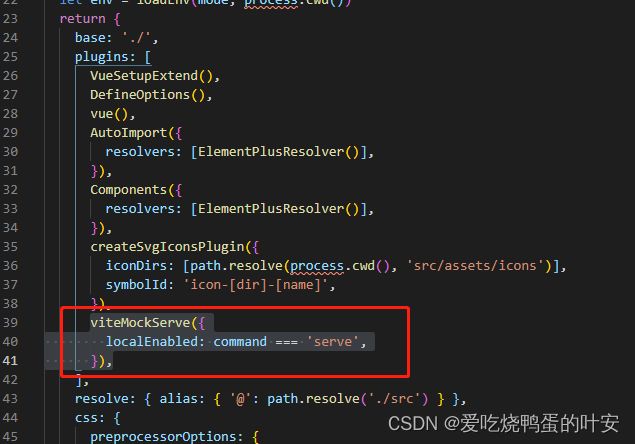
并在vite.config.ts中配置文件,启用插件
import { viteMockServe } from 'vite-plugin-mock'

viteMockServe({
   localEnabled: command === 'serve',
 }),
根目录下新建mock文件夹,并新建user.ts编写接口
// createUserList此函数执行返回一个数组,数组包含两个用户信息
function createUserList() {
    return [
        {
            userId: 1,
            avatar:
                'https://wpimg.wallstcn.com/f778738c-e4f8-4870-b634-56703b4acafe.gif',
            username: 'admin',
            password: '123456',
            desc: '平台管理员',
            roles: ['平台管理员'],
            buttons: ['cuser.detail'],
            routes: ['home'],
            token: 'Admin Token',
        },
        {
            userId: 2,
            avatar:
                'https://wpimg.wallstcn.com/f778738c-e4f8-4870-b634-56703b4acafe.gif',
            username: 'system',
            password: '123456',
            desc: '系统管理员',
            roles: ['系统管理员'],
            buttons: ['cuser.detail', 'cuser.user'],
            routes: ['home'],
            token: 'System Token',
        },
    ]
}

export default [
    // 用户登录接口
    {
        url: '/api/user/login', //请求地址
        method: 'post', //请求方式
        response: ({ body }) => {
            //获取请求体携带过来的用户名与密码
            const { username, password } = body
            //调用获取用户信息函数,用于判断是否有此用户
            const checkUser = createUserList().find(
                (item) => item.username === username && item.password === password,
            )
            //没有用户返回失败信息
            if (!checkUser) {
                return { code: 201, data: { message: '账号或者密码不正确' } }
            }
            //如果有返回成功信息
            const { token } = checkUser
            return { code: 200, data: { token } }
        },
    },
    // 获取用户信息
    {
        url: '/api/user/info',
        method: 'get',
        response: (request) => {
            //获取请求头携带token
            const token = request.headers.token
            //查看用户信息是否包含有次token用户
            const checkUser = createUserList().find((item) => item.token === token)
            //没有返回失败的信息
            if (!checkUser) {
                return { code: 201, data: { message: '获取用户信息失败' } }
            }
            //如果有返回成功信息
            return { code: 200, data: { checkUser } }
        },
    },
]
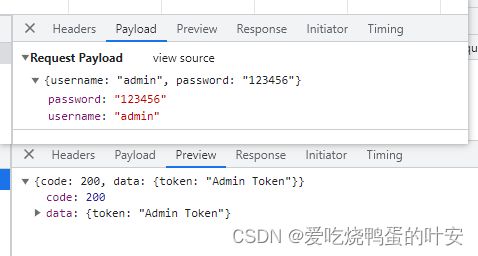
安装axios,在入口函数中测试接口的调用
pnpm i axios
import axios from 'axios'
axios({
  url:'/api/user/login',
  method:'post',
  data:{
    username: 'admin',
    password: '123456'
  }
})
3.7 axios二次封装
在开发项目时,避免不了与后端交互,因此需要使用axios插件实现发送网络请求;在开发项目的时候,经常对axios进行二次封装。
目的:
1、使用请求拦截器,并处理一些业务(开始进度条、请求头携带公共参数、超时时间)
2、使用响应拦截器,处理一些业务(进度条就结束 、简化服务器返回的数据、处理http网络错误)
根目录下新建utils/request.ts
// axios二次封装:使用请求与响应拦截器
import axios from 'axios'
import { ElMessage } from 'element-plus'

// 第一步:利用axios对象的create方法,创建axios实例(其他配置:基础路径、超时时间)
let request = axios.create({
    //基础路径
    baseURL: import.meta.env.VITE_APP_BASE_API,
    timeout: 5000
})

//第二步: request实例添加请求与响应拦截器
request.interceptors.request.use(config => {
    //config配置对象,headers属性请求头,常给服务器携带公共参数
    return config
})

//第三步: 响应拦截器
request.interceptors.response.use((response) => {
    //成功回调
    return response.data
}, (error) => {
    //失败回调 一般处理网络http错误
    // 定义一个变量:存储网络错误信息
    let message = ''
    switch (error.response.status) {
        case 401:
            message = 'TOKEN过期'
            break;
        case 403:
            message = '无权访问'
            break;
        case 404:
            message = '请求地址找不到'
            break;
        case 500:
            message = '服务器出现问题'
            break;
        default:
            message = '网络出现问题'
            break;
    }
    ElMessage({
        type: 'error',
        message
    })
    return Promise.reject(error)
})

export default request
app.vue中测试使用接口
import request from '@/utils/request'
import { onMounted } from 'vue'

onMounted(()=>{
  request({
    url:'/user/login',
    method: 'post',
    data:{
      username: 'admin',
      password: '123456'
    }
  }).then(res=>{
    console.log(res)
  })
})
