vue+springboot项目练习(三、引入数据库)
本篇联系引入数据库,通过数据库验证进行访问页面
一、引入数据库
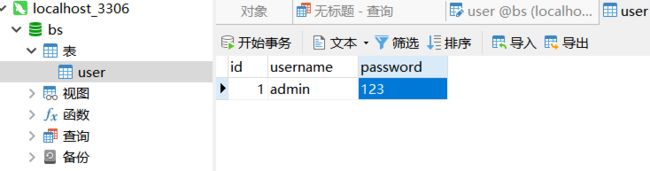
使用MySQL的可视化工具Navicat直接新建表
二、使用数据库验证登录
上一篇中我们直接在后端的控制器中用把账号密码进行写死验证

下面可使用数据库验证逻辑如下
1、获得前端发送过来的用户名和密码信息
2、查询数据库中是否存在相通的一堆用户名和密码
3、如果存在返回 Result(400),如果不存在返回 Result(200)
三、使用数据库进行项目配置
在项目中修改 pom.xml来更新Maven库中的依赖
数据库导入mysql
data-jpa下面写user类需要使用
        <dependency>
            <groupId>mysqlgroupId>
            <artifactId>mysql-connector-javaartifactId>
        dependency>
        <dependency>
            <groupId>org.springframework.bootgroupId>
            <artifactId>spring-boot-starter-data-jpaartifactId>
        dependency>
在IDEA中连接数据库

配置完依赖后,还需要配置数据库。打开src\main\resources\application.properties ,在原来的基础上,添加如下语句
spring.datasource.url= jdbc:mysql://localhost:3306/bs?useUnicode=true&characterEncoding=UTF-8&serverTimezone=UTC
spring.datasource.username= root
spring.datasource.password= 123456
spring.datasource.driver-class-name= com.mysql.cj.jdbc.Driver
spring.jpa.hibernate.ddl-auto = none
mysql8.0 driver-class-name中必须填写cj
四、完善登录控制器
需要修改项目说明

User类
修改 User 类代码如下,以建立对数据库的映射。
package com.example.wei.pojo;

import com.fasterxml.jackson.annotation.JsonIgnoreProperties;
import org.springframework.boot.autoconfigure.domain.EntityScan;
import javax.persistence.*;

@Entity
@Table(name = "user")
@JsonIgnoreProperties({"handler","hibernateLazyInitializer"})
public class User {
    @Id
    @GeneratedValue(strategy = GenerationType.IDENTITY)
    @Column(name = "id")
    int id;
    @Column(name = "username")
    String username;
    @Column(name = "password")
    String password;

    public int getId() {
        return id;
    }

    public void setId(int id) {
        this.id = id;
    }

    public String getUsername() {
        return username;
    }

    public void setUsername(String username) {
        this.username = username;
    }

    public String getPassword() {
        return password;
    }

    public void setPassword(String password) {
        this.password = password;
    }
}
注解说明
@Entity表示这是一个实体类
@Table(name=“user”)表示对应user表
@JsonIgnoreProperties({“handler”,“hibernateLazyInitializer”})简化数据库操作使用了 Java Persistence API(JPA)作用是在 json 序列化时忽略 bean 中的一些不需要转化的属性
前后端分离,而前后端数据交互用的是 json 格式。 那么 User 对象就会被转换为 json 数据。 而本项目使用 jpa 来做实体类的持久化,jpa 默认会使用 hibernate, 在 jpa 工作过程中,就会创造代理类来继承 User ,并添加 handler 和 hibernateLazyInitializer 这两个无须 json 化的属性,所以这里需要用 JsonIgnoreProperties 把这两个属性忽略掉。
UserDao
数据访问对象,DAO,用来操作数据库对象,对象可自己开发可使用框架我们通过继承 JpaRepository来构建Dao层
JpaRepository增删改查博客讲解
新建package包,命名dao,然后创建UserDao接口(Interface)
package com.example.wei.dao;

import com.example.wei.pojo.User;
import org.springframework.data.jpa.repository.JpaRepository;

public interface UserDao extends JpaRepository<User,Integer> {
    User findByUsername(String username);
    User getByUsernameAndPassword(String username,String password);

}
方法名字使用。使用了 JPA,无需手动构建 SQL 语句,而只需要按照规范提供方法的名字即可实现对数据库的增删改查。
如findByUsername,就是通过 username字段查询到对应的行并返回给 User 类。
构建了两个方法,一个是通过用户名查询,一个是通过用户名及密码查询。
UserService
新建package包,命名service然后创建UserService类
package com.example.wei.service;

import com.example.wei.dao.UserDao;
import com.example.wei.pojo.User;
import org.springframework.beans.factory.annotation.Autowired;
import org.springframework.stereotype.Service;

@Service
public class UserService {
    @Autowired
    UserDao userDao;

    public boolean isExist(String username) {
        User user = getByName(username);
        return null!=user;
    }

    public User getByName(String username) {
        return userDao.findByUsername(username);
    }

    public User get(String username,String password){
        return userDao.getByUsernameAndPassword(username, password);
    }
    public void add(User user){
        userDao.save(user);
    }


}
这里对 UserDao 进行了二次封装,一般来讲,我们在 dao 中只定义基础的增删改查操作,而具体的操作,需要由 dao 来完成。
由于我们做的操作原本就比较简单,所以这里看起来只是简单地重命名了一下
比如把 “通过用户名及密码查询并获得对象” 这种方法命名为 get。
LoginController
登录控制器是通过 UserService 提供的 get 方法查询数据库,如果返回的对象为空,则验证失败,否则就验证成功。
package com.example.wei.controller;

import com.example.wei.pojo.User;
import com.example.wei.result.Result;
import com.example.wei.service.UserService;
import org.springframework.beans.factory.annotation.Autowired;
import org.springframework.stereotype.Controller;
import org.springframework.web.bind.annotation.CrossOrigin;
import org.springframework.web.bind.annotation.PostMapping;
import org.springframework.web.bind.annotation.RequestBody;
import org.springframework.web.bind.annotation.ResponseBody;
import org.springframework.web.util.HtmlUtils;

import java.util.Objects;

@Controller
public class LoginController {
    @Autowired
    UserService userService;
//    LoginController loginController;

    @PostMapping(value = "/api/login")
    @ResponseBody
    @CrossOrigin
    public Result login(@RequestBody User requsetUser){
        String username = requsetUser.getUsername();
        username = HtmlUtils.htmlEscape(username);

//        if (!Objects.equals("admin",username) || !Objects.equals("123456", requsetUser.getPassword())){
//           String message= "账号密码错误";
//            System.out.println("test");
//            return new Result(400);
//        }else{
//            return new Result(200);
//        }
        User user =userService.get(username,requsetUser.getPassword());
        if (null == user){
            return new Result(400);
        }else{
            return new Result(200);
        }
    }
}
三层架构(Dao + Service + Controller)具体说明
- Dao用来与数据库的直接操作,定义增删改查操作
- Service负责业务逻辑,跟功能相关的代码一般写在这里编写、调用各种方法对 DAO 取得的数据进行操作
- Controller负责数据交互,接收前端发送的数据,通过调用 Service 获得处理后的数据并返回
在实践中倾向于让 Controller 显得干净一些,方便代码的阅读者寻找分析功能的入口。(后期重构)
五、测试
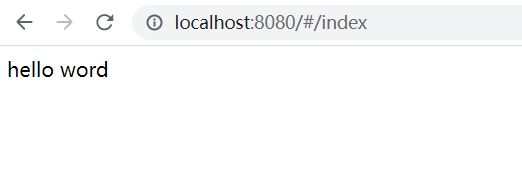
同时运行前端和后端项目,访问localhost:8080/#/login ,输入用户名 admin,密码 123

点击登录,成功进入localhost:8080/#/index 并输出hello word