Unity-动作系统-案例学习(1)人物移动和转向
系列文章目录
一 、 人物移动和转向
二、 人物跳跃和落地
三、 人物攻击和判定
四、 人物受伤和死亡
目录
前言
一、人物的站立状态
二、人物的移动实现
1. 添加必要组件
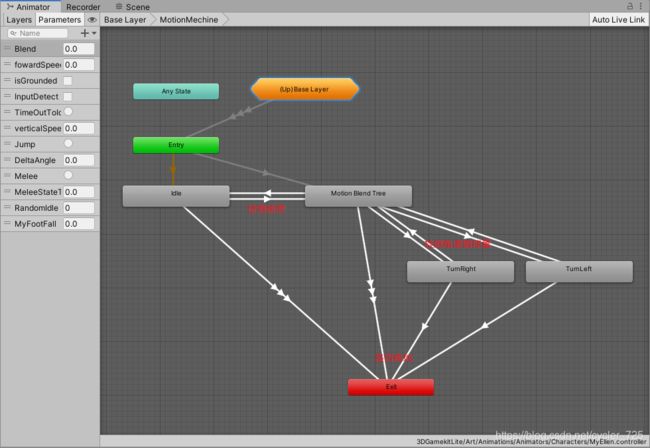
2. Animator状态结构体设置
3. MyPlayerInput脚本实现:
4. MyPlayerController脚本实现:
二、实现转向
根据Axis偏移量实现转向。
然后再update中更新玩家的自身rotation:
总结
前言
本人对游戏的动作系统比较感兴趣,同时打算尽可能系统的学习Unity3d的动作系统,再次记录基于unity案例的学习历程。
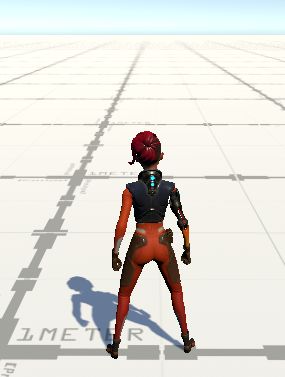
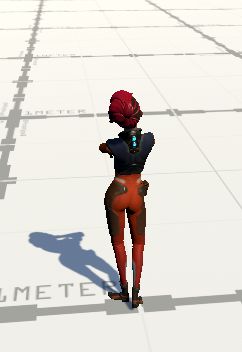
实现效果(示例):
提示:以下是本篇文章正文内容,下面案例可供参考
一、人物的站立状态
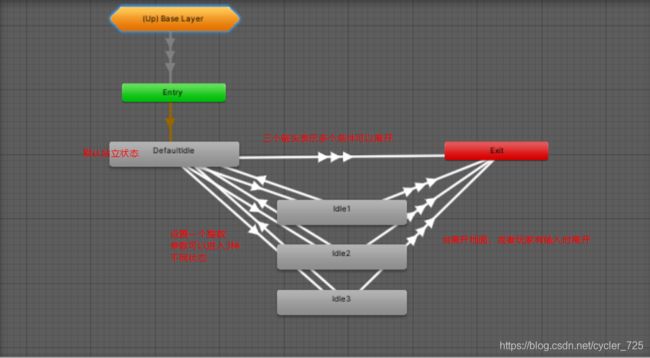
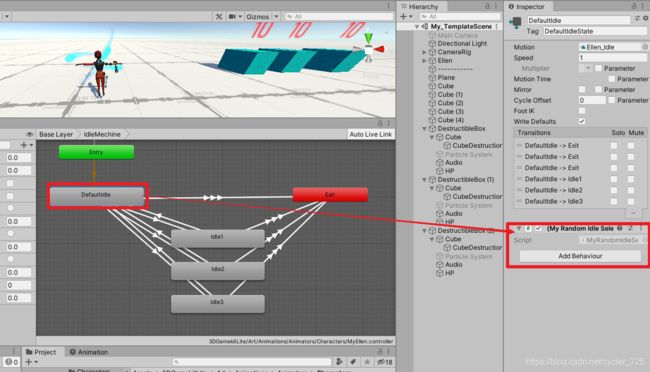 在defaultIdle中添加StateMachineBehaviour的派生类;
在脚本中实现一定时间后更改整数参数的函数(接口)(创建脚本时会自动生成接口的模板)
    protected float ChangeTime;
    protected bool idleState = false;
    protected float idleTime = 0f;
    protected readonly int hashOfRandomIdle = Animator.StringToHash("RandomIdle");
    protected readonly int hashOfDefaultIdleState = Animator.StringToHash("DefaultIdleState");//默认idle标签
    override public void OnStateEnter(Animator animator, AnimatorStateInfo stateInfo, int layerIndex)
    {
        ChangeTime = Random.Range(5f,8f);
        idleState = true;
        animator.SetInteger(hashOfRandomIdle,0);
    }

override public void OnStateExit(Animator animator, AnimatorStateInfo stateInfo, int layerIndex)
    {
        idleState = false;
    }

    // OnStateMove is called right after Animator.OnAnimatorMove()
    override public void OnStateMove(Animator animator, AnimatorStateInfo stateInfo, int layerIndex)
    {
        idleTime += Time.deltaTime;
        if(animator.GetCurrentAnimatorStateInfo(0).tagHash == hashOfDefaultIdleState && idleTime >= ChangeTime)
        {
            idleTime = 0f;
            int index = Random.Range(1, 4);
            //Debug.Log("idle:" + index);
            animator.SetInteger(hashOfRandomIdle, index);//随机赋值 1 到 3
        }
    }
OnstateEnter:进入该状态时自动调用,idleTime = 0,idle状态参数设置为0;
OnstateMove: 在Animator.OnAnimatorMove()后调用,对idleTime计时,达到一定时间随机切换idle状态;
二、人物的移动实现
实现人物的向前移动,首先实现的只是向朝向移动,不涉及转向。
1. 添加必要组件
为人物添加animator、character Controller组件,新建一个MyPlayerInput、MyPlayerController脚本。
设置人物为Player层级
2. Animator状态结构体设置
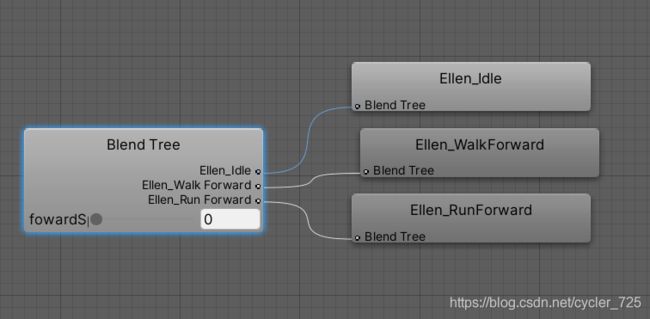
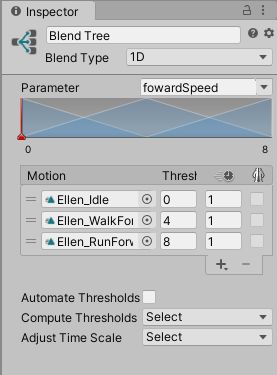
Motion混合树:
这里只用1D就行了。在脚本中不断更新forwardSpeed的速度,从而控制人物的前进速度和前进状态(idle、walk、run)。
3. MyPlayerInput脚本实现:
 public class MyPlayerInput : MonoBehaviour
    {
        public static MyPlayerInput m_Input
        {
            get
            {
                return m_Instance;
            }
        }
        protected static MyPlayerInput m_Instance;
        protected Vector2 m_MoveInput;
        protected Vector2 m_CameraInput;
        protected bool m_Jump;
        protected bool m_attack;
        [HideInInspector]
        public bool playerInputBlock;
        public bool Attack
        {
            get
            {
                return m_attack && !playerInputBlock;//还要不处于其他状态
            }
        }
        public Vector2 MoveInput
        {
            get
            {
                return m_MoveInput;
            }
        }
        public Vector2 CameraInput
        {
            get
            {
                return m_CameraInput;
            }
        }

        public bool Jump
        {
            get
            {
                return m_Jump;
            }
        }

        public Coroutine MeleeCoroutine { get; private set; }

        private void Awake()
        {
            Cursor.visible = false;
            Cursor.lockState = CursorLockMode.Locked;
            if (m_Instance == null)
                m_Instance = this;
        }
        private void Update()
        {
            m_MoveInput.Set(Input.GetAxis("Horizontal"), Input.GetAxis("Vertical"));
            m_CameraInput.Set(Input.GetAxis("Mouse X"),Input.GetAxis("Mouse Y"));
            m_Jump = Input.GetButton("Jump");//按着即触发
            if(Input.GetButton("Fire1"))//攻击键
            {
                if(MeleeCoroutine != null)//现在有个线程(不能进行attack)
                {
                    StopCoroutine(MeleeCoroutine);
                    MeleeCoroutine = null;
                }
                MeleeCoroutine = StartCoroutine(StartMelee());//获取线程
            }
            if(Input.GetButtonDown("Pause"))//按下瞬间触发
            {
                if(Cursor.visible == false)
                {
                    Cursor.visible = true;
                    Cursor.lockState = CursorLockMode.None;
                }
                else
                {
                    Cursor.visible = false;
                    Cursor.lockState = CursorLockMode.Locked;
                }
            }
        }

        private IEnumerator StartMelee()
        {
            m_attack = true;
            //print(Attack);
            yield return new WaitForSeconds(0.03f);
            m_attack = false;
        }
    }
脚本获取前后左右偏移量,作为Vecetor2的只读属性传递给PlayerController脚本。
4. MyPlayerController脚本实现:
 protected float m_MaxForwardSpeed
        {
            get
            {
                if (Input.GetMouseButton(1))//按住鼠标右键可以加速
                    return 8f;
                else return 4f;
            }
        }
//计算前进速度
        private void CalculateFowardSpeed()
        {
            Vector2 moveInput = myInput.MoveInput;
            if(moveInput.sqrMagnitude > 1)
            {
                moveInput.Normalize();
            }
            float myDesireForwardSpeed = moveInput.magnitude * m_MaxForwardSpeed;
            //加速度
            float acceleration = isMoveInput? 13f : 3f;//一直按着前进有不同的加速度效果
            //v = v0 + at;
            m_forwardSpeed = Mathf.Lerp(m_forwardSpeed , myDesireForwardSpeed,Time.deltaTime * acceleration);

            m_animator.SetFloat(hashOfForwardSpeed, m_forwardSpeed);
        }
private void OnAnimatorMove()
{
Vector3 movement = Vector3.zero;
if(IsGround)
{
//角色中心向脚下发射射线
Ray ray = new Ray(m_CharaCtrl.center,-Vector3.up);
RaycastHit hitInfo;
//根据坡度分解速度
if(Physics.Raycast(ray,out hitInfo, k_GroundedRayDistance ,Physics.AllLayers, QueryTriggerInteraction.Ignore))
{
movement = /*速度在平面方向的投影*/Vector3.ProjectOnPlane(m_animator.deltaPosition/*transform.forward * Time.deltaTime*/,hitInfo.normal);
}
else
{
movement = m_animator.deltaPosition;
}
}
else//在空中
{
movement = m_forwardSpeed * transform.forward * Time.deltaTime;
}
//向下的速度
movement += Vector3.up * m_verticalSpeed * Time.deltaTime;
m_CharaCtrl.Move(movement);
if (!IsGround)//不在空中时的verticalSpeed没有意义
m_animator.SetFloat(hashOfVertialSpeed, m_verticalSpeed);
}一个根据获取的Axis偏移量计算ForwardSpeed,(为了一定的真实性,用v = v0 + at进行速度递增),同时加速度动态变化。
一个根据上面的speed给characterController移动(vertical可以默认一个小的向下速度)
实现效果:
二、实现转向
根据Axis偏移量实现转向。
这个主要要用到四元数。
目标方向: Target = new Vector3(moveInput.x,0,moveInput.y);在xz平面的目标方向
cameraDirection :摄像机的正前方(Quaternion)(世界方向)
TargetRotation:cameraDirection 乘 Target,顺序不要反(目标世界方向)
 //计算(玩家)目标的角度
        private void CalculateRotation()
        {
            //目标角度
            Vector2 mouseInput = new Vector2(myInput.MoveInput.x, myInput.MoveInput.y);//注意这个不是目标方向!!!
            Vector3 targetDirection = new Vector3(mouseInput.x,0,mouseInput.y);
            //摄相机的正前方
            Quaternion CameraForward = Quaternion.Euler(0,m_CameraSetting.Current.m_XAxis.Value,0);
            //当玩家有输入才计算targetRotation
            if(!Mathf.Approximately(targetDirection.magnitude,0))
                m_TargetRotation = Quaternion.LookRotation(CameraForward * targetDirection);

            //计算偏移角度(增量)
            Vector3 target = m_TargetRotation * Vector3.forward;
            float forwardAngle = Mathf.Rad2Deg * Mathf.Atan2(transform.forward.x, transform.forward.z);
            float targetAngle = Mathf.Rad2Deg * Mathf.Atan2(target.x,target.z);
            m_DeltatAngle = Mathf.DeltaAngle(forwardAngle,targetAngle);
        }
然后再update中更新玩家的自身rotation:
//更新玩家的方向
        private void UpdateQuaternion()
        {
            //设置转向角度:
            m_animator.SetFloat(hashOfDeltaAngle,m_DeltatAngle * Mathf.Deg2Rad);

            m_TargetRotation = Quaternion.RotateTowards(transform.rotation , m_TargetRotation/*暂时的*/ , turnSpeed);  //转向可以更自然一点
            transform.rotation = m_TargetRotation;
        }
总结
本文记录了实现角色的移动和转向,为了使得移动转向更为自然真实,用加速度控制,并且随着时间递增。
笔者感觉难度主要是转向的方向计算、然后是和animation控制器的参数检测。
后续更新角色的跳跃、落地、音效和攻击以及反馈等
