阿克曼结构移动机器人的gazebo仿真(六)
阿克曼结构移动机器人的gazebo仿真(六)
第六章、配置controller并用键盘控制节点让小车动起来
0.前言
上一节用xacro对urdf文件进行一个优化,并且配置好小车gazebo仿真所需的插件,以及传感器的插件。这一节通过配置controller让小车能够在gazebo仿真环境中真正动起来,并且能够用键盘控制节点来做一个控制。
1.配置racebot_control功能包
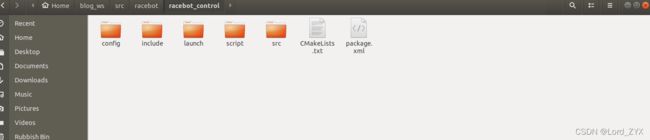
在工作空间下新建racebot_control功能包,并在功能包中新建如下文件夹:
ros_control是ROS为开发者提供的机器人控制中间件,包含一系列控制器接口、传动装置接口、硬件接口、控制器工具箱等。
配置yaml文件
在config文件夹中新建racebot_control.yaml文件,代码如下:
racebot:
  #上面的racebot是运行动命名空间 Publish all joint states --公布所有--------------------
  joint_state_controller:
    type: joint_state_controller/JointStateController
    publish_rate: 50

  # Velocity Controllers ----速度控制器---------------------
  left_rear_wheel_velocity_controller:
    type: effort_controllers/JointVelocityController
    joint: left_rear_wheel_joint
    pid: {p: 1, i: 0.0, d: 0.0, i_clamp: 0.0}
  right_rear_wheel_velocity_controller:
    type: effort_controllers/JointVelocityController
    joint: right_rear_wheel_joint
    pid: {p: 1, i: 0.0, d: 0.0, i_clamp: 0.0}
  left_front_wheel_velocity_controller:
    type: effort_controllers/JointVelocityController
    joint: left_front_wheel_joint
    pid: {p: 0.5, i: 0.0, d: 0.0, i_clamp: 0.0}
  right_front_wheel_velocity_controller:
    type: effort_controllers/JointVelocityController
    joint: right_front_wheel_joint
    pid: {p: 0.5, i: 0.0, d: 0.0, i_clamp: 0.0}

  # Position Controllers ---位置控制器-----------------------
  left_steering_hinge_position_controller:
    joint: left_steering_hinge_joint
    type: effort_controllers/JointPositionController
    pid: {p: 10.0, i: 0.0, d: 0.5}
  right_steering_hinge_position_controller:
    joint: right_steering_hinge_joint
    type: effort_controllers/JointPositionController
    pid: {p: 10.0, i: 0.0, d: 0.5}
在yaml文件中,用到了ros_controllers功能包中的JointVelocityController控制器来控制轮子的转速,用JointPositionController控制器控制摆转件的旋转。之前在URDF中约束了摆转件的旋转角度。控制器发布控制指令,通过上一节配置的Transmission将控制指令转换为执行器的控制信号,实现机器人的运动。注意命名空间可以自行修改但是要与其他相关代码中的命名空间保持一直,否则会让小车无法跑动。
配置launch文件
launch文件代码如下:
launch首先加载上述的yaml文件,接着运行controller_manager功能包,加载yaml文件中的控制器,注意命名空间的一致性,接下去运行joint_state_publish节点,发布机器人的关节状态,最后加载servo_commands.py文件,通过这个文件接收控制小车运动的话题,并让小车在仿真环境中实现运动。
配置servo_commends.py文件
首先安装ackermann-msgs功能包,本节使用ackermann_msgs/AckermannDriveStamped 消息类型控制小车的运动。
sudo apt install ros-melodic-ackermann-msgs
查看ackermann_msgs消息类型

发现ackermann_msgs/AckermannDriveStamped 消息类型控制的是轮子的速度以及摆转件的转向角,并将速度与转向角配置到六个对应的运动关节上,以此来编写servo_commends.py文件,并且令其订阅到控制运动的话题,代码如下:
#!/usr/bin/env python
import rospy
from std_msgs.msg import Bool
from std_msgs.msg import Float32
from std_msgs.msg import Float64
from ackermann_msgs.msg import AckermannDriveStamped

flag_move = 0

def set_throttle_steer(data):

    global flag_move

    pub_vel_left_rear_wheel = rospy.Publisher('/racebot/left_rear_wheel_velocity_controller/command', Float64, queue_size=1)
    pub_vel_right_rear_wheel = rospy.Publisher('/racebot/right_rear_wheel_velocity_controller/command', Float64, queue_size=1)
    pub_vel_left_front_wheel = rospy.Publisher('/racebot/left_front_wheel_velocity_controller/command', Float64, queue_size=1)
    pub_vel_right_front_wheel = rospy.Publisher('/racebot/right_front_wheel_velocity_controller/command', Float64, queue_size=1)

    pub_pos_left_steering_hinge = rospy.Publisher('/racebot/left_steering_hinge_position_controller/command', Float64, queue_size=1)
    pub_pos_right_steering_hinge = rospy.Publisher('/racebot/right_steering_hinge_position_controller/command', Float64, queue_size=1)

    throttle = data.drive.speed*31.25
    steer = data.drive.steering_angle

    pub_vel_left_rear_wheel.publish(throttle)
    pub_vel_right_rear_wheel.publish(throttle)
    pub_vel_left_front_wheel.publish(throttle)
    pub_vel_right_front_wheel.publish(throttle)
    pub_pos_left_steering_hinge.publish(steer)
    pub_pos_right_steering_hinge.publish(steer)

def servo_commands():

    rospy.init_node('servo_commands', anonymous=True)

    rospy.Subscriber("/ackermann_cmd_mux/output", AckermannDriveStamped, set_throttle_steer)

    # spin() simply keeps python from exiting until this node is stopped
    rospy.spin()

if __name__ == '__main__':
    try:
        servo_commands()
    except rospy.ROSInterruptException:
        pass
配置键盘控制节点
在racebot_gazebo/scripts文件夹中创建keyboard_teleop.py文件,该代码发布了控制小车运动的话题/ackermann_cmd_mux/output,并且按wasd键让小车前后左右运动,并且配置了一个TK框显示,代码如下:
#!/usr/bin/env python

# Copyright (c) 2019, The Personal Robotics Lab, The MuSHR Team, The Contributors of MuSHR
# License: BSD 3-Clause. See LICENSE.md file in root directory.

import atexit
import os
import signal
from threading import Lock
from Tkinter import Frame, Label, Tk

import rospy
from ackermann_msgs.msg import AckermannDriveStamped

UP = "w"
LEFT = "a"
DOWN = "s"
RIGHT = "d"
QUIT = "q"

state = [False, False, False, False]
state_lock = Lock()
state_pub = None
root = None
control = False


def keyeq(e, c):
    return e.char == c or e.keysym == c


def keyup(e):
    global state
    global control

    with state_lock:
        if keyeq(e, UP):
            state[0] = False
        elif keyeq(e, LEFT):
            state[1] = False
        elif keyeq(e, DOWN):
            state[2] = False
        elif keyeq(e, RIGHT):
            state[3] = False
        control = sum(state) > 0


def keydown(e):
    global state
    global control

    with state_lock:
        if keyeq(e, QUIT):
            shutdown()
        elif keyeq(e, UP):
            state[0] = True
            state[2] = False
        elif keyeq(e, LEFT):
            state[1] = True
            state[3] = False
        elif keyeq(e, DOWN):
            state[2] = True
            state[0] = False
        elif keyeq(e, RIGHT):
            state[3] = True
            state[1] = False
        control = sum(state) > 0


# Up -> linear.x = 1.0
# Down -> linear.x = -1.0
# Left ->  angular.z = 1.0
# Right -> angular.z = -1.0


def publish_cb(_):
    with state_lock:
        if not control:
            return
        ack = AckermannDriveStamped()
        if state[0]:
            ack.drive.speed = max_velocity
        elif state[2]:
            ack.drive.speed = -max_velocity

        if state[1]:
            ack.drive.steering_angle = max_steering_angle
        elif state[3]:
            ack.drive.steering_angle = -max_steering_angle

        if state_pub is not None:
            state_pub.publish(ack)


def exit_func():
    os.system("xset r on")


def shutdown():
    root.destroy()
    rospy.signal_shutdown("shutdown")


def main():
    global state_pub
    global root

    global max_velocity
    global max_steering_angle
    max_velocity = rospy.get_param("~speed",2.0)
    max_steering_angle = rospy.get_param("~max_steering_angle", 0.6)

    state_pub = rospy.Publisher(
        "/ackermann_cmd_mux/output", AckermannDriveStamped, queue_size=1
    )
    rospy.Timer(rospy.Duration(0.1), publish_cb)
    atexit.register(exit_func)
    os.system("xset r off")

    root = Tk()
    frame = Frame(root, width=100, height=100)
    frame.bind("", keydown)
    frame.bind("", keyup)
    frame.pack()
    frame.focus_set()
    lab = Label(
        frame,
        height=10,
        width=30,
        text="Focus on this window\nand use the WASD keys\nto drive the car.\n\nPress Q to quit",
    )
    lab.pack()
    print("Press %c to quit" % QUIT)
    root.mainloop()


if __name__ == "__main__":
    rospy.init_node("keyboard_teleop", disable_signals=True)

    signal.signal(signal.SIGINT, lambda s, f: shutdown())
    main()
2.让小车在gazebo中动起来
从新配置racebot.launch代码,将键盘控制节点以及racebot_control.launch加载进去:
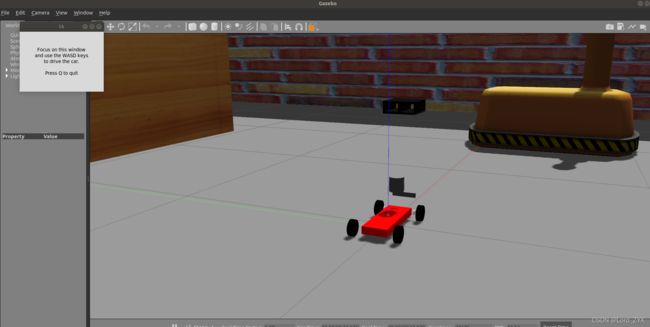
运行racebot.launch文件:
roslaunch racebot_gazebo racebot.launch
将鼠标点击到tk框上,此时可以用键盘wasd按键控制小车运动:
3.用Twist消息类型控制小车运动
由于后期导航需要用到move_base做路径规划,而move_base发布的cmd_vel话题是geometry_msgs.msg/Twist消息类型,上文说到本节用的是ackermann_msgs/AckermannDriveStamped 消息类型控制小车运动,因此要做一个消息类型的转换,在racebot_control/scripts文件夹中新建transform.py文件,代码如下:
#!/usr/bin/env python
import rospy
import std_msgs.msg
from ackermann_msgs.msg import AckermannDriveStamped
from geometry_msgs.msg import Twist

import time
import threading
pub = rospy.Publisher("/ackermann_cmd_mux/output", AckermannDriveStamped,queue_size=1)

def thread_job():
    rospy.spin()

def callback(data):
    speed = data.linear.x
    turn = data.angular.z

    msg = AckermannDriveStamped();
    msg.header.stamp = rospy.Time.now();
    msg.header.frame_id = "base_link";

    msg.drive.speed = speed;
    msg.drive.acceleration = 1;
    msg.drive.jerk = 1;
    msg.drive.steering_angle = turn
    msg.drive.steering_angle_velocity = 1

    pub.publish(msg)

def SubscribeAndPublish():
    rospy.init_node('nav_sim', anonymous=True)
    rospy.Subscriber('cmd_vel', Twist, callback,queue_size=1,buff_size=52428800)
    #rospy.Subscriber('cmd_vel', Twist, callback,queue_size=1,buff_size=52428800)
    rospy.spin()


if __name__ == '__main__':
    try:
        SubscribeAndPublish()
    except rospy.ROSInterruptException:
        pass


########################
修改racebot_control.launch代码,加载transform.py文件:
此时即可用geometry_msgs.msg/Twist消息类型话题的键盘控制节点控制小车运动了,比如上一个项目的tianbot_mini小车的键盘控制节点。
小结
本节内容通过配置controller与键盘控制节点让小车动起来,下一节则是让小车发布里程计信息,并实现gmapping建图。
参考资料
1.古月老师的<
2.奥特学园
3.古月学院《如何在Gazebo中实现阿克曼转向车的仿真 • 王泽恩》