通过实例学习:使用Spring Cache实现实际场景的缓存策略
文章目录
- 前言
- 一、Spring Cache 常用注解
-
- 1.@Cacheable:
- 2.@CachePut:
- 3.@CacheEvict:
- 4.@CacheConfig:
- 5.@EnableCathing:
- 二、使用步骤
-
- 1.引入依赖
- 2.配置
- 3.@EnableCaching的使用:
- 4.@Cacheable的使用:
- 5.@CachePut的使用:
- 6.@CacheEvict的使用:
- 总结
前言
Spring Cache 是 Spring 框架中的一个模块,提供了对缓存的支持。
它的目标是提高应用程序的性能和响应速度,通过缓存数据来避免频繁的数据访问和计算。
Spring Cache 的主要特点和功能包括:
1.缓存注解:Spring Cache
提供了一组注解,如@Cacheable、@CachePut、@CacheEvict,用于在方法级别声明缓存行为。
通过简单的注解配置,你可以指定方法的返回值是否应该被缓存、缓存的键以及缓存的名称。2. 多种缓存实现支持:
Spring Cache 支持多种常见的缓存实现,如基于内存的实现(如 Caffeine、Ehcache)、分布式缓存(如
Redis、Memcached)等。你可以根据需求选择适合的缓存提供商,并进行简单的配置将其集成到你的应用程序中。️ 3.灵活的缓存策略:
Spring Cache提供了灵活的缓存策略支持。你可以通过自定义键生成器、条件判断和缓存注解属性等方式,
来定制缓存的行为。这样可以根据具体的业务需求来管理缓存的更新、过期和失效等情况。
4.缓存管理器:
Spring Cache 使用缓存管理器来管理缓存实例。
你需要配置相应的缓存管理器,并将其与缓存提供商进行关联。通过使用Spring Cache, 你可以减少对数据库或其他耗时操作的频繁访问,从而提高应用程序的性能和响应速度。
它可以帮助你简化缓存的使用和管理,提供了一种便捷的方式来集成缓存功能到你的Spring 应用程序中。
一、Spring Cache 常用注解
1.@Cacheable:
用于标记方法的结果应该被缓存。当方法被调用时,Spring Cache 会首先检查缓存中是否存在已缓存的结果,如果存在,则直接返回缓存结果,否则执行方法并将结果放入缓存。你可以通过指定缓存的名称和键来进一步控制缓存的行为。
2.@CachePut:
用于标记方法的结果应该被缓存,并将结果放入缓存中。与 @Cacheable 不同,@CachePut 会每次都执行方法,并将结果放入缓存中,以保证缓存的更新。同样,你可以通过指定缓存的名称和键来进行更精确的控制。
3.@CacheEvict:
用于标记方法,表示将缓存中的指定数据移除。通过指定缓存的名称和键,@CacheEvict 可以帮助你在方法调用后从缓存中移除指定的数据。
4.@CacheConfig:
用于在类级别上指定缓存的公共配置。通过将常见的缓存配置放在类级别上,能够简化方法级别的注解,并提高代码的可读性。
5.@EnableCathing:
开启缓存注解,通常加在启动类上。
二、使用步骤
1.引入依赖
pom文件:
		<dependency>
			<groupId>org.springframework.boot</groupId>
            <artifactId>spring-boot-starter-cache</artifactId>
        <version>2.7.3</version>
        </dependency>

        <dependency>
            <groupId>org.springframework.boot</groupId>
            <artifactId>spring-boot-starter-data-redis</artifactId>
        </dependency>
2.配置
spring.redis.database=1
spring.redis.host=localhost
spring.redis.port=6379

#设置缓存组件类型
spring.cache.type=redis
#设置缓存过期时间
spring.cache.redis.time-to-live=3600000
#指定默认前缀,如果此处我们指定了前缀则使用我们指定的前缀,推荐此处不指定前缀
#spring.cache.redis.key-prefix=CACHE_
#是否开始前缀,建议开启
spring.cache.redis.use-key-prefix=true
#是否缓存空值,防止缓存穿透
spring.cache.redis.cache-null-values=true
3.@EnableCaching的使用:
在启动类上开启基于注解的缓存
@SpringBootApplication
// 开启基于注解的缓存
@EnableCaching
public class DemoApplication {

    public static void main(String[] args) {
        SpringApplication.run(DemoApplication.class, args);
    }

}
到此,spring cache的基础配置就完成啦!以下是spring cache的实际使用场景
4.@Cacheable的使用:
用于标记方法的结果应该被缓存。当方法被调用时,Spring Cache 会首先检查缓存中是否存在已缓存的结果,如果存在,则直接返回缓存结果,否则执行方法并将结果放入缓存。你可以通过指定缓存的名称和键来进一步控制缓存的行为。
步骤一:
在控制层里新增一个查询方法:
@RestController
public class MyCache {
    @Resource
    private UserMapper userMapper;

    @GetMapping("/query/{id}")
    @Cacheable(cacheNames = "user",key = "#id",unless = "#result == null")
    public User getById(@PathVariable Long id){
        User user = userMapper.selectById(id);
        return user;
    }
}
步骤二:
查询存在的值:
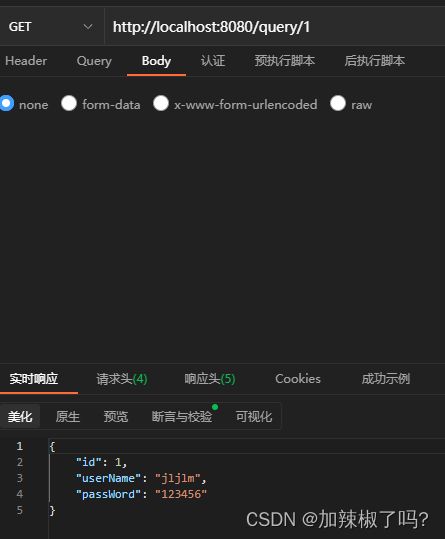
redis中出现新增值:

步骤三:
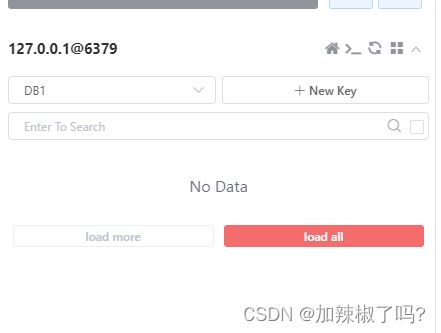
查询不存在的值:

结果并没有存入redis,测试正确
5.@CachePut的使用:
用于标记方法的结果应该被缓存,并将结果放入缓存中。与 @Cacheable 不同,@CachePut 会每次都执行方法,并将结果放入缓存中,以保证缓存的更新。同样,你可以通过指定缓存的名称和键来进行更精确的控制
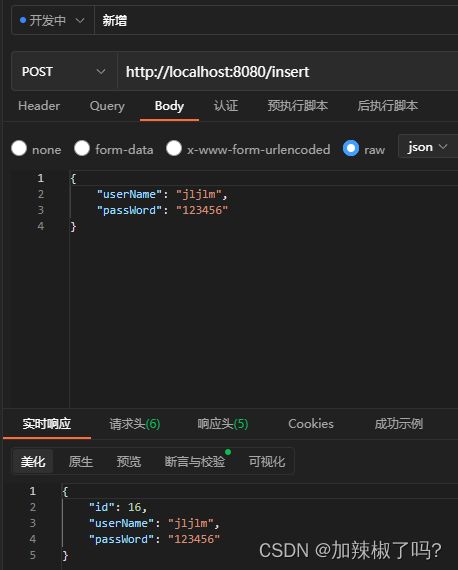
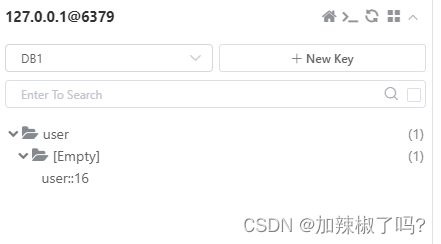
@RestController
public class MyCache {
    @Resource
    private UserMapper userMapper;

    // @CachePut的5种写法:
    @CachePut(cacheNames = "user",key = "#user.id")
//    // 对象导航:key名insert::返回对象的id(result是固定的)
//    @CachePut(cacheNames = "insert",key = "#result.id")
//    // 下标从零开始,代表第几个参数;有三种写法:p,a,root.args[0]
//    @CachePut(cacheNames = "insert",key = "#p0.id")
//    @CachePut(cacheNames = "insert",key = "#a0.id")
//    @CachePut(cacheNames = "insert",key = "#root.args[0].id")
    @PostMapping("/insert")
    public User insert(@RequestBody User user){
        userMapper.insert(user);
        return user;
    }
}
6.@CacheEvict的使用:
用于标记方法,表示将缓存中的指定数据移除。通过指定缓存的名称和键,@CacheEvict 可以帮助你在方法调用后从缓存中移除指定的数据。
删除单个缓存值:
	@DeleteMapping("/delete/{id}")
    @CacheEvict(cacheNames = "user",key = "#id")
    public void delete(@PathVariable Long id){
        userMapper.deleteById(id);
    }
删除全部缓存值:
	@DeleteMapping("/delete/{id}")
    @CacheEvict(cacheNames = "user",allEntries = true)
    public void delete2(@PathVariable Long id){
        userMapper.deleteById(id);
    }
执行删除方法:
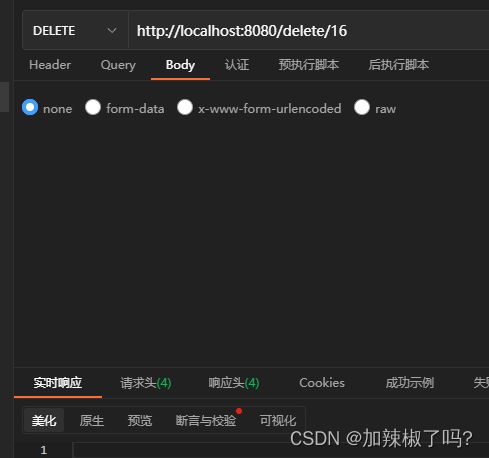
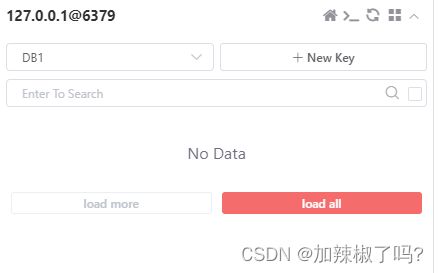
redis中的值成功删除!
以上就是Spring Cache的基本使用啦!希望对大家有帮助嘿嘿嘿!
总结
@作者:加辣椒了吗?
简介:憨批大学生一枚,喜欢在博客上记录自己的学习心得,也希望能够帮助到你们!
