Linux上部署Elasticsearch集群
文章目录
- 一、安装前准备
-
- 1.1开放端口
- 1.2文件准备
-
- (1)下载es
- (2)下载ik分词器插件
- 二、部署ES集群
-
- 2.1 将上传的文件解压缩
- 2.2 创建用户
- 2.3 修改每个节点的es配置文件
- 2.4 启动时的报错处理
- 2.5 插件的安装
- 2.6 测试集群
一、安装前准备
1.1开放端口
# 查看是否占用
firewall-cmd --query-port=9200/tcp
# 开放端口
firewall-cmd --zone=public --add-port=9200/tcp --permanent
# 开放端口
firewall-cmd --zone=public --add-port=9201/tcp --permanent
# 开放端口
firewall-cmd --zone=public --add-port=9202/tcp --permanent
# 重载文件,让其生效
firewall-cmd --reload
1.2文件准备
(1)下载es
(2)下载ik分词器插件
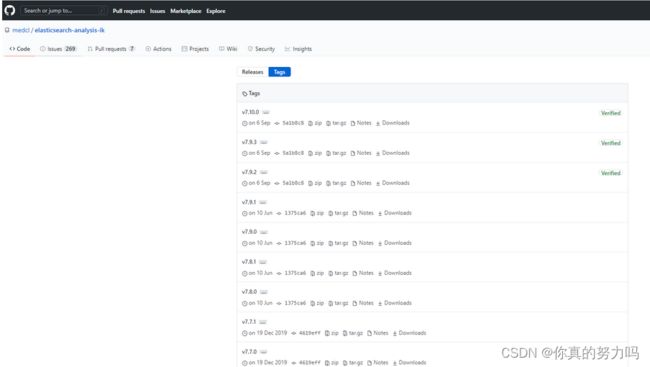
打开github官网,搜索"elasticsearch-analysis-ik",第一个项目就是ik分词器插件的。

进入"medcl/elasticsearch-analysis-ik"项目
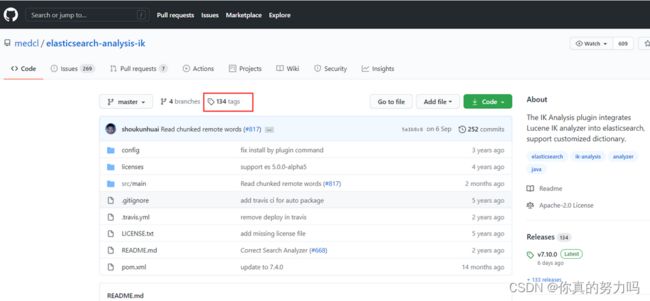
然后点击tags,然后找到7.9.3版本的插件下载即可!
二、部署ES集群
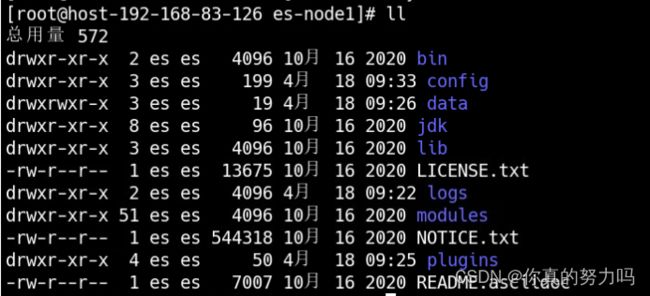
2.1 将上传的文件解压缩
# 解压缩
tar -zxvf elasticsearch-7.9.3-linux-x86_64.tar.gz
# 改名
mv elasticsearch-7.9.3 es-node1
2.2 创建用户
因为安全问题, Elasticsearch 不允许 root 用户直接运行,所以要在每个节点中创建新用户,在 root 用户中创建新用户
useradd es #新增用户
passwd es #为 es 用户设置密码
userdel -r es  #如果错了,可以删除再加
chown -R es:es /home/yc/elastic/es-node1 #文件夹所有者
chown -R es:es /home/yc/elastic/es-node2 #文件夹所有者
chown -R es:es /home/yc/elastic/es-node3 #文件夹所有者

#给最高权限
chmod 775 文件名
2.3 修改每个节点的es配置文件
修改/home/yc/elastic/es-node1/config/elasticsearch.yml 文件
# 加入如下配置
#集群名称
cluster.name: cluster-es
#节点名称, 每个节点的名称不能重复
node.name: node-1
#ip 地址,填入每个节点的ip,这里就一台机子,先保持一致
network.host: xxx.xxx.xxx.xxx
#是不是有资格主节点
node.master: true
node.data: true
# 设置对外服务的http端口,默认为9200
http.port: 9200
# 设置节点间交互的tcp端口,默认是9300
transport.tcp.port: 9300
# head 插件需要这打开这两个配置
http.cors.allow-origin: "*"
http.cors.enabled: true
http.max_content_length: 200mb
#es7.x 之后新增的配置,初始化一个新的集群时需要此配置来选举 master
cluster.initial_master_nodes: ["node-1", "node-2", "node-3"]
#es7.x 之后新增的配置,节点发现
discovery.seed_hosts: ["xxx.xxx.xxx.xxx:9300","xxx.xxx.xxx.xxx:9301","xxx.xxx.xxx.xxx:9302"]
#集群内同时启动的数据任务个数,默认是 2 个
cluster.routing.allocation.cluster_concurrent_rebalance: 16
#添加或删除节点及负载均衡时并发恢复的线程个数,默认 4 个
cluster.routing.allocation.node_concurrent_recoveries: 16
#初始化数据恢复时,并发恢复线程的个数,默认 4 个
cluster.routing.allocation.node_initial_primaries_recoveries: 16
修改/home/yc/elastic/es-node2/config/elasticsearch.yml 文件
# 加入如下配置
#集群名称
cluster.name: cluster-es
#节点名称, 每个节点的名称不能重复
node.name: node-2
#ip 地址,填入每个节点的ip,这里就一台机子,先保持一致
network.host: xxx.xxx.xxx.xxx
#是不是有资格主节点
node.master: true
node.data: true
# 设置对外服务的http端口,默认为9200
http.port: 9201
# 设置节点间交互的tcp端口,默认是9300
transport.tcp.port: 9301
# head 插件需要这打开这两个配置
http.cors.allow-origin: "*"
http.cors.enabled: true
http.max_content_length: 200mb
#es7.x 之后新增的配置,初始化一个新的集群时需要此配置来选举 master
cluster.initial_master_nodes: ["node-1", "node-2", "node-3"]
#es7.x 之后新增的配置,节点发现
discovery.seed_hosts: ["xxx.xxx.xxx.xxx:9300","xxx.xxx.xxx.xxx:9301","xxx.xxx.xxx.xxx:9302"]
#集群内同时启动的数据任务个数,默认是 2 个
cluster.routing.allocation.cluster_concurrent_rebalance: 16
#添加或删除节点及负载均衡时并发恢复的线程个数,默认 4 个
cluster.routing.allocation.node_concurrent_recoveries: 16
#初始化数据恢复时,并发恢复线程的个数,默认 4 个
cluster.routing.allocation.node_initial_primaries_recoveries: 16
修改/home/yc/elastic/es-node3/config/elasticsearch.yml 文件
# 加入如下配置
#集群名称
cluster.name: cluster-es
#节点名称, 每个节点的名称不能重复
node.name: node-3
#ip 地址,填入每个节点的ip,这里就一台机子,先保持一致
network.host: xxx.xxx.xxx.xxx
#是不是有资格主节点
node.master: true
node.data: true
# 设置对外服务的http端口,默认为9200
http.port: 9202
# 设置节点间交互的tcp端口,默认是9300
transport.tcp.port: 9302
# head 插件需要这打开这两个配置
http.cors.allow-origin: "*"
http.cors.enabled: true
http.max_content_length: 200mb
#es7.x 之后新增的配置,初始化一个新的集群时需要此配置来选举 master
cluster.initial_master_nodes: ["node-1", "node-2", "node-3"]
#es7.x 之后新增的配置,节点发现
discovery.seed_hosts: ["xxx.xxx.xxx.xxx:9300","xxx.xxx.xxx.xxx:9301","xxx.xxx.xxx.xxx:9302"]
#集群内同时启动的数据任务个数,默认是 2 个
cluster.routing.allocation.cluster_concurrent_rebalance: 16
#添加或删除节点及负载均衡时并发恢复的线程个数,默认 4 个
cluster.routing.allocation.node_concurrent_recoveries: 16
#初始化数据恢复时,并发恢复线程的个数,默认 4 个
cluster.routing.allocation.node_initial_primaries_recoveries: 16
2.4 启动时的报错处理
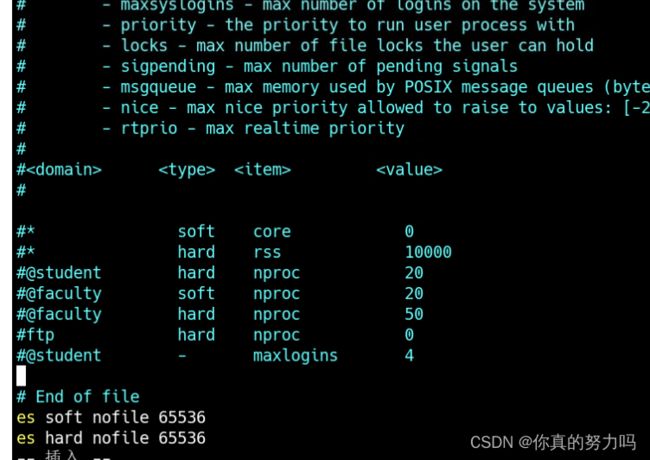
# 配置 es 用户打开文件最大数(因为es在启动时调用的文件超出普通用户默认打开文件最大数4096,会导致报错)
# 在文件末尾中增加下面内容
es soft nofile 65536
es hard nofile 65536
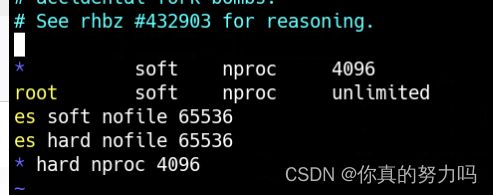
修改/etc/security/limits.d/20-nproc.conf
# 修改单个用户能打开的线程数
# 在文件末尾中增加下面内容
es soft nofile 65536
es hard nofile 65536
* hard nproc 4096
# 注: * 代表 Linux 所有用户名称
修改/etc/sysctl.conf
# 系统虚拟内存默认最大映射数为65530,无法满足ES系统要求,需要调整为262144以上。
# 在文件中增加下面内容
vm.max_map_count=655360
# 重新加载
sysctl -p
查看是否生效
ulimit -Hn

下面的报错是提示要切换es用户启动才行。

切换下重新尝试

2.5 插件的安装
先把下载的插件放入es下面的plugins文件夹

启动时有如下日志,就说明插件在启动中,可以观察启动情况
![]()
2.6 测试集群
分别在不同节点上启动 ES 软件, 一定要切换到es账户
# 切换用户
su es

cd /home/yc/elastic/es-node1/bin
#启动
./elasticsearch
#后台启动,一台一台启动
./elasticsearch -d
测试启动情况
curl -XGET 192.168.83.126:9201/_cat/nodes

