BOT_SORT复现(Ubuntu20.04)
论文地址:https://arxiv.org/abs/2206.14651
代码地址:NirAharon/BoT-SORT: BoT-SORT: Robust Associations Multi-Pedestrian Tracking (github.com)
1 环境配置
1.1 conda新环境
conda create -n botsort python=3.7
conda activate botsort
1.2 根据cuda版本安装torch
pip install torch==1.10.1+cu111 torchvision==0.11.2+cu111 torchaudio==0.10.1 -f https://download.pytorch.org/whl/cu111/torch_stable.html1.3 下载代码
这里我是手动下载传到服务器指定位置的。
也可以按照官方指令
git clone https://github.com/NirAharon/BoT-SORT.git1.4依赖项
cd botsort
pip3 install -r requirements.txt
python3 setup.py develop
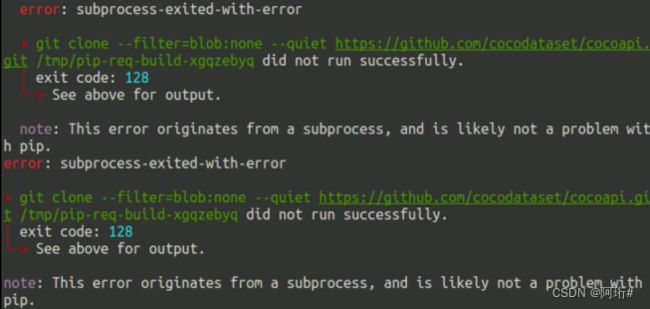
pip3 install cython; pip3 install 'git+https://github.com/cocodataset/cocoapi.git#subdirectory=PythonAPI'
最后一个报错了
使用pip安装,参考解决pycocotools安装问题
pip install pycocotools其他依赖项
pip3 install cython_bbox
pip3 install faiss-gpu
1.5 bytetrack和fastREID的依赖项
这部分先不安装了,报错的时候再安装
bytetrackifzhang/ByteTrack: [ECCV 2022] ByteTrack: Multi-Object Tracking by Associating Every Detection Box (github.com)
fastreidhttps://github.com/JDAI-CV/fast-reid/blob/master/INSTALL.md
2 数据集准备
MOT Challenge - Data
分别下载mot17、mot20数据集
直接解压缩就是要求的数据集结构
3 下载模型
在bytetrack的model zoo里下载训练好的检测模型
在botsort的model zoo下载训练好的reid模型
在botsort下新建文件夹pretrained,将下载的模型放在pretrained里
4 测试模型(直接使用作者训练好的模型)
测试mot20
将track.py的config和weight改成了MOT20
测试命令,在botsort下终端运行
python3 tools/track.py /home/extend/zhy/dataset/MOT20 --default-parameters --with-reid --benchmark "MOT20" --eval "test" --fp16 --fuse测试过程:(1.92fps好慢啊,todo:试试mot17上的s、nano模型的速度)
测试结果:
这是测试后保存的txt文件,在botsort/YOLOX_outputs/yolo_x_mix_mot20_ch/track_results.txt
这个和数据集的标注格式是对应的
分别表示:第几帧,ID号,目标框坐标(四个值),置信度,3D坐标(3个值,2D检测不存在3D坐标,故全为-1)
转换成mot challenge的txt文件:
python3 tools/interpolation.py --txt_path /home/extend/zhy/code/botsort/YOLOX_outputs/yolox_x_mix_mot20_ch/track_results测试MOT17(x模型)
测试mot17要记得把track.py的reid参数改回MOT17
python3 tools/track.py /home/extend/zhy/dataset/MOT17/images --default-parameters --with-reid --benchmark "MOT17" --eval "test" --fp16 --fuse8fps, 比mot20快了不少,感觉实时性还是不够
结果文件示例:
mot challenge格式转换
python3 tools/interpolation.py --txt_path /home/extend/zhy/code/botsort/YOLOX_outputs/yolox_x_mix_det/track_results进行转换后的结果,对比之前的结果发现置信度那一列变成了-1,其他除了顺序打乱外没有什么变化:
这里我的MOT17数据集结构是这样的,实测可以正常训练测试,但数据集路径要一直写到/.../MOT17/images
MOT validation set(即训练序列的后一半)
python3 tools/track.py /home/extend/zhy/dataset/MOT17/images --default-parameters --with-reid --benchmark "MOT17" --eval "val" --fp16 --fuse
python3 tools/interpolation.py --txt_path
5 测试一下本地视频跟踪吧
使用yolox的mot17的x模型:
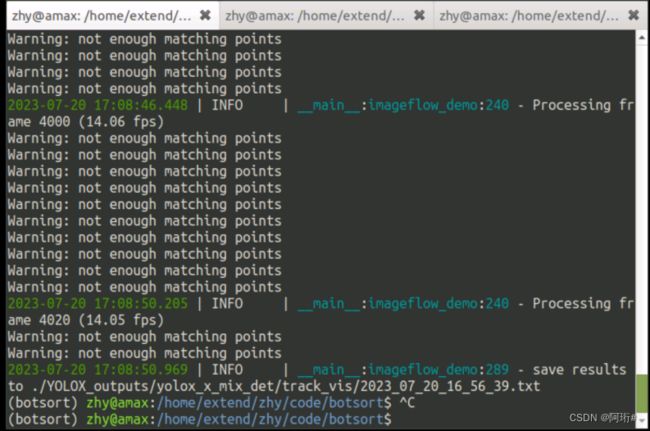
python3 tools/demo.py video --path /home/extend/zhy/dataset/NEU/1.mp4 -f yolox/exps/example/mot/yolox_x_mix_det.py -c pretrained/bytetrack_x_mot17.pth.tar --with-reid --fuse-score --fp16 --fuse --save_result测试过程中会warning没有足够的匹配点,这个问题应该是在那一帧相机运动估计时匹配点不足,无法进行相机运动估计。
测试结果:
在这个视频上的id Switch还是挺多的
生成txt结果和视频,但不是边运行边出现视频的(如何实时可视化?)


