SpringBoot文件上传
SpringBoot文件上传
上传文件是互联网中常常应用的场景之一,最典型的情况就是上传头像等,今天就带着带着大家做一个 Spring
Boot 上传文件的小案例。
1、pom依赖
<project xmlns="http://maven.apache.org/POM/4.0.0" xmlns:xsi="http://www.w3.org/2001/XMLSchema-instance"
         xsi:schemaLocation="http://maven.apache.org/POM/4.0.0 https://maven.apache.org/xsd/maven-4.0.0.xsd">
    <modelVersion>4.0.0modelVersion>
    <parent>
        <groupId>org.springframework.bootgroupId>
        <artifactId>spring-boot-starter-parentartifactId>
        <version>2.1.0.RELEASEversion>
    parent>

    <groupId>com.examplegroupId>
    <artifactId>spring-boot-file-uploadartifactId>
    <version>0.0.1-SNAPSHOTversion>
    <name>spring-boot-file-uploadname>
    <description>spring-boot-file-uploaddescription>

    <properties>
        <java.version>1.8java.version>
    properties>

    <dependencies>

        <dependency>
            <groupId>org.springframework.bootgroupId>
            <artifactId>spring-boot-starter-webartifactId>
        dependency>

        <dependency>
            <groupId>org.springframework.bootgroupId>
            <artifactId>spring-boot-starter-thymeleafartifactId>
        dependency>

        <dependency>
            <groupId>org.springframework.bootgroupId>
            <artifactId>spring-boot-devtoolsartifactId>
            <optional>trueoptional>
        dependency>

    dependencies>

    <build>
        <plugins>
            <plugin>
                <groupId>org.springframework.bootgroupId>
                <artifactId>spring-boot-maven-pluginartifactId>
            plugin>
        plugins>
    build>

project>
引入了spring-boot-starter-thymeleaf做页面模板引擎,写一些简单的上传示例。
2、启动类设置
package com.example;

import org.springframework.boot.SpringApplication;
import org.springframework.boot.autoconfigure.SpringBootApplication;

@SpringBootApplication
public class Application {

    public static void main(String[] args) {
        SpringApplication.run(Application.class, args);
    }
}
3、配置文件
#http://docs.spring.io/spring-boot/docs/current/reference/htmlsingle/#common-application-properties
#search multipart
spring.servlet.multipart.max-file-size=10MB
spring.servlet.multipart.max-request-size=10MB
4、编写前端页面
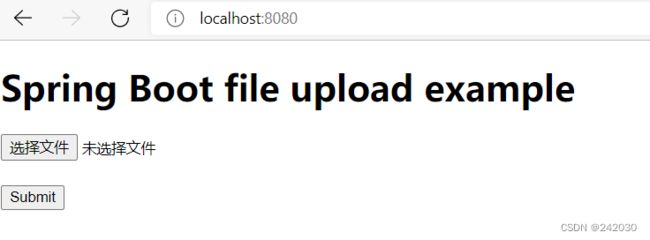
上传页面upload.html
DOCTYPE html>
<html>
<body>

<h1>Spring Boot file upload exampleh1>

<form method="POST" action="/upload" enctype="multipart/form-data">
    <input type="file" name="file"/><br/><br/>
    <input type="submit" value="Submit"/>
form>

body>
html>
非常简单的一个 Post 请求,一个选择框选择文件,一个提交按钮,效果如下。
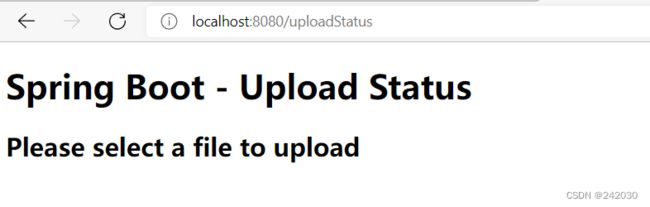
上传结果展示页面uploadStatus.html
DOCTYPE html>
<html lang="en" xmlns:th="http://www.thymeleaf.org">
<body>

<h1>Spring Boot - Upload Statush1>

<div th:if="${message}">
    <h2 th:text="${message}"/>
div>

body>
html>
效果图如下:
5、编写上传控制类
访问 localhost 自动跳转到上传页面:
package com.example.controller;

import org.springframework.stereotype.Controller;
import org.springframework.web.bind.annotation.GetMapping;
import org.springframework.web.bind.annotation.PostMapping;
import org.springframework.web.bind.annotation.RequestParam;
import org.springframework.web.multipart.MultipartFile;
import org.springframework.web.servlet.mvc.support.RedirectAttributes;

import java.io.IOException;
import java.nio.file.Files;
import java.nio.file.Path;
import java.nio.file.Paths;

@Controller
public class UploadController {

    // 上传的文件的保存路径
    private static String UPLOADED_FOLDER = "D:\\content\\【完】SpringBoot\\【完】007-SpringBoot文件上传\\";

    @GetMapping("/")
    public String index() {
        return "upload";
    }

    @PostMapping("/upload")
    public String singleFileUpload(@RequestParam("file") MultipartFile file,
                                   RedirectAttributes redirectAttributes) {
        if (file.isEmpty()) {
            redirectAttributes.addFlashAttribute("message", "Please select a file to upload");
            return "redirect:uploadStatus";
        }
        try {
            // 获取文件并设置保存路径
            byte[] bytes = file.getBytes();
            Path dir = Paths.get(UPLOADED_FOLDER);
            Path path = Paths.get(UPLOADED_FOLDER + file.getOriginalFilename());
            // 不存在的话则创建
            if (!Files.exists(dir)) {
                Files.createDirectories(dir);
            }
            Files.write(path, bytes);
            // 该方法可以直接上传到目标文件
            // file.transferTo(target);
            redirectAttributes.addFlashAttribute("message",
                    "You successfully uploaded '" + file.getOriginalFilename() + "'");
        } catch (IOException e) {
            redirectAttributes.addFlashAttribute("message", "Server throw IOException");
            e.printStackTrace();
        }
        return "redirect:/uploadStatus";
    }

    @GetMapping("/uploadStatus")
    public String uploadStatus() {
        return "uploadStatus";
    }

}

上面代码的意思就是,通过MultipartFile读取文件信息,如果文件为空跳转到结果页并给出提示;如果不为空
读取文件流并写入到指定目录,最后将结果展示到页面。
MultipartFile是Spring上传文件的封装类,包含了文件的二进制流和文件属性等信息,在配置文件中也可对相
关属性进行配置,基本的配置信息如下:
-
spring.http.multipart.enabled=true#默认支持文件上传. -
spring.http.multipart.file-size-threshold=0#支持文件写入磁盘. -
spring.http.multipart.location=# 上传文件的临时目录 -
spring.http.multipart.max-file-size=1Mb# 最大支持文件大小 -
spring.http.multipart.max-request-size=10Mb# 最大支持请求大小
最常用的是最后两个配置内容,限制文件上传大小,上传时超过大小会抛出异常。
更多配置信息参考这里:
https://docs.spring.io/spring-boot/docs/current/reference/htmlsingle/#common-application-properties
6、异常处理
package com.example.controller;

import org.springframework.web.bind.annotation.ControllerAdvice;
import org.springframework.web.bind.annotation.ExceptionHandler;
import org.springframework.web.multipart.MultipartException;
import org.springframework.web.servlet.mvc.support.RedirectAttributes;

/**
 * 全局异常处理
 */
@ControllerAdvice
public class GlobalExceptionHandler {

    //https://jira.spring.io/browse/SPR-14651
    //4.3.5 supports RedirectAttributes redirectAttributes
    @ExceptionHandler(MultipartException.class)
    public String handleError1(MultipartException e, RedirectAttributes redirectAttributes) {
        redirectAttributes.addFlashAttribute("message", e.getCause().getMessage());
        return "redirect:/uploadStatus";
    }
}
设置一个@ControllerAdvice用来监控Multipart上传的文件大小是否受限,当出现此异常时在前端页面给出提
示。利用@ControllerAdvice可以做很多东西,比如全局的统一异常处理等。
这样一个使用 Spring Boot 上传文件的简单 Demo 就完成了。