sam和mobilesam导出预处理的onnx
一、前言
sam或者mobilesam的python推理都存在一些前处理,如下所示:
sam.to(device='cuda')
predictor = SamPredictor(sam)
predictor.set_image(image)
image_embedding = predictor.get_image_embedding().cpu().numpy()
checkpoint = "./weights/mobile_sam.pt"
model_type = "vit_t"
sam = sam_model_registry[model_type](checkpoint=checkpoint)
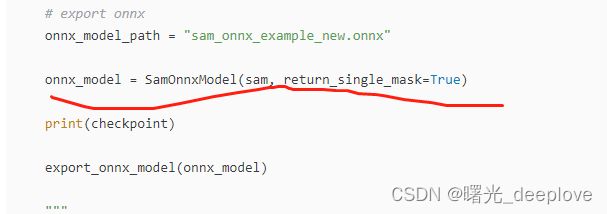
# export onnx
onnx_model_path = "sam_onnx_example_new.onnx"
onnx_model = SamOnnxModel(sam, return_single_mask=True)
print(checkpoint)
export_onnx_model(onnx_model)
"""
如果需要,还可以对模型进行量化和优化。我们发现,这显著改善了web运行时,
而性能的变化可以忽略不计。
"""
result_quantized = quantized_model(onnx_model_quantized_path = "sam_onnx_quantized_example.onnx")
image = cv2.imread('images/test/picture2.jpg')
image = cv2.cvtColor(image, cv2.COLOR_BGR2RGB)
plt.figure(figsize=(10,10))
plt.imshow(image)
plt.axis('on')
plt.show()
ort_session = onnxruntime.InferenceSession(onnx_model_path)
"""
要使用ONNX模型,必须首先使用SAM图像编码器对图像进行预处理。
这是一个较重的过程,最好在GPU上执行。SamPredictor可以正常使用,
那么.get_image_embedding()将检索获取到中间特征。
"""
sam.to(device='cpu')
predictor = SamPredictor(sam)
predictor.set_image(image)
image_embedding = predictor.get_image_embedding().cpu().numpy()
print(image_embedding.shape)
"""
onnx模型的输入签名与SamPredictor.prpredict不同。onnx模型的输入
必须提供以下输入。注意在“输入点”和“输入掩膜”二种特殊情况。所有的输入都是np.float32
image_embeddings:预测器.get_image_embedding()中的图像嵌入。具有长度为1的批索引。
point_coords:稀疏输入提示的坐标,对应点输入和框输入。方框使用两个点进行编码,一个用于左上角,另一个用于右下角。
坐标必须已转换为长边1024。具有长度为1的批索引。
point_labels:稀疏输入提示的标签。0是负输入点,1是正输入点,2是左上角,3是右下角,-1是填充点。
如果没有框输入,则应连接标签为-1且坐标为(0.0,0.0)的单个填充点。
mask_input:形状为1x1x256x256的模型的掩码输入。即使没有掩码输入,也必须提供此项。在这种情况下,它可以只是零。
has_mask_input:掩码输入的指示符。1表示掩码输入,0表示没有掩码输入。
orig_im_size:在任何转换之前,(H,W)格式的输入图像的大小。
"""
##################点输入例子###########################
low_res_logits = point_infer_onnx()
##################掩膜输入例子###########################
mask_infer_onnx(low_res_logits)
##################框输入和点输入例子###########################
box_point_infer_onnx()
print("all ok!")注:整个是sam的模型了,这个就是没包含到预处理。因此我们想要在c++中推理,这样独立于python环境,那么预处理就要也要做到onnx中。因此接下来的重点就是给出如何把预处理导出到onnx中。
二、直接给出导出pre onnx的代码如下
"""
将预处理包在onnx里面
"""

import torch
import numpy as np

import os

from mobile_sam import sam_model_registry,SamPredictor
from mobile_sam.utils.transforms import ResizeLongestSide
from onnxruntime.quantization import QuantType
from onnxruntime.quantization.quantize import quantize_dynamic


class Model(torch.nn.Module):
    def __init__(self, image_size, checkpoint, model_type):
        super().__init__()
        self.sam = sam_model_registry[model_type](checkpoint=checkpoint)
        self.sam.to(device='cpu')
        self.predictor = SamPredictor(self.sam)
        self.image_size = image_size

    def forward(self, x):
        self.predictor.set_torch_image(x, (self.image_size))
        if 'interm_embeddings' not in output_names:
            return self.predictor.get_image_embedding()
        else:
            return self.predictor.get_image_embedding(), torch.stack(self.predictor.interm_features, dim=0)


if __name__ == "__main__":

    checkpoint = "./weights/mobile_sam.pt"
    model_type = "vit_t"

    sam = sam_model_registry[model_type](checkpoint=checkpoint)
    sam.to(device='cpu')

    output_path = './savemodel/mobile_sam_preprocess.onnx'
    quantize = False

    output_names = ['output']

    #output_names = ["masks", "iou_predictions", "low_res_masks"]

    # Target image size is 1024x720
    image_size = (1024, 720)


    output_raw_path = output_path
    if quantize:
        # The raw directory can be deleted after the quantization is done
        output_name = os.path.basename(output_path).split('.')[0]
        output_raw_path = '{}/{}_raw/{}.onnx'.format(
            os.path.dirname(output_path), output_name, output_name)
    os.makedirs(os.path.dirname(output_raw_path), exist_ok=True)

    transform = ResizeLongestSide(sam.image_encoder.img_size)

    image = np.zeros((image_size[1], image_size[0], 3), dtype=np.uint8)
    input_image = transform.apply_image(image)
    input_image_torch = torch.as_tensor(input_image, device='cpu')
    input_image_torch = input_image_torch.permute(
        2, 0, 1).contiguous()[None, :, :, :]


    model = Model(image_size, checkpoint, model_type)
    model_trace = torch.jit.trace(model, input_image_torch)
    torch.onnx.export(model_trace, input_image_torch, output_raw_path,
                    input_names=['input'], output_names=output_names)

    if quantize:
        quantize_dynamic(
            model_input=output_raw_path,
            model_output=output_path,
            per_channel=False,
            reduce_range=False,
            weight_type=QuantType.QUInt8,
        )
参考:
(1)https://github.com/dinglufe/segment-anything-cpp-wrapper/blob/main/export_pre_model.py
(2)https://github.com/dinglufe/segment-anything-cpp-wrapper
