Cypress之整合完成一个完整的UI层自动化测试
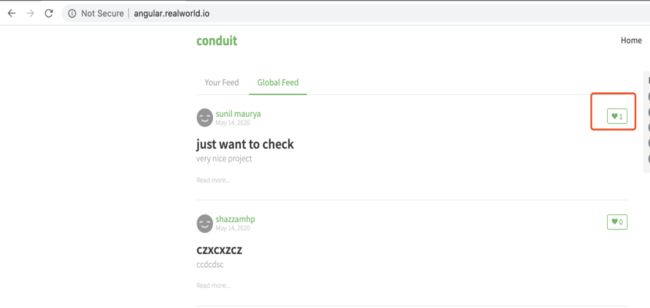
前面博客介绍了测试数据管理、配置信息管理以及定位操作页面元素、校验执行结果,此次课程把前面的内容进行整合,完成一个完成的UI层自动化案例。需要测试的场景是验证是否能给自己创建的blog添加comment以及能否将自己创建的blog打星。被测应用页面如下所示
上面包含了两个测试场景,为自己创建的blog添加comment和为自己创建的blog打星,因为这两个测试场景的测试点在添加comment和打星,那么在执行测试前需要为每个测试场景准备测试数据,即创建blog,这属于测试数据准备环节,且这类测试数据和用例强相关,是为某个用例准备的,不与其他用例共享的测试数据,可以把它称为独占测试数据。另外,假设一:该系统有不同的用户角色,期望检查普通用户角色能够给自己创建的帖子添加comment和打星,那么需要管理不同角色的用户信息,这里也涉及测试数据的管理。一个系统,同一个角色用户可能需要执行不同的测试场景,即这类测试数据是多个测试案例共享的,可以把它称为共享测试数据。因为多个案例共享,这类测试数据的特点是案例运行过程中不改变测试数据内容,这类测试数据在所有案例运行前进行准备。假设二:这两个测试案例需要在多环境中运行,即能在多套环境中切换运行,需要管理配置信息。
下面是实现上述两个测试场景中case层的测试脚本。同样,Test Runner上选择“addBlogComment_spec.js”和“favorateBlog_spec.js”即可运行下面的脚本。
const util = require('../../helper/util');
const globalFeedPage = require('../page/globalFeedPage');
const blogDetailsPage = require('../page/blogDetailsPage');
const prepareBlogTestData = require('../../testData/prepareBlogTestData');
const testDataManage = require('../../testData/testDataManage');
describe("add comment for blog test", () => {
    beforeEach('prepare blog for test', () => {
        prepareBlogTestData.createBlogWithRegularUser();
        //调用封装好的方法准备测试数据,即创建blog
    });
    it("should add comment for blog successfully", () => {
        util.loginWithRegularUser();
        //登陆web应用,属于多场景共用的一个操作步骤,故封装在util.js文件中

        globalFeedPage.goToGlobalFeed();
        testDataManage.getLoginUserInfo('userInfo');
        //获取登陆用户信息,因为测试场景是给自己创建的blog添加comment,故在定位blog时需要登陆的用户名称信息

        cy.get('@userInfo').then((data) => {
            globalFeedPage.goToBlogDetailByAuthor(data.regular.username);
            //跳转到自己创建的blog的详情页面,该页面可以添加comment
        });
        blogDetailsPage.addComment("this is comment");
        blogDetailsPage.shouldAddCommentSuccessfully("this is comment");
        //添加comment并校验是否添加成功
    })
    //这个web应用没有删除blog按钮,故这里没有编写清理测试数据脚本,真实项目中上面脚本运行完成后,应该清理掉创建的blog
});
favorateBlog_spec.js
const util = require('../../helper/util');
const globalFeedPage = require('../page/globalFeedPage');
const prepareBlogTestData = require('../../testData/prepareBlogTestData');
const testDataManage = require('../../testData/testDataManage');
describe("favorite blog test", () => {
    beforeEach('prepare blog for test', () => {
        prepareBlogTestData.createBlogWithRegularUser();
        //调用封装好的方法准备测试数据,即创建blog
    });
        it("should favorite blog successfully", () => {
            util.loginWithRegularUser();
            globalFeedPage.goToGlobalFeed();
            //从页面登陆并进入globalFeed页面

            testDataManage.getLoginUserInfo('userInfo');
            cy.get('@userInfo').then((data) => {
                globalFeedPage.favoriteBlog(data.regular.username);
                //给自己创建的blog打星

                globalFeedPage.shouldFavoriteBlogSuccess(data.regular.username);
                //校验是否打星成功
            });
        })
    });
上面是case层的测试脚本,接下来,我们再看看准备测试数据的脚本,即创建blog部分,这里通过调用接口准备blog测数据。具体脚本如下所示
const util = require('../helper/util');
const testDataMange = require('../testData/testDataManage');
const configManage = require('../config/configManage');
function createBlogWithRegularUser(){
testDataMange.getLoginUserInfo('loginUser');
    cy.get('@loginUser').then((data) => {
        util.getToken(data.regular.email,data.regular.password)
        //调用创建blog的接口前需要先调用登陆接口获取token,获取token属于多个脚本都会共用的内容,故封装在util里面。

            .then((token)=> {
                cy.request({
                    method: 'POST',
                    url: configManage.getApiBaseUrl()+'/api/articles/',
                    //这里url是读取cypress.json中配置的接口baseUrl,这样当环境切换后,脚本仍然能正常运行。

                    headers: {
                        'authorization': 'Token '+token
                    },
                    body: {
                        "article": {
                            "tagList": [],
                            "title": "testTitle",
                            "description": "test",
                            "body": "test"
                        }
                    }
                }).then(response => {
                    expect(response.status).to.eq(200);
                    //调用接口后,对返回状态进行校验,保证接口调用成功。
                })
            })
    })
}
module.exports = {
    createBlogWithRegularUser:createBlogWithRegularUser
};
//生成token部分脚本
function getToken(email,password) {
    return cy.request({
        url: configManage.getApiBaseUrl()+'/api/users/login',
        method: "POST",
        body: {
            "user": {
                "email": email,
                "password": secret.decrypt(password)
                //生成token这里只需注意一点,password属于敏感信息,password需要进行脱敏处理,故从json文件中读取到password后,需要做解密处理。
            }
        }
    }).then(response => {
        return response.body.user.token
    })
}
最后再看一下定位和操作页面元素部分脚本,其中定位自己创建的blog有一定难度,因为globalFeed页面上有不同的用户在创建各种blog,故如果要定位自己创建的blog需要通过登陆的用户名称进行定位,具体的定位脚本如下所示。
function goToBlogDetailByAuthor(authorName){
    // let hrefValue= '"'+"/profile/" +authorName +'"';
    // cy.get('app-article-meta a[href='+hrefValue+']').first().parents('app-article-preview').find('a h1').click()
    cy.get('app-article-meta a').contains(authorName).first().parents('app-article-preview').find('a h1').click()

    //上面列举了两种“通过登陆的用户名称定位到自己创建的blog,并点击进入blog详情页面”实现方式
}

function favoriteBlog(authorName){
    let hrefValue= '"'+"/profile/" +authorName +'"';
    cy.get('app-article-meta a[href='+hrefValue+']').first().parents('app-article-preview').find('app-favorite-button button').click()
    //通过登陆的用户名称定位到自己创建的blog,并给该blog打星

function shouldFavoriteBlogSuccess(authorName){
    let hrefValue= '"'+"/profile/" +authorName +'"';
    cy.get('app-article-meta a[href='+hrefValue+']').first().parents('app-article-preview').find('app-favorite-button button').should('contain','1')
   //校验自己创建的blog打星是否成功
}
可以看到为了定位自己创建的blog并能对该blog打星需要多次级连定位,从这里也可以看到,cypress提供了丰富的定位页面元素方式,能极大的降低编写脚本成本。